
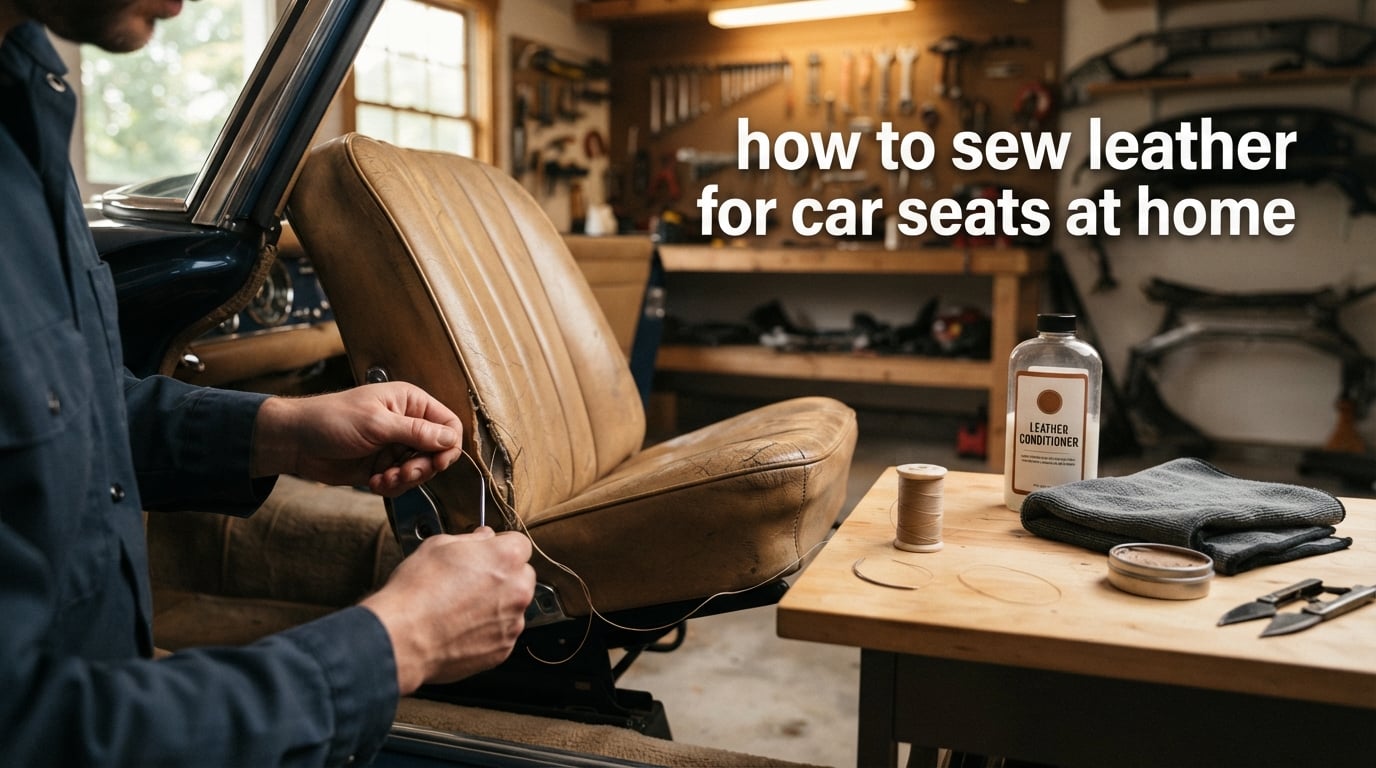
Learning how to sew leather for car seats at home can save you hundreds of dollars compared to professional reupholstery costs. Whether you have a small tear from everyday wear or a seam that has come undone, the right tools and techniques make this a manageable DIY project. In this guide, I will walk you through everything you need to know, from choosing the best thread and needles to completing professional-quality repairs in your own garage.
We have helped countless car owners restore their leather interiors without the expense of a full reupholster. The process requires patience and the right materials, but the results are incredibly satisfying. You will learn how to assess damage, select appropriate tools, and execute repairs that last.
By the end of this guide, you will have the knowledge to tackle tears, re-stitch seams, and maintain your leather seats for years to come. Let’s get started with understanding when sewing is the right solution for your situation.
Table of Contents
- When to Sew Leather Car Seats vs When to Replace
- Assessing the Damage: Tear Size and Location Guide
- Tools and Materials Checklist for Leather Sewing
- Best Thread for Sewing Leather Car Seats
- How to Sew Leather for Car Seats at Home: Step-by-Step Guide
- Stitch Patterns for Leather Upholstery
- Finishing Touches: Dyeing and Conditioning
- Frequently Asked Questions
- Conclusion
When to Sew Leather Car Seats vs When to Replace
Not every leather seat problem requires sewing, and not every tear can be fixed with a simple stitch. Understanding the difference saves you time, money, and frustration. Here is what you need to consider before grabbing a needle.
Damage Types Suitable for Sewing
Small to medium tears along seams or in flat, accessible areas are ideal candidates for hand sewing. Tears under 4 inches with clean edges and intact surrounding leather respond well to stitching. Seam failures where the original stitching has pulled apart are actually the easiest repairs, because you are simply re-stitching along an existing line.
Rips caused by sharp objects with relatively straight edges sew up cleanly. The leather on either side of the tear should be flexible and not brittle. If the leather crumbles when you press it with your fingernail, the material itself has degraded and sewing may not hold.
When to Call a Professional
Large tears bigger than 4 inches often need backing material or a patch sewn underneath for proper reinforcement. Professionals have the equipment to insert patches invisibly and blend the repair seamlessly. If your tear is in a high-stress area like the driver’s seat bolster, consider professional help for a longer-lasting result.
Cracked or crumbling leather indicates material breakdown that simple stitching cannot fix. Leather that has been exposed to prolonged sun damage or harsh chemicals may need replacement rather than repair. Airbag-equipped seats require extra caution, as the stitching is part of the safety system deployment path.
Cost Comparison Overview
DIY sewing repairs typically cost between $30 and $100 for supplies, including quality thread, needles, leather conditioner, and dye. Professional leather seat repair ranges from $100 to $300 per seat for patching. Full reupholstery costs $500 to $2,000 per seat depending on the vehicle and leather quality.
The savings are substantial if you are willing to invest the time. Even a failed DIY attempt rarely destroys the seat beyond professional repair. The worst case is you spend some money on supplies and end up calling a pro anyway.
Assessing the Damage: Tear Size and Location Guide
Before you begin any repair, carefully evaluate what you are working with. The size, location, and type of damage all influence your approach. This assessment takes just a few minutes and prevents costly mistakes.
Small Tears Under 2 Inches
Tiny punctures and rips under 2 inches are the most straightforward repairs. These can often be closed with just a few stitches and may not even need a patch backing. The key is catching them early before they expand from normal seat use.
Small tears in non-stress areas like the seat back or headrest are perfect for beginners. You can practice your technique without worrying about the repair failing under pressure. Clean the area thoroughly and use a fine needle with matching thread for an invisible repair.
Medium Tears 2 to 4 Inches
Tears in this range require more attention but remain within DIY capability. You will need to assess whether the edges can be brought together without tension. If pulling the edges together causes the leather to pucker or distort, you need a patch backing.
Medium tears benefit from a fabric or leather patch glued or sewn underneath the tear. This backing material distributes stress across a larger area and prevents the repair from pulling apart. The sewing technique remains the same, but you are stitching through two layers instead of one.
Large Tears and Seam Failures
Tears over 4 inches or seam separations longer than 6 inches challenge even experienced DIYers. These repairs need significant backing material and careful color matching. Consider whether the effort matches your skill level and available time.
Seam failures are deceptive. The torn seam might indicate that the leather has stretched or that the original factory stitching was weak. Simply re-stitching may fail again if the underlying issue is not addressed. Examine the leather on both sides of the seam for stretching or damage.
Location Considerations
High-wear areas like the driver’s seat bottom and side bolsters receive constant friction and pressure. Repairs here must be exceptionally strong to hold up. Consider reinforcing these areas with an extra layer of leather or vinyl underneath the repair.
Low-wear areas like rear seats, headrests, and the center of seat backs face minimal stress. Repairs here can be more cosmetic and less structural. A less-than-perfect stitch in these locations will still look fine and last for years.
Tools and Materials Checklist for Leather Sewing
Gathering the right tools before you start makes the job infinitely easier. Nothing derails a repair faster than realizing you need something you do not have. Here is your complete checklist for success.
Essential Tools List
Curved upholstery needles: These are non-negotiable for car seat work. The curved shape lets you stitch in tight spaces and around corners where a straight needle cannot reach. Buy at least two in medium and heavy sizes.
Heavy-duty straight needles: For more accessible areas, straight needles in various sizes give you options. Glover’s needles with triangular points cut through leather cleanly rather than punching and potentially damaging fibers.
Needle-nose pliers: You will need these to pull needles through thick leather. Trying to push a needle through multiple layers by hand alone will tire your fingers quickly. Quality pliers with textured grips make the work much easier.
Scissors and thread snips: Sharp scissors for cutting backing material and thread snips for clean thread cuts. Dull scissors fray leather edges and make a mess of your repair.
Thread Types Explained
The thread you choose matters as much as the needle. Standard sewing thread is too weak for leather car seats and will snap under stress. You need thread specifically designed for upholstery work.
Bonded nylon thread: This is the gold standard for automotive leather. The bonding process prevents unraveling and adds strength. Bonded nylon resists UV damage and holds up to temperature extremes inside a car.
Polyester upholstery thread: Slightly less strong than nylon but more colorfast. Polyester holds its color better under sun exposure and may be the better choice for light-colored leather where thread shows.
Waxed thread: The wax coating helps the thread slide through leather smoothly and provides water resistance. Waxed thread is excellent for exterior stitching but can leave residue on your hands during long sessions.
Needle Selection Guide
Needle size and point type determine how easily you can work with different leather thicknesses. Automotive leather varies from thin seat backs to thick bolster areas. A selection of needles covers all situations.
Curved needles: Available in 2-inch, 3-inch, and 4-inch curves. The 3-inch curve works for most car seat applications. Smaller curves fit tight spaces, larger curves cover more area per stitch.
Glover’s needles: Triangular points that cut rather than punch. These are ideal for thicker leather areas and create cleaner stitch holes. Use them when straight needles are sufficient for access.
Tapestry needles: Blunt tips for working with pre-punched holes or existing seams. Use these when re-stitching along an existing seam line where holes already exist.
Additional Supplies
Leather cleaner and conditioner: Clean the repair area thoroughly before stitching. Dirt and oils prevent the thread from seating properly and can cause infection in the leather around the repair.
Leather glue or adhesive: For securing backing patches and holding tear edges together while you stitch. Water-based leather glue is forgiving and repositionable. Contact cement is permanent but harder to work with.
Backing material: Leather scraps, vinyl patches, or heavy canvas for reinforcing larger tears. The backing should be slightly larger than the tear on all sides. Match the backing material flexibility to the seat leather.
Leather dye and applicator: For color matching after the repair. Even with matching thread, the repair area may show slightly. Dye helps blend the work into the surrounding leather.
Best Thread for Sewing Leather Car Seats
Thread selection can make or break your repair. The wrong thread will fray, snap, or fade within months of your hard work. Here is how to choose thread that lasts as long as the original factory stitching.
Bonded Nylon vs Polyester
Bonded nylon offers superior strength for high-stress areas. A size 92 or 138 bonded nylon thread handles most automotive leather thicknesses. The bonding prevents the individual fibers from separating under tension, which is critical for seams that flex every time someone sits down.
Polyester thread excels in color retention. If your seats are exposed to significant sunlight, polyester resists fading better than nylon. The strength difference is minimal for most repairs, so choose based on your priorities between strength and colorfastness.
Waxed Thread Benefits
Waxed thread slides through leather with less friction, reducing hand fatigue during long sewing sessions. The wax also seals the thread fibers, providing additional water resistance. This is particularly valuable for convertibles or vehicles with leaky seals.
The downside is that waxed thread can attract dirt over time. The wax may also interfere with leather dye absorption if you plan to recolor the repaired area. Test the thread with your dye before committing to a full repair.
Color Matching Strategies
Matching thread to leather color is one of the most challenging aspects of seat repair. Most thread manufacturers offer limited color ranges compared to the variety of leather colors in cars. Do not expect an exact match from a limited selection.
The best approach is to choose a thread slightly darker than your leather. Darker thread blends better than lighter thread, which stands out against darker leather. Bring a leather sample to a specialty shop if possible, or order thread sample cards before buying a full spool.
For truly difficult colors, consider dyeing white or natural thread to match. Leather-friendly fabric dyes work on thread just as they do on leather. Test the dyed thread on a hidden area before using it on your visible repair.
Thread Weight Recommendations
Thread weight is measured in tex or denier, with higher numbers indicating thicker, stronger thread. Automotive leather typically requires tex 90 to tex 135 thread. Too thin and the thread snaps. Too thick and the stitches look bulky and may not seat properly.
For most car seat repairs, tex 105 (approximately V-92 in marine thread sizing) provides the right balance. This weight is strong enough for daily use but fine enough for neat stitching. Go up to tex 135 for thick bolster areas or heavy truck seats.
How to Sew Leather for Car Seats at Home: Step-by-Step Guide
Now that you have your tools and materials ready, it is time to begin the actual repair. Follow these steps carefully for professional-quality results. Take your time with each step, as rushing leads to mistakes.
Step 1: Prepare the Work Area and Remove Seat if Needed
Good lighting is essential for leather work. Set up a bright work light that illuminates the repair area from multiple angles. Shadows hide mistakes and make threading needles unnecessarily difficult.
If the tear is on the seat bottom or in a tight corner, consider removing the seat from the vehicle. Most car seats unbolt from the floor with 4 bolts and disconnect from a wiring harness. This gives you full access to all sides of the tear and lets you work at a comfortable angle.
Before removing any seat, disconnect the car battery to avoid airbag issues. Seats with side airbags have orange or yellow connectors that require careful handling. If you are unsure about airbags, work on the seat in place rather than risking a safety system.
Step 2: Clean and Condition the Leather
Dirt, oils, and previous leather treatments interfere with your repair. Clean the entire area around the tear with a leather-specific cleaner. Use a lint-free cloth and work in circles to lift grime from the leather grain.
Apply leather conditioner to the cleaned area and let it soak in for 15 minutes. This softens the leather around the tear, making it more pliable for stitching. Wipe away excess conditioner before beginning your repair.
Allow the cleaned and conditioned leather to dry completely. Wet leather stretches and distorts, leading to puckered repairs. Wait at least 30 minutes after conditioning before picking up a needle.
Step 3: Position and Secure the Tear
For tears with clean edges, align the sides carefully. The leather should lie flat without puckering or gaps. If the edges do not meet cleanly, you may need to trim small amounts of damaged material.
Apply leather glue to the edges of the tear and press them together. This temporary bond holds the leather in position while you stitch. Use clothespins or binder clips to maintain alignment as the glue sets.
For larger tears, cut a backing patch about one inch larger than the tear on all sides. Apply adhesive to the patch and slide it under the tear. Press the leather down onto the backing and let the adhesive set for at least 30 minutes.
Step 4: Thread Your Curved Needle
Cut a length of thread about 3 feet long for most repairs. Longer thread tangles and shorter thread requires frequent re-threading. Thread your curved needle and pull about 6 inches through the eye.
Double the thread back on itself for extra strength if your needle eye is large enough. Tie a secure knot at the end of the thread. A figure-eight knot works well and resists pulling through leather.
Coat the thread with a small amount of beeswax if you are using non-waxed thread. This helps the thread slide through the leather and adds water resistance. Run the thread through the wax block several times until it is lightly coated.
Step 5: Choose Your Stitch Pattern
The stitch pattern you choose affects both strength and appearance. A simple whipstitch works for most repairs and is easy to learn. A saddle stitch is stronger but requires two needles and more skill.
For seams, follow the existing stitch pattern and holes if possible. Re-stitching through existing holes is easier than creating new ones. If the original holes are damaged, you will need to create a new stitch line close to the original.
For tears, space your stitches about 1/4 inch apart. Closer stitches are stronger but more visible. Wider stitches are faster but may not hold as well. Find a balance based on the stress the area receives.
Step 6: Begin Sewing With Proper Technique
Push the needle through the leather at a consistent angle. For a whipstitch, bring the needle up through one side of the tear, cross over the seam, and push it down through the other side. Each stitch crosses over the previous one diagonally.
Pull each stitch tight enough to close the tear without puckering the leather. Use needle-nose pliers to grip the needle and pull it through thick areas. Maintain even tension throughout your work.
Work slowly and check your progress frequently. It is better to take out a bad stitch and redo it than to continue with uneven work. Keep your stitches the same size and spacing for a professional appearance.
Step 7: Complete the Stitching
When you reach the end of your repair, make several small backstitches to lock the thread in place. Backstitching means sewing backward over your last few stitches. This prevents the seam from unraveling under stress.
Push the needle through to the back side of the leather for your final stitch if possible. Tie off the thread with several tight knots. Bury the thread end between leather layers or under a seam to hide it.
Trim the thread ends close to the knot, leaving about 1/8 inch. This prevents the ends from fraying but keeps enough length to prevent the knot from slipping. Melt synthetic thread ends slightly with a lighter to seal them if you are comfortable doing so.
Step 8: Finish and Condition
Inspect your work carefully under good light. Look for loose stitches, uneven tension, or areas where the leather puckered. Address any issues now before moving to finishing.
Apply leather conditioner to the repaired area and surrounding leather. Massage it in with your fingers to help the leather relax around the new stitches. This step helps blend the repair into the surrounding material.
Allow the conditioner to absorb fully, then buff the area with a clean cloth. Your repair is now structurally complete. You may choose to apply leather dye for color matching, which brings us to the next section.
Stitch Patterns for Leather Upholstery
The stitch pattern you use affects both the durability and appearance of your repair. Different patterns work better for different situations. Understanding your options helps you choose the right approach.
Whipstitch Technique
The whipstitch is the simplest and most common pattern for DIY repairs. You stitch diagonally across the seam, creating a braided appearance along the tear edge. Each stitch wraps over the previous one.
This pattern works well for tears where the edges come together cleanly. It is fast to execute and forgiving of mistakes. The diagonal stitches distribute tension across the tear, making it strong enough for most situations.
Use a whipstitch for beginner repairs and when appearance is less important than function. The visible diagonal stitches add character but may not match factory styling. This pattern is ideal for underside repairs and areas that receive seat covers.
Saddle Stitch for Strength
The saddle stitch uses two needles working from opposite sides of the leather. Each stitch locks the previous one in place, creating an exceptionally strong seam. This is the technique used for high-quality leather goods.
This pattern requires more skill and patience but produces superior results. The finished seam looks the same on both sides of the leather. Saddle stitch repairs often outlast the surrounding leather.
To execute a saddle stitch, thread two needles on the same piece of thread, one at each end. Push one needle through, then the other from the opposite side. The needles pass each other in the middle of the leather. Keep tension even as you work.
Baseball Stitch for Aesthetics
The baseball stitch creates a decorative V-pattern along the seam. This pattern is purely aesthetic and mimics the stitching on a baseball. It adds a sporty or custom look to seat repairs.
While visually striking, the baseball stitch offers less structural strength than other patterns. Use it for decorative touches on low-stress areas or as an accent alongside stronger structural stitching.
This pattern works well for adding a custom touch to plain leather seats. Some enthusiasts use it intentionally for its unique appearance. Consider combining baseball stitch aesthetics with hidden reinforcement stitching underneath.
Choosing the Right Pattern
Match your stitch pattern to the repair requirements. High-stress areas need strong patterns like the saddle stitch. Visible areas may benefit from decorative patterns if you have the skill. Hidden repairs can use simple whipstitch for efficiency.
Consider your experience level when choosing. The whipstitch succeeds for almost everyone on their first attempt. The saddle stitch requires practice before attempting visible repairs. Start with easier patterns and progress to advanced techniques.
Finishing Touches: Dyeing and Conditioning
The sewing is complete, but your repair is not finished. Proper finishing protects your work and blends it into the surrounding leather. These final steps make the difference between obvious repairs and professional-looking results.
Color Matching Leather Dye
Even with matching thread, repairs often show slightly. The new stitches may be shinier than the surrounding area, or the leather around the repair may be slightly different in color. Leather dye evens out these differences.
Start with a leather dye slightly lighter than your target color. It is easier to add layers of dye than to remove excess. Test the dye on a hidden area first, as leather takes dye differently depending on its condition and previous treatments.
Apply dye with a small sponge or brush, working in thin layers. Let each layer dry completely before adding the next. Build up color gradually until the repaired area blends with the surrounding leather. Finish with a clear topcoat for protection.
Applying Leather Conditioner
Leather conditioner keeps your repair flexible and prevents cracking. The sewing process and adhesive application can dry out leather locally. Reconditioning restores moisture and flexibility.
Apply conditioner to the entire seat, not just the repaired area. This ensures even wear and prevents the repaired spot from standing out. Work the conditioner into the leather grain with circular motions.
Let the conditioner absorb for at least 30 minutes, then buff off excess with a clean cloth. Reapply conditioner every few months to maintain leather health. Well-conditioned leather resists future tears better than dry, brittle material.
Protecting Repaired Areas
Consider applying a leather protectant to high-stress areas after your repair. These products create a barrier against dirt, oils, and UV damage. They extend the life of both the original leather and your repair work.
For driver’s seats that receive the most wear, consider adding a leather seat cover over the repaired area during daily use. This protects your work while still allowing you to show off your repair when you want to.
Frequently Asked Questions
What type of thread is best for sewing leather car seats?
Bonded nylon thread in size 92 to 138 (tex 90 to 135) is the best choice for sewing leather car seats. This thread offers superior strength, resists UV damage, and handles temperature extremes inside vehicles. Polyester upholstery thread is an excellent alternative if colorfastness is your priority, as it holds color better under sun exposure. For beginners, start with bonded nylon in a color close to your leather shade.
How much does it cost to sew a car seat?
DIY leather car seat sewing costs $30 to $100 for supplies including quality thread, curved needles, leather conditioner, and dye. Professional leather seat repair costs $100 to $300 per seat for patching and stitching. Full professional reupholstery ranges from $500 to $2,000 per seat depending on vehicle type and leather quality. DIY saves significant money if you have the time and patience to learn proper technique.
Can I make my car seats leather?
Yes, you can reupholster cloth seats with leather, but it is an advanced project requiring significant skill, time, and tools. Full reupholstering involves removing old fabric, creating new leather patterns, and sewing complete seat covers. This project typically costs $500 to $1,500 in materials alone for a full set of seats. Most car owners choose professional shops for full leather conversions, as mistakes are costly and the learning curve is steep.
What type of fabric is best for reupholstering car seats?
Automotive-grade leather and heavy-duty vinyl are the best materials for reupholstering car seats, offering durability and resistance to wear. High-quality canvas and durable synthetic fabrics like neoprene also work well for specific applications. The best choice depends on your climate, usage, and aesthetic preferences. Leather provides luxury feel and easy cleaning. Vinyl offers similar appearance at lower cost. Canvas and synthetic fabrics excel in durability for work vehicles or extreme climates.
Conclusion
Learning how to sew leather for car seats at home gives you a valuable skill that saves money and extends the life of your vehicle’s interior. With the right tools, quality thread, and patience, you can repair tears and seams that would otherwise require expensive professional work.
Start with small repairs to build your confidence before tackling larger projects. Remember that proper preparation, careful stitching, and good finishing techniques are the keys to invisible repairs. Your first attempt may not be perfect, but each repair improves your skills.
Take pride in maintaining your vehicle yourself. The satisfaction of a completed repair lasts long after the work is done. Your leather seats will thank you for the care and attention you give them.