
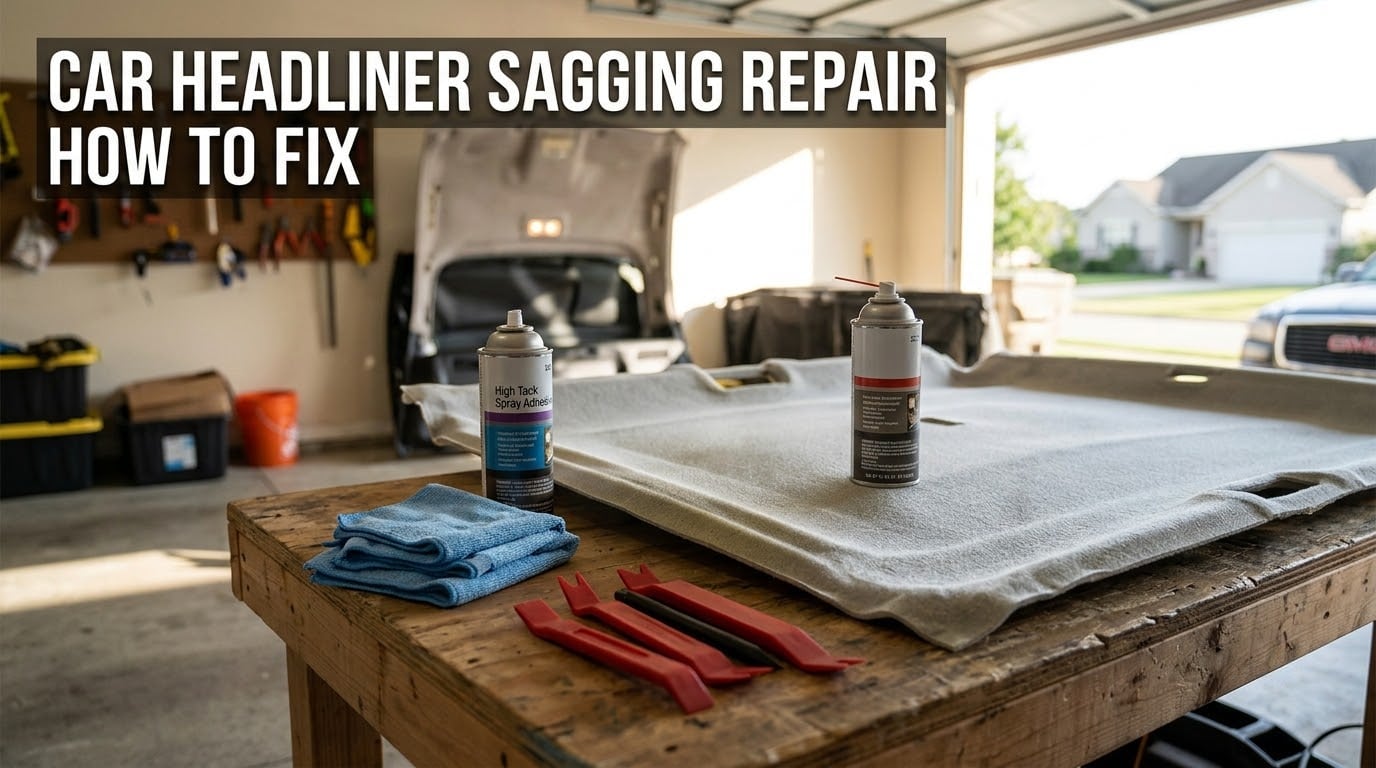
That annoying fabric drooping from your car’s ceiling isn’t just unsightly. It can block your view, rattle while you drive, and make your vehicle look years older than it is. The good news? You can often fix a sagging headliner yourself with the right approach and materials.
In this comprehensive guide on car headliner sagging repair how to fix, I’ll walk you through everything from understanding why headliners sag to completing a professional-quality repair at home. You’ll learn which adhesives actually work, when to repair versus replace, and how to make your fix last as long as possible.
Our team has researched forum discussions, tested repair methods, and consulted professional upholsterers to bring you the most practical, honest advice. Whether your headliner just started drooping or has been hanging for months, this guide will help you decide the best path forward.
Table of Contents
- What Causes a Sagging Headliner
- Tools and Materials You Will Need
- Car Headliner Sagging Repair How to Fix: Step-by-Step Guide
- Best Adhesive for Headliner Repair
- Repair vs Replace: When to Call a Professional
- Cost to Fix a Sagging Headliner
- Preventing Future Headliner Sagging
- Frequently Asked Questions
- Conclusion
What Causes a Sagging Headliner
Understanding why your headliner is sagging helps you choose the right repair approach. The headliner is that fabric-covered foam panel attached to your car’s interior ceiling. When it fails, several factors are usually to blame.
Heat and UV Damage
Prolonged sun exposure breaks down the adhesive bonding your headliner fabric to its foam backing. Parked cars can reach temperatures over 140°F inside, especially in summer. This repeated heating weakens glue bonds until they fail completely. Vehicles in hot climates like Arizona or Florida often show headliner sagging after just 5-6 years.
Adhesive Breakdown
Factory headliners use automotive-grade adhesive designed to last 10-15 years. However, this adhesive eventually dries out and loses its grip. Once the bond fails in one spot, gravity pulls the fabric down, creating that bubble or drooping effect. The adhesive doesn’t fail evenly, so you’ll often see sagging start in one area before spreading.
Foam Backing Deterioration
Here’s a critical detail many guides miss: the foam backing between your fabric and the roof board often disintegrates. When this happens, simply gluing the fabric back won’t work long-term. The old, crumbly foam prevents new adhesive from bonding properly. You can spot this problem when you see fuzzy, deteriorated foam stuck to the roof board after the fabric detaches.
Moisture Damage
Water leaks are a major cause of headliner sagging that many people overlook. A sunroof drain clog, leaking door seal, or windshield leak introduces moisture that attacks both the adhesive and foam backing. If your headliner sagging started after you noticed water stains or a musty smell, you likely have moisture damage. This type of damage makes repair much more difficult because the underlying foam and roof board may be compromised.
Age-Related Wear
Even without heat, moisture, or UV damage, time eventually wins. Most headliners last 10-15 years before showing signs of failure. The combination of temperature cycling, vibration, and natural material degradation eventually causes the adhesive bond to fail. Vehicles older than 12 years almost universally show some headliner sagging.
Tools and Materials You Will Need
Before starting your repair, gather everything you’ll need. Nothing derails a project faster than stopping midway to hunt for supplies.
Essential Tools
Trim removal tools help you remove interior panels without damaging clips or scratching surfaces. Plastic trim tools work better than metal ones for this purpose.
A scraper or putty knife removes old adhesive and deteriorated foam. Choose one with a comfortable grip since you’ll be scraping for a while.
A wire brush helps clean the roof board surface after scraping. Use a stiff-bristled brush meant for automotive work.
Clean rags and rubbing alcohol prepare surfaces for adhesive application. Never skip the cleaning step.
Masking tape and plastic sheeting protect surrounding areas from overspray if using spray adhesive.
Adhesive Options
Choosing the right adhesive makes or breaks your repair. I’ll cover specific recommendations in detail later, but your main options are:
Automotive spray adhesive designed specifically for headliners. This is the most common DIY choice and works well when applied correctly.
Brush-on contact cement offers more controlled application and stronger bonds for some situations.
Headliner repair kits include adhesive and sometimes replacement fabric for a complete solution.
Safety Equipment
Work in a well-ventilated area. Adhesive fumes can be overwhelming in enclosed spaces. Wear gloves to protect your skin from adhesive, and consider safety glasses if scraping overhead.
Optional Helpful Items
A heat gun can help soften old adhesive for easier removal, but use caution. Too much heat melts foam backing, making your job harder.
Replacement headliner fabric is worth considering if your original fabric shows damage, staining, or extensive foam deterioration on the back.
Paint roller or flat edge helps press fabric evenly into the adhesive for a smooth finish.
Car Headliner Sagging Repair How to Fix: Step-by-Step Guide
Now for the main event. Follow these steps carefully for the best results. I’ll include warnings for common mistakes that cause repairs to fail.
Step 1: Assess the Damage
Before diving in, examine your headliner carefully. This assessment determines whether repair is even worth attempting.
Check the sagging area size. Small sags under 6 inches are excellent candidates for DIY repair. Large areas over 2 feet may indicate widespread adhesive failure requiring full replacement.
Inspect the fabric condition. Pull the sagging fabric down gently and look at the back. If you see intact foam still attached to the fabric, you have a good chance at successful repair. If the fabric is bare or the foam is crumbling and falling off, you’ll need new fabric.
Look for water damage signs. Brown water stains, mold spots, or a musty smell indicate moisture problems. Address the water source before repairing, or your repair will fail quickly.
Test the roof board. Press on the hard backing behind the headliner. If it feels soft, spongy, or crumbly, the board itself is damaged. This situation calls for professional replacement.
Step 2: Prepare the Work Area
Preparation determines your success. Rush this step, and your repair will likely fail within months.
Remove any items attached to the headliner. This includes sun visors, grab handles, dome lights, and coat hooks. Use your trim removal tools to pry off covers, then unscrew the mounting hardware. Keep all screws and hardware organized.
If possible, remove the headliner board from the car. This gives you full access and lets you work flat. However, some vehicles make headliner removal extremely difficult. In those cases, you can work with the headliner in place.
Cover seats, dashboard, and any exposed areas with plastic sheeting. Masking tape secures the plastic. Adhesive overspray is nearly impossible to remove from fabric and plastic surfaces.
Open all windows or work outside. Ventilation isn’t optional when working with automotive adhesives.
Step 3: Remove Old Adhesive and Foam
This is the most time-consuming step, but skipping it dooms your repair. New adhesive cannot bond to old, crumbly foam or failed glue.
Start by gently pulling the sagging fabric away from the roof board. Work slowly to avoid tearing the fabric if you plan to reuse it.
Use your scraper to remove deteriorated foam from the roof board. You’ll see that fuzzy, orange or yellow foam stuck everywhere. Scrape until you reach a relatively clean, hard surface. This may take 30 minutes or more depending on the area size.
Here’s where many DIYers fail: they clean the roof board but forget to clean the back of the fabric. Flip the fabric over and scrape off any loose foam from that side too. The new adhesive needs to bond to both surfaces.
Use a wire brush on stubborn spots. Brush in circles to break up remaining foam and adhesive residue.
Wipe everything down with rubbing alcohol. This removes dust, oils, and remaining adhesive particles. Let surfaces dry completely before moving to the next step.
Step 4: Apply New Adhesive
With surfaces clean and dry, you’re ready for adhesive application. Follow your specific adhesive’s instructions carefully.
For spray adhesive, shake the can vigorously for at least one minute. Hold the can 8-10 inches from the surface and apply in a sweeping motion. Work in light, even coats rather than one heavy application. Heavy adhesive application causes runs, uneven bonding, and longer drying times.
Apply adhesive to both surfaces: the roof board and the back of the fabric. Many people only spray the roof board, but bonding strength increases dramatically when you coat both surfaces.
Let the adhesive become tacky before reattaching. Most spray adhesives need 2-5 minutes to reach the right tackiness. Touch the adhesive with your finger. It should feel sticky but not wet. If adhesive transfers to your finger, wait longer.
For contact cement, apply a thin layer to both surfaces and let it dry completely. Contact cement bonds instantly on contact, so you only get one chance to position the fabric correctly.
Step 5: Reattach the Fabric
This step requires patience and a steady hand. Once fabric touches tacky adhesive, repositioning is difficult or impossible.
Start from one edge of the repaired area. If working with a full headliner board, start from the center and work outward toward the edges.
Press the fabric firmly into place. Use a flat edge or paint roller to smooth the fabric against the roof board. Work in overlapping strokes to eliminate bubbles and wrinkles.
Pay special attention to corners and edges. These areas are most likely to peel later if not pressed firmly. Use your roller or the edge of your scraper to really work the fabric into adhesive at the boundaries.
For sagging areas in the middle of the headliner, you can sometimes create a small access hole, apply adhesive through it, then press the fabric up. However, this approach rarely lasts as long as full removal and proper repair.
Step 6: Let It Cure Properly
Adhesive needs time to reach full strength. Resist the urge to reinstall trim pieces or drive the car immediately.
Most headliner adhesives require 24-48 hours to fully cure. Check your adhesive’s specific recommendations. During this time, keep the car in a temperature-stable environment. Extreme heat or cold affects curing.
If you removed the headliner board, reinstall it after the adhesive cures. Carefully maneuver the board back into position, threading it through door openings or rear hatches as needed.
Reinstall all trim pieces, lights, and hardware you removed earlier. Tighten screws snugly but don’t overtighten, which can crack plastic trim or create new pressure points on the headliner.
Common Mistakes to Avoid
Review these pitfalls before and during your repair:
Incomplete foam removal causes most repair failures. That crumbly old foam prevents new adhesive from reaching a solid surface. If your repair peels after a few months, you likely didn’t clean thoroughly enough.
Reusing damaged fabric saves money upfront but costs more later. If the foam backing on your fabric is deteriorated, no amount of adhesive will create a lasting bond. Forum users consistently report better results with new fabric.
Using the wrong adhesive leads to quick failure. General-purpose spray adhesives often can’t handle the temperature extremes inside a car. Use adhesive specifically designed for automotive headliners.
Rushing the cure time weakens the bond. Even if the adhesive feels dry, chemical curing continues for hours. Give it the full recommended time.
Ignoring water damage guarantees future problems. If moisture caused your headliner sag, find and fix the leak first. Otherwise, you’ll be repairing again in a few months.
Best Adhesive for Headliner Repair
Adhesive choice significantly impacts repair longevity. Here’s what our research and forum feedback reveal about your options.
Spray Adhesive Options
3M Super 77 is widely available and works for many light-duty repairs. However, forum users report mixed results for headliners. The bond may weaken in hot conditions. Best for small repairs in moderate climates.
3M Headliner Adhesive (specifically designed for this application) performs better in temperature extremes. The formula handles the heat cycling that cars experience. This is the most commonly recommended spray adhesive in automotive forums.
Permatex Headliner Adhesive offers another automotive-specific option. Users report good results with proper surface preparation. Application is similar to 3M products.
3M #90 High Strength Adhesive works well for some applications, particularly where you need a stronger bond. However, it’s more expensive and can be harder to find. Some users prefer this for securing edges that keep peeling.
Brush-On Contact Cement
Contact cement creates an instant, strong bond. DAP Weldwood and similar products work well, but application differs from spray adhesive.
Brush-on adhesive gives you more control over where adhesive goes. This helps avoid overspray issues. However, getting even coverage over large areas takes more effort than spray.
The main advantage is bond strength. Contact cement typically creates stronger bonds than spray adhesive when properly applied. This matters for heavy fabrics or vehicles in hot climates.
What to Avoid
Stay away from general-purpose glues like Gorilla Glue, construction adhesive, or super glue. These products aren’t designed for the flexible, porous materials in headliners. They create rigid bonds that crack when the car flexes or temperature changes.
Also avoid cheap, generic spray adhesives from discount stores. The low price is tempting, but the bond typically fails within weeks in automotive conditions.
Adhesive Longevity Expectations
Be realistic about how long your repair will last. Based on forum user reports, DIY spray adhesive repairs typically last 6-18 months. Some last years, others fail within months. Climate, adhesive quality, and preparation quality all affect longevity.
Contact cement repairs tend to last longer when properly applied, often 2-3 years or more. The stronger bond holds up better to temperature cycling.
Professional replacement using high-quality materials typically lasts 10+ years. You pay more upfront but enjoy much longer service life.
Repair vs Replace: When to Call a Professional
Not every sagging headliner is worth repairing yourself. Here’s how to decide whether DIY repair or professional replacement makes more sense.
Signs a DIY Repair Will Work
The sagging area is small, under 12 inches in diameter. Small repairs are manageable and more likely to succeed.
The fabric and foam are in good condition. When you pull the fabric back, you see intact foam attached to it. This means the fabric is still usable.
The roof board is solid. Pressing on the backing behind the headliner reveals no soft spots or crumbling.
No water damage is present. Your headliner sagging comes from age or heat, not moisture infiltration.
You’re comfortable with DIY projects and have the time to do thorough preparation work.
Signs You Need Professional Replacement
The headliner is sagging in multiple large areas or across most of the ceiling. Widespread failure indicates the entire adhesive bond has failed. Spot repairs will look uneven and likely fail quickly.
The foam backing has disintegrated. When you see more bare fabric than foam on the back of your headliner, new fabric is necessary. Reattaching fabric without foam backing looks uneven and won’t last.
The roof board is damaged. Soft spots, water damage, or crumbling in the board itself require professional attention. DIY repair on a damaged board wastes time and materials.
Water leaks caused the sagging. You need to find and fix the leak, then replace the headliner. Repair on a water-damaged headliner almost always fails.
Your vehicle has complex headliner removal. Some cars require nearly complete interior disassembly to remove the headliner board. Professional shops have experience and tools for these challenging vehicles.
Professional Replacement Benefits
A professional job typically costs more but lasts significantly longer. Shops use commercial-grade adhesives and materials not available to consumers. They also have experience with difficult vehicles and can often complete the job in one day.
Most professional headliner replacements come with warranties. If the new headliner sags within a year or two, the shop fixes it. DIY repairs have no such guarantee.
You also get new fabric rather than reusing your old, potentially damaged material. New fabric looks fresher and provides better adhesion surface.
Cost to Fix a Sagging Headliner
Understanding the cost helps you budget and decide between DIY and professional options. Here’s what to expect.
DIY Repair Costs
For a DIY repair, you’re looking at roughly 20-60 dollars in materials. Spray adhesive costs 10-20 dollars per can. You may need two cans for larger areas. A headliner repair kit with adhesive and fabric runs 30-60 dollars.
If you need new fabric, budget an additional 30-100 dollars depending on material quality and how much you need. Rolls of headliner fabric vary widely in price.
Tools are an additional expense if you don’t already own them. A trim removal tool set costs 15-30 dollars. Scraper, wire brush, and cleaning supplies add another 10-20 dollars.
Total DIY cost typically lands between 50-120 dollars for materials plus any tools you need to purchase.
Professional Replacement Costs
Professional headliner replacement varies significantly by vehicle and shop. Basic sedans and coupes typically run 300-600 dollars for a complete headliner replacement. SUVs, minivans, and trucks with larger headliners cost 500-900 dollars.
Luxury vehicles and cars with complex headliner shapes can cost 800-1,500 dollars or more. Some vehicles require significantly more labor to remove and reinstall the headliner board.
Shop around and get multiple quotes. Prices can vary by hundreds of dollars between shops. Mobile headliner services sometimes offer better prices since they have lower overhead.
Factors Affecting Price
Vehicle size and complexity impact professional cost most significantly. A small coupe headliner takes less time and material than a full-size SUV.
Headliner condition matters too. A headliner that’s already been repaired multiple times or shows water damage requires more preparation work, increasing labor costs.
Geographic location affects pricing. Shops in major metropolitan areas typically charge more than rural shops. Cost of living differences show up in labor rates.
Preventing Future Headliner Sagging
Once you’ve fixed your headliner, you want it to stay fixed. Here’s how to extend your repair’s life and prevent future problems.
Climate Control Tips
Park in shade whenever possible. A windshield sunshade reduces interior temperature by 20-40°F. Lower peak temperatures mean less stress on your adhesive bond.
If you live in an extremely hot climate, consider tinted windows. This reduces overall interior temperature and UV exposure that degrades adhesive.
In cold climates, let your car warm up gradually. Rapid heating after a cold night stresses the headliner bond. Give the interior time to reach temperature naturally rather than blasting heat immediately.
Moisture Prevention
Check sunroof drains annually. Clogged drains cause water to pool and eventually leak into the headliner. Run a thin wire through drain tubes to clear any blockages.
Inspect door and window seals for cracks or gaps. Replace deteriorated seals before they allow water intrusion.
Watch for windshield leaks. Water stains on the headliner near the windshield indicate seal failure. Address these quickly before damage spreads.
Regular Inspection
Every few months, look up at your headliner while sitting in the car. Early detection of sagging lets you make small repairs before problems grow.
Pay special attention to corners and edges. These areas typically show early sagging. Small repairs now prevent large repairs later.
Warning Signs to Watch
Small bubbles or ripples forming in the fabric indicate adhesive failure beginning. Address these early while repair is still manageable.
Water stains anywhere on the headliner signal a leak. Find and fix the source immediately before moisture destroys your headliner.
Increasing noise from the headliner while driving means the fabric is loosening. The flapping sound indicates it’s time for repair.
Frequently Asked Questions
How much does it cost to fix a sagging headliner?
DIY repair costs 50-120 dollars for materials and basic tools. Professional replacement ranges from 300-600 dollars for sedans to 500-1,500 dollars for larger vehicles or luxury cars with complex headliners.
Can you fix a sagging headliner without removing it?
Yes, for small sagging areas you can inject adhesive through a small access hole and press the fabric back up. However, this method rarely lasts as long as proper repair with headliner removal, thorough surface preparation, and adhesive applied to both surfaces.
What is the best adhesive for headliner repair?
Automotive-specific spray adhesives like 3M Headliner Adhesive or Permatex Headliner Adhesive work best for most DIY repairs. Contact cement creates stronger bonds for larger areas or hot climates. Always choose adhesive designed for automotive use and temperature extremes.
How long does headliner repair last?
DIY repairs typically last 6-18 months depending on climate, adhesive quality, and preparation thoroughness. Contact cement repairs often last 2-3 years. Professional replacement using commercial-grade materials usually lasts 10+ years.
Can I use spray adhesive on headliner?
Yes, but use automotive headliner spray adhesive, not general-purpose spray adhesive. Products like 3M Headliner Adhesive are formulated for the temperature extremes cars experience. Apply in thin, even coats to both surfaces and allow proper tack time before bonding.
Is it worth repairing a headliner or should I replace it?
Repair is worth attempting for small sagging areas under 12 inches with intact fabric and solid roof board. Replace when sagging is widespread, foam backing has disintegrated, water damage exists, or the roof board is compromised. Professional replacement costs more but lasts significantly longer.
Conclusion
A sagging car headliner is annoying but fixable. With the right approach, materials, and preparation, most DIY repairs succeed. The key is thoroughness: completely remove old adhesive and foam, use automotive-specific adhesive, and allow proper cure time.
For car headliner sagging repair how to fix, the steps are straightforward. Assess damage, prepare surfaces meticulously, apply adhesive to both surfaces, press firmly, and let cure completely. Rushing any step, especially foam removal, leads to premature failure.
Remember that DIY repairs have limitations. Widespread sagging, water damage, or deteriorated foam usually calls for professional replacement. The higher cost brings significantly longer service life and warranty protection.
Whether you tackle this project yourself or hire a professional, addressing a sagging headliner improves your driving experience and vehicle value. Start by assessing your situation using the guidelines in this article, then choose the path that makes sense for your vehicle, skills, and budget.