
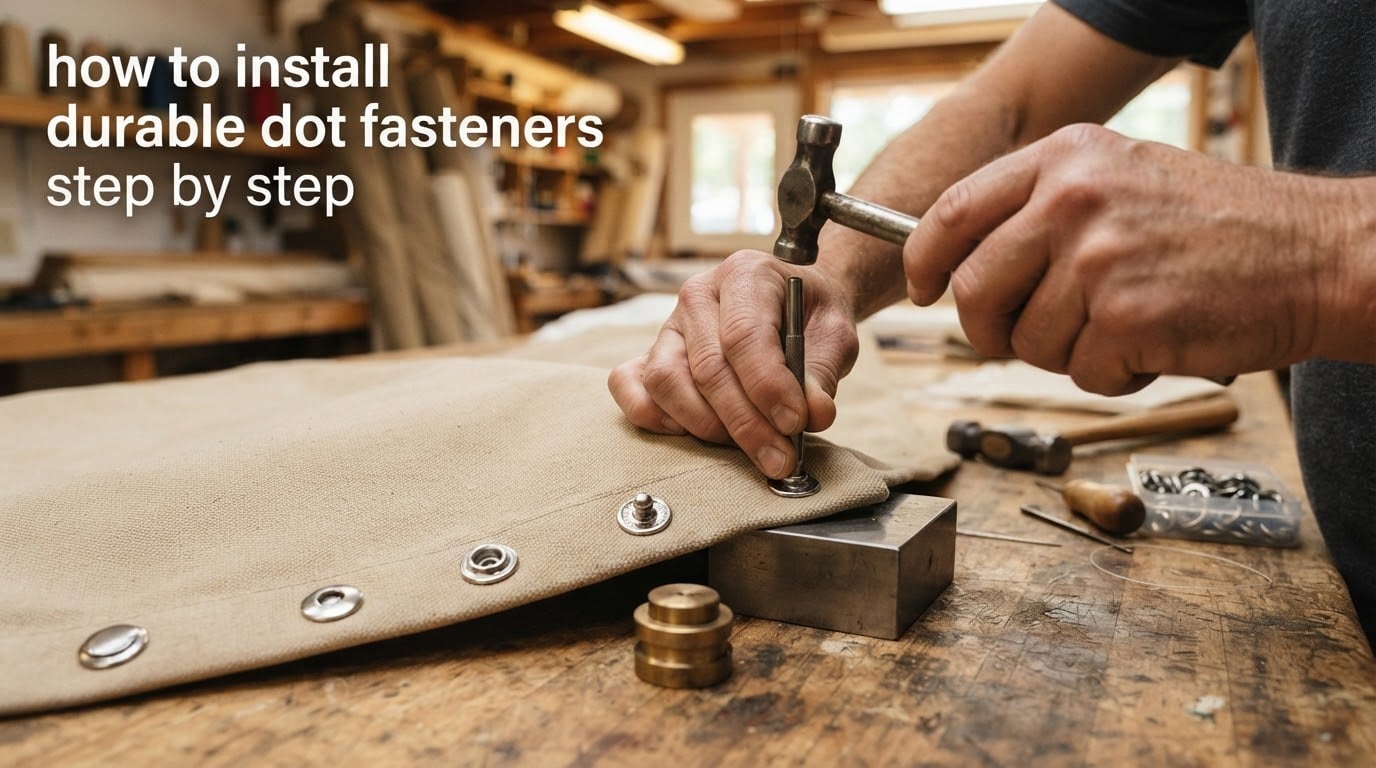
If you have ever wrestled a flapping boat cover or watched a convertible top balloon up at highway speed, you already understand why the durable dot fastener has earned its name. This guide walks through how to install durable dot fasteners step by step, from choosing the right cap and socket to the final crimp that locks the assembly into your canvas, leather, or aluminum frame.
By the end, you will know which tools you need, how to space the snaps, and how to troubleshoot the most common installation failures. We will also compare durable dot, lift-the-dot, and pull-the-dot styles so you can pick the right directional fastener for your project.
Table of Contents
- What Is a Durable Dot Fastener?
- Tools and Materials You Will Need
- Durable Dot vs Lift-the-DOT vs Pull-the-DOT
- Prepare the Workpiece Before You Cut
- How to Install Durable Dot Fasteners Step by Step
- Installing Durable Dot Fasteners Without a Snap Press
- Mounting Durable Dots on Aluminum Frames
- Spacing and Pattern Layout
- Common Mistakes and Troubleshooting
- Removing and Replacing a Durable Dot Snap
- Maintenance Tips for Long-Lasting Snaps
- Frequently Asked Questions
- Wrapping Up
What Is a Durable Dot Fastener?
A durable dot fastener is a two-part press stud designed for repeated use on canvas, marine vinyl, leather, and fabric covers. The assembly has four pieces: a stud (cap), a socket, an eyelet backing, and the material it sits in. When you press the cap and socket together with a snap-setting tool, the socket curls over the cap and locks mechanically.
The “DOT” name comes from the original manufacturer, DOT Fasteners, whose marine-grade snaps have been specified by the U.S. military and NASA for decades. NASA used directional press studs on spacesuit layers because the snaps must hold under pressure yet release on command.
Three styles share the DOT heritage. Durable dot snaps are non-directional: they engage and release from any angle. Lift-the-dot snaps only release when you lift the edge of the cap. Pull-the-dot snaps only release when you pull straight out. That directional release is what makes lift-the-dot and pull-the-dot favorites for windscreens, tonneau covers, and anything that should never pop open by accident.
Tools and Materials You Will Need
You can install a durable dot snap with very little gear, but the right tool makes the difference between a clean crimp and a torn fabric. Our team keeps the following on the bench for every install.
- Snap-setting tool: A hand press such as the Pres-N-Snap, a bench-mounted hand press, or the M840 Snapmaster for production runs.
- Setting die and anvil: Match the die to your snap size (most marine DOT fasteners are 24 ligne, sometimes called “size 4” or “line 24”).
- Foot press (optional): A manual foot press delivers even pressure for thicker stacks or workwear.
- Hammer and anvil block (backup method): Works for occasional installs but is harder to control.
- Hole punch or awl: A rotary hole punch sized to the snap shaft gives a clean opening without fraying fabric.
- Backing plates: Plastic or metal washers that spread the load on thin canvas or vinyl.
- Marking tools: Tailor’s chalk, silver pen, and a steel ruler or template.
- Countersunk machine screws and a tap (for aluminum frames): 8-32 is the most common size.
- Marine grade stainless steel snaps: Stainless resists corrosion far better than nickel-plated brass in saltwater.
If you only plan to set a handful of snaps, a Pres-N-Snap or similar hand tool is the sweet spot between price and effort. For more than a hundred snaps in a season, step up to the M840 Snapmaster. We have set thousands of snaps with both and the Snapmaster pays for itself once you stop fighting hand fatigue.
Durable Dot vs Lift-the-DOT vs Pull-the-DOT
Picking the wrong DOT style is one of the most common frustrations we see. The cap and socket look similar at a glance, but the release direction is built into the geometry of the parts.
- Durable DOT: Non-directional. Engages and releases from any angle. Best for general canvas, clothing, and removable panels where convenience matters.
- Lift-the-DOT: Directional. Releases only when you lift the cap edge. Common on tonneau covers, workwear pockets, and truck cab curtains.
- Pull-the-DOT: Directional. Releases only when you pull straight out. Favored for windscreens, marine canvas, and anywhere vibration could pop a non-directional snap.
The cap and socket on lift-the-dot and pull-the-dot fasteners look almost identical at first glance. The release direction depends on whether the socket has a flat edge (pull-the-dot) or a uniformly round profile (lift-the-dot). When in doubt, lay the parts next to each other and compare the socket opening.
Prepare the Workpiece Before You Cut
Most failed installs trace back to layout mistakes. A snap set in the wrong spot either tears the fabric or pulls free under load. Spend five minutes on layout and you will save an hour of rework.
Mark every snap location with tailor’s chalk first. Use a steel ruler or a cardboard template so spacing stays consistent. For most canvas projects, 1 to 1.5 inches from the edge is the safe zone. Any closer and the snap is sitting on the bias where fabric is weakest.
Pair the cap and socket to confirm orientation. The stud side usually sits on the frame or fixed panel, while the socket goes on the removable cover. Lay the cover flat over the frame, mark through the existing hole, and double-check the mark sits centered on the frame before you commit.
How to Install Durable Dot Fasteners Step by Step
This is the core procedure. The exact pressure and order changes slightly between a hand press, foot press, and hammer method, but the sequence is the same.
- Mark and punch the hole. Push the awl or rotary punch through the mark. Keep the hole just large enough for the snap shaft; a sloppy hole is the number one cause of torn canvas.
- Insert the stud (cap side). Push the stud shaft through the hole from the back of the fabric so the cap face shows on the finished side.
- Add a backing plate (optional). Slide the backing plate over the shaft on the back. Backing plates spread load on thin materials and prevent pull-through.
- Seat the stud in the anvil die. The anvil die holds the stud centered while you set the socket.
- Place the socket over the stud. Drop the socket over the protruding stud, oriented so the open side faces the stud.
- Crimp with the setting die. Bring the setting die down with firm, even pressure. Stop when you feel the snap “click” home; over-crimping flattens the socket and weakens the hold.
- Test the snap. Pull the cover on and off several times. The snap should engage with a positive click and release only with the expected force.
If you are using a hand press such as the Pres-N-Snap, the dies are color-coded. Match the die color to the snap box. Mismatched dies are the second most common cause of crooked snaps.
Installing Durable Dot Fasteners Without a Snap Press
You can install durable dot fasteners without a dedicated snap press if you have a vise, a hammer, and an anvil block. The hammer method is slower and less consistent, but it works for one-off repairs.
- Set the stud in the anvil block on a solid surface (a thick slab of steel or a cast-iron anvil works well).
- Drop the socket over the stud.
- Set the setting punch squarely on top of the socket.
- Strike the punch once firmly with a ball-peen hammer. Hit it straight, not at an angle.
- Test the snap and adjust as needed.
The trick with the hammer method is a single, controlled blow. Multiple light taps will deform the socket without ever locking it onto the stud. Reviewers on LocostUSA forums confirm that this method works for occasional windscreen snaps, but a hand press is worth buying if you set more than a dozen at a time.
Mounting Durable Dots on Aluminum Frames
Boat windscreens, motorcycle screens, and many convertible top frames are aluminum. You can rivet durable dots to aluminum, but you can also screw them on. Our team prefers screws for screens because rivets can crack if you ever need to remove the snap for service.
Tap an 8-32 thread directly into the aluminum channel before you install your glass or panel. Use countersunk machine screws so the head sits flush with the frame and does not catch on the cover. Forum members from LocostUSA note that you should never let a rivet touch the glass; the same applies to any rigid mount near a windshield.
Spacing and Pattern Layout
Spacing is where most DIY installs go wrong. Snaps set too far apart let wind work the cover loose between fasteners. Snaps set too close waste hardware and weaken the fabric in one small area.
For boat covers, place a snap every 8 to 12 inches along the edge and at every 18 to 24 inches across the body. For windscreens, forum experience suggests at least nine snaps across the top edge to prevent the center from lifting at highway speed. For tonneau covers, work from the corners and set a snap every 6 inches along the perimeter.
A simple template speeds up repetitive installs. Cut a cardboard strip with holes punched at your chosen spacing. Lay the strip on the workpiece, mark through each hole, and you get identical layouts across multiple panels.
Common Mistakes and Troubleshooting
Even experienced installers hit problems. Here are the failures we see most often and how to fix them.
- Snap pulls out of the fabric. The hole is too big or the backing plate is missing. Redo the snap with a fresh hole and add a backing plate.
- Snap crimps crooked. The stud is not seated in the anvil die, or the setting punch is misaligned. Disassemble the snap and start over with new parts.
- Socket is too loose. You under-crimped. Reset the socket with firmer pressure, or replace both parts if the cap is deformed.
- Fabric tears around the snap. The hole was punched too close to the seam or the edge. Move the snap and patch the original spot with a reinforcing patch.
- Snap will not release. The wrong DOT style is in use, or the socket is over-crimped. Compare against a known good fastener and replace parts as needed.
When a snap fails, replace both the cap and socket. Mixing old and new parts often leaves a weak crimp because the geometry no longer matches.
Removing and Replacing a Durable Dot Snap
To remove a snap, work from the back side. Slip a small flat screwdriver under the socket flange and gently pry the socket open. Be careful not to cut the fabric underneath. Once the socket is off, push the stud out from the front.
If the stud spins but does not come out, the back of the stud is deformed. Cut the fabric around the snap, remove the assembly, and patch the hole with a reinforcing piece of similar material before you set a new snap in a slightly offset position.
Maintenance Tips for Long-Lasting Snaps
A marine grade stainless steel snap will outlast a nickel-plated brass snap in most environments, but it still needs basic care. Rinse snaps with fresh water after saltwater exposure, and apply a thin coat of marine grease or silicone spray once a season to keep the release smooth. Check for loose snaps at the start of each boating or driving season and replace any that show movement.
Frequently Asked Questions
How to install lift the dot fasteners?
Mark the location, punch a clean hole, insert the stud from the back, set the socket over the stud, and crimp with a matching setting die. Lift-the-dot snaps use the same installation sequence as durable dot snaps, only the socket has a directional release that opens when you lift the cap edge.
What is a fastener dot?
A fastener dot is a press stud snap made by DOT Fasteners. The family includes durable dot (non-directional), lift-the-dot (releases only when lifted), and pull-the-dot (releases only when pulled straight out). All three styles crimp onto fabric, canvas, or metal with a setting tool.
How do you set a durable dot snap without a tool?
You can set a durable dot snap with a hammer, anvil block, and setting punch. Place the stud in the anvil, drop the socket over the stud, set the punch on top, and strike once with a firm, controlled blow. A dedicated snap press gives more consistent results for production work.
Can durable dot fasteners be riveted?
Yes, durable dot fasteners can be riveted to metal panels or aluminum frames. Use a rivet that matches the snap shaft diameter, and keep the rivet head away from glass or other surfaces where contact could cause cracking. Screws are easier to remove if you ever need to service the snap.
What is the difference between durable dot and lift the dot?
Durable dot snaps are non-directional and release from any angle. Lift-the-dot snaps are directional and only release when you lift the edge of the cap. Lift-the-dot is the better choice for tonneaus and truck curtains where vibration could pop a non-directional snap loose.
Wrapping Up
You now have the complete picture of how to install durable dot fasteners step by step. Start with the right DOT style for your application, mark your layout carefully, and use a setting die that matches your snap size. Marine grade stainless steel parts will outlast nickel-plated brass in any outdoor project, and a dedicated hand press will outlast a hammer once you set more than a dozen snaps.
If you are repairing a boat cover or windscreen, measure twice and test-fit before you commit to a layout. If you are building something new, build a cardboard template first and reuse it on every panel. Either way, the install goes quickly once the prep work is done.
For more tips on automotive trim and fastener work, our team’s complete archive of guides and how-tos is the next stop on your reading list.