
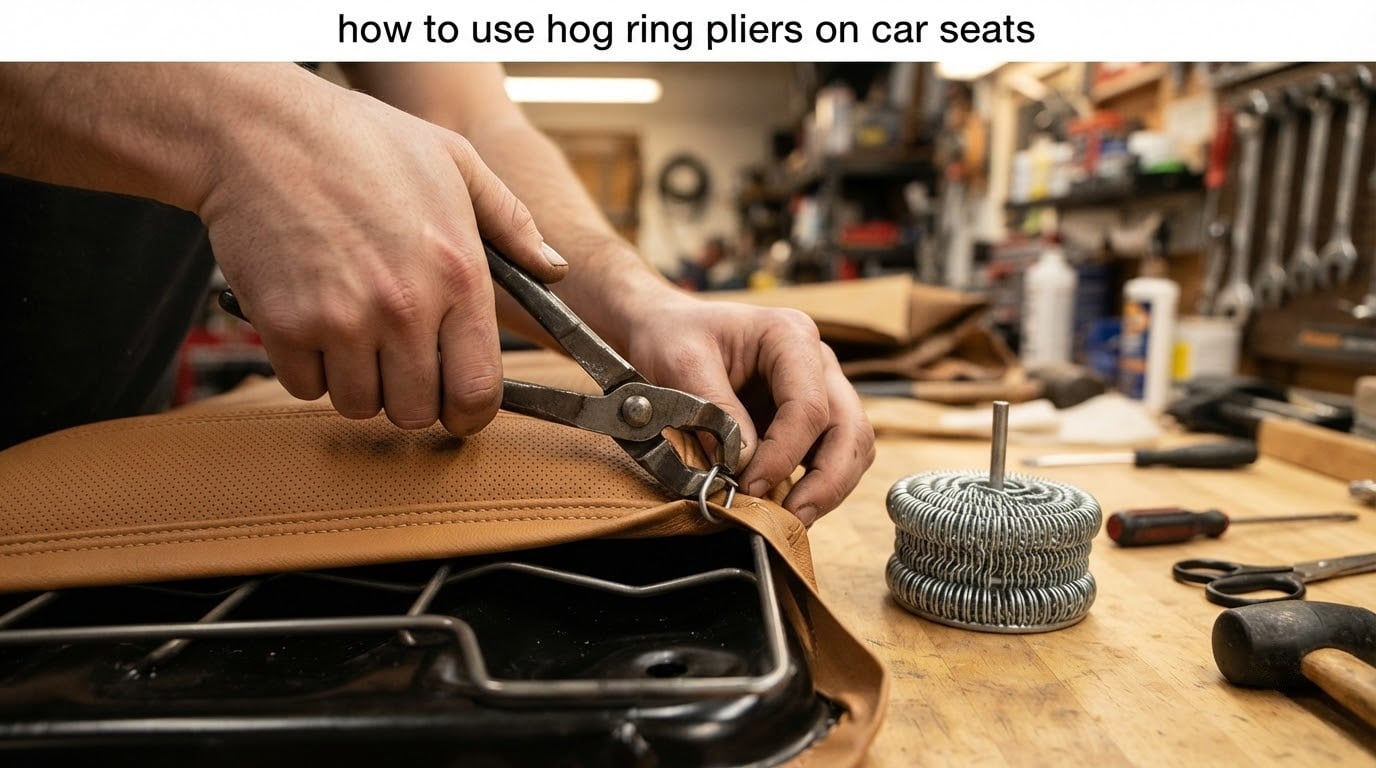
If your seat covers are sagging, slipping, or coming loose at the seams, the fix almost always comes down to one small tool and one small piece of metal. Learning how to use hog ring pliers on car seats is the single most useful skill in DIY auto upholstery, and it is much easier than most beginners expect.
I have spent the last several years helping our team at Segal Motor Trimmings walk first-time DIYers through seat cover installations, and the same questions come up every week. Which pliers do I buy? What size rings do I need? Do I reuse the old rings or cut them out? In this guide, I will answer all of those questions, walk you through a full installation step by step, and share the mistakes I see beginners make most often.
By the end, you will know exactly how to use hog ring pliers on car seats to get a tight, factory-quality finish on your upholstery, fabric, or leather seat covers, without paying a shop several hundred dollars to do it for you.
Table of Contents
- What Are Hog Rings and How Do Hog Ring Pliers Work?
- Essential Tools and Materials You Need
- Angled vs Straight Hog Ring Pliers: Which Should You Choose?
- Choosing the Right Hog Ring Size and Material
- How to Remove Old Hog Rings Safely
- How to Use Hog Ring Pliers on Car Seats: Step-by-Step
- Hog Ring Spacing, Tension, and Pattern Guidelines
- Common Mistakes to Avoid When Using Hog Ring Pliers
- Hog Rings vs Zip Ties vs Christmas Tree Clips: When to Use Each
- Troubleshooting: Fixing Loose Covers and Puckered Fabric
- Safety Tips and Protective Equipment
- Frequently Asked Questions
- What size hog ring should I use for auto upholstery?
- How do I remove hog rings from upholstery without damaging the seat?
- What are the best hog ring pliers for auto upholstery?
- Are hog rings better than zip ties for car seat covers?
- How do you use hog ring pliers step by step?
- How many hog rings do I need per car seat?
- Final Thoughts on Mastering Hog Ring Pliers for Car Seats
What Are Hog Rings and How Do Hog Ring Pliers Work?
Hog rings are small, open metal fasteners shaped like the letter C or D that get crimped closed around fabric, foam, and the seat frame wire to lock upholstery in place. Hog ring pliers are specialty pliers with grooved jaws designed to hold an open ring, squeeze it shut, and lock the material together in one motion.
Think of a hog ring as a tiny metal staple that loops around the seat cover edge and the seat frame wire at the same time. When the pliers close the ring, the loop tightens and pulls the fabric down onto the foam and frame, leaving a clean, taught surface that does not sag or bunch.
There are two common ring shapes you will see. C-rings are the most common in modern vehicles and look like an open letter C. D-rings have a slightly different geometry that some installers prefer because they crimp a little flatter. For most DIYers, either shape works fine as long as you match the size to your seat.
The pliers themselves come in a few styles. Spring-loaded manual pliers are the most popular for DIY because they feed rings automatically from a magazine. Basic manual pliers hold one ring at a time and require you to load each one by hand. Both work, but the magazine style saves a huge amount of time on a full seat cover job.
Essential Tools and Materials You Need
Before you start a seat cover project, gather every tool and material on this checklist. Running out of rings halfway through a seat installation is frustrating, and scrambling for a socket at the bottom of a toolbox while the seat is half-disassembled is worse.
- Spring-loaded hog ring pliers with a magazine that holds at least 50 rings at a time
- Galvanized steel hog rings, 3/4 inch (factory standard for most vehicles)
- Small diagonal cutters for removing old rings without bending them
- T55, T50, and T20 Torx bits for removing seat bolts and trim panels
- 15mm wrench or socket for most seat mounting bolts
- 10mm deep socket for seat track and side rail hardware
- Trim removal tools (plastic pry tools) to avoid scratching panels
- Safety glasses to protect your eyes from flying metal rings
- Work gloves to keep sharp ring edges off your fingers
- Seat removal tools if your vehicle has one-piece seat bracket clips
- A roll of listing wire for securing seat cover edges before ring installation
- A small flashlight or headlamp for the cramped areas under the seat
A basic kit of pliers, rings, and cutters will run you less than a typical professional installation, and you can reuse it for headliners, door panels, and other interior jobs for years. Buy at least 300 rings for a full front seat pair, and add 100 more if you plan to do the rear bench.
Angled vs Straight Hog Ring Pliers: Which Should You Choose?
Angled hog ring pliers have jaws set at roughly 45 to 60 degrees from the handles, which lets you reach into the tight spaces under the seat without twisting your wrist. Straight hog ring pliers have jaws that line up directly with the handles, which gives you more pushing force but less access in cramped areas.
For most car seat work, I strongly recommend an angled pair. The space between the seat foam and the seat pan wire is narrow, and your hands have to come in from odd angles. A straight pair works fine on open surfaces like the seat back or headrest area, but you will find yourself struggling under the seat front where the cover wraps around the front lip of the foam.
Another choice is between magazine-style and single-load pliers. Magazine pliers hold a strip of pre-loaded rings and feed one into the jaws each time you squeeze. Single-load pliers require you to drop one ring into the jaws for every crimp. Magazine pliers are three to four times faster on a full seat job, and they are not much more expensive.
If budget matters more than speed, single-load pliers still get the job done, and many DIYers keep a pair in the toolbox for occasional repairs. If you are doing a full interior restoration or expect to do more than one seat, the magazine style is well worth the small upcharge.
Choosing the Right Hog Ring Size and Material
For most factory automotive upholstery, 3/4 inch round galvanized steel hog rings are the correct size. This is the size that virtually every OEM seat uses, and it is what your seat cover manufacturer expects if you bought a replacement cover set.
You will sometimes see 1/2 inch and 1 inch rings sold alongside 3/4 inch. The smaller rings are too weak for seat cover work and tend to pop open under tension. The larger rings are made for heavier jobs like cargo netting and fencing. Stay with 3/4 inch unless your seat cover manufacturer specifically calls for a different size.
On material, galvanized steel is the standard and works for almost every interior application. Stainless steel rings resist corrosion better, which matters if you live in a coastal area or drive a convertible with the top down often. For a daily driver with a closed cabin, galvanized is the right balance of cost and durability.
For leather seats versus fabric seats, the ring size stays the same. What changes is how tightly you crimp. Leather stretches less than cloth, so you can pull it taut before crimping. Fabric has more give, so leave a small amount of slack to avoid tearing the cover at the ring.
How to Remove Old Hog Rings Safely
The single most important rule for removing old hog rings is this: cut them, do not bend them. Trying to pry old rings open with regular pliers will either damage the surrounding fabric or send a sharp ring fragment flying. Cut them out cleanly and install new ones in their place.
Start by sliding the seat out of the car and onto a clean work surface. Take photos of the original hog ring pattern with your phone so you have a reference for the new installation. Then use small diagonal cutters to snip each ring in one place, working your way around the cover.
Cut each ring in one motion and let the two halves fall free. Do not pull on the cover while you cut, because a sudden release can tear the fabric or foam. As you remove each ring, drop it into a small container so the sharp metal pieces do not end up on your garage floor or in your carpet later.
One Mustang7G forum user put it perfectly when they wrote, “In the name of all that is holy, do not attempt to bend the old hog rings out with pliers, or try to bend and re-use the old rings.” Community experience across years of seat installations has shown that cutting and replacing is faster, safer, and gives a cleaner result than trying to reuse old rings.
Once all the old rings are out, brush off the seat foam and inspect the seat pan wire. If the wire is bent or corroded, straighten it with a pair of needlenose pliers before installing the new cover.
How to Use Hog Ring Pliers on Car Seats: Step-by-Step
This is the core of the guide, and it is the part I wish I had when I did my first seat cover job. Follow these steps in order, and do not skip the prep work at the beginning. The seat you save by taking an extra hour to remove carefully is your own.
Step 1: Disconnect the battery. Modern seats have side airbag sensors and seat occupancy detectors. Disconnect the negative battery terminal and wait at least five minutes before unplugging any seat wiring harness.
Step 2: Remove the seat from the vehicle. Slide the seat all the way back to expose the front bolts, then all the way forward to expose the rear bolts. Use the correct Torx bit and socket for your vehicle. Most cars use a T55 or T50 for the front bolts and a 15mm or 10mm for the side rails. Lift the seat out with a helper if it is heavy.
Step 3: Take reference photos. Photograph the original cover from multiple angles, especially the hog ring pattern on the seat bottom and back. These photos will save you when you are trying to remember which loop goes where.
Step 4: Remove the old cover. Cut the old hog rings with diagonal cutters. Slide the cover off the foam carefully and set it aside. Do not throw the old cover away yet, because you will use it as a pattern.
Step 5: Inspect and prep the foam. Check the foam for cracks or thin spots. If the foam is degraded, replace it now. Slide the new cover over the foam and align the seams with the original cover pattern.
Step 6: Anchor the center first. Start with the center of the seat bottom. Pull the cover taut over the foam, hook a hog ring around the seat pan wire and the cover listing, and crimp it closed with the pliers. The first ring sets the position for every other ring.
Step 7: Work outward in a star pattern. Move from the center ring to the front, back, left, and right, adding rings as you go. Working in a star pattern keeps tension even and prevents puckering.
Step 8: Crimp the corners last. The corners collect the most fabric and need the most adjustment. Pull the cover into position, fold any excess toward the inside, and add two to three rings close together to lock the fold.
Step 9: Repeat for the seat back. Follow the same center-out, star-pattern approach on the backrest. Be careful around any seat-mounted airbags or occupancy sensors that the cover has to fit over.
Step 10: Reinstall the seat. Slide the seat back into the vehicle, torque the bolts to factory spec, reconnect the wiring harness, and reconnect the battery. Test all seat functions including heating, cooling, and power adjustments before driving.
Hog Ring Spacing, Tension, and Pattern Guidelines
How many hog rings per seat section depends on the seat, but a typical front bucket seat uses 25 to 40 rings, and a rear bench uses 50 to 70. Spread the rings evenly along the seat pan wire, keeping about 2 to 3 inches between each ring on open areas and tightening the spacing to 1 inch on curves and corners.
For tension, the cover should feel like a drum head. Not loose enough to shift when you sit down, not so tight that it pulls the foam out of shape. If you can grab the cover between two rings and pull more than a quarter inch away from the foam, add another ring.
On corners, fold the extra fabric toward the back of the seat and trap the fold under two rings placed an inch apart. This keeps the corner flat and prevents the cover from slipping off the foam over time. Avoid diagonal folds, because they tend to come loose.
For leather specifically, work a little looser than you would for fabric. Leather does not have much stretch, and over-tightening can crack the hide at the ring points. Pull the cover until the wrinkles disappear, then back off a fraction of an inch before crimping.
Common Mistakes to Avoid When Using Hog Ring Pliers
I have made most of these mistakes myself, and I have seen every one of them on customer seat covers that came into our shop for repair. Avoid them, and your installation will look factory-fresh for years.
Reusing old rings. Once a ring has been crimped and opened, the metal has work-hardened. Reusing it almost always leads to the ring popping open under tension. Always install new rings.
Skipping safety glasses. When a ring slips out of the pliers mid-crimp, it can launch across the room at high speed. Safety glasses are non-negotiable for this job, and they cost less than an emergency room visit.
Using the wrong size rings. Anything smaller than 3/4 inch will fail under normal driving loads. Anything bigger will not close properly in the pliers.
Tightening one side at a time. If you crimp all the rings on the left side before touching the right, the cover will end up crooked. Always work in pairs from the center out.
Forgetting to disconnect the battery. Modern seats have airbags and sensors. Disconnect the battery before unplugging anything and wait five minutes for the system to power down.
Not taking reference photos. Without photos, you are guessing at the original pattern. Take at least four photos of the original cover before you remove it.
Hog Rings vs Zip Ties vs Christmas Tree Clips: When to Use Each
Hog rings, zip ties, and Christmas tree clips all fasten seat covers, but they work best in different situations. Hog rings are the gold standard for OEM-style installations and any spot where the fastener will be hidden under the seat. They are strong, permanent, and lie flat against the seat pan wire.
Zip ties are a popular alternative because they are cheap, easy to find, and quick to install. One Honda-Tech forum user noted, “I cut them off with heavy duty wire cutters and reinstall with zip ties. It sounds ghetto, but they are much easier to work with and work just as well.” For a budget installation on a daily driver, zip ties can hold a cover in place for years.
The downside of zip ties is that they do not lie flat. Over time, they can rub against the foam and create wear spots, and they make a creaking sound when you sit down. If you go this route, use black UV-resistant zip ties and trim the tails flush after tightening.
Christmas tree clips, also called Detroit clips, are push-in fasteners used on some bench seats and trucks. They are factory correct for certain applications, but they are not interchangeable with hog rings. If your seat originally used clips, do not switch to rings, because the seat pan will not have the holes to receive them.
For most DIYers restoring leather or premium fabric seats, hog rings give the best long-term result. For budget repairs on work trucks and older vehicles, zip ties are an honest alternative that many people use successfully.
Troubleshooting: Fixing Loose Covers and Puckered Fabric
If your seat cover is sagging in one spot after installation, you do not have to remove the whole cover. Add a single new hog ring at the lowest point of the sag, pull the cover taut toward the seat pan wire, and crimp. The extra ring will pull the slack out and lock the cover flat.
If a hog ring pops open after installation, the most common cause is over-crimping. When you squeeze the pliers too hard, the metal work-hardens and cracks. Cut out the failed ring with diagonal cutters and install a new one, this time using a firm but moderate squeeze.
Puckered fabric usually means the rings are too close together in one area. Cut the closest two rings with your diagonal cutters, redistribute the fabric, and re-crimp with the rings spread out an inch further apart. If the puckering is on a corner, the fold direction is wrong. Reverse the fold and add two rings to lock it in the new position.
If a cover is still loose after you have installed the recommended number of rings, the foam underneath is likely worn out. Compressed foam loses its spring back over the years, and no amount of ring tightening will fix that. The right answer is to replace the foam pad, not to add more rings.
Safety Tips and Protective Equipment
Always wear safety glasses when crimping hog rings. A ring that slips out of the pliers mid-crimp can travel several feet and cause serious eye injury. Clear polycarbonate glasses from any hardware store are fine.
Wear work gloves when handling cut rings. The ends of a snipped ring are razor sharp, and a quick wipe across a bare palm will draw blood. Cut resistant gloves are best, but even basic leather work gloves will protect you.
Work in a clean, well-lit area. Lost rings on a dark garage floor are a puncture hazard for weeks afterward. A drop cloth or a magnetic parts tray will save you from rolling around on the floor with a flashlight looking for a one-inch piece of metal.
Disconnect the battery before unplugging any seat wiring harness. Modern seats have side airbags, occupancy sensors, and heating elements that can fault or deploy if the system is disturbed while powered up.
Keep your fingers clear of the plier jaws during crimping. The closing force of spring-loaded pliers is enough to bruise or break a finger, and the rings themselves are sharp on both sides.
Frequently Asked Questions
What size hog ring should I use for auto upholstery?
For most factory automotive upholstery, 3/4 inch round galvanized steel hog rings are the correct size. This is the OEM standard for the majority of vehicles, and it is the size your seat cover manufacturer will expect if you bought a replacement cover set. Smaller 1/2 inch rings are too weak for seat work, while larger 1 inch rings are made for cargo netting and fencing rather than upholstery.
How do I remove hog rings from upholstery without damaging the seat?
Cut the old hog rings with small diagonal cutters rather than prying them open with regular pliers. Snip each ring in one place and let the two halves fall free, working your way around the cover. Do not pull on the fabric while cutting, and brush off the foam afterward. Take reference photos of the original ring pattern before you start so you can match the layout on the new cover.
What are the best hog ring pliers for auto upholstery?
Spring-loaded magazine-style pliers with angled jaws are the best choice for most DIYers. The magazine holds 50 or more rings and feeds one into the jaws per crimp, which makes a full seat job three to four times faster than single-load pliers. Angled jaws let you reach under the seat lip without twisting your wrist, which straight-jaw pliers cannot do well in tight spaces.
Are hog rings better than zip ties for car seat covers?
Hog rings are the better choice for OEM-style installations because they lie flat against the seat pan wire, do not rub the foam, and stay silent over time. Zip ties are cheaper and easier to install, and they work fine for budget repairs on work trucks and older vehicles. The trade-off is that zip ties can creak under load and may wear through foam if not trimmed flush.
How do you use hog ring pliers step by step?
Load the magazine with 3/4 inch rings, position the open ring around the seat cover listing and the seat pan wire, then squeeze the pliers to crimp the ring shut. Work from the center of the seat outward in a star pattern, keeping rings 2 to 3 inches apart on flat areas and 1 inch apart on corners. Pull the cover taut before each crimp, but leave a fraction of an inch of slack on leather to prevent cracking.
How many hog rings do I need per car seat?
A typical front bucket seat uses 25 to 40 hog rings, and a rear bench seat uses 50 to 70. The exact number depends on the seat shape, the number of curves and corners, and the cover material. Order 300 rings for a front pair and add 100 more for a rear bench to make sure you do not run out mid-installation.
Final Thoughts on Mastering Hog Ring Pliers for Car Seats
Learning how to use hog ring pliers on car seats is one of those skills that pays you back every time you get into your car. A properly installed cover stays tight for years, holds up to daily use, and looks factory-fresh without the several-hundred-dollar price tag of a professional shop.
Start with the right tools. Buy a quality pair of angled, spring-loaded pliers, a box of 3/4 inch galvanized rings, and a good pair of diagonal cutters. Take your time on the first seat, follow the center-out star pattern, and do not try to reuse old rings.
If you are still weighing whether to do the job yourself, our team at Segal Motor Trimmings is happy to talk through your specific vehicle and seat cover kit. We have helped hundreds of first-time installers get a clean, OEM-quality result, and we are confident you can do the same.