
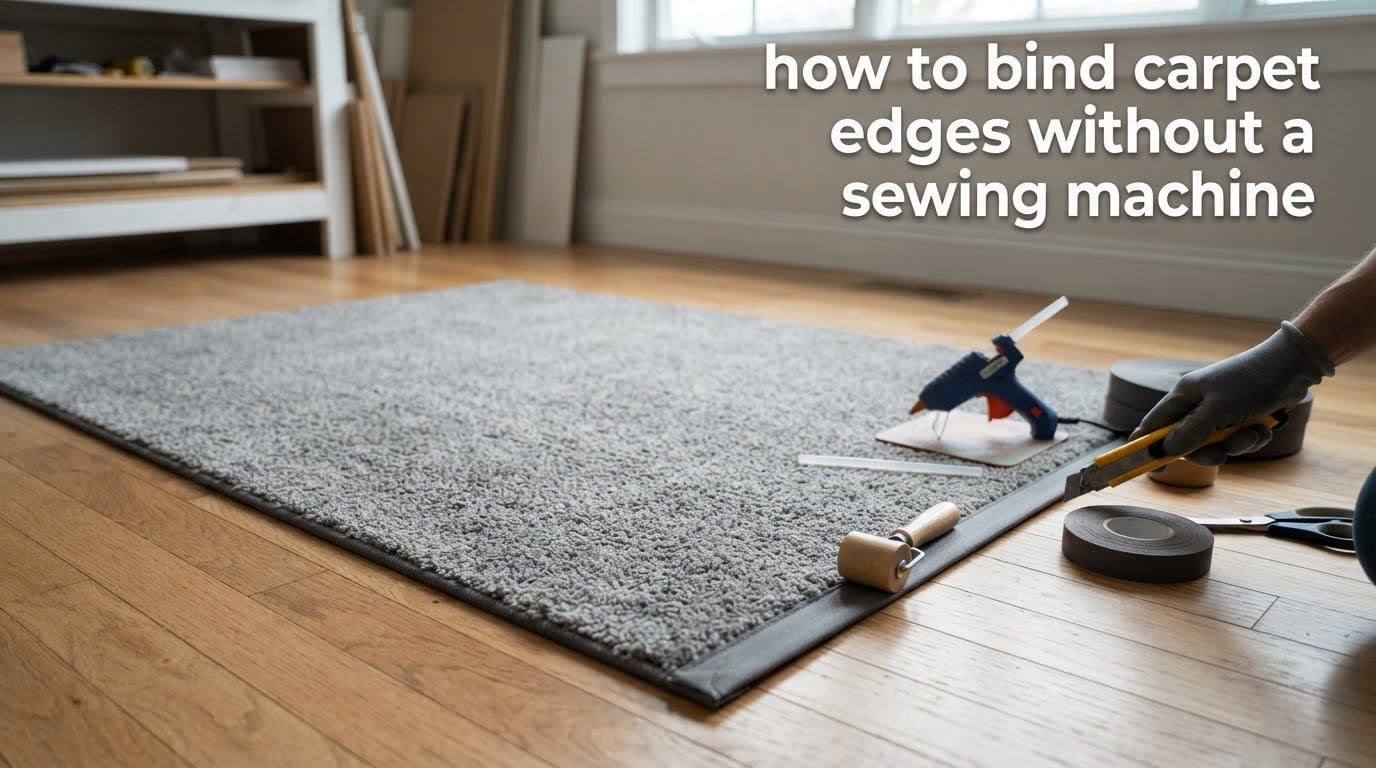
You can absolutely bind carpet edges without a sewing machine. The most reliable no-sew method uses peel-and-stick carpet binding tape paired with a hot glue gun for the corners, and most beginners finish a 5×7 foot remnant in about an hour. I have walked countless customers through this exact project at our workroom, and the result looks every bit as clean as a professionally bound rug when you follow the steps below.
This guide is built from real DIY projects, forum feedback, and the same techniques we use on professional jobs. You will get the tools list, the 6-step binding process, a corner miter technique that does not lift, a comparison of every method worth considering, and a troubleshooting section for the mistakes almost everyone makes on their first try.
Table of Contents
- Why Bind Carpet Edges (And When It Makes Sense)
- Tools and Materials You’ll Need
- How to Bind Carpet Edges in 6 Steps (No Sewing Machine)
- How to Bind Carpet Corners With a Clean Miter
- Alternative Methods to Finish Carpet Edges
- DIY Binding vs Serging vs Buying a Rug: Honest Comparison
- How to Choose Binding Style and Color for Your Room
- 5 Common DIY Binding Mistakes (and How to Fix Them)
- Safety Checks: Trip Hazards and Re-Inspection
- Frequently Asked Questions
- Final Thoughts on Binding Carpet Edges Without a Sewing Machine
Why Bind Carpet Edges (And When It Makes Sense)
Binding carpet edges does three jobs at once. It stops the backing from unraveling, it seals loose pile fibers so vacuuming does not pull them out, and it gives the carpet a finished look that turns a leftover remnant into a custom area rug.
From the questions I get every week, most readers land here for one of these reasons:
- You bought a carpet remnant at a clearance price and want to turn it into a specific rug size.
- An existing rug or stair runner is starting to fray along one edge.
- You want a custom-sized mat for a camper, workshop, or man cave without paying for a finished rug.
- You need a quick fix before listing a home for sale or hosting guests.
Binding makes sense when the carpet itself is in good shape and the edges are the only problem. If the carpet is worn, stained, or has a backing that has crumbled, binding will not save it. In that case, spend the money on a new rug or cut the good center out and bind what is left.
The cost difference is significant. Reviewers on Reddit’s r/DIY report that professional binding typically runs a few dollars per linear foot, while a full DIY project usually lands somewhere between the price of a single binding tape roll and a basic glue gun. For a 5×7 rug with a 24-foot perimeter, that is a meaningful gap.
Tools and Materials You’ll Need
Before you cut anything, gather your supplies. Having everything in reach is the difference between a clean edge and a project where the tape lifts two hours later. Here is the list our team uses on every no-sew binding job.
- Carpet remnant or carpet piece — slightly larger than your finished size so you can square the edges.
- Peel-and-stick carpet binding tape — cotton or polyester, 1.5 to 2.25 inches wide depending on carpet thickness.
- Hot glue gun and high-temperature latex glue sticks — only needed for corners or for full glue-down method.
- Utility knife with fresh blades — a dull blade tears carpet backing and causes fraying before you even start.
- Metal straightedge or heavy yardstick — at least 24 inches long for straight cuts.
- Seam roller or smooth wooden block — to press the tape into the adhesive.
- Measuring tape, carpenter’s square, marker — for marking cuts.
- Scissors and a clean rag — for trimming and wiping.
One quick note on the tape. Binding tape comes in cotton, polyester, and olefin (synthetic). Cotton looks the most natural and takes dye well. Polyester is more durable in high-traffic areas. Olefin is the budget choice and works fine for utility rooms, basements, and campers.
If you want a reversible mat (rug on one side, floor protection on the other), buy double-sided carpet tape instead of peel-and-stick binding. It is thinner and works the same way, but it does not have the wrapped-edge look.
How to Bind Carpet Edges in 6 Steps (No Sewing Machine)
This is the core method. Follow the order, do not skip the dry-fit step, and you will end up with an edge that looks store-bought. Most beginners take 60 to 90 minutes for their first rug. By the third one, you will be under 45 minutes.
Step 1: Measure and Mark Straight Cut Lines
Carpet remnants rarely come square. Lay your piece face-down on a hard floor and use a carpenter’s square to mark your finished dimensions on the backing. Measure twice, mark once, and add a half inch of waste on every edge so you can square it up after the first cut.
Use a black marker on the backing. Pencil lines vanish against most backing textures.
Step 2: Cut the Carpet Cleanly
Place your straightedge on the marked line and cut through the backing with a fresh utility knife blade. Use firm pressure and one continuous stroke. A rocking motion tears the backing and creates exactly the fraying you are trying to prevent.
Replace the blade the moment it drags. A new blade costs almost nothing. A ruined carpet remnant costs whatever you paid for it, plus a trip back to the store.
Step 3: Vacuum and Prep the Edge
Run the vacuum along the cut edge, both face and back. Loose fibers and backing dust are the number one reason peel-and-stick tape fails within a few weeks. Use a clean rag to wipe the back of the carpet right where the tape will land.
Reviewers on Reddit’s r/DIYUK who skipped this step consistently reported lifting edges within a month. Those who wiped first had bindings still flat after a year.
Step 4: Dry-Fit the Binding Tape
Unroll the binding tape along the edge without peeling the adhesive backing. Check the alignment, the coverage on the back of the carpet, and the wrap around the front of the pile. Cut the tape slightly long at each corner so you have room to fold a clean miter.
This step is optional in theory and absolutely essential in practice. It is the difference between a binding job you love and one you undo and start over.
Step 5: Apply the Tape (Peel-and-Stick Method)
Working in 12 to 18 inch sections, peel the backing paper and press the adhesive side of the tape onto the back of the carpet, half an inch up from the cut edge. Keep the tape centered along the cut line.
Once the back half is stuck down, fold the tape up and over the cut edge so the front half wraps onto the pile. Press it down firmly with your fingers first, then roll the seam with a seam roller or the side of a wooden block. Heat from your hand helps the adhesive wet out, so work in a warm room if you can.
If you are using the hot glue method instead, run a continuous bead of high-temp latex glue along the back of the carpet right at the edge, press the tape into the glue, fold over the pile, and roll. Hot glue gives you a stronger bond on stairs and high-traffic runners, but it sets fast, so work in smaller sections.
Step 6: Roll the Seam and Inspect
After every edge is taped, go around the rug one more time with the seam roller. Apply firm pressure. Look for any spot where the tape did not fully contact the carpet. If you see a bubble or a lifted corner, lift that section gently, add a dab of hot glue underneath, and re-press.
Leave the rug flat for at least four hours before walking on it. Overnight is better. Furniture weight on a fresh edge is a common cause of adhesive failure within the first week.
How to Bind Carpet Corners With a Clean Miter
Corners are where most first-timers ruin an otherwise clean project. The pile lifts, the tape gaps open, and the corner looks like it was finished with a stapler. Here is the method that gives you a hospital-corner look every time.
At each corner, the binding tape from the two adjoining edges should overlap by about half an inch. Fold the overlap at a 45-degree angle so the fold line runs from the outside corner of the carpet to the inside corner of the binding tape. This creates a mitered fold that lies flat against the pile.
Here is the short version:
- Stop your tape about half an inch past the corner on the first edge.
- Start the next edge with about half an inch of overlap.
- Fold the overlap into a 45-degree miter so the fold points away from the corner.
- Lift the fold slightly and run a 2-inch bead of hot glue underneath it.
- Press the miter flat and weight it with a hardcover book for 5 minutes while the glue cures.
Latex-based glue sticks are worth the small upgrade over standard hot glue. They stay flexible after curing, which means the corner does not snap when the carpet flexes underfoot.
Alternative Methods to Finish Carpet Edges
Peel-and-stick binding tape is the best general-purpose method for most DIY projects, but it is not the only option. Depending on the carpet, the room, and your skill level, one of these alternatives may be a better fit.
Rigid Trim or Transition Strip
A rigid metal or vinyl trim works best at doorways where carpet meets tile, hardwood, or vinyl plank. It does not give you a finished edge so much as it covers the gap between two floors. You cut the trim to length, screw or glue it down, and the carpet edge tucks underneath.
Use this method when the goal is a safe transition between flooring types rather than a finished rug edge. It is also the right call for commercial thresholds where a flexible binding would wear through in a few months.
Double-Sided Carpet Tape
Double-sided carpet tape is essentially thin binding tape with adhesive on both sides instead of one. It is fast, cheap, and almost invisible. The trade-off is durability. It holds well in bedrooms and low-traffic areas. It will lift in doorways, hallways, and stairs within a season.
If you are binding a guest room rug or a display mat, double-sided tape is the easiest choice. If the rug will see daily foot traffic, spend the extra few minutes on peel-and-stick binding tape and hot glue.
Professional Serging
Serging wraps yarn around the carpet edge with a specialized overlock machine. It produces a thicker, more decorative edge than binding tape and is the standard finish on most retail area rugs. Serging holds up better than binding tape on stairs, wool carpet, and curved or irregular shapes.
Most local carpet workrooms offer serging by the linear foot. Turnaround is usually one to two weeks. Serging is the right call when the carpet is high quality, the shape is complex, or the rug will see heavy use.
DIY Binding vs Serging vs Buying a Rug: Honest Comparison
Most readers want to know whether the time spent binding a carpet remnant is worth it versus just buying a finished rug. The honest answer depends on the size, the carpet quality, and what you would do with the time saved. Here is how the three options stack up.
| Method | Cost | Time | Skill Level | Best For |
|---|---|---|---|---|
| DIY peel-and-stick binding | Lowest (one-time tape and glue gun) | 1 to 2 hours per rug | Beginner friendly | Remnants, custom sizes, low to medium traffic |
| Hot glue binding | Low | 1.5 to 2.5 hours per rug | Beginner to intermediate | Stairs, runners, high-traffic rugs |
| Rigid trim / transition strip | Low to moderate | 30 to 60 minutes | Beginner | Doorways, thresholds, commercial floors |
| Professional serging | Moderate per linear foot | 1 to 2 weeks turnaround | None (out sourced) | Wool carpet, curved rugs, premium finishes |
| Buying a finished rug | Highest | None | None | Standard sizes, immediate need, no remnant match |
The break-even point is usually around 30 to 40 square feet. Below that, a finished rug from a discount retailer often costs less than your time and materials. Above that, DIY binding almost always wins on cost.
How to Choose Binding Style and Color for Your Room
This is the part most guides skip, and it is the part that decides whether your finished rug looks custom or homemade. The two questions to answer are: match or contrast, and how wide should the binding be.
For most rooms, matching the binding to the dominant color in the carpet creates a clean, custom-rug look. Use contrast when the binding is a deliberate design choice, like a black border on a light gray rug in a modern space, or a natural cotton edge on a patterned remnant in a coastal room.
Width matters more than people expect. A 1.5-inch binding tape looks proportional on low-pile commercial carpet. A 2.25-inch tape is the right call for medium and high pile because it has enough material to wrap around the thicker edge without showing the cut line. Anything wider starts to look like a frame around the rug.
If you cannot find binding tape in the exact color you want, cotton binding takes fabric dye beautifully. Polyester does not. Olefin will take some dye but the color will be inconsistent.
5 Common DIY Binding Mistakes (and How to Fix Them)
No one gets their first rug perfect. These are the five failures I see most often, what causes them, and how to fix each one without redoing the whole project.
Mistake 1: Wavy or Uneven Edges
The carpet was not cut along a true straight line. The fix is prevention. Use a carpenter’s square and a metal straightedge, not a freehand cut. If the wave is mild, you can sometimes pull it straight with the binding tape by stretching the edge as you press the tape down. If the wave is severe, recut that edge with a fresh blade.
Mistake 2: Lifted Corners
Either the miter was not glued or the corner was walked on before the adhesive cured. Lift the corner gently, add a generous bead of hot glue under the fold, press the miter flat, and weight it with a heavy book for at least 10 minutes.
Mistake 3: Adhesive Failure Along a Straight Edge
The backing was dusty, the room was too cold, or the wrong tape was used. Warm the room to at least 65 degrees Fahrenheit, clean the back of the carpet with isopropyl alcohol, and reapply the tape with a fresh section. If the tape you bought is for low-pile only and you have a thick carpet, step up to a high-tack carpet-specific tape.
Mistake 4: Uneven Cuts From a Dull Blade
If the cut edge looks ragged, the utility knife blade was dull. Lift the binding tape carefully (you can usually reuse it if it stayed clean), replace the blade, recut the edge, and reapply the tape.
Mistake 5: Wrong Tape Width
Tape that is too narrow exposes the cut edge of the carpet. Tape that is too wide bunches up on the pile. Measure the carpet thickness and choose tape that is at least three times as wide as the carpet is thick. A typical residential carpet is about half an inch thick, so 1.5 to 2 inch tape is the right range.
Safety Checks: Trip Hazards and Re-Inspection
A clean-looking edge that sits a quarter inch proud of the floor is a trip hazard waiting to happen. Before you call any binding project done, walk the rug barefoot in a slow figure eight. Feel for any spot where the binding tape creates a ridge or a lifted corner.
After 24 hours, walk it again. Adhesive can shift as it fully cures, and a corner that looked fine at hour one can lift by hour twenty. Re-press anything that has moved while the glue is still workable.
For rugs in hallways, kitchens, and entryways, plan to re-inspect every six months. For bedroom and guest room rugs, once a year is fine. Catching a lifted corner early means a 30-second hot glue fix instead of re-binding an entire edge.
Frequently Asked Questions
Can I bind carpet edges myself?
Yes. DIY carpet edge binding is one of the most beginner-friendly upholstery and flooring projects. With peel-and-stick binding tape, a utility knife, and a hot glue gun for the corners, most people finish a standard area rug in one to two hours.
What can I put on the edge of carpet to stop fraying?
The three most common options are peel-and-stick carpet binding tape, hot glue with binding tape, and professional serging at a carpet workroom. For most DIYers, peel-and-stick binding tape is the fastest and most affordable choice that still produces a durable edge.
Can you bind a carpet yourself?
Yes. Self-binding a carpet is a standard DIY project. The most popular no-sew method uses self-adhesive binding tape wrapped over the cut edge and secured with a seam roller, with hot glue reinforcing the corners for a clean miter.
Is serging or binding better?
Serging produces a thicker, more decorative edge that holds up better on stairs, wool carpet, and curved rugs. Binding tape is faster, cheaper, and easier to do at home. For standard rectangular remnants in low to medium traffic areas, binding tape is the better choice. For premium carpet or unusual shapes, serging is worth the extra cost.
How to bind carpet edges yourself by hand?
Start by cutting the carpet to a clean square shape using a straightedge and fresh utility knife blade. Dry-fit peel-and-stick binding tape along each edge, then apply the tape in 12 to 18 inch sections, folding the tape over the cut edge and rolling it flat with a seam roller. Finish each corner with a 45-degree miter fold secured with hot glue.
Is it cheaper to bind carpet or buy a rug?
Below roughly 30 to 40 square feet, a finished discount rug often costs less than the time and materials for DIY binding. Above that size, binding a carpet remnant almost always saves money, especially when the remnant was purchased at clearance. Professional serging falls between the two for most medium-sized rugs.
What can I use to bind carpet?
The most common DIY binding supplies are peel-and-stick carpet binding tape (cotton, polyester, or olefin), high-temperature hot glue gun with latex glue sticks, utility knife with fresh blades, metal straightedge, and a seam roller. For doorways and thresholds, a rigid transition strip is often used instead.
How to bind carpet together?
To join two carpet pieces edge to edge, lay them face down with the backing edges butted together, run a bead of carpet seam adhesive along both backing edges, press a seam tape (hot melt or iron-on) into the adhesive, and roll the seam flat with a seam roller. Allow 24 hours of curing before walking on the seam.
Final Thoughts on Binding Carpet Edges Without a Sewing Machine
You do not need a sewing machine to bind carpet edges and get a professional finish. The peel-and-stick method covered here is the same one our team recommends for first-time projects, and it works on everything from carpet remnants to stair runners. Start with a small mat, follow the dry-fit step, and take your time on the corners.
For more project walkthroughs and material recommendations, browse the rest of the Segal Motor Trimmings guide library.