
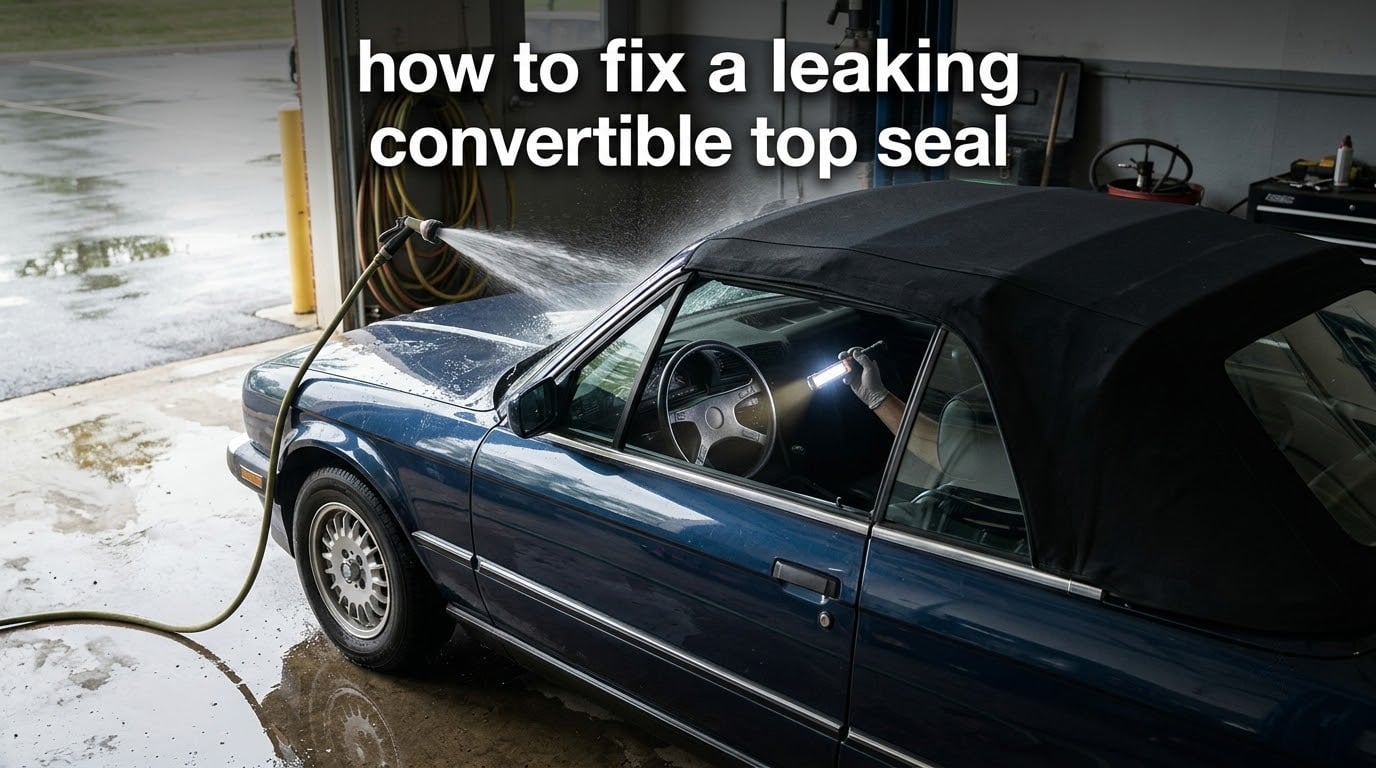
Water dripping onto your passenger seat during a rainstorm is one of the most frustrating things that can happen to a convertible owner. After more than two decades of working on fabric and vinyl tops at our shop, we can tell you that a leaking convertible top seal is almost always fixable without a full replacement if you catch it early. The trick is knowing where the water is actually getting in, then choosing the right repair method for that spot.
This guide walks you through everything we do in the shop, from the first garden-hose test to the final bead of sealant. If your top is more than five years old, has been parked outdoors, or has been through a few harsh winters, there’s a good chance the seals are showing their age and need attention.
Table of Contents
- Why Convertible Top Seals Leak (And What You’re Actually Dealing With)
- Signs Your Convertible Top Seal Is Failing
- How to Find the Exact Source of a Leaking Convertible Top
- Tools and Materials You’ll Need for the Repair
- How to Fix a Leaking Convertible Top Seal: Step-by-Step Repair
- Common Sealant Types and When to Use Them
- When to Replace Seals Instead of Repairing Them
- Preventing Future Convertible Top Leaks
- Frequently Asked Questions
- Final Thoughts
Why Convertible Top Seals Leak (And What You’re Actually Dealing With)
A convertible top seal is a rubber or EPDM weatherstripping component that creates a watertight barrier between the convertible roof and the car body. The seal compresses when the top is latched, blocking water from entering the cabin. Over time, exposure to UV rays and temperature changes causes the rubber to dry out, crack, and lose elasticity, leading to leaks.
Most modern convertibles use a combination of materials: EPDM or natural rubber for the main perimeter seals, foam-backed fabric for the header bow at the windshield, and molded corner pieces that wrap around the rear quarters. Each material ages a little differently. EPDM tends to stay flexible longer, while older natural rubber compounds dry out and crack in as little as five years.
The most common leak sources, in our experience, are the front corners where the top meets the windshield header, the bottom corners of the rear window, and the small drain tubes hidden behind the rear quarters. Water finds the smallest gap, and once the rubber starts to compress unevenly, even a hairline opening can let in a surprising amount of water during a heavy rain or car wash.
A leaking seal is more than just an annoyance. Constant moisture wrecks the headliner, soaks the padding under the carpet, and feeds the kind of mold that nobody wants to deal with. Catching the leak early is the single most important thing you can do for the long-term health of the car.
Signs Your Convertible Top Seal Is Failing
Before you grab a hose and start spraying, look for these telltale signs. We’ve seen every one of these in our shop, and they almost always point back to a seal problem rather than the top fabric itself.
Water pooling behind the seats. If you notice damp carpet or standing water in the footwells after a storm, the leak is almost always coming from a side seal or a corner, not the rear window.
Damp headliner or sagging fabric. Water entering through the header seal often shows up first as discoloration or stains on the inside of the top, usually near the front corners.
Wet trunk or cargo area. A common and often-missed sign. Drain tubes run from the rear quarters down into the trunk. When those tubes clog with debris, water backs up and spills into the interior.
Musty smell after rain. If your car smells musty after a storm even when you can’t see visible water, moisture is getting in somewhere and staying there.
Streaks or water marks on the inside of the rear window. This usually points to a worn bottom seal on the rear glass or a separator issue between the window and the top fabric.
Wind noise or whistling at highway speed. Compressed seals do double duty as weatherstripping. If you suddenly hear new wind noise with the top up, a seal has likely shifted, shrunk, or hardened.
Reviewers on enthusiast forums report that water showing up during a car wash, even when the top is brand new, almost always points to a sealing issue rather than a fabric failure. Same goes for leaks that only happen in heavy rain but not drizzle.
How to Find the Exact Source of a Leaking Convertible Top
The single best diagnostic tool in your garage is a regular garden hose with a sprayer attachment. Forget pressure washers and forget guessing. We’re going to walk you through the same method we use in the shop to find even the sneakiest leaks.
Step 1: Prepare the interior. Remove floor mats and lay down old towels or paper towels where you suspect water might come in. Pull the headliner down gently at the front corners if possible, or use a flashlight to peek underneath. Have a helper ready if you can.
Step 2: Close and latch the top. Make sure the top is fully latched and the windows are up. Turn on the climate control to a moderate setting so the fan circulates air, which can help you hear drips inside.
Step 3: Start at the roof and work down. Spray the roof panel itself first with gentle pressure. Move the hose in overlapping circles across the entire top. Wait 60 seconds and check for drips inside.
Step 4: Spray the windshield header. This is the strip of seal that runs across the top of the windshield. Run the hose along this entire length slowly. Most leaks will show up here within a minute.
Step 5: Hit the front corners. Front corners are definitely weak spots on just about every convertible we’ve worked on. Aim the hose directly at the joint where the top meets the windshield pillar. Hold for a long count of 30.
Step 6: Move to the sides and rear quarters. Spray down the length of both side rails, then aim at the rear quarter panels. Water often enters here and tracks along a frame member before dripping onto the carpet, which makes the leak seem to come from “nowhere”.
Step 7: Test the rear window area. Spray the perimeter of the rear window where it meets the top fabric. Look for streaks inside the glass or any signs of separation.
Step 8: Check the drain tubes. Pour a small amount of water into the drain cups at the rear corners (you’ll see small openings where the top folds down). If the water doesn’t come out beneath the car near the rear wheels, the drain tube is clogged.
Pro tip from the shop floor: have someone inside the car with a flashlight and a roll of paper towels. They’ve found the leak source much faster than the person with the hose every single time.
Tools and Materials You’ll Need for the Repair
Most convertible top seal repairs can be done with supplies you probably already own. Here’s the kit we lay out for a typical reseal job at our shop.
Cleaning and prep supplies:
- Mild dish soap and warm water
- Microfiber towels (at least 6)
- Isopropyl alcohol (90 percent or higher)
- Soft-bristled brush (an old toothbrush works)
- Painter’s tape
- Clean cotton rags
Sealing and repair materials:
- Silicone-based convertible top sealant or EPDM-compatible seam sealant
- Black silicone sealant (for corner patches and A-pillar repairs)
- Weatherstrip adhesive (3M yellow or equivalent)
- Splint material or rubber patch kit for small holes
- Silicone spray lube (for conditioning existing seals)
Tools:
- Caulking gun (for tube sealant)
- Utility knife with fresh blades
- Small flat-blade screwdriver
- Plastic trim removal tools
- Needle-nose pliers
- Small mirror and flashlight for inspection
- Air compressor or canned air (optional, for clearing drain tubes)
You don’t need to buy everything at once. If this is your first repair, start with the cleaning supplies, a single tube of quality silicone sealant, and silicone spray lube. That covers about 80 percent of what you’ll find on a typical leak inspection.
How to Fix a Leaking Convertible Top Seal: Step-by-Step Repair
Once you’ve found the leak and gathered your supplies, the repair itself is straightforward. We’ll cover the three most common fixes: resealing a perimeter seal, patching a small hole or separated seam, and clearing a clogged drain tube. Most of you will only need the first two.
Resealing a Perimeter Seal
This is the most common repair we do. The seals are usually still intact but have lost enough compression or adhesion to let water through the edges.
Step 1. Lift the top halfway so you have access to the seal mounting surface. Use painter’s tape to protect the paint and top fabric about 1/8 inch from the seal edge.
Step 2. Pull the seal back gently. If it’s held with adhesive, work slowly and warm the area with a hair dryer on low if the rubber resists. Don’t yank, or you’ll tear the top fabric where it wraps around the bow.
Step 3. Clean both surfaces thoroughly. We mean it. Any old adhesive or dirt left behind will keep the new sealant from bonding. Wipe with isopropyl alcohol and let it dry completely.
Step 4. Apply a continuous bead of weatherstrip adhesive along the seal channel. Work in 12-inch sections so the adhesive doesn’t skin over before you set the seal.
Step 5. Press the seal back into place firmly. Use a clean rag to smooth and remove any squeeze-out before it sets.
Step 6. Let the seal rest for at least 24 hours before closing the top and testing. Adhesive needs a full day to reach handling strength.
Patching a Small Hole or Separated Seam
For pinholes, separated seams at corners, or hairline cracks, a patch and sealant combo works well. Reviewers on enthusiast forums have had particular success sealing the edges of rubber components in the A-pillar area with black silicone, which fully cured chronic leaks on multiple BMW Z3 builds.
Step 1. Clean and dry the area thoroughly. Any moisture trapped under a patch will cause failure within weeks.
Step 2. Cut a piece of patch material at least one inch larger than the damaged area on all sides. Round the corners to prevent peel-up.
Step 3. Apply a thin, even layer of sealant to both the patch and the repair area. Use a plastic spatula or credit card to spread it evenly.
Step 4. Press the patch in place from the center outward, working out any air bubbles. Apply firm pressure for at least two minutes.
Step 5. Seal the edges of the patch with a thin bead of silicone. Smooth with a wet finger for a clean finish.
Step 6. Allow 48 hours of cure time before exposing the patch to water.
Clearing a Clogged Drain Tube
This one is often overlooked but solves more leaks than people expect, especially in convertibles that are parked under trees.
Step 1. Locate the drain cups. These are small oval openings at the lowest point of each rear quarter, usually where the top folds down.
Step 2. Remove any debris from the cup with a pick or needle-nose pliers. Leaves and pine needles are the usual suspects.
Step 3. Use compressed air or a length of small-diameter tubing to blow the clog down through the tube. You should see air exit beneath the car near the rear wheel well.
Step 4. Pour a cup of water into each drain cup. If it flows freely out the bottom, your tubes are clear. If water backs up, repeat the air step or use a flexible hose to push the clog through.
Step 5. Once clear, treat the rubber drain grommet with silicone spray to keep it flexible and reduce future buildup.
Window Adjustment for Top-Down Leaks
Sometimes the leak isn’t a seal at all but a window that isn’t seating properly in the seal. Reviewers report that top and side windows can require adjustment, and checking whether the windows are settling into the seals correctly is a good early check before going straight to seal replacement.
With the top latched, the window glass should sit flush against the inner sealing strip with even pressure across the entire edge. If the glass sits too low or too high, the regulator can usually be adjusted at the mounting bolts. Refer to a vehicle-specific forum for exact adjustment points, since these vary widely between models.
Common Sealant Types and When to Use Them
Walking into an auto parts store and grabbing the first tube of “rubber sealant” on the shelf is one of the fastest ways to ruin a repair. Different sealants are formulated for different materials, and the wrong one can actually make a leak worse over time.
Silicone-based convertible sealant. This is the go-to choice for most fabric and vinyl tops. It stays flexible, holds up to UV exposure, and bonds well to both rubber and coated fabrics. Use it for general perimeter sealing and patching.
EPDM-compatible seam sealant. Specifically designed for EPDM rubber seals. If your top uses EPDM weatherstripping (most modern convertibles do), this is the right choice. Generic silicone can interfere with EPDM over time and cause it to swell or lose shape.
Black silicone sealant. Best for corner patches and A-pillar repairs where the seal is structural and needs to be waterproof rather than paint-ready. Cures to a flexible, rubber-like finish.
Silicone spray lube. Not a sealant at all, but a conditioning product that restores flexibility to dry rubber seals. Use it as a preventative treatment every 6 months rather than as a primary repair. Keeping the seals clean and applying silicone lube by hand can restore compression in seals that are still in decent shape.
3M weatherstrip adhesive. Yellow or yellow-black contact adhesive used to reattach seals to the body or the top frame. The industry standard for seal reattachment jobs.
Avoid polyurethane-based sealants designed for windshield installation. They cure hard and will crack the first time the top is folded down. Also avoid any petroleum-based products on rubber seals; they cause the rubber to swell and degrade rapidly.
When to Replace Seals Instead of Repairing Them
Sometimes a repair is just throwing good money after bad. We’ve replaced seals where customers tried three or four rounds of sealant first. Knowing when to stop and commit to a replacement saves time and frustration.
Replace when the rubber is cracked, brittle, or crumbling. If pieces of seal break off when you touch them, no amount of sealant will restore compression. The rubber has reached the end of its service life.
Replace when the seal has shrunk or pulled away from its mounting channel. Heat cycles cause rubber to shrink over decades. A shortened seal no longer reaches the sealing surface even with adhesive.
Replace when the top frame is warped. If the underlying bow or rail is bent, the seal can’t do its job no matter what you do to the rubber. Frame repair is a separate, more involved job.
Replace when you see daylight through the seal. Compress the seal with your fingers and look at it from the side. If you can see light between the rubber pieces, the seal is structurally compromised.
For most modern convertibles, full seal replacement is a job for a professional upholstery shop with the right adhesive and the patience to set a top properly. If you can’t find a leak after a thorough diagnosis, it’s also worth having a shop do an inspection; they may find what’s actually happening (warped frame, separated top fabric) that a simple reseal won’t fix.
Preventing Future Convertible Top Leaks
Once you’ve fixed the leak, a small amount of seasonal maintenance will keep it from coming back. These habits take about 30 minutes twice a year and extend seal life dramatically.
Spring inspection. Walk around the car with a hose, check for any seepage, and condition every accessible seal with silicone spray. Pay extra attention to the front corners and rear quarter areas.
Fall inspection. Before winter storage, clean the seals thoroughly, dry them completely, and apply a generous coat of silicone conditioner. Cold weather hardens rubber, and a conditioned seal handles temperature swings much better.
Avoid car washes with high-pressure water. Hand washing is easier on seals. Pressure washers can force water past even good seals and shorten the repair life.
Park indoors when possible. UV exposure is the biggest seal killer. Even a simple car cover makes a noticeable difference if outdoor parking is your only option.
Lubricate seals when they start to stick. If you hear squeaking when you raise or lower the top, the seals are dry. A shot of silicone lube on the contact surfaces prevents early failure.
Check drain tubes every spring. One minute of clearing debris prevents 80 percent of rear-quarter leaks.
Frequently Asked Questions
How do I stop my convertible top from leaking?
The fastest way to stop a leak is to find the source with a garden hose test. Spray the roof, header, and corners one at a time with gentle pressure while someone watches inside with paper towels. Once you identify the leak point, clean the area, let it dry completely, and apply an EPDM-compatible sealant. For worn or cracked seals, apply silicone conditioner to restore compression. Clear any clogged drain tubes at the rear quarters. For stubborn leaks or warped frames, have a convertible specialist inspect the top.
How to reseal a convertible top?
To reseal a convertible top, start by lifting the top halfway and lifting the seal away from the mounting surface. Remove old adhesive with a plastic scraper and clean both surfaces with isopropyl alcohol. Apply a continuous bead of weatherstrip adhesive to the seal channel, working in 12-inch sections so the adhesive does not skin over. Press the seal back into place firmly, smooth any squeeze-out with a clean rag, and let it cure for at least 24 hours before testing. Repeat for each seal that shows wear or compression loss.
How can I repair a leak in my convertible roof?
Repair a leak in your convertible roof in three steps. First, run a garden hose test to find the exact entry point. Second, clean the area with mild soap and isopropyl alcohol, then let it dry completely. Third, apply the correct sealant for the material: silicone sealant for fabric and vinyl tops, EPDM-compatible seam sealant for modern EPDM rubber, or black silicone for corner patches and structural seals. For pinholes or separated seams, use a fabric patch with sealant on both sides and 48 hours of cure time. For drain-related leaks, clear the drain tubes at the rear quarters first.
Can you patch a hole in a convertible top?
Yes, small holes and separated seams can be patched effectively if you prep the surface properly. Cut a patch at least one inch larger than the damage on all sides and round the corners. Apply sealant to both the patch and the repair area, then press the patch in place from the center outward to remove air bubbles. Seal the patch edges with a thin bead of silicone and allow 48 hours of cure time before exposing the repair to water. Patches are a temporary solution for holes larger than a quarter inch; full seal or top replacement is usually required beyond that point.
Why does my convertible top leak in the rain?
Convertible tops leak in the rain because the rubber or EPDM seals around the perimeter and rear window have lost compression, cracked, or pulled away from their mounting channels. UV exposure, temperature swings, and age cause rubber to dry out and become less flexible, creating gaps where water can enter. Drain tubes hidden behind the rear quarters can also clog with debris, causing water to back up into the interior. Identifying the exact entry point with a garden hose test is the first step toward a permanent fix.
Is it better to replace the seals or patch them?
Patch seals when the rubber is in good condition but has small cracks, gaps at corners, or separated seams. This is the right call for vehicles under 10 years old with localized leaks. Replace seals when the rubber is brittle, has shrunk, shows daylight when compressed, or when the top frame is warped. Reviewers on enthusiast forums note that replacing all seals at once is more effective than spot repairs when the original seals are over a decade old, since the remaining seals are typically close to failure as well.
Final Thoughts
Learning how to fix a leaking convertible top seal is one of the most valuable skills any convertible owner can develop. Most leaks come down to three things: a seal that has lost compression, a small crack at a corner, or a clogged drain tube. All three are fixable on a Saturday afternoon with basic tools and the right sealant.
Take your time with the diagnosis. Rushing the repair before you know exactly where the water is coming in is the most common mistake we see. Use the garden hose, mark the entry point with a piece of tape on the outside, and only then start the repair.
If the seals are clearly worn and the top is more than a decade old, replacement is usually the better long-term call. We’ve seen people patch the same leak four or five times over two years when a single reseal would have held for another decade. Set realistic expectations, follow the steps in this guide, and your convertible will stay dry through whatever weather rolls in.