
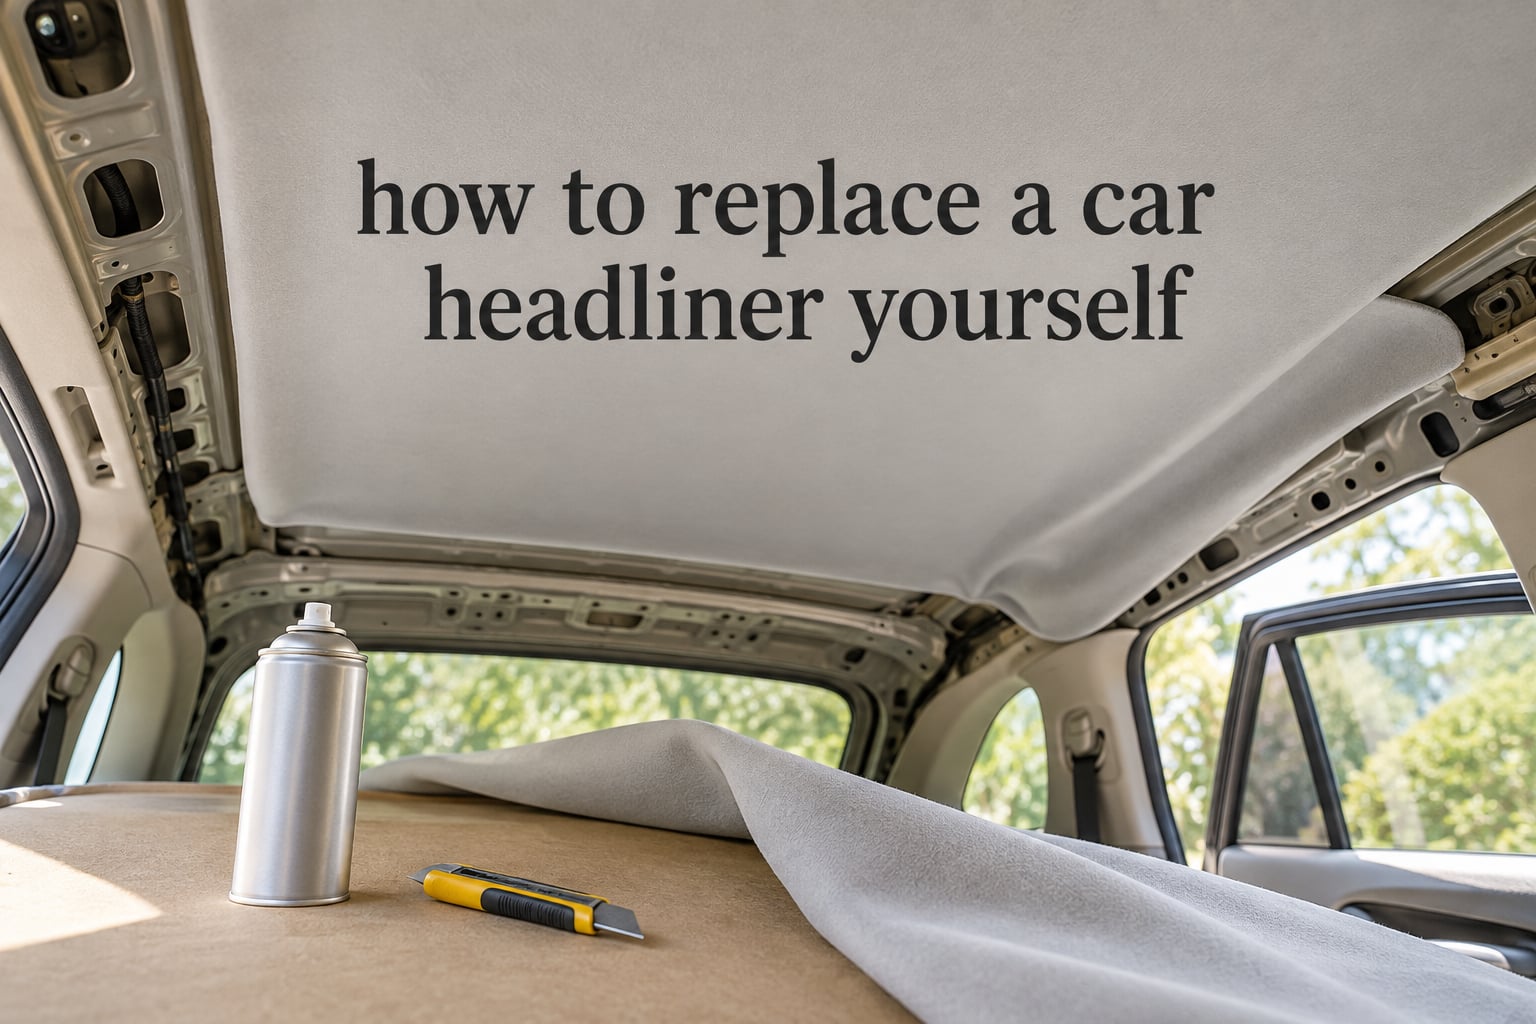
A sagging headliner is one of those problems that looks like pure cosmetics and turns out to be neither cheap nor simple. The fabric you see is stretched across a board held in the roof by a single layer of sprayed adhesive, and once that bond lets go, nothing pulls the material back up. Learning how to replace a car headliner yourself takes roughly a full weekend, a second pair of hands, and more patience than the actual gluing step suggests.
I have pulled these boards out of sedans, wagons and vans, and the pattern is consistent. The removal is the slow part. The reattachment, done properly, takes about an hour. What separates a result that looks factory-finished from one that wrinkles within a month is entirely in the prep work on the board and the timing of the adhesive.
This guide walks through the whole job, start to finish, the way a trimmer would explain it to a friend. You will find the tool list, how to pick fabric and adhesive, all seven steps, what to do when bubbles appear, and an honest look at when the job is worth handing to a shop.
Table of Contents
- How to Replace a Car Headliner Yourself: The 7-Step Summary
- Why Headliners Fail and Why It Matters
- Tools and Materials Checklist
- Choosing the Right Headliner Fabric
- Choosing the Right Headliner Adhesive
- Step 1: Remove the Interior Trim
- Step 2: Remove the Headliner Board
- Step 3: Strip the Old Fabric and Clean the Board
- Step 4: Cut and Prep the New Fabric
- Step 5: Apply Adhesive and Attach the Fabric
- Step 6: Curves, Cutouts and Edges
- Step 7: Reinstall the Headliner and All Trim
- Troubleshooting Bubbles, Wrinkles and Poor Adhesion
- DIY vs Professional Headliner Replacement
- Seven Mistakes to Avoid
- Post-Installation Care and Maintenance
- Frequently Asked Questions
- Is it easy to replace a car headliner?
- Can I repair my car’s headliner at home?
- How much does it usually cost to replace a headliner?
- Does AutoZone sell a headliner repair kit?
- What is the best fabric to use for replacing a headliner?
- What is the best adhesive for replacing a headliner?
- Which is better for car headliner adhesive, 3M or Permatex?
- How to reattach car headliner fabric?
- Does 3M headliner adhesive work?
- How long does it take for 3M headliner adhesive to cure?
- How do I remove the headliner board from my car?
- What tools are needed for a headliner replacement?
- Conclusion
How to Replace a Car Headliner Yourself: The 7-Step Summary
Here is the short version. Full detail sits under each step heading further down.
- Strip the interior trim. Visors, dome lights, grab handles, pillar trim, the sunroof shade and any overhead console come out first. Label every clip location as you go.
- Lower and remove the headliner board. Undo the screws and clips, drop the board at the door openings, then lift it out with a second person supporting the roof edge.
- Peel the old fabric and clean the board. Pull the material away, dissolve the adhesive residue, and scrub or sand the board back to a uniform matte surface.
- Cut and shape the new fabric. Use the old panel as a physical template, keep the grain running front to back, and leave extra material at every cutout.
- Coat both surfaces and work from the centre out. Adhesive on the board and on the fabric back, correct flash-off time, then tack the middle first and smooth outward with light pressure.
- Handle curves and cutouts with relief slits. Instead of stretching fabric into tight corners, cut it so the material lies flat without tension.
- Let it cure, then refit the board and every piece of trim. Full cure takes longer than most people wait, and the trim goes back far easier on a cured board.
Budget a full day for a sedan if you have done trim work before, and plan on two days the first time. Members of the r/Autoupholstery and r/carmodification communities commonly report six to eight hours on a sedan and closer to ten or more on a wagon or an SUV, where the board is larger and the pillar trim is heavier.
Why Headliners Fail and Why It Matters
A headliner is a sandwich. A rigid backing board, sometimes moulded plastic and sometimes a composite panel, is covered in polyurethane foam, and a fabric is glued over the whole assembly. A moisture barrier layer sits between the fabric and the metal roof in many vehicles.
Everything above that adhesive layer is a consumer product. It was designed to look good on the day it left the factory, not to survive fifteen years of a parked car in summer.
The usual causes
- Heat cycling. A roof panel can swing dramatically in temperature between a cold morning and an afternoon in the sun. That expansion and contraction works the adhesive bond apart slowly.
- Moisture. A leaking roof seam, a cracked windshield gasket or a blocked sunroof drain lets water into the foam. Wet foam loses its structure and never fully recovers.
- Age and material degradation. The rubber and resin-based adhesives used in older vehicles harden, powder and lose tack. The foam underneath crumbles into a sticky residue.
- Physical damage. A headrest or grab handle that has been replaced too many times, a hard hit from luggage in the cargo area, or a child poking at the ceiling all start small tears that then spread.
- Overhead accessories. A roof console, a radar unit or an aftermarket light adds weight and heat right where the board is thinnest.
Why leaving it alone is a bad idea
Beyond appearance, a detached headliner traps water against the roof skin. That combination of warmth, darkness and moisture is exactly what mould needs, and forum threads on r/Detailing regularly describe brown staining that returned even after the fabric was replaced, simply because the wet foam underneath was never dried or replaced.
There is a second, more serious angle. On many cars the headliner sits directly on top of wiring, connector blocks and the roof-mounted sensor or antenna housing. Sagged material exposes those to view and to contact, and in a crash the loose board can also interfere with curtain airbag deployment along the pillars.
Loss of sound insulation is the quietest cost. The foam is a thermal and acoustic layer, and once it is compressed or missing, road and exhaust noise at motorway speed becomes noticeably worse. A tidy headliner also matters when you sell, because it is one of the first things a buyer looks up at.
Tools and Materials Checklist
Work through this list before you start. Half the frustration people report comes from realising mid-way that a tool is missing while the dashboard is already in pieces.
Tools
- Trim removal tools. Plastic pry tools or a pick set. Using metal screwdrivers on pillar trim is how you crack clips and scratch paint.
- Torx and Phillips set. A full range is better than a fixed driver, since headliner screws vary in size between models.
- Socket set and ratchet. For seat belt anchor bolts and any rail hardware you must release.
- Utility knife with plenty of spare blades. Used to score the old adhesive and to trim the new fabric.
- Wide plastic scraper or spreader. For pushing adhesive residue off the board without gouging it.
- Spray adhesive gun. A can with an adjustable nozzle gives far more control than the stock push sprayer.
- Stiff nylon brushes, shop towels and a vacuum. For board cleaning.
- Masking tape and markers. For labelling trim locations and marking trim piece orientation before removal.
- Measuring tape, chalk or a fabric marker. For marking the board centre and cutout positions.
- Handheld work light or headlamp. You will be working above and behind your head in a dark cabin.
- Random orbital sander, 80 to 120 grit. Only if the board needs fairing after scraping.
- Heat gun or hair dryer. For softening stubborn adhesive residue and pre-warming a cold panel in winter.
- Blind rivet gun or small screws. Depending on how your board was originally secured.
Materials
- Headliner fabric. Ideally foam-backed and perforated, cut generously larger than the board.
- High-temperature spray adhesive. Contact-style, applied to both surfaces. Details in the adhesive section below.
- Trim clips and screws in matching sizes. Old plastic on a high-mileage car is brittle. Buy a clip assortment before you start.
- Masking tape. Low tack, for protecting painted pillars near the work area.
- Interior cleaner and a mild degreaser. For the board and for the roof skin around the openings.
- Replacement grille and fastener kit for dome lights. A useful low-cost insurance policy when pulling a lamp bezel out of a brittle plastic housing.
Pro tip: Photograph every connector, every clip position and every trim piece before it comes off. Ten seconds of photos saves an hour of guessing when something does not go back the way it came out.
Choosing the Right Headliner Fabric
Foam-backed headliner fabric is the right answer for almost every daily-driven car. The backing is a thin, porous foam layer with perforations that let moisture escape, and it gives you the thickness and feel of an original roof rather than the flat, papery look of plain upholstery cloth.
Plain fabric from a fabric store will physically stick to the board and look tidy on day one. Forum users report that the thinner material tends to show every contour of the roof bows and wiring underneath, and it feels like a tent rather than a car interior. It is a reasonable choice for a van conversion or a project car that lives in a garage.
Getting the colour to match
Original equipment headliner cloth comes in a specific shade that is almost never an exact match to a current off-the-shelf swatch. The colour also matters less than you might expect once it is stretched over a large curved surface, because the whole roof reads as one tone. Where an exact match matters, ask an upholstery shop for a swatch, or check salvage yards for a donor headliner panel from the same vehicle and colourway.
Light colours show every water stain, so consider a light grey or beige instead of cream or white if the car lives outdoors. Dark colours hide old foam residue and adhesive shadows, which makes the visual outcome more forgiving for a first attempt.
Sizing and grain direction
Fabric has a grain, and the headliner board has front and back. Stretch the material in the wrong axis and it will fight you all the way across the roof, then relax and wrinkle once the adhesive releases under sun heat. Lay the piece out, check the weave runs from windscreen to rear window, and only then cut.
Buy more than you think. Cutting to an exact template feels efficient and leaves you no margin to adjust tension, which is the single most common reason a first attempt looks slightly off-centre.
Choosing the Right Headliner Adhesive
Adhesive choice matters more than most guides admit. Headliner adhesive is a contact cement, which means it bonds the instant the two surfaces touch and there is no wet stage to reposition with.
That single fact explains the flash-off window. Too short and the bond is weak and inconsistent. Too long and the adhesive has passed its tacky stage and will not grab at all. Manufacturers print a range on the can; treat it as a starting point and adjust for your workshop temperature and humidity.
Comparing the common options
- 3M Super 77. A general-purpose spray often suggested by DIYers for its low cost and short flash-off time. It works on many applications, but it is not engineered for a roof panel that can exceed the temperature of a parked car in summer. Expect a shorter service life than a dedicated product.
- 3M 90. A heavier, higher-build adhesive favoured widely by trim shops and repeatedly recommended on enthusiast forums. It lays down a stronger film and tolerates heat better than Super 77, at the cost of a longer flash-off and less working time once contact is made.
- Permatex headliner adhesive. Sold as a dedicated carpet and headliner product with a controlled application pattern. It performs reliably, but setup time is longer and the can format suits smaller panels more than a full roof board.
- T65. The professional-shop standard for a reason. It is formulated for temperature resistance and gives a long working time that makes large panels manageable. It is harder to find at general retail outlets and is the usual choice when the car is a long-term vehicle or a classic restoration.
Whichever you choose, buy more than one can. A single can will not fully coat both the board and the back of a full-size headliner panel, and discovering that at the halfway point means a visible untreated stripe.
Safety note: Work in a ventilated space, ideally outdoors or with extraction. Contact cement fumes are unpleasant and flammable, and the overspray will stick to any painted surface it lands on, so mask or cover nearby bodywork before you pull a trigger.
Step 1: Remove the Interior Trim
Everything above the headliner comes out before the board does. Work slowly and systematically from the front of the car to the back, and keep removed fasteners in labelled bags or a magnetic tray.
- Disconnect the battery. Turn the key off, then disconnect the negative terminal and leave the key away. Overhead light and visor connectors carry live current, and you do not want the dome lamp circuit energised while you are pulling trim.
- Sun visors. Remove the retaining screw or the plastic cover, unplug any vanity lamp connector, and slide the visor out of its channel. Note the orientation of the second visor, which is usually reversed.
- Dome and map lights. Most bezels twist out or pop out with a small flat tool. The wiring connector needs a gentle pull, not a yank, and the bulb or LED module is easier to damage than to replace.
- Grab handles and coat hooks. These come out once the headliner is lowered, but marking their positions now saves hunting later.
- Pillar trim. Start at the bottom of each A-pillar and work upward, releasing clips every few centimetres. Keep the pry tool flat against the trim so the load goes into the clip rather than the pillar.
- Rear header trim and any overhead console. Seat belt heights, roof speakers and sunroof switches all need to be unplugged, not just unbolted.
- Sunroof shade or glass. On a tilting or sliding roof, the shade cassette and its trim are usually captive to the headliner. Removing them with the board, rather than forcing them, prevents the mechanism catching on the new fabric later.
Airbag warning: Many B and C pillars carry side curtain airbag wiring and a pretensioner connector. Do not probe at the pillar with a test light or a screwdriver, and do not rest a knee or your body weight against the pillar trim. If a connector looks damaged or the trim is already broken, treat the pillar as a professional job.
On older vehicles the plastic trim is brittle and clips frequently snap in half. Posts on thirdgen.org and the Corral Mustang forum both make the same point: when a clip breaks, do not attempt to reuse the panel, because the tension from a missing clip is what makes the fit look wrong later.
Step 2: Remove the Headliner Board
With the trim out, you can see how the board is held. The front edge usually clips or screws to a channel above the windscreen, and the rear edge screws into a channel behind the rear parcel shelf.
- Reach the front screws through the windscreen header area, using a long extension or a slim driver. A magnetic extension head saves a lot of time here.
- Undo the rear fixing through the parcel shelf or boot opening, and check the C-pillar area for hidden retainers.
- Lower the front edge of the board about ten centimetres. The board should now be loose in the roof cavity.
- Bring in your helper. The board is large, light and awkward, and it will fold or crack if you try to slide it out one-handed. One person feeds the rear corner through the door opening while the other supports the roof edge and guides the front.
- If the board will not clear the door aperture, check for a sunroof mechanism, an antenna housing, or a roof-mounted sensor that is still attached to the fabric.
If the panel resists, do not lever against the roof bows. Those are structural and a bent bow shows through the new fabric immediately.
Step 3: Strip the Old Fabric and Clean the Board
This is the least enjoyable part and the one that decides the result. People who rush here are the ones calling back a month later with bubbles.
- Score the adhesive. Run a utility knife along the foam line where the fabric meets the old foam layer, without cutting the board beneath.
- Pull the fabric away. Peel in long, slow sections with the grain. Tearing it leaves debris on the board and fragments of old material in the foam.
- Deal with the foam. Depending on the vehicle, what remains is either a thin layer of sound foam you can leave in place, or deteriorated foam that crumbles into a sticky mess. On many European cars, forum posters describe a particularly stubborn orange foam that resists solvents and often has to be scraped and sanded back mechanically.
- Remove the adhesive residue. A plastic scraper and a dedicated plastic cleaner, or careful use of a heat gun to soften it first, will lift most of it. Avoid soaking the board, and go easy with aggressive solvents on composite panels.
- Clean the board. Vacuum everything, then wipe with interior cleaner. The surface must be dry, matte and free of grease, because a glossy patch will not bond.
- Fair if needed. Where the old adhesive left a textured or gouged area, a random orbital sander on 80 to 120 grit levels it. Vacuum thoroughly afterwards.
- Inspect the board. This is the moment to spot cracks, delamination or water damage. A board that has split through a fibre layer needs repair or replacement before it goes back in.
The drying trick: For a damp or musty headliner, several users on r/Autoupholstery and r/vandwellers report that generously coating the old foam with baking soda or talcum powder, letting it sit, then vacuuming it off absorbs a surprising amount of moisture and cuts the smell. It is a holding measure, not a cure. Any foam that stays soft and crumbly after drying has lost its structure and should come off.
Step 4: Cut and Prep the New Fabric
The old panel is your best template, and you already have it in your hands. Keep it.
- Lay the old fabric on the new material, align the grain, and trace around it. Add fifteen to twenty centimetres of extra on all sides for tensioning and trim overlap.
- Mark the centre line of the board on the back of the new fabric with a chalk line. This is your reference for the centre-out technique in Step 5.
- Mark every cutout. Dome light openings, handle openings, sunroof frame, speaker holes and pillar channels all need a little extra material around them, because they will be stretched slightly to seat into place.
- Test the piece by draping it over the board and pulling the edges down around the sides. It should sit flat with no tension pulling it out of shape.
If the fabric is stiff, warm it slightly before fitting. A material that is relaxed and slightly pliable will cooperate far better on a curved board than one that is still cold and rigid.
Step 5: Apply Adhesive and Attach the Fabric
This is the step people rush, and the reason the coating goes on both surfaces. Adhesive applied to the board alone can soak into porous foam and leave a starved bond underneath. Applying to both the board and the back of the fabric gives you an even, controlled film.
- Take the board outside or into a well-ventilated space, and lay it flat with the bonding side up.
- Shake the can hard for a full thirty seconds, then test the spray on scrap card. You want a fine, even mist with no heavy droplets.
- Coat the board. Sweep side to side, overlapping passes, holding the can the distance printed on the label. Missed patches become later bubbles.
- Coat the fabric back. The same coverage. Let the material relax flat while the adhesive goes off.
- Watch the flash-off time. The surface should be tacky but not wet or stringy. Test by touching a folded corner. Too early and the bond is weak. Too late and it simply will not grab.
- Tack the centre first. Lay the fabric down along the centre line, align the grain with the board, and press gently from the middle outward. Starting at the edges guarantees wrinkles.
- Work outward in stages. Move about thirty centimetres at a time, smoothing with the flat of your hand or a soft roller. Push bubbles toward the nearest un-bonded area rather than trapping them under a fold.
- Burnish. Once fully covered, roll the entire panel firmly with a roller or the flat of a plastic tool. Even pressure improves contact more than any amount of extra spray.
Three things hold a headliner up once it is installed: the adhesive bond across the surface, tension from the trim and pillar channels pulling the edges tight, and the stiffness of the foam-backed material itself. When the bond is thin and the tension is uneven, the panel sags between the fixing points, and that sag is what you see from the driver’s seat.
Step 6: Curves, Cutouts and Edges
Most of the ugly results people post come from tight corners, not from the flat areas.
- Use relief slits rather than stretched cuts. Around a dome light or handle opening, cut small straight slits at the four points where the curve is sharpest. The material then lies flat instead of pulling against the adhesive.
- Fold into channels, do not wrap. The board edge that tucks into the A, B and C pillar channels should be folded over and dressed with a small bead of adhesive. Excess bulk in the channel can stop the trim from seating fully.
- Sunroof frames sit on a raised section of board. Cut the opening generously and let the frame cover the edge. Trim to the frame, not to the opening line.
- Speaker and console cutouts are easier to enlarge slightly than to shrink. A too-tight cutout pulls the surrounding material and creates a permanent dimple.
- Deep holes and torn corners are best patched with a scrap of new material, feathered outward and bonded under a slightly larger piece, rather than trying to stretch a small remnant into shape.
Take a step back every few minutes and look at the board from a distance. Distortion that is obvious from across the workshop disappears when you are close, and the reverse is also true.
Step 7: Reinstall the Headliner and All Trim
Resist the urge to refit immediately. The adhesive continues to gain strength for a period measured in hours, and lifting the board back into the roof while it is still soft risks disturbing a bond you have just built.
- Let the board cure in a clean, dust-free space. The window varies by product, and the can tells you.
- Lift the board into the roof cavity with your helper, feeding the front corners in first and then pushing the rear edge up into its channel.
- Secure the front and rear fixings. Where the original used small screws into the channel, use the same size, and where it used plastic push rivets, fit fresh ones rather than reusing old brittle ones.
- Refit the sunroof shade and check that its cassette slides smoothly with no fabric catching in the rails.
- Work forward again: visors, dome lights, grab handles, overhead console, pillar trim.
- Power the car back up and test every light, the vanity lamps, the sunroof switch and the seat belt height adjusters before you close the trim up.
On a car with side curtain airbags, the pillar trim must be seated with its clips fully engaged. A trim panel that is merely resting in position can interfere with the airbag deployment path.
Troubleshooting Bubbles, Wrinkles and Poor Adhesion
Almost every problem traces back to one of three things: a dirty board, adhesive applied at the wrong stage, or uneven tension across the panel.
Bubbles that form during installation
A bubble means air trapped under the fabric. Prevention is straightforward: coat both surfaces, respect the flash-off time, and work from the centre outward so that any air has somewhere to travel. If one appears anyway, lift the fabric slightly at the edge of the bubble, let the air escape, and press it back down while the adhesive is still within its working window.
Wrinkles that appear days later
Wrinkles show up once the panel warms up and the material relaxes into the shape the adhesive did not fully capture. The usual causes are a surface that was not fully cleaned, uneven tension at the pillar channels, and fabric cut from a pattern that was too small. If the wrinkle is small, heat from a heat gun applied gently through the fabric can re-activate the adhesive and let you re-smooth it. A deep crease usually means lifting and re-bonding that section.
The panel sags again after a few months
Recurring sag is a symptom, not a fabric problem. Look first at the roof skin above, then at the drainage paths: a blocked sunroof drain or a leaking windscreen seal puts water straight onto the board. Confirm the adhesive used was rated for the temperature inside a parked car, and check that the board edges are properly tensioned in the channels. If you used a general-purpose spray rather than a high-temperature product, that is the most likely explanation.
Mould and odour return after replacement
If the smell comes back within weeks, moisture is still reaching the foam. Dry the cavity fully, treat or replace the affected foam, and block the water entry point. Replacing fabric over damp material is a delay, not a repair.
The board will not sit flat in the roof
Usually the board is creased, or the roof bows have been pushed out of alignment during removal. If the panel has a set from being stored on edge, warm it gently and flatten it under light weight before refitting.
When to stop and call a shop: a cracked or delaminated backing board, water damage in the roof skin or foam, a bent roof bow, side curtain airbag wiring in the pillar, or a headliner that is part of a panoramic roof assembly. These are structural or safety issues, and the cost of getting them wrong is far higher than the cost of the job.
DIY vs Professional Headliner Replacement
The honest comparison is not about material prices, which are modest, but about time and risk.
A professional shop charges mainly for labour hours in a booth, and the total varies widely by region, vehicle and how much trim needs to come out. A sedan is straightforward. A wagon, an SUV with a panoramic roof, or a vehicle with heavy pillar trim and multiple roof-mounted electronics takes considerably longer in the bay, and that labour is what you are paying for.
Your side of the ledger: the fabric, the adhesive, a clip assortment, and your own weekend. The dominant cost of doing it yourself is not materials, it is the risk of a cracked clip, a snapped visor post or a board that will not go back in, each of which adds an hour.
Vehicle type difficulty and typical DIY hours
- Compact sedan. Usually six to eight hours. The main complication is brittle pillar clips on high-mileage cars.
- Full-size sedan. Usually seven to nine hours. A larger board and more foam to clean push the time up.
- Wagon or hatchback. Usually nine to twelve hours. A longer board, rear trim and the cargo area add significant time.
- SUV or ute. Usually ten to fourteen hours. Roof rails, cross members and the third brake light all have to come out.
- Vehicle with a sunroof. Add two to three hours. The shade cassette and frame alignment are the extra work.
- Vehicle with a panoramic roof. Consider a shop. Tight tolerances and multiple cutouts make this a poor first project.
- Van or camper conversion. Usually eight to twelve hours. A large uninterrupted panel and extra accessories slow you down.
When DIY makes sense
Do it yourself when the car has a simple roof, the board is intact, you have trim removal experience, and you can get a full day and a helper. It is genuinely satisfying work and the result can be indistinguishable from the original.
When a professional is worth it
Hire a shop when the vehicle is worth more than the saving, when there is water damage or mould, when the headliner is bonded to a panoramic roof assembly, when the board has cracked, or when you are not prepared to buy the clip assortment and spend the time. For a classic car or a vehicle you plan to keep for years, a professional finish using a proper high-temperature adhesive and factory-matched fabric is usually the more durable outcome.
Seven Mistakes to Avoid
- Rushing the board clean. Every forum thread on a failed headliner points back to residue left on the board. Adhesive does not bond to grease, dust or old foam.
- Using a general-purpose spray adhesive. A roof panel in summer gets hot enough to soften a bond that was never designed for it. Use a high-temperature product.
- Spraying the board only. Coat both surfaces or the bond will be uneven and prone to bubbling.
- Ignoring the flash-off time. This is the single most common adhesive error. Too early starves the bond, too late and it will not grab.
- Starting at the edges. Tack the centre first and work outward, or you will build wrinkles into the panel from the start.
- Stretching fabric into corners instead of cutting relief slits. Tension in a tight corner is tension that pulls the whole panel loose over time.
- Reusing old trim clips and screws. Brittle plastic and rusted screws fail later, usually while the car is in motion. Replace them the first time.
One more worth naming: do not treat a musty headliner as a cosmetic job. If moisture got in, find the leak before the new fabric goes on.
Post-Installation Care and Maintenance
A few checks in the first month will tell you whether the bond took properly.
After 24 hours
Look up at the headliner from outside the car in daylight. Soft shadows along the pillar channels or a faint ripple near the centre are normal at this stage. Hard bubbles or visible ripples are not, and are easier to correct now than next month.
After one week
Run the heater and the air conditioning for ten minutes with the doors closed, then inspect. The panel will have been through a full heat cycle, and any bond weakness will show up as the start of a dip between the fixing points.
After one month
Check the pillar channels for any movement, press gently on the fabric around a dome light, and confirm the sunroof shade still slides freely. At this point a well-bonded panel will feel completely solid.
Long term
- Keep the sunroof drain channels clear so water never enters the roof cavity.
- Vacuum the headliner gently rather than scrubbing, and use interior cleaner sparingly on foam-backed fabric.
- Recheck after any roof work, roof rack fitting or roof-mounted accessory installation.
- Inspect for water staining after heavy rain, particularly at the windscreen header and the rear parcel shelf.
If you are doing sound deadening at the same time, this is the ideal moment. The headliner is already off, and deadening pads can be applied to the roof skin and the inside of the board before it goes back in.
Frequently Asked Questions
Is it easy to replace a car headliner?
Not quick, but it is straightforward for anyone comfortable with trim removal. Plan on six to eight hours on a sedan and ten or more on a wagon or SUV, plus curing time. The removal is the slow part, the adhesive work takes about an hour, and the whole job needs a second pair of hands for the board itself.
Can I repair my car’s headliner at home?
Yes. A headliner is a foam-backed fabric panel glued to a board and held by surrounding trim, so it can be removed, cleaned and re-covered in a home garage. You will need a ventilated workspace, a spray adhesive gun, basic trim tools and a helper for lifting the board out and back in.
How much does it usually cost to replace a headliner?
The total depends mostly on whether you do it yourself or hire a shop. A professional charges mainly for labour and quotes vary widely by region, vehicle type and trim complexity, with larger vehicles and panoramic roofs costing the most. Doing it yourself, the expense is the fabric, the adhesive, a clip assortment and your time, and the material cost is modest compared with the labour saving.
Does AutoZone sell a headliner repair kit?
General auto parts stores typically stock spray adhesive, trim clips and interior cleaner rather than a complete headliner kit. The full material list is short, so it is usually easier to buy foam-backed fabric from an upholstery supplier and pick up adhesive and clips locally. Check the current product listings at your local store before driving over.
What is the best fabric to use for replacing a headliner?
Foam-backed, perforated headliner fabric is the best choice for a daily-driven car. It matches the thickness and feel of an original roof, disguises contours in the metal, and holds its shape. Plain upholstery cloth from a fabric store will bond and look tidy briefly, but it is thinner, shows every roof bow and feels flat.
What is the best adhesive for replacing a headliner?
A high-temperature contact adhesive intended for automotive headliners. Popular choices include 3M 90, Permatex headliner adhesive and T65, which is the professional standard for heat resistance, with 3M Super 77 suggested by many DIYers as a lower-cost general option. Apply to both surfaces and respect the flash-off time printed on the can.
Which is better for car headliner adhesive, 3M or Permatex?
3M 90 lays down a heavier film and tolerates heat better, which suits a full roof panel, while Permatex headliner adhesive is purpose-made for this job with a controlled application pattern and works reliably, though it has a longer setup time. For a vehicle you will keep long term, a high-temperature product such as 3M 90 or T65 is the safer choice.
How to reattach car headliner fabric?
Clean the board to a matte finish, spray adhesive evenly onto the board and onto the back of the fabric, then wait for the flash-off time so the surface is tacky. Tack the fabric along the centre line, work outward in stages, burnish the whole panel firmly, and cut small relief slits at tight curves rather than stretching the material.
Does 3M headliner adhesive work?
Yes, when the 3M product you choose is rated for the heat inside a parked car. 3M 90 is widely used for headliners and performs well, while general-purpose 3M Super 77 is more of a budget option and can shorten service life in hot climates. The bigger factor in success is surface preparation and correct flash-off timing.
How long does it take for 3M headliner adhesive to cure?
Check the label on your specific can, as cure time differs between products. As a general guide, the bond grabs immediately because this is a contact adhesive, but it continues to strengthen over several hours. Let the board cure flat in a clean space before refitting it, and avoid lifting or flexing it during that period.
How do I remove the headliner board from my car?
Disconnect the battery, then remove the visors, dome lights, grab handles, overhead console, sunroof shade and A, B and C pillar trim. Undo the screws or clips holding the board at the front windscreen header and rear parcel shelf, lower the front edge, and lift the board out with a second person supporting the roof.
What tools are needed for a headliner replacement?
You need plastic trim removal tools, a full Torx and Phillips set, a socket set, a utility knife with spare blades, a spray adhesive gun, a scraper, stiff nylon brushes, a vacuum, masking tape, a marker, a work light, a roller, and optionally a random orbital sander and a heat gun. A fresh assortment of trim clips and screws is worth having before you start.
Conclusion
Knowing how to replace a car headliner yourself comes down to three things: a genuinely clean board, adhesive applied to both surfaces at the right stage, and tension held evenly through the pillar channels. Get those right and the result looks factory fresh. Rush any one of them and the sag returns within weeks.
Start by checking whether the board is intact and whether the roof cavity is dry. If both are fine, gather the tools, pick foam-backed fabric and a high-temperature adhesive, and set aside a full day with a helper. If there is water damage, a cracked board or a panoramic roof in the equation, book a trim specialist instead.
And if you are only just starting to notice the dip above the passenger seat, catch it early. Reattaching loose fabric while the old board is still usable is a much smaller job than the full replacement described here.