
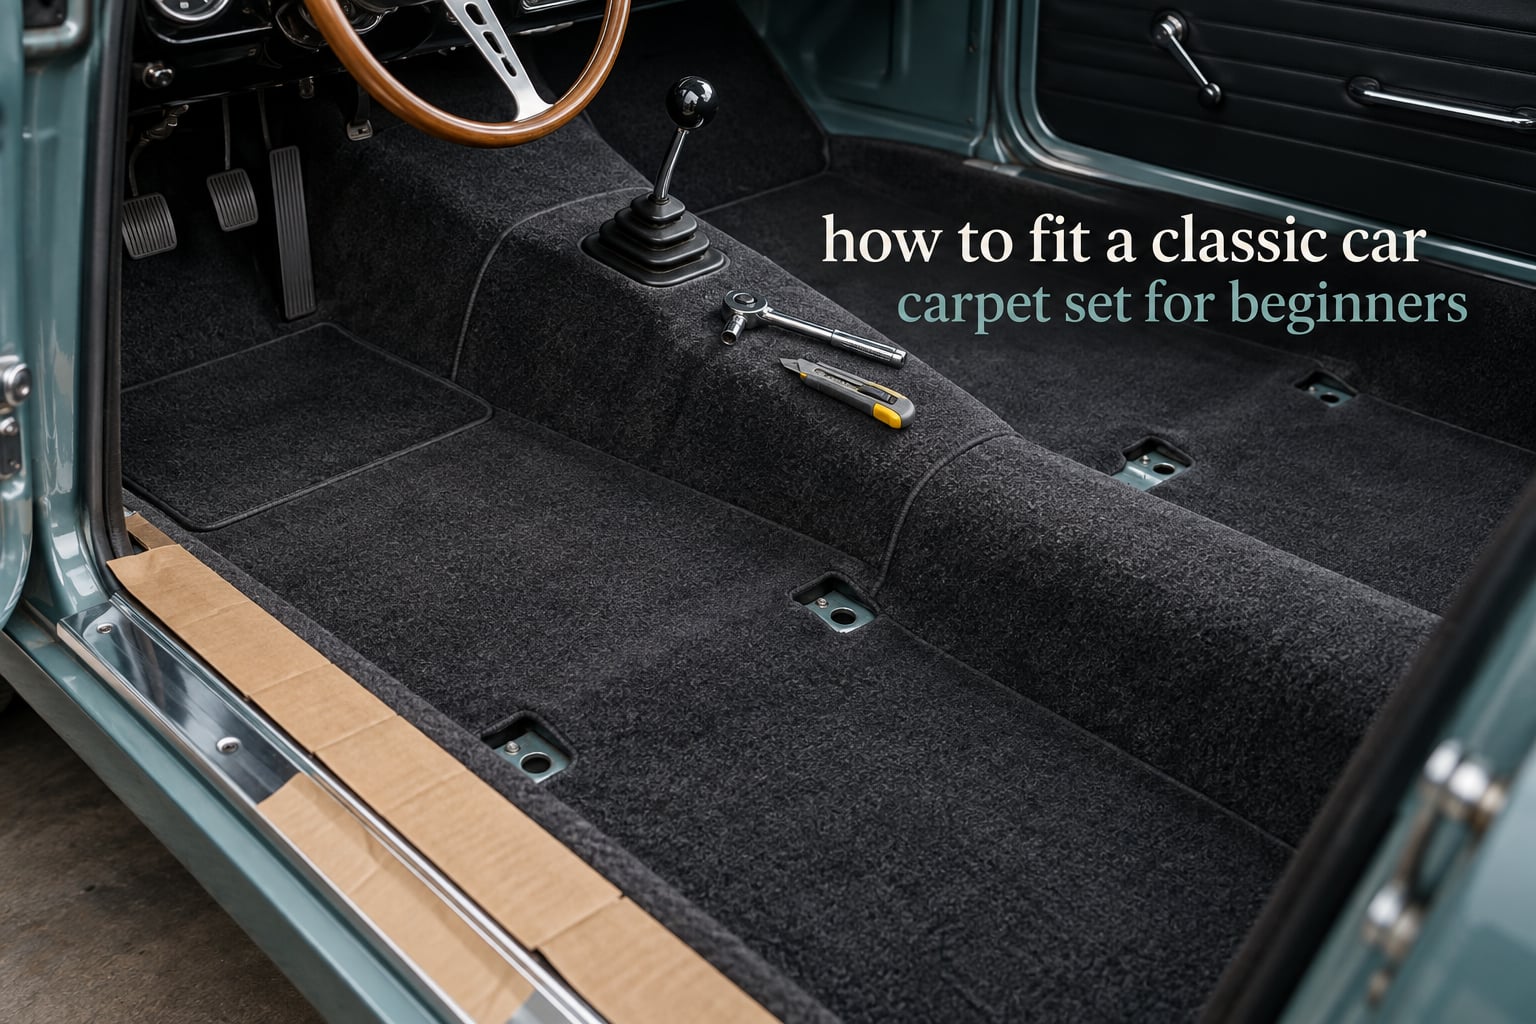
Fitting a classic car carpet set is a beginner-doable weekend job. You need basic hand tools, about a full day once the carpet has relaxed flat, and the patience to make every cut twice. Most of the work is removal and refitting, not carpet handling. Learning how to fit a classic car carpet set properly comes down to one rule that veteran builders on the forcbodiesonly and vintage-mustang forums repeat constantly: never make a final cut until the seats are back in and clamping the carpet down.
That single rule explains most of what looks complicated about the job. Carpet shifts as it settles, and the seat rails and seat bolts hold it in a fixed position. Trim to the tunnel before the seats go back and you can end up with an edge the seat will not cover.
This guide walks through the whole sequence in order, from unpacking the kit to refitting the console. It also covers the question that comes up first in almost every thread: whether automotive carpet is supposed to be glued down.
Table of Contents
- What a Classic Car Carpet Set Actually Includes
- What You’ll Need
- Before You Start
- How to Fit a Classic Car Carpet Set, Step by Step
- 1. Remove seats, belts and trim
- 2. Pull the old carpet out
- 3. Clean and prep the floor pan
- 4. Chalk the hole positions
- 5. Let the carpet settle
- 6. Rough-trim, but keep a wide margin
- 7. Refit the seats to clamp the carpet
- 8. Cut the openings and make final trims
- 9. Refit trim, console and check every fastener
- Do You Even Need Glue?
- Underlay, Sound Deadening and Padding Options
- How Long Does It Take?
- Common Mistakes to Avoid
- Frequently Asked Questions
- Conclusion
What a Classic Car Carpet Set Actually Includes
A carpet set made for your year, make and model usually arrives as a bundle of pre-moulded sections rather than one flat piece. The moulding is what gives the carpet its shape, so it conforms to the floor pan, transmission tunnel and firewall without stretching.
A typical kit contains the following:
- Front section, shaped around the footwells and pedals
- Rear section, covering the rear floor pan and back seat area
- Trunk or boot section, on cars with a separate rear compartment
- Underfelt or underlay pads, on kits that reproduce the factory sound deadening
- Grommets, seat belt bezels, clips and mounting hardware
- Reinforced heel pad on the driver’s side, on quality kits
Every section is deliberately cut oversized. The excess is your trimming margin, not a manufacturing error. Kits often use pre-cut or pre-drilled mounting holes, though the positions should still be chalk-marked from your old carpet before you trust them.
Two-piece and three-piece layouts are normal. Sedans and coupes commonly use a front and rear section, while hatchbacks, wagons and panelvans add a third piece to cover the load area.
What You’ll Need
Nearly every guide lists a flat tools list. This table says what each tool is actually for, so you can see which ones you can skip and which ones decide how clean the result looks.
| Tool | What it is used for |
|---|---|
| Chalk or white marker | Marking hole positions and trim lines from the old carpet before any cutting |
| Heavy-duty scissors or a carpet cutter | Rough-trimming the oversized sections and shaping edges around the tunnel |
| Box cutter | Final trims at the sills and under kick panels, with a fresh blade |
| Soldering iron | Burning seat belt and switch holes for a clean, factory-style edge |
| Socket and wrench set | Removing seats, seat belts, console and sill plates |
| Screwdriver set | Trim screws, kick panel fasteners and belt bezels |
| Vise grips | Temporary clamps on the sill plate rail while the carpet settles |
| Vacuum | Cleaning the floor pan before and after fitting |
| Painter’s tape and cardboard | Masking the rockers and protecting paint when heavy seats go back in |
| Contact or spray adhesive | Underfelt and holding points only, not the carpet itself |
Before you start, confirm the kit contents against the list above. Members on thesamba.com and supraforums.com both describe kits arriving without grommets or bezels, and factory hardware is far harder to source later than to keep. Reuse the original grommets, clips and belt bezels from the old carpet wherever they are still serviceable.
Check the colour against your existing interior before you cut anything. A mismatch is far easier to return than to live with, and door cards and headliners often fade at different rates from the carpet.
Before You Start
Unpack the kit and lay every section flat, ideally in warm sunlight, for at least a day. Freshly rolled carpet arrives with a memory from the packaging, and heat plus gravity will relax the moulded contours so they drop into the floor pan instead of fighting it. Experienced members on forcbodiesonly.com describe leaving carpet out for several days indoors when sun was not an option.
Mask the rockers and lay thick cardboard over the sill plates before any seat goes back in. This is the cheapest protection in the whole job, and builders who skipped it report chipped paint and gouged trim every time.
Keep the old carpet. Even a torn, filthy section tells you where the factory holes were, and it remains your template through the final cut.
How to Fit a Classic Car Carpet Set, Step by Step
Nine steps, in order. Do not skip ahead, and do not make any final cut until step eight.
1. Remove seats, belts and trim
Take out the front and rear seats, unbolt the seat belts, and remove the sill plates, kick panels and console. Store the hardware in labelled bags or a magnetic tray so nothing disappears into the footwell. If you have a floor shifter, note its position and how the carpet is cut around it.
2. Pull the old carpet out
Lift the old carpet from the front of the car first, working toward the rear, and fold it out rather than dragging it across the sills. Keep it flat if you can. This piece is your record of every hole position, every clip location and the original trim line at the rockers.
Old carpet also tells you about the car’s history. If yours smells musty or has black spotting, treat the floor pan before you cover it, because new carpet will trap that moisture again.
3. Clean and prep the floor pan
Vacuum the pan thoroughly and check for surface rust, particularly along the seat rails and the front footwells where water collects. Treat any rust you find and let it dry fully. Sound deadening mat goes on at this stage, before any carpet or underfelt, so it can cover the whole pan without seams around the edges.
4. Chalk the hole positions
Lay the old carpet over the new one and poke or chalk through at every mounting point: seat bolts, seat belt anchors, shifter, dimmer switch and any brake or accelerator cable pass-through. Count the holes as you go. This chalk-before-cutting step is what keeps a mistake reversible, and it is the reason you keep the old carpet at all.
If the new kit has holes the old carpet did not, trust the kit and mark the extra positions on the new carpet instead. That happens on cars whose seat mounts were relocated during a previous repair.
5. Let the carpet settle
Lay the rear section in first, centred on the transmission tunnel, and let it sit under its own weight for a while before you touch it. The tunnel is the fixed reference point for the whole car, so getting it centred here saves fighting the front section later. Grip the carpet at the tunnel and work outward, letting the moulded contours fall into place rather than pushing them.
Clamp temporarily with vise grips on the sill plate rail where the carpet edge needs holding. Keep walking away and coming back. A carpet that looks wrong at first often looks correct after twenty minutes of settling.
6. Rough-trim, but keep a wide margin
Take off the bulk of the excess at the rockers and kick panels with scissors or a carpet cutter, but leave several inches of margin everywhere. Nothing gets a final edge yet. The people who get this wrong are the ones who fit the trim line perfectly to the old carpet and then find the seat no longer covers it.
Kick the carpet up under the kick panels and tuck it into the corners of the footwells while the material is still soft. Do not stretch it to reach; stretching is what creates ripples later.
7. Refit the seats to clamp the carpet
Put the front and rear seats back in and bolt them down. This is the step that makes the whole installation work, because the seat rails and bolts now hold the carpet exactly where it belongs. Take your time with the seat belt anchors, tightening them evenly so the carpet is not dragged out of alignment.
Leave the console loose for now. You will need to reach the shifter and dimmer switch openings without working around a heavy casting.
8. Cut the openings and make final trims
Now cut the holes you chalked in step four. A soldering iron gives the cleanest, most factory-like edge on seat belt and dimmer switch openings, which is why one restorer on forcbodiesonly.com uses one for every opening. A sharp box cutter with a fresh blade works too, on the flat, away from the pile.
Push the original grommets into every hole. They are what keeps the edges from fraying, and they are the difference between a factory interior and a DIY one.
With the seats clamped, make your final trims at the sills, rockers and under the kick panels. Cut from the back side where possible, in small increments, and check the fit by refitting the sill plate before you commit to a longer cut.
9. Refit trim, console and check every fastener
Install the sill plates, kick panels, console and remaining trim in the reverse of removal order. Work through your hardware bags and confirm every fastener is present and torqued. Walk around the car with a flashlight and check the carpet edges in daylight, because a gap that is invisible in a dark garage is obvious in the sun.
Do You Even Need Glue?
No. Automotive carpet was generally not glued down at the factory. The moulded floor shape, the seat rails, the seat bolts and the trim hold everything in position, and multiple builders describe installing complete cars without touching an adhesive. Gluing the carpet to the floor pan can actually create problems later, because it makes the material harder to remove if you ever need to get at the pan.
Adhesive does have a place, just not where beginners expect it. Contact adhesive or spray adhesive is the right choice for underfelt, and a few dabs at the front and rear edges stop the carpet creeping on a car that sees rough roads. If you do use adhesive on the carpet itself, apply it to the backing, keep it clear of the pile, and remember that overspray on the floor pan is effectively permanent.
Use staples only on rare cases, such as carpet wrapping a step or a kick panel edge with no other retainer.
Underlay, Sound Deadening and Padding Options
Three options sit between the carpet and the floor pan, and they solve different problems.
Factory underfelt is the original-style choice. It gives a period-correct interior, adds a little insulation, and fits into the same recesses the old carpet used. Members on bmw2002faq.com treat it as the right answer when the aim is originality.
Sound-deadening mat, such as Dynamat or Stinger RoadKill, is the choice for a daily-driven car. It is thin, dense and applied directly to the pan, and builders report a clear reduction in road noise and heat through the floor. It goes down before the underfelt and before the carpet.
Mass backing is a heavier material bonded to the back of the carpet itself. It adds weight and kills pile flutter, which suits a show car being driven to events, at the cost of making the sections noticeably heavier to handle.
On wet padding: if the old underfelt or padding got soaked, replace it rather than reusing it. Wet foam compresses permanently, dries lumpy, and holds the smell that made you replace the carpet in the first place.
How Long Does It Take?
Plan on a full day for a first attempt on a two-door car, assuming the carpet has already relaxed. Seat and trim removal usually eats the first two hours, the template and chalk work another hour, and the laying, settling and trimming take the rest. A sedan with a trunk section and new sound deadening runs closer to a long weekend.
Skill level matters less than sequence. If you follow the order above and resist the urge to cut early, the physical work is straightforward. The awkward part is the corners under the kick panels, and the fix for that is more time, not more force.
Common Mistakes to Avoid
These are the faults that show up again and again in build threads. Each one is avoidable at a specific step.
| Mistake | How to avoid it |
|---|---|
| Final-trimming the rockers and sills too early | Rough-trim only, leave a few inches of margin, and make the final cut after the seats are bolted down |
| Cutting seat belt and switch holes before the seats go back in | Chalk every position first, refit the seats, then cut in step eight |
| Skipping the settling period | Lay the kit flat and warm for a day, and let the carpet sit under its own weight at the tunnel |
| Forgetting grommets and bezels | Reuse the factory hardware from the old carpet and check the kit contents on delivery |
| Guessing hole positions instead of using a template | Chalk through from the old carpet and count the holes as you mark them |
| Stretching the carpet to reach a corner | Let the moulded contours fall into place, and walk away and return rather than pulling |
One more deserves its own note: reusing the original carpet as a template matters most on the tunnel section. An oversized molded tunnel piece looks like it cannot possibly fit, and on many kits it only conforms once the carpet has spent time relaxing under weight.
Frequently Asked Questions
How do I fit carpet step by step?
Remove the seats, seat belts, sill plates, kick panels and console, then pull out the old carpet and keep it as a template. Vacuum the floor pan, chalk the hole positions from the old carpet, and lay the new carpet in starting at the transmission tunnel and working outward. Rough-trim with a wide margin, refit the seats to clamp the carpet, then cut the openings and make your final trims before refitting the trim.
Is it hard to replace car carpet?
It is a moderate job rather than a difficult one. The carpet handling is simple, and the time goes into removing and refitting seats and trim. Most beginners finish in a full day for a two-door car once the carpet has relaxed flat, provided they avoid final cuts until the seats are back in.
How hard is it to recarpet a car?
Recarpeting a car is within reach of a confident beginner who uses basic hand tools. The sequence is the hard part, not the physical work. Work slowly, keep every fastener bagged and labelled, and follow the order of removal and refit exactly as the reverse of each other.
What glue is used for automotive carpet?
Automotive carpet was generally not glued at the factory. The moulded floor shape, seat rails, seat bolts and interior trim hold it in place. Contact adhesive or spray adhesive is appropriate for underfelt and a few holding points at the carpet edges, and staples are reserved for step or kick panel edges with no other retainer.
What are the common carpet installation mistakes?
The most common faults are final-trimming the rockers and sills before the seats go back in, cutting seat belt and switch holes too early, and skipping the settling period so the carpet fights you in the car. Other frequent errors include forgetting grommets, guessing hole positions instead of using the old carpet as a template, and stretching the material to reach a corner.
Is carpet padding ruined if it gets wet?
Foam padding and underfelt that have been soaked should be replaced. Wet foam compresses permanently, dries lumpy, and holds the damp smell that prompted the carpet replacement in the first place. If the new carpet is going down anyway, this is the moment to fit fresh underfelt or sound-deadening mat while the floor pan is clear.
Is old car carpet unhealthy to keep in the car?
Old carpet that smells musty, feels damp or shows black spotting should not be refitted. Those signs point to trapped moisture and mould on the floor pan beneath. Pull it out, dry and treat the pan, and fit new underfelt before the new carpet goes down.
Conclusion
How to fit a classic car carpet set comes down to sequence and restraint: remove the trim, keep the old carpet as a template, chalk before you cut, lay in at the transmission tunnel, and hold every final trim until the seats are bolted down. Set aside a day, let the kit relax flat beforehand, and take your time under the kick panels.
Done in that order, the result looks factory-original, and you will have taught yourself the sequence well enough to fit the next section, or the boot carpet, without any help at all.