
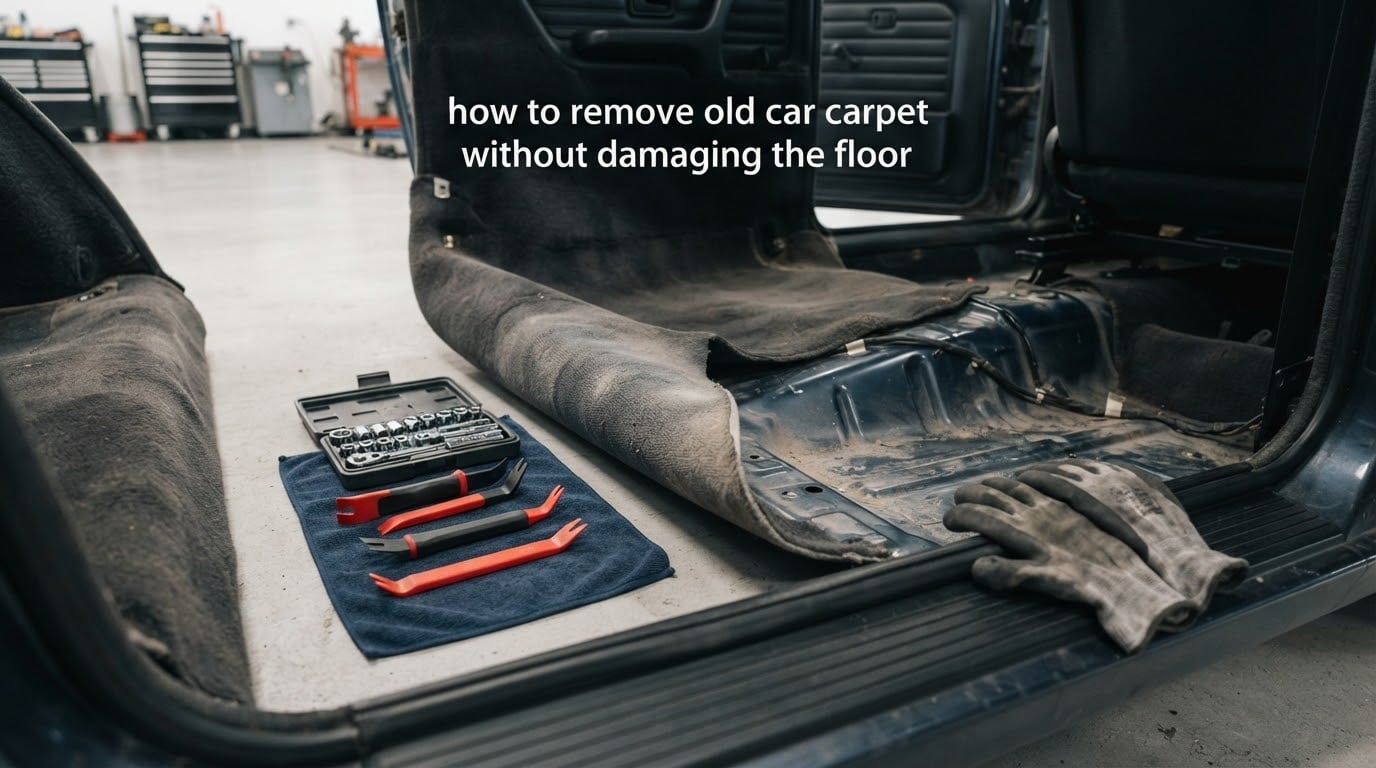
Removing old car carpet without damaging the floor is a task that many vehicle owners face, whether dealing with water damage, stubborn stains, or preparing for a full interior restoration. The process requires patience, the right tools, and a systematic approach to protect your floorboards from scratches, dents, and adhesive residue. This guide will walk you through every step of how to remove old car carpet safely while keeping your floor pristine for whatever comes next—whether you plan to reinstall the original carpet, lay down new flooring, or treat hidden rust before it spreads.
Your car’s carpet does more than just look good. It insulates the cabin, dampens road noise, and protects the metal floorboard from temperature extremes. But over time, moisture, dirt, and wear can turn that protective layer into a problem. Removing the carpet gives you a chance to clean what’s underneath, fix issues you couldn’t see, and start fresh with a healthier interior.
Table of Contents
- Quick Reference: Tools and Materials Checklist
- Safety First: Battery Disconnect and SRS Precautions
- How to Remove Old Car Carpet Without Damaging the Floor
- Step 1: Prepare the Workspace and Disconnect Power
- Step 2: Remove Front and Rear Seats
- Step 3: Remove Trim Panels and Kick Plates
- Step 4: Disconnect Seat Belts and SRS Sensors
- Step 5: Locate and Release Carpet Fasteners
- Step 6: Loosen Carpet Edges Carefully
- Step 7: Remove Adhesive Without Scratching the Floor
- Step 8: Lift Carpet in Sections
- Step 9: Inspect the Floorboard for Damage
- Step 10: Clean and Prepare the Floor for Reinstallation
- Floorboard Inspection and Cleaning
- Frequently Asked Questions
- Can I remove car carpet without removing the seats?
- How long does it take to remove car carpet?
- What should I do if I find rust under my car carpet?
- Can I reuse my old car carpet as a template for new carpet?
- Do I need special tools to remove carpet adhesive from the floor?
- Is it safe to work under car carpet near airbag sensors?
- Conclusion
Quick Reference: Tools and Materials Checklist
Before you begin the car carpet removal process, gather everything you need. Having the right tools on hand prevents frustrated pauses and helps you work methodically without improvising solutions that might damage your floorboard.
Essential Tools
- Socket set and ratchet – For seat bolts, seat belt anchors, and trim panel screws
- Pry tools or trim removal kit – Plastic tools are gentler on interior panels than metal screwdrivers
- Utility knife with fresh blades – For carefully cutting carpet around obstacles if needed
- Needle-nose pliers – For gripping and pulling carpet fasteners
- Shop vacuum – For cleaning debris as you go
- Wire brush or plastic scraper – For removing adhesive residue without scratching metal
- Flashlight or work light – For seeing under seats and into dark corners
Materials You’ll Need
- Adhesive remover – Choose one safe for automotive metal surfaces
- Clean rags or microfiber towels – For wiping surfaces and applying solvents
- Gloves – To protect your hands from adhesive, chemicals, and sharp edges
- Safety glasses – To protect your eyes from debris and splashing solvents
- Masking tape and marker – For labeling parts and connectors
- Plastic bags – For organizing bolts, clips, and fasteners by location
Optional but Helpful Items
- Moisture meter – For testing floorboard dampness after carpet removal
- Phone or camera – For photographing wiring and fastener positions before disassembly
- Multimeter – For safely disconnecting electrical components
- Shop fan or heater – For drying the floorboard after cleaning
Safety First: Battery Disconnect and SRS Precautions
Before you touch a single bolt or trim piece, address the most critical safety concern in modern vehicles: the Supplemental Restraint System (SRS), which includes airbags and their sensors. Many SRS components are located under or near the carpet, particularly seat-mounted side airbags and floor-mounted sensors. Improper handling can trigger accidental airbag deployment, which can cause serious injury.
Battery Disconnect Procedure
Start by disconnecting the negative terminal of your car battery. This eliminates power to all electrical systems, including the airbag system. Use a socket wrench to loosen the clamp on the negative terminal (usually marked with a minus sign or black cable), then move the cable away from the terminal and secure it so it cannot accidentally make contact. Wait at least 10 minutes after disconnecting before working near SRS components—this allows stored energy in the airbag system capacitors to dissipate.
SRS Sensor Awareness
Not all vehicles have floor-mounted airbag sensors, but many do. Check your owner’s manual or a repair guide for your specific vehicle to identify SRS component locations. If your car has seat-mounted side airbags, handle the seats with extreme care and avoid pulling or twisting wiring harnesses. If you’re unsure about any connector, leave it alone and consult a professional. The risk of accidental airbag deployment is low but the consequences are severe, so treat every wire and connector as potentially critical.
Additional Electrical Precautions
Modern vehicles often have wiring harnesses running under the carpet for power seats, seat heaters, audio systems, and lighting. Before you cut or pull carpet, inspect for wires and connectors. Use your camera to document connector positions and wire routing. Label each connector with masking tape and a marker to make reassembly easier. Never yank carpet blindly—always check for hidden wiring first.
How to Remove Old Car Carpet Without Damaging the Floor
Now that you’ve prepared your tools and addressed safety, it’s time to begin the actual removal. Work slowly and methodically, checking for obstacles before each move. The goal is to lift the carpet away cleanly while leaving the floorboard in the best possible condition.
Step 1: Prepare the Workspace and Disconnect Power
Park your vehicle on a flat surface with plenty of space to work. Open all doors fully to give yourself access to the interior. If you’re working indoors, ensure good ventilation—adhesive removers and cleaning chemicals can produce fumes. Put on your gloves and safety glasses before you start.
Disconnect the battery following the procedure outlined in the safety section. This step is non-negotiable if your vehicle has any airbag components. Take a few minutes to remove loose items from the car: floor mats, personal belongings, and any aftermarket accessories that might be in the way.
Step 2: Remove Front and Rear Seats
In most vehicles, the seats must come out to access the carpet fully. Front seats are typically held by four bolts each—two at the front of the seat rail and two at the rear. These bolts are often accessible from inside the cabin, but some vehicles have nuts on the underside of the floorboard.
Use your socket set to remove all four seat bolts. Before lifting the seat out, check for electrical connectors underneath. Power seats, heated seats, and seats with airbags will have wiring harnesses. Unplug these connectors carefully, pressing the release tab rather than pulling on the wires. Lift the seat out of the vehicle and set it aside in a safe place.
Rear seats vary widely by vehicle. Many sedans have a bottom cushion that pops up when you pull a release lever or push down on the front edge. The seat back may be held by bolts at the bottom or by clips that release when you push down and lift. Consult a service manual for your specific vehicle if you’re unsure. Remove the rear seats completely to give yourself unobstructed access to the rear floorboard.
Step 3: Remove Trim Panels and Kick Plates
Carpet edges are usually tucked under or behind trim panels. You’ll need to remove door sill plates (the metal or plastic strips at the bottom of the door frame), kick panels (the plastic covers near your feet), and any other trim that holds the carpet edges in place.
Use plastic pry tools to avoid scratching or denting trim pieces. Start at one edge and gently work the pry tool under the trim. Apply steady, even pressure until clips release. Some trim pieces also have screws, often hidden under small plastic caps—check for these before prying. As you remove each trim piece, place its screws and clips in a labeled plastic bag. Taking photos before removal helps you remember how everything fits together.
Step 4: Disconnect Seat Belts and SRS Sensors
Seat belt anchors are typically bolted to the floor or the center console. Remove the bolts that hold the lower anchor points. In some vehicles, the seat belt retractor is also attached to the floor or a pillar—you may need to remove these as well. Keep all seat belt hardware organized and labeled.
If your vehicle has floor-mounted SRS sensors, now is the time to identify and handle them carefully. Look for small modules with yellow or orange wiring harnesses—these colors typically indicate SRS components. If you see sensors mounted to the floor, note their exact position and orientation. You may need to unbolt them and set them aside without disconnecting their wiring. If you’re uncertain about any SRS component, stop and consult a professional rather than risk accidental airbag deployment.
Step 5: Locate and Release Carpet Fasteners
Many vehicles use plastic or metal fasteners to hold the carpet to the floorboard. These are often located near the firewall, under the seats, along the transmission tunnel, and near the wheel wells. Fasteners may be push-in plastic clips, screw-in anchors, or hook-and-loop strips.
Use needle-nose pliers or a trim tool to release push-in clips. Grip the center pin and pull it up, then remove the outer sleeve. Screw-in anchors simply unscrew. Hook-and-loop fasteners release when you peel the carpet back slowly—avoid yanking, which can tear the carpet backing. As you remove each fastener, place it in a labeled bag. These small parts are easy to lose and often hard to replace.
Step 6: Loosen Carpet Edges Carefully
With fasteners removed and trim panels out of the way, you can begin peeling the carpet back. Start at one corner—usually near the firewall or a door sill—and work slowly. Use your hands to lift the carpet edge, feeling for resistance. If the carpet sticks, check for missed fasteners or adhesive before applying more force.
Work from the edges toward the center of the vehicle. This approach lets you see what’s underneath as you go and prevents you from pulling carpet over hidden obstacles. In many vehicles, the carpet is one large molded piece that covers the entire floor. In others, there may be separate pieces for different areas. Understand your vehicle’s layout before committing to a removal strategy.
Step 7: Remove Adhesive Without Scratching the Floor
Some vehicles have carpet glued directly to the floorboard, particularly in older models or cars that have had replacement carpet installed. Adhesive can be stubborn, and removing it without damaging the floor requires the right technique and materials.
Start by applying an adhesive remover formulated for automotive use. Follow the product instructions for application and dwell time. Use a plastic scraper or wire brush to gently loosen the softened adhesive. Work in small sections, applying more remover as needed. Avoid metal scrapers that can gouge the floorboard, and never use sharp tools at an angle that could dig into the metal.
For particularly stubborn adhesive, you can try a combination of heat and solvent. A heat gun held at a safe distance can soften old glue, but be careful not to overheat painted surfaces or wiring. Always test any chemical or technique in a small, hidden area first to ensure it won’t damage the floorboard’s protective coating.
Step 8: Lift Carpet in Sections
Once the carpet is fully loosened, carefully lift it from the vehicle. If it’s one large piece, you may need to fold or roll it to get it out without tearing. Work slowly and have a helper if possible—large molded carpet pieces can be awkward to maneuver.
If the carpet is in poor condition and you plan to replace it, you can cut it into more manageable sections using a utility knife. Cut carefully, staying away from the floorboard and any remaining wiring. If you plan to reuse the old carpet as a template for a new piece, avoid cutting it if possible. Instead, note the positions of any holes, fastener locations, and cutouts for seats and controls.
Step 9: Inspect the Floorboard for Damage
With the carpet removed, you have your first clear view of the floorboard in years—or possibly ever. This inspection is one of the most valuable reasons to remove old carpet, as hidden problems often lurk beneath.
Look for rust, which appears as orange or brown discoloration, bubbling paint, or actual holes in the metal. Pay special attention to areas under the seats, along the edges near door sills, and near the firewall. Water often pools in low spots, creating ideal conditions for corrosion. Press gently on any suspicious areas with a screwdriver handle—if the metal gives or crumbles, you have structural rust that needs professional attention.
Check for moisture stains, mold, or mildew. These indicate past or present water intrusion, possibly from leaks, condensation, or flooding. Mold can appear as black, green, or white patches, often accompanied by a musty odor. Even if the floorboard looks dry, moisture can linger in seams and crevices.
Step 10: Clean and Prepare the Floor for Reinstallation
After inspection, thoroughly clean the exposed floorboard. Use a shop vacuum to remove all loose debris, dirt, and rust particles. Follow with a damp cloth to wipe down the entire surface, working into corners and seams where dirt collects. If you found mold or mildew, treat the area with a mold-killing solution appropriate for automotive interiors.
For adhesive residue, use your chosen remover and scraper to clean the floor to bare metal or the factory coating. If you discovered rust, treat it according to severity. Light surface rust can be sanded and coated with a rust converter or automotive primer. Deeper rust may require professional repair or patch panels.
Before you reinstall carpet or install new flooring, let the floorboard dry completely. Use a moisture meter to verify that the metal is dry, especially if you found dampness. A fan or heater can speed the drying process. Installing new carpet over a damp floor is a recipe for mold, odor, and ongoing corrosion.
Floorboard Inspection and Cleaning
After carpet removal, your floorboard deserves careful attention. This is your opportunity to address problems that would otherwise remain hidden and worsen over time. A thorough inspection and cleaning now can prevent costly repairs later and ensure a solid foundation for whatever flooring you install next.
Visual Inspection Checklist
Systematically examine the entire floorboard, section by section. Use your flashlight to illuminate dark areas under the dashboard and along the transmission tunnel. Check for:
- Rust – Look for discoloration, bubbling, and pitting
- Moisture – Check for water stains, dampness, and mineral deposits
- Mold or mildew – Look for patches of growth and note any musty odors
- Dents or damage – Note any areas where the metal is bent, creased, or punctured
- Wiring issues – Look for damaged insulation, loose connectors, or corrosion on electrical components
- Seal failures – Check around seams and drain holes for signs of water entry
Document your findings with photos. This record helps you plan repairs and provides evidence for insurance claims if the damage resulted from flooding or another covered event.
Rust Detection and Treatment
Rust is the most common and concerning issue found under old carpet. Left untreated, it spreads and can eventually compromise the structural integrity of your vehicle. Early detection and treatment are essential.
Surface rust appears as light orange discoloration without deep pitting. You can treat this by sanding the area with medium-grit sandpaper until you reach clean metal, then applying a rust converter or automotive primer followed by paint. Scale rust appears as flaking, bubbling layers and requires more aggressive removal with a wire brush or grinder. After removing loose material, treat the area with rust converter and paint. Penetrating rust that creates holes or severely thins the metal requires professional repair, possibly including welding in patch panels or replacing floorboard sections.
Moisture Testing Procedure
Even if the floorboard looks dry, moisture can remain in seams, undercoating, and porous surfaces. Testing before reinstallation prevents trapping moisture under new carpet, where it can cause ongoing problems.
Use a moisture meter designed for automotive or construction use. Press the meter’s probes against the metal in several locations, especially in low spots, near seams, and in areas that showed stains or discoloration. Most meters give a percentage reading; a reading below 15 percent is generally acceptable for reinstalling carpet. Higher readings indicate moisture that needs to be addressed.
If you don’t have a moisture meter, you can perform a plastic sheet test: tape a square of clear plastic sheeting to the floorboard in several areas. Leave it for 24 hours, then check underneath. Condensation on the plastic indicates moisture evaporating from the floor. Dry those areas thoroughly before proceeding.
Adhesive Residue Removal Options
Old carpet adhesive can leave a sticky, uneven layer that interferes with new flooring installation. Choosing the right removal method depends on the type of adhesive, the condition of your floorboard, and your preference for chemical versus mechanical approaches.
Chemical removers soften adhesive so it can be scraped away. Choose a product formulated for automotive use and safe for painted or coated metal surfaces. Apply according to instructions, allow the recommended dwell time, and scrape with a plastic tool. Work in small sections and ventilate the area well. Chemical removers are effective for thick, stubborn adhesive but can be messy and require protective equipment.
Mechanical removal uses tools like wire brushes, plastic scrapers, and abrasive pads to physically remove adhesive. This method gives you more control but requires more effort. Start with gentle pressure and increase as needed. Avoid power tools like grinders, which can remove floorboard coatings or gouge the metal.
For most situations, a combination works best: apply a chemical remover to soften the adhesive, then use mechanical tools to remove the loosened residue. This approach balances efficiency with safety and minimizes the risk of floorboard damage.
Frequently Asked Questions
Can I remove car carpet without removing the seats?
In some vehicles, you can lift carpet edges and pull it out from under the seats, but this approach limits your access and increases the risk of damaging the carpet or floorboard. Removing seats gives you full access and makes the job easier and safer. Most professional restorers recommend removing seats for complete carpet removal.
How long does it take to remove car carpet?
Plan for 3 to 5 hours for a complete carpet removal in a typical sedan or SUV. This includes seat removal, trim panel removal, carpet extraction, and basic floorboard cleaning. Vehicles with extensive adhesive or complicated interiors may take longer. Working carefully is more important than working quickly.
What should I do if I find rust under my car carpet?
Treat rust as soon as you discover it. Light surface rust can be sanded and primed. Deeper rust may require a rust converter product or professional repair. Address any water entry points that caused the rust before reinstalling carpet, or the problem will return.
Can I reuse my old car carpet as a template for new carpet?
Yes, many restorers use old carpet as a template. Before removing it, mark the positions of all holes, cutouts, and fastener locations. When ordering new carpet, choose a kit designed for your specific vehicle for the best fit. A good template ensures your new carpet fits correctly around seats, controls, and trim.
Do I need special tools to remove carpet adhesive from the floor?
No special tools are required, but the right tools make the job easier. A plastic scraper, wire brush, and adhesive remover formulated for automotive use will handle most adhesive removal jobs. Avoid metal scrapers or sharp tools that can gouge the floorboard.
Is it safe to work under car carpet near airbag sensors?
It is safe if you follow proper procedures. Disconnect the battery and wait at least 10 minutes before working near SRS components. Never disconnect airbag sensors unless you have training—instead, unbolt them and set them aside if they are in your way. If you are uncertain about any SRS component, consult a professional.
Conclusion
Knowing how to remove old car carpet without damaging the floor gives you the ability to restore your vehicle’s interior, address hidden problems, and prepare for new flooring with confidence. The process requires patience and the right tools, but the results are worth the effort: a clean floorboard, freedom from hidden moisture and mold, and a fresh start for your car’s interior.
By following this guide, you’ve taken the time to disconnect power safely, remove seats and trim properly, release fasteners without damage, and inspect your floorboard thoroughly. These steps protect both your vehicle and yourself during the removal process. The extra attention you give to floor protection, adhesive removal, and moisture testing will pay off when you reinstall carpet or install new flooring that lasts for years.
Take your time, document your work with photos, and label everything. A methodical approach now makes reassembly easier and ensures that your next interior project—whether carpet replacement, vinyl flooring, or a full restoration—has the solid foundation it deserves.