
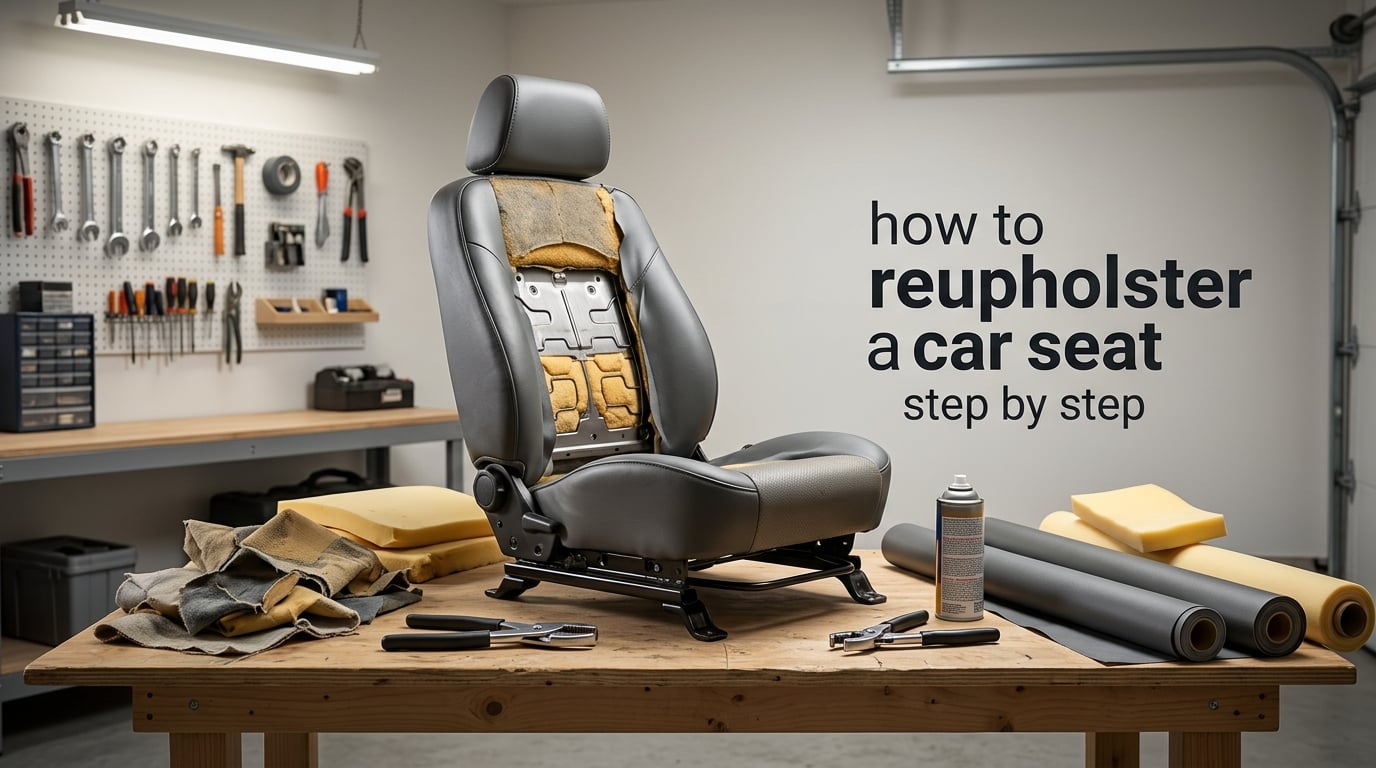
You can reupholster your car seats yourself, and many first-time DIYers complete front and rear seats in about two weekends. Learning how to reupholster a car seat step by step gives you control over materials, saves you significant money compared to professional services, and lets you customize your vehicle’s interior exactly the way you want it. This guide walks you through every phase of the process, from gathering materials to installing your new seat covers, so you can tackle this project with confidence.
Reupholstering car seats involves removing the old fabric or leather, repairing the underlying foam and frame, and stretching new material over the seat structure. The process requires patience and attention to detail, but it’s entirely achievable for anyone comfortable with basic hand tools. You’ll need about four days for a complete front and rear seat job if this is your first attempt.
In this guide, I’ll show you exactly what tools and materials you need, walk you through each step with real tips from experienced DIYers, and help you avoid the common mistakes that derail many first-time projects. By the end, you’ll have the knowledge to transform your worn, torn, or faded seats into something you’re proud to sit on.
Table of Contents
- What You’ll Need – Complete Materials & Tools List
- Fabric Selection Guide: Leather vs Vinyl vs Cloth
- Step 1: Prepare Workspace & Remove Seats
- Step 2: Document & Remove Old Upholstery
- Step 3: Inspect & Repair Seat Frame and Springs
- Step 4: Replace or Repair Foam Padding
- Step 5: Cut & Prepare New Seat Covers
- Step 6: Install New Upholstery
- Step 7: Reinstall Seats & Final Adjustments
- Common Mistakes to Avoid
- Pro Tips from Experienced DIYers
- Cost Breakdown: DIY vs Professional
- Time Estimate by Vehicle Type
- Frequently Asked Questions
- Conclusion
What You’ll Need – Complete Materials & Tools List
Before you start, gather all the necessary tools and materials. This complete checklist ensures you won’t make emergency trips to the hardware store mid-project, which can break your momentum and extend your timeline significantly.
Essential Tools
You need a hog ring tool and plenty of hog rings to secure the new fabric to your seat frame. Hog rings are C-shaped metal fasteners that clamp around the fabric and wire channels on your seat. A quality hog ring tool saves your hands and speeds up installation dramatically. Forum users consistently recommend buying a higher-quality tool rather than the cheapest option, as cheap tools break quickly under the pressure this work requires.
Piano wire, also called listing wire, holds the fabric tight in channels along the seat frame. You’ll need needle-nose pliers for manipulating this wire, wire cutters for trimming it, and a flathead screwdriver for prying channels open. Regular pliers, a utility knife, and a measuring tape round out your basic tool kit. Many DIYers also find a staple gun helpful for securing fabric to wooden or fiberboard seat bottoms.
Essential Materials
Your choice of fabric is the most visible decision you’ll make. Options include leather, vinyl, and cloth, each with distinct advantages I’ll cover in the fabric selection guide below. You’ll need new foam padding if your existing foam is deteriorated, and burlap or muslin cloth to create a smooth layer between the foam and your outer fabric. These intermediate layers are often missing from modern kits, but experienced upholsterers consider them essential for a professional finish.
High-quality spray adhesive is critical. Forum users strongly advise against water-based adhesives because they fail under the heat and stress car seats experience. Choose a professional-grade, solvent-based adhesive designed for automotive upholstery. You’ll also need rust converter if your seat frames show corrosion, and touch-up paint to match the frames to your final interior color.
Optional but Helpful Tools
A heat gun or hair dryer helps soften vinyl covers during installation, making them more pliable and easier to stretch. Heat lamps serve the same purpose if you’re working in a cold garage. A sewing machine is necessary only if you’re creating custom covers from raw fabric. Most DIYers purchase pre-made seat covers that only need trimming and fitting, eliminating the need for sewing skills.
Other optional tools include an air compressor for the dry cleaner bag trick I’ll describe later, work lights for clear visibility, and a camera or smartphone for documenting your disassembly. Trust me, those photos will save you hours of confusion during reassembly.
Fabric Selection Guide: Leather vs Vinyl vs Cloth
Choosing the right fabric affects both the look of your finished seats and the difficulty of your installation. Each material has distinct characteristics that suit different vehicles, budgets, and skill levels.
Leather
Leather offers unmatched durability, a premium appearance, and resistance to wear that makes it ideal for classic cars and luxury vehicles. It develops a rich patina over time and can last for decades with proper care. However, leather is the most expensive option and requires more skill to install correctly. It’s less forgiving than synthetic materials, and mistakes are harder to hide.
Leather also demands ongoing maintenance with conditioners to prevent cracking and fading. For a classic car restoration where authenticity matters, leather is worth the investment. For a daily driver or a first-time DIY project, you might consider a high-quality vinyl alternative.
Vinyl
Vinyl is the most popular choice for DIY reupholstery because it’s affordable, easy to work with, and available in countless colors and textures. Modern automotive vinyl can mimic leather’s appearance convincingly while offering excellent durability and UV resistance. The material stretches more readily than leather, making it forgiving for beginners.
Heat is your ally when working with vinyl. Use a heat gun or hair dryer to warm the material before stretching it over foam. Many DIYers report that working in warm weather or using heat lamps makes vinyl installation significantly easier. Vinyl requires minimal maintenance compared to leather and handles exposure to sunlight well.
Cloth
Cloth seats were standard in many vehicles and offer breathability that leather and vinyl lack. Fabric is easier to work with than leather but can show wear more quickly than vinyl. Choose automotive-grade cloth specifically designed for seats, as regular fabric won’t withstand the friction and UV exposure car seats endure.
Cloth works well for vintage vehicles where you want an original appearance, or for budget-conscious projects where you’re prioritizing cost savings. The material is forgiving during installation and doesn’t require heat to stretch. However, cloth stains more easily than vinyl or leather and may need more frequent cleaning.
Step 1: Prepare Workspace & Remove Seats
Proper workspace setup makes the difference between a smooth project and a frustrating struggle. You need adequate space to work around each seat, good lighting to see what you’re doing, and a clean surface for organizing the many small parts you’ll remove.
Start by disconnecting your car’s battery. Modern seats often contain airbags, seat heaters, and electric motors that you don’t want to accidentally activate during removal. Wait at least ten minutes after disconnecting the battery before touching any electrical components to allow capacitors to discharge.
Move the seat to its highest position and slide it all the way forward to access the rear mounting bolts. Remove the plastic covers over the mounting bolts, typically four bolts total that secure the seat to the floor. These bolts are usually 14mm or 17mm, but check your specific vehicle. With the bolts removed, tilt the seat back and unplug any electrical connectors. Some connectors have release tabs that require a small flathead screwdriver to unlock.
Lift the seat out carefully. Seats are heavy and awkward, so get help if needed. Place the seat on a workbench or clean floor with plenty of room around it. If you’re doing both front seats, remove them both now but work on one at a time. This gives you a reference seat to consult if you forget how something fits together.
Step 2: Document & Remove Old Upholstery
This is the most critical step in the entire process, and it’s where many first-time DIYers create problems for themselves later. Before you remove anything, photograph everything. Take pictures from multiple angles of the seat from the front, back, sides, top, and bottom. Get close-up shots of how the fabric attaches, where the seams sit, and how the hog rings are positioned.
Forum users consistently emphasize this point. One experienced DIYer noted that photographing every step before disassembly is the single most valuable thing you can do. You’ll refer back to these photos constantly during reassembly, and the small effort you invest now will save you hours of frustration later.
Remove the headrest first if your seat has one. Look for a release button or lever, then pull the headrest out. Some headrests have covers that unclip or unzip. Set aside all hardware and keep it organized, preferably in labeled bags or containers.
Flip the seat over to access the bottom. You’ll see hog rings securing the fabric to the frame. Use your hog ring tool or needle-nose pliers to pry these rings open. Start from one side and work systematically around the seat. Save the old hog rings as a reference for how many new ones you’ll need, but don’t reuse them. New hog rings provide a more secure hold.
As you remove each section of fabric, photograph the exposed foam and frame underneath. The old covers may be brittle and tear as you remove them, especially on older vehicles. This is normal and actually helpful, as torn covers are easier to remove. Just make sure you’ve already photographed how the intact cover fit before it tears.
Pull the fabric off carefully, noting how it tucked into channels and wrapped around the frame. The old covers serve as your templates for cutting the new fabric, so try to remove them in large pieces rather than cutting them unnecessarily. Label each piece with its position, such as driver seat bottom or passenger seat back.
Step 3: Inspect & Repair Seat Frame and Springs
With the old upholstery removed, you can finally see the condition of your seat’s internal structure. This is where many DIYers discover unexpected problems, particularly rust on the frame and broken springs. Address these issues now, before you install new foam and fabric, or you’ll regret it later.
Frame Inspection and Repair
Check the seat frame for rust, cracks, and broken welds. Rust is common, especially in older vehicles or cars that have been stored in damp conditions. Use a wire brush to remove loose rust, then apply a rust converter to stop the corrosion. After the converter dries, paint the frame to protect it from future rust and to match your final interior color.
Forum DIYers note that painting the frames to match the final upholstery color creates a professional finish. If your new seats are black, paint the frames black so any small gaps don’t reveal bare metal. This attention to detail separates amateur work from professional results.
Spring Examination
Examine all springs for breakage, sagging, or deformation. Seat springs provide the underlying support that determines your seat’s comfort. Broken springs should be replaced, and sagging springs can sometimes be tensioned back into shape. Check how the springs attach to the frame, as some use clips that may also need replacement.
Finding replacement springs can be challenging. Specialty automotive upholstery suppliers stock common spring types, and some fabricators can create custom springs if needed. If your springs are in good condition, simply clean them and move forward. If they’re damaged, this is the time to source replacements before you proceed.
Recline Mechanism
Test the recline mechanism while you have access to it. The mechanism should move smoothly without binding or slipping. If it feels loose or fails to hold position, you may need to tighten mounting bolts, replace worn bushings, or in severe cases, source a replacement mechanism. Lubricate all pivot points with white lithium grease for smooth operation.
Step 4: Replace or Repair Foam Padding
The foam beneath your fabric determines the comfort and shape of your seat. Most original foam deteriorates over time, becoming compressed, crumbly, or completely disintegrated in areas. Replacing or repairing the foam is essential for a professional result that actually feels good to sit on.
Evaluate your existing foam. If it’s merely compressed but structurally sound, you can build it up with additional layers. If it’s crumbling, crumbling, or missing chunks, you need complete replacement. Many DIYers choose to replace all the foam rather than patch problem areas, ensuring consistent density and longevity.
Removing Old Foam
Old foam often comes off in chunks. Use your hands to pull away loose pieces, and a putty knife to scrape the frame clean. Remove all old adhesive residue as well, as it can interfere with the new foam’s bond. Some frames have a thin fiberboard layer between the springs and foam. If this layer is intact, leave it in place. If it’s damaged, replace it with similar material.
Installing New Foam
Choose foam with appropriate density for automotive seating. Too soft and you’ll bottom out against the frame. Too firm and the seat will feel uncomfortable on long drives. Most auto upholstery suppliers offer foam specifically designed for car seats, with the right balance of support and comfort.
Apply spray adhesive to both the frame and the foam surface. Forum users strongly recommend using non-water-based adhesive for this application. Water-based adhesives fail under the heat and stress that car seats experience. Let the adhesive become tacky according to the manufacturer’s instructions before pressing the foam into place.
The Burlap and Muslin Layers
Experienced upholsterers use burlap and muslin cloth layers between the foam and the outer fabric. These intermediate layers create a smooth surface that prevents the foam from showing through your final fabric and adds durability to the installation. Many modern kits omit these layers, but forum DIYers consider them essential for professional results.
Wrap burlap over the foam first, securing it with adhesive or staples to wooden areas of the frame. Then wrap muslin cloth over the burlap for a smooth finish. These layers also help the outer fabric slide more easily during installation, reducing friction that can cause uneven stretching.
Step 5: Cut & Prepare New Seat Covers
If you purchased a pre-made seat cover kit, much of this work is already done for you. If you’re creating custom covers or modifying a kit for your specific seat, this step requires careful measurement and cutting. The old covers you removed serve as your templates.
Lay each old cover piece flat on your new fabric. Trace around it with chalk or a fabric marker, adding about an inch of extra material on all sides for seam allowances and stretching. Mark any seams, pleats, or channels on your new fabric so you can replicate the original construction. If the old cover was damaged or incomplete, use your photos to reconstruct how the original piece should look.
Consider the direction of the fabric’s stretch. Most automotive fabrics stretch more in one direction than the other. You want the stretch to run across the seat rather than front to back, so the fabric gives when you sit but doesn’t sag over time. This orientation matters most for vinyl and cloth seats. Leather has less directional stretch, but you should still consider grain direction for appearance.
Marking and Cutting
Double-check your measurements before cutting. The old saying measure twice, cut once applies strongly here. You can always trim excess fabric, but you can’t add material back once it’s gone. Mark seam lines clearly so you know exactly where to sew or where factory seams should fall.
If you’re working with a kit, compare each piece to your old covers to verify you have everything and that the shapes are correct. Some kits are designed for multiple seat styles and may have extra pieces you don’t need, or missing pieces you’ll need to source separately.
Pre-Installation Preparation
Before you start installing, lay out all your cover pieces in order. Having everything organized and within reach prevents frustrating searches mid-installation. Double-check that you have enough hog rings for each section. Most DIYers find they need more hog rings than they expected, so buy extra. You can always return unused rings.
Step 6: Install New Upholstery
This is the moment you’ve been working toward. All your preparation, documentation, and repair work comes together as you stretch new fabric over your refreshed seat frame and foam. This step requires patience and the specific techniques I’ll describe below. Rush this part and you’ll end up with wrinkles, loose spots, and an amateur appearance.
The Dry Cleaner Bag Trick
Here’s the single most valuable technique I learned from forum discussions: use a dry cleaner bag to help you stretch tight-fitting covers. This trick works incredibly well and separates first-time DIYers from those with professional knowledge. Place a thin plastic dry cleaner bag over your foam before installing the cover. The plastic creates a slippery surface that lets the fabric slide rather than grab the foam. As you pull the fabric tight, the bag compresses and eventually disappears into the foam.
Some DIYers use a vacuum to compress the foam inside the bag before stretching the cover over it. This gives you more room to work and results in a tighter final fit. Once the cover is in place, the foam expands to fill every pocket of the fabric. This technique alone can save you hours of struggling with tight covers.
Heat Softening for Vinyl
If you’re working with vinyl, heat is your friend. Cold vinyl is stiff and reluctant to stretch. Warm vinyl becomes pliable and cooperative. Use a heat gun on low setting or a hair dryer to warm the fabric before and during installation. Keep the heat source moving to avoid overheating any spot, which can damage the material.
Forum users recommend working in warm weather or using heat lamps if you’re in a cold garage. The ambient temperature significantly affects how easily vinyl stretches. Even professional upholsterers prefer working in warm conditions for vinyl installations.
Working with Hog Rings
Start installing from the center of each section and work outward toward the edges. This approach prevents bunching and ensures even tension across the fabric. Load a hog ring into your hog ring tool, position the fabric where it needs to attach, and squeeze the tool to close the ring around both the fabric and the wire channel or frame.
Space hog rings every few inches along channels and edges. Too few rings and the fabric will loosen over time. Too many is wasteful but not harmful. Most seats need 20 to 40 hog rings per section, depending on the complexity of the shape. Check your photos of the original installation for guidance on ring placement.
Piano Wire Channels
Some seats use piano wire channels instead of direct hog ring attachment. For these seats, you’ll insert the fabric’s edge into a metal channel, then run piano wire through a sewn channel in the fabric to lock it in place. This method requires more precision than hog rings but creates a very secure hold.
Cut piano wire slightly longer than you need. You can trim excess after installation. Thread the wire through the fabric channel while the fabric is loose, then seat the fabric edge into the metal channel and push the wire into place. The wire creates a lock that holds the fabric firmly. This technique works particularly well for seat backs and sides where tension is highest.
Stretching Techniques
Pull the fabric tight from multiple points simultaneously rather than stretching one spot at a time. This approach distributes tension evenly and prevents the fabric from distorting. Work with a helper if possible, having one person hold tension while the other secures hog rings.
Check your work frequently by stepping back and viewing the seat from different angles. Look for wrinkles, loose areas, and uneven seams. Fix problems as you find them rather than hoping they’ll disappear later. Once the fabric is secured, wrinkles become permanent unless you release and re-stretch that section.
Forum DIYers emphasize that achieving a professional finish requires patience. One user reported spending almost a week making adjustments until satisfied with the result. Don’t rush this step. The difference between amateur and professional work often comes down to taking the time to adjust and re-adjust until every surface is smooth and tight.
Step 7: Reinstall Seats & Final Adjustments
With your new upholstery installed, it’s time to put the seat back in your vehicle. This step goes faster than disassembly because you have your photos and labeled parts to guide you. But take your time and verify each connection to ensure everything works properly.
Carry the seat to your vehicle and position it near the mounting location. If your seat has electrical components, plug in all connectors before you secure the mounting bolts. Check that airbag connectors, seat heater connections, and power seat motors all plug in correctly. Some connectors only fit one way, so verify the orientation before forcing anything.
Electrical Connections
Seat heaters require careful attention during reinstallation. If you added aftermarket heaters, route the wiring neatly along the frame and secure it with zip ties away from any moving parts. Connect the power leads according to the heater kit’s instructions, typically to a switched power source so the heaters don’t drain your battery when the car is off.
After connecting all electrical components, reconnect your battery and test each function before final mounting. Adjust the seat position, test the recline mechanism, and verify seat heaters if equipped. Finding electrical problems after the seat is bolted in means removing it again.
Mounting and Final Fit
Lower the seat into position and start all mounting bolts by hand to prevent cross-threading. Once all bolts are started, tighten them in a crisscross pattern to ensure even pressure. Torque to your vehicle’s specifications, typically 30 to 40 foot-pounds for most passenger vehicles.
Slide the seat through its full range of motion to verify nothing binds or catches. The new upholstery might be thicker than the original, so check that the seat doesn’t rub against the center console, door panel, or headliner. Trim any interference areas carefully, leaving enough fabric to maintain a professional appearance.
Final Adjustments
Sit in the seat and evaluate the feel. New foam and fabric change the seat’s character, and you may notice high or low spots that need adjustment. If you can access the back of the seat, smooth any wrinkles or loose areas. Some DIYers find that the seat continues to settle over the first few days of use as the foam compresses to match their body shape.
Common Mistakes to Avoid
Every experienced DIYer has made mistakes on early projects. Learning from others’ errors saves you time, money, and frustration. Here are the most common pitfalls and how to avoid them.
Not Photographing Disassembly
This is the number one mistake first-time DIYers make. You think you’ll remember how everything fits together. You won’t. The complex layering of fabric, foam, and hardware becomes a blur after hours of work. Take comprehensive photos from multiple angles at every stage of disassembly. Your future self will thank you.
Using Water-Based Adhesive
Water-based spray adhesives are cheaper and easier to find, but they fail in automotive applications. The heat that builds up inside a car during summer, combined with the flexing and compression seats endure, breaks down water-based adhesive bonds. Spend the extra money on solvent-based, automotive-grade adhesive. The alternative is re-doing your work in a year when the foam separates from the frame.
Working on Multiple Seats Simultaneously
You might think doing both front seats at once saves time. It doesn’t. Working on one seat at a time gives you a reference for how things fit together. If you get confused during reassembly, you can walk over to the untouched seat and see how the original looks. By the time you start the second seat, you’ve learned from the first and the work goes faster.
Cheap Hog Ring Tool Failures
Forum users consistently report that cheap hog ring tools break on the first or second project. These tools experience significant force, and inexpensive models aren’t built to withstand it. A quality hog ring tool costs more upfront but lasts through many projects and makes the work easier. Don’t skimp on this tool.
Rushing the Stretching Process
The difference between professional and amateur upholstery is almost entirely in the stretching. Professional upholsterers spend significant time adjusting fabric tension until every surface is smooth and wrinkle-free. Rush this step and you’ll see the results every time you get in your car. Take your time, check your work frequently, and adjust until you’re truly satisfied.
Pro Tips from Experienced DIYers
Forum discussions reveal techniques that experienced upholsterers use but that most guides never mention. These tricks make the work easier and the results more professional.
Garbage Bag and Hair Dryer Trick
Similar to the dry cleaner bag technique, some DIYers use a regular garbage bag to help stretch covers over foam. Place the bag over the foam, use a hair dryer to warm both the bag and the vinyl, then slide the cover on. The warmth makes the vinyl more pliable, and the bag reduces friction. As the cover stretches into place, the bag compresses and disappears into the foam.
Vacuum Compression Method
For extremely tight covers, wrap the foam in a plastic bag, insert a vacuum hose, and seal the bag around it. The vacuum compresses the foam to a fraction of its normal size, giving you plenty of room to position the cover. Once the cover is in place, turn off the vacuum and the foam expands to fill the fabric perfectly. This technique works especially well for complex seat shapes.
Work in Summer or Use Heat Lamps
Temperature dramatically affects how vinyl behaves. Professional shops maintain warm workspaces for this reason. If you’re working in a cold garage, use heat lamps to warm the fabric before and during installation. Some DIYers wait for warm weather to tackle reupholstery projects, making the work significantly easier.
Label Driver vs Passenger Components
Even if you’re only working on one seat at a time, label every piece you remove. Use painter’s tape and a marker to note left side, right side, top, bottom, driver, passenger. The labeling takes seconds but saves confusion. When you’re deep in a project and can’t remember which bracket goes where, those labels become invaluable.
Keep All Hardware Until 100% Complete
Don’t throw away any hardware until your project is finished and you’ve driven the car for a few weeks. You might discover you need a reference piece, or that a replacement part doesn’t fit correctly and you need to modify the original. Store everything in labeled containers. Only after you’re completely satisfied with the work should you dispose of old materials.
Cost Breakdown: DIY vs Professional
Understanding the costs helps you decide whether DIY reupholstery makes sense for your situation. The financial picture varies based on your vehicle, chosen materials, and local labor rates.
DIY Material Costs
For a typical set of front bucket seats, expect to spend on materials ranging from basic vinyl covers to premium leather. Foam replacement adds to the cost if your existing padding is deteriorated. Tools represent a one-time investment, with a quality hog ring tool being the most significant expense. Spray adhesive, burlap, muslin, and miscellaneous supplies add to the total.
For rear seats, material costs are generally lower than front seats due to simpler shapes. However, bench seats require more fabric than bucket seats, which can offset the complexity advantage.
Professional Service Costs
Professional reupholstery services charge significantly more than DIY material costs. The premium covers labor, overhead, expertise, and warranty. A professional shop can complete the work faster than a DIYer and typically offers a warranty on workmanship. For classic car restorations where authenticity and quality matter more than cost, professional services often represent the better choice.
When DIY Makes Sense
DIY reupholstery makes sense when you enjoy hands-on work, have time to invest, want to learn a new skill, or need to stretch your budget. The project is achievable for anyone with basic mechanical aptitude and patience. Your first seat will take longer than subsequent ones, so budget extra time for the learning curve.
When to Hire a Professional
Consider professional services when you lack workspace or tools, your seats have complex shapes or electrical components, you want absolutely perfect results for a show car, or the time investment doesn’t fit your schedule. Professional shops also have access to materials and patterns that may not be available to individuals.
Time Estimate by Vehicle Type
Time requirements vary significantly based on seat type and your experience level. First-time DIYers should expect to spend more time than estimates suggest.
For bucket seats, a first-time DIYer typically needs one to two days per seat including removal, disassembly, repair, and reinstallation. An experienced DIYer can complete a bucket seat in about half a day. Front bucket seats are the most common type and offer good starting points for learning the process.
Bench seats require more time per seat due to their larger size, but they’re actually simpler to reupholster because the shape is less complex. A first-time DIYer needs one and a half to two and a half days for a bench seat. The additional time comes from handling more fabric and working across a larger surface area.
Split bench seats combine elements of both bucket and bench seat work. You have multiple sections that must align properly, but each section is smaller than a full bench. Plan for about two days for a split bench seat as a first-time DIYer.
Frequently Asked Questions
What’s the average cost to reupholster a car seat?
The average cost to reupholster a car seat ranges widely depending on whether you do it yourself or hire a professional. DIY material costs run significantly lower than professional services. Professional upholstery shops charge based on labor hours, materials, and seat complexity. Luxury materials like leather increase both DIY and professional costs compared to vinyl or cloth options.
Can I reupholster my car seats myself?
Yes, you can reupholster your car seats yourself. Many first-time DIYers successfully complete front and rear seat reupholstery in about two weekends. The process requires basic hand tools, patience, and attention to detail. Start with one seat and use it as a reference for the others. Take extensive photos during disassembly to guide reassembly.
Is it cheaper to reupholster car seats or buy new ones?
Reupholstering is typically cheaper than buying new seats, especially for older or classic vehicles where replacement seats may not be available. New seat assemblies cost more than upholstery materials. However, if your existing seat frames and foam are severely damaged, replacement might be more practical. Evaluate your seat structure before deciding which path makes sense.
What type of fabric is best for reupholstering car seats?
The best fabric depends on your priorities. Leather offers premium appearance and durability but costs more and requires more skill to install. Vinyl provides an excellent balance of affordability, durability, and ease of installation, making it the most popular choice for DIYers. Cloth offers breathability and lower cost but may show wear faster than leather or vinyl. Consider your vehicle type, budget, and skill level when choosing.
Is reupholstering car seats hard?
Reupholstering car seats is moderately challenging but achievable for DIYers with patience and basic mechanical skills. The process involves detailed work but doesn’t require specialized training. Most difficulty comes from the time investment rather than technical complexity. First-time DIYers should expect a learning curve and allow extra time for their first seat.
Conclusion
Learning how to reupholster a car seat step by step gives you a valuable skill that saves money and lets you customize your vehicle’s interior. The process requires patience and attention to detail, but with proper documentation, quality materials, and the techniques shared here, you can achieve professional-looking results. Start with one seat, work methodically, and don’t rush the stretching process. Your newly upholstered seats will reward your effort every time you get behind the wheel.