
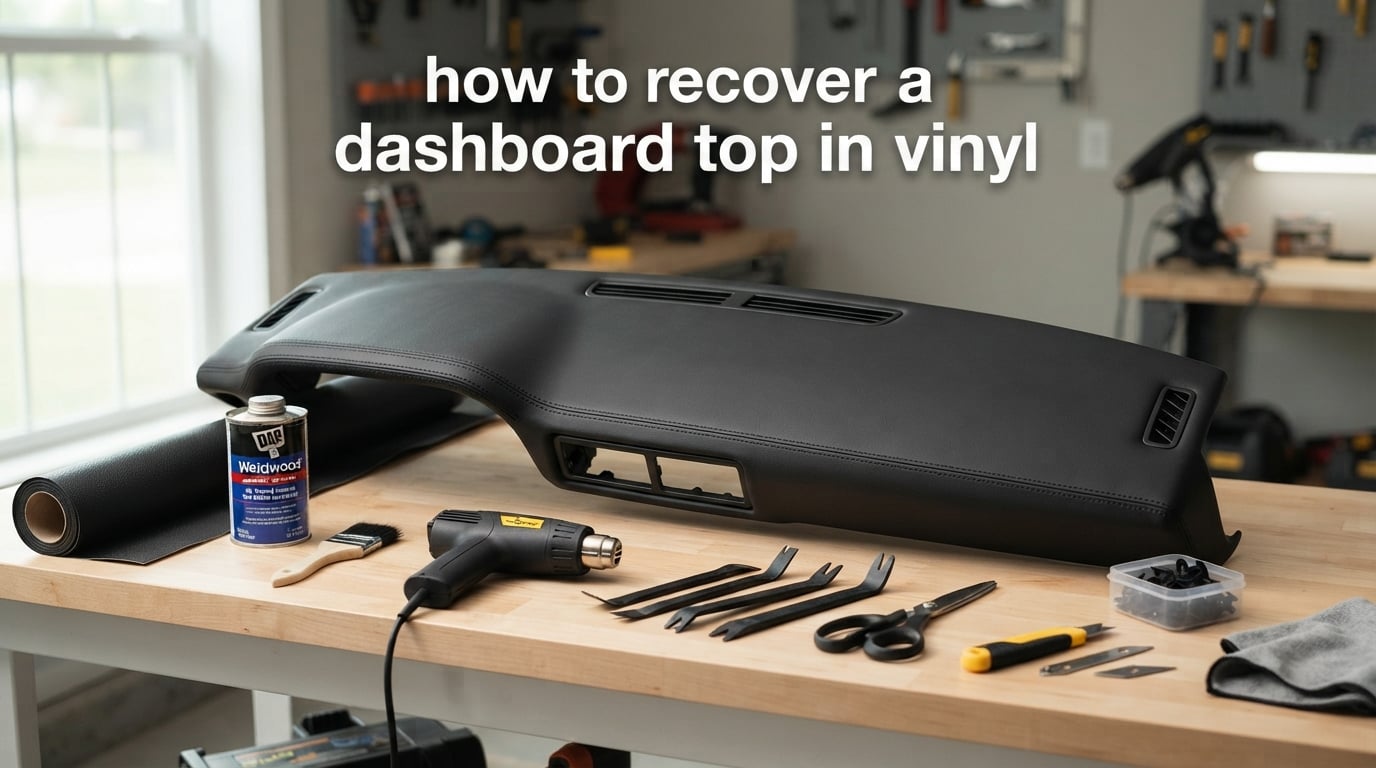
When we first pulled the cracked, sun-baked dashboard out of our shop’s project car, the original vinyl crumbled in our hands. That is the moment most people decide whether to recover a dashboard top in vinyl themselves or hand the keys to a trim shop.
I have walked dozens of car owners through this job over the years, and the truth is that recovering a dashboard top in vinyl is one of the most satisfying interior jobs a DIYer can tackle. With the right tools, the right adhesive, and a patient approach to heat-forming, you can produce a result that looks factory-fresh and lasts for years.
This guide walks through the entire process the way we teach it at the bench: removing the dashboard, stripping the old covering, repairing the substrate, fitting new vinyl, and reinstalling. We will cover what to use, what to avoid, and the mistakes that turn a good job into a bubbled mess.
Table of Contents
- What Does Recovering a Dashboard Top in Vinyl Mean?
- Tools and Materials You’ll Need
- Step 1: Remove the Dashboard
- Step 2: Strip Off the Old Vinyl and Foam
- Step 3: Prepare the Surface
- Step 4: Repair Cracks, Holes, and Damage
- Step 5: Apply New Foam Padding
- Step 6: Cut and Fit the New Vinyl
- Step 7: Adhere the Vinyl
- Step 8: Heat-Form Around Compound Curves
- Step 9: Finish, Detail, and Reinstall
- Vinyl Thickness, Adhesive, and Foam Selection Guide
- Common Mistakes to Avoid
- How Long Does Dashboard Vinyl Recovery Take?
- Frequently Asked Questions
- Conclusion
What Does Recovering a Dashboard Top in Vinyl Mean?
Dashboard vinyl recovery is the process of removing the original worn vinyl covering from your dashboard top and replacing it with fresh vinyl material to restore the look and feel of your interior.
The “dashboard top” is the horizontal pad in front of the driver, while the “dashboard front” is the vertical panel that houses the gauges. We will focus on the top piece since it sees the worst sun damage and is the most common recovery project. Members of the Jag-Lovers forum use this exact distinction, and it matters because each piece is shaped differently and uses different vinyl cuts.
You might also hear this job called dashboard reupholstery, dashboard vinyl wrap, or dash pad replacement. All four describe the same core process: strip the old, prep the surface, fit the new vinyl, and glue it down with heat assistance.
Tools and Materials You’ll Need
Before you touch a single screw, gather everything. Nothing kills momentum like stopping mid-job for a missing tool. Here is the complete kit we use.
Essential Tools
- Phillips and flathead screwdriver set
- Plastic trim removal tools (avoid metal on painted surfaces)
- Heat gun with adjustable temperature
- Sharp utility knife with fresh blades
- Scissors and tin snips
- Sandpaper in 80, 180, and 320 grit
- Wire brush for removing old foam and glue
- Staple gun (1/4 inch crown staples)
- Heavy-duty sewing shears
- Clean microfiber cloths
- Respirator or dust mask (old foam and glue dust are not friendly to lungs)
Materials
- Vinyl in the correct gauge for your dashboard (we cover thickness below)
- Contact cement or high-temperature spray adhesive
- Low-expansion foam (typically 1/4 inch closed-cell)
- Sheet aluminum for filling large holes
- Body filler or plastic filler if needed
- Vinyl cleaner and conditioner
- Painter’s tape
- Heavy-duty gloves for stripping old covering
Tip Box
Buy 10 to 15 percent more vinyl than you think you need. The cost difference is small compared to the frustration of running short during the final fit.
Step 1: Remove the Dashboard
Removing the entire dashboard assembly gives you the best access to every curve and edge. Pulling the dash is more work upfront, but it makes the recovery dramatically easier and produces cleaner results. A FerrariChat member put it best: it takes one full day to remove everything and three more days to strip, prep, and recover.
Disconnect the Battery First
Pop the negative terminal and wait at least 10 minutes before touching anything electrical. This step is non-negotiable, especially on vehicles with airbags.
Airbag Safety
Do not disconnect or remove an airbag yourself unless you are trained. If your dashboard has a passenger airbag, leave it in place and recover around it carefully. Some owners choose to have a professional handle airbag-equipped dashes to avoid deployment risk.
Document Everything
Shoot a short video as you remove each connector and trim piece. Our team has saved countless hours by reviewing these clips during reassembly. Bag and label every screw, especially the longer ones that go into specific mounting brackets.
Step 2: Strip Off the Old Vinyl and Foam
Place the bare dashboard on a clean workbench. Now comes the messy part.
Start by peeling the old vinyl back with your hands or pliers. On older cars, the vinyl often comes off in chunks. On newer dashboards, it can be glued so firmly that you need a heat gun at low setting to soften the adhesive.
Remove the Old Foam Carefully
Underneath the vinyl you will find a foam underlayment. Use a wire brush or stiff putty knife to scrape the foam off the plastic substrate. A heat gun helps here too, but keep it moving so you do not melt the plastic shell.
Reviewers on TheSamba forum warn that gorilla glue and similar expanding adhesives can cause bubbles if used to glue foam back down. We will cover the right adhesive choice later.
Warning
Old foam produces a fine dust that is hard on your lungs. Wear a respirator, work outdoors if possible, and bag the waste immediately.
Step 3: Prepare the Surface
A perfect bond depends on a perfect substrate. After the old material is stripped, the dashboard top will be covered in glue residue and small bits of foam.
Scrape and Sand
Use a plastic scraper first so you do not gouge the ABS or fiberglass shell. Then progress through 80 grit to remove glue, 180 grit to smooth the surface, and 320 grit to give the adhesive something to bite into.
Clean Thoroughly
Wipe the surface with a lint-free cloth and a vinyl-safe solvent. Mineral spirits work on most adhesives, but test a hidden spot first. Any leftover oil or residue will cause the new vinyl to lift within weeks.
The plastic should feel slightly rough to the touch when you are done. If it feels glassy, scuff it again.
Step 4: Repair Cracks, Holes, and Damage
Sun damage rarely stops at the vinyl. By the time we strip a dashboard, we usually find cracked plastic, popped mounting holes, or even small holes from removed accessories.
Fill Small Holes
For tiny screw holes or stress cracks, apply a thin layer of plastic body filler. Let it cure, then sand smooth.
Repair Larger Damage
For larger holes, TheSamba forum users cut a piece of sheet metal slightly larger than the hole and bond it to the back with epoxy. Then fill the front with body filler and sand flush. This technique has saved many dashboards that would otherwise have been scrapped.
Reinforce Mounting Tabs
If any of the original mounting tabs broke off, glue small pieces of sheet plastic or metal behind them with epoxy. These tabs carry the load when the dashboard is reinstalled, so do not skip this step.
Step 5: Apply New Foam Padding
Most dashboards have a thin foam underlayment between the plastic shell and the vinyl. Replace it if the old foam crumbled or if you want the original soft feel back.
Choose Closed-Cell Foam
Closed-cell foam does not absorb moisture and will not break down under heat. Open-cell foam feels softer but absorbs glue and turns into a sponge.
Glue the Foam Down
Use a light mist of spray adhesive on both the dashboard and the back of the foam. Let it tack up for 30 seconds, then press the foam into place. Trim the edges with a sharp utility knife, leaving the foam slightly inside the edge of the plastic shell.
Some classic cars originally had no foam at all, so match the factory look. If you are not sure, a thin 1/8 inch layer is a safe middle ground.
Step 6: Cut and Fit the New Vinyl
This is where craftsmanship shows. A clean fit depends on a good pattern and the right grain direction.
Make a Paper Pattern First
Lay butcher paper or old newsprint over the foam-backed dashboard and tape it down. Rub your hand across the surface so the paper takes the shape, then trim along the edges with scissors. Transfer this pattern to your vinyl and add a half-inch seam allowance on every edge.
Mind the Grain Direction
Most automotive vinyl has a directional grain that catches light differently. Make sure your pattern orients the grain so it runs from the driver’s left to right, the way factory vinyl typically does.
Cut Once, Check Twice
Trim your vinyl slightly oversize first, then drape it over the dashboard and refine the fit by trimming small amounts. It is far easier to cut more off than to glue a piece that is too small.
Step 7: Adhere the Vinyl
This is the most important step for a long-lasting recovery. Two adhesives dominate the field: contact cement and high-temperature spray adhesive.
Contact Cement
Contact cement is the traditional choice. Brush it on both the dashboard and the back of the vinyl, wait 5 to 10 minutes until it is tacky but not wet, then press them together. The bond is instant and very strong, so position carefully before contact.
Spray Adhesive
High-temperature spray adhesive gives you a longer working time and a slightly softer bond. It is the better choice for first-timers because you can reposition the vinyl for several seconds before the bond sets.
Work from the Center Out
Start at the center of the dashboard top and work outward. Stretch the vinyl gently as you go and press it into the foam with the flat of your hand. Avoid wrinkles by smoothing in small sections rather than laying the entire piece down at once.
Seal the Edges
Once the vinyl is in place, fold the seam allowance to the underside of the dashboard and staple every inch and a half. The staples are hidden from view but hold the vinyl secure for the long haul.
Step 8: Heat-Form Around Compound Curves
Dashboard tops are full of compound curves where the surface dips, rises, and twists at the same time. These curves are the reason a heat gun is mandatory. TSSC forum members stress that heat is critical for forming vinyl correctly.
Heat and Stretch Technique
Set your heat gun to medium (around 250 degrees F). Hold it 4 to 6 inches from the vinyl and keep it moving. When the vinyl starts to feel soft and pliable, use the palm of your hand or a soft roller to press it into the curve.
Warning
Too much heat will scorch, shrink, or even melt the vinyl. If the surface goes shiny or starts to smoke, pull the heat gun back and let it cool. Practice on scrap vinyl before touching your finished piece.
Work in Small Sections
Heat one small area at a time and form it before moving on. Rushing this step is what causes wrinkles around the vents and speaker grilles.
Step 9: Finish, Detail, and Reinstall
After the vinyl is fully bonded and formed, finish the edges and prepare for reassembly.
Trim Final Edges
Use a fresh utility blade to trim any excess vinyl flush with the underside of the dashboard. Hold the blade at a shallow angle so it cuts cleanly without pulling.
Cut Vents and Speaker Openings
From the underside, feel for the vent and speaker openings. Make a small X cut in the center, then trim outward to the edge of the opening. The vinyl will lay flat into the recess.
Optional Stitching
Some owners add a decorative stitch line along the front edge for a factory look. Use a heavy-duty needle and outdoor-rated thread that matches the vinyl.
Reinstall the Dashboard
Reverse your removal steps using the video you shot earlier. Reconnect all electrical connectors before pushing the dash fully into place. Finally, reconnect the battery and test every switch and gauge before buttoning up the trim.
Vinyl Thickness, Adhesive, and Foam Selection Guide
Choosing the right materials is half the job. Here is how the main options stack up.
Vinyl Thickness
- Thin (0.5 mm): Best for tight compound curves and factory-original appearance. Harder to work with because wrinkles show easily.
- Medium (0.8 mm): The best all-around choice for most dashboards. Hides minor substrate flaws and still wraps around curves.
- Thick (1.0 mm plus): Easier for beginners but adds bulk that can fight you on tight curves. Best for flat panels and bench seats.
Adhesive Comparison
- Contact cement: strongest bond, less working time, more fumes, best for large flat areas.
- Spray adhesive: easier for beginners, longer working time, slightly softer bond, better for compound curves.
- 3M 08090 high-temperature spray: our team’s go-to for dashboard recovery because it holds under summer heat.
Foam Underlayment
- 1/8 inch closed-cell foam: matches most factory dashboards, easy to glue.
- 1/4 inch closed-cell foam: adds cushion for restoration builds, slightly harder to wrap.
- No foam: matches older cars that originally came without padding.
Common Mistakes to Avoid
Most failed dashboard recoveries come down to a handful of avoidable errors. Watch for these.
Skipping the Test Fit
Always drape the vinyl over the foam before applying adhesive. A test fit catches pattern errors while you can still recut.
Using Gorilla Glue or Other Expanding Adhesives
Forum users consistently warn that expanding glues create bubbles under the vinyl as they cure. Stick with contact cement or spray adhesive designed for upholstery.
Overheating the Vinyl
Heat gun damage is the most common cause of ruined vinyl. Keep the gun 4 to 6 inches away, keep it moving, and never concentrate heat on one spot.
Laying the Vinyl Wet
If your adhesive is still wet when you press the vinyl down, the bond will never reach full strength. Wait until it is tacky to the touch.
Ignoring Airbag Zones
If your dashboard has a passenger airbag, do not add thick foam that could interfere with deployment. Leave those zones at factory thickness or thinner.
How Long Does Dashboard Vinyl Recovery Take?
Plan for 3 to 4 full days if it is your first time. A FerrariChat thread confirmed that one full day for removal and three days for stripping, prepping, and recovering is a realistic expectation.
After you have done a few dashboards, you can shave that to a weekend. The heat-forming step alone takes longer than most beginners expect, so budget extra time there.
Frequently Asked Questions
How do you fix a vinyl dashboard?
You fix a vinyl dashboard by removing the dashboard top, stripping off the old vinyl and foam, repairing any cracks or holes, applying fresh foam padding if needed, and bonding new vinyl in place with contact cement or high-temperature spray adhesive. A heat gun helps the vinyl form around compound curves without wrinkles.
Can you vinyl wrap a dashboard?
Yes, you can vinyl wrap a dashboard. Vinyl wrap works well on smooth, gently curved dashboards, and is a good option if you want a custom color or finish. For dashboards with deep compound curves, traditional upholstery vinyl usually lasts longer and looks more factory-correct than thin wrap film.
How do you restore a plastic dashboard?
Restore a plastic dashboard by cleaning thoroughly, sanding lightly to scuff the surface, applying a plastic restorer or trim dye, and sealing with a UV-protective dressing. For badly cracked or faded dashes, recovering with new vinyl produces a much more durable result than surface restoration alone.
How much does it cost to vinyl wrap a dashboard?
A DIY dashboard vinyl recovery typically costs a fraction of a professional job, with materials including vinyl, contact cement, foam, and small tools. Professional upholstery shops charge significantly more for labor, which usually makes up the largest share of a professional quote.
What type of glue works best for vinyl dashboard covering?
Contact cement and high-temperature spray adhesive are the two best choices. Contact cement gives the strongest bond but has a short working time. High-temperature spray adhesive gives beginners more time to position the vinyl and still holds up under summer heat inside the cabin.
Do I need to remove the dashboard to recover it?
Removing the dashboard is strongly recommended for a clean result. It gives you full access to every edge and lets you staple the underside of the vinyl for a long-lasting bond. Some owners recover the dashboard in place, which is faster but produces a less durable finish and makes it harder to form vinyl around curves.
Conclusion
Learning how to recover a dashboard top in vinyl is one of those skills that pays back every time you look at your interior. The job rewards patience and punishes shortcuts, especially around the heat-forming step and the substrate prep.
If you are starting your first dashboard vinyl recovery, take it slow, buy extra material, and follow the steps in order. The end result is a dashboard that looks like new and holds up for years of daily driving. When you are ready for supplies, adhesives, or even a custom-cut vinyl kit for your specific model, our team at Segal Motor Trimmings is here to help.