
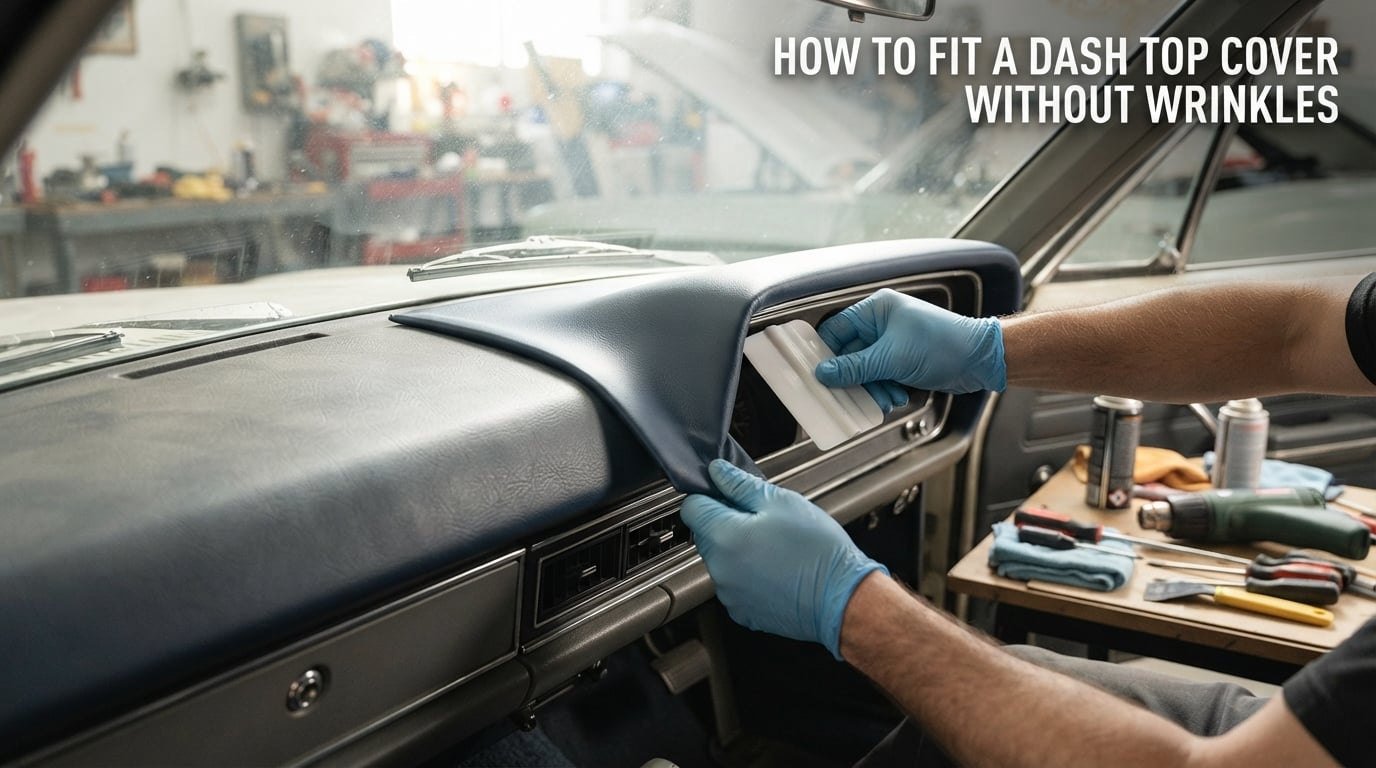
To fit a dash top cover without wrinkles, clean the dash thoroughly, dry-fit the cover and trim it for vents and switches, apply the right adhesive to both surfaces until tacky, lay the cover from one end using a cardboard backing strip to avoid trapping air, then smooth it with controlled heat (sun or a steam iron, never a heat gun held close). Padded dashboards are common in classic and modern cars because the foam-backed vinyl softens glare and hides cracks, and a wrinkle-free fit keeps that surface looking factory-fresh.
I’ve fitted dozens of dash covers over the years in our shop, and most of the wrinkled, bubbled, peeling disasters we get asked to fix come from the same handful of skipped steps. This guide walks you through the exact process our team uses on Chevrolet, Ford, and classic restoration jobs, so you can do it once and do it right.
Table of Contents
- Materials and Tools Checklist
- Pre-Formed vs Custom-Fit Dash Covers: Which Wrinkles Less?
- Step 1: Prepare the Dash Surface
- Step 2: Test Fit and Trim the Cover
- Step 3: Apply Adhesive Correctly
- Step 4: Position the Cover Without Trapping Air
- Step 5: Remove Wrinkles and Bubbles
- Step 6: Cure and Final Inspection
- Common Mistakes to Avoid
- Frequently Asked Questions
- What is the best material to cover a car dashboard?
- How to fix leather dashboard bubbles?
- Why are padded dashboards used in cars?
- What is a good dashboard filler for cracks?
- How to stick a dashboard cover?
- What are people saying about Dash Cover Company in reviews?
- Do Dash covers actually work?
- What type of adhesive is best for installing dash covers?
- Final Thoughts: A Wrinkle-Free Dash Cover You Can Trust
Materials and Tools Checklist
Before you touch the dash, gather everything in one place. A mid-job trip to the parts store is how wrinkles end up cured into place.
- Cleaning supplies: isopropyl alcohol (90 percent or higher), lint-free microfiber cloths, a soft brush, painter’s tape, and a plastic trim removal tool.
- Adhesive: 3M spray adhesive (High Strength 90) for vinyl or fabric, OR contact cement for leather and heavier pads. See the comparison below.
- Heat tool (choose one): a steam iron with a damp cloth, a heat gun on LOW setting (kept moving at 8 inches or more), or simply direct sunlight on a warm day.
- Smoothing tools: a plastic squeegee (old credit card works in a pinch), a rolling pin or wallpaper seam roller, and strips of thin cardboard.
- Repair supplies for cracked dashes: flexible dashboard filler (such as Bondo Dash Patch) and 220-grit sandpaper if your dash has surface cracks.
- Trim tools: sharp utility knife with fresh blades, scissors for the rough cut, and a marking pen for vent and switch outlines.
Skipping any of these leads to the most common post-install complaints we hear on forums: trapped bubbles, lifted edges, and permanent heat marks.
Pre-Formed vs Custom-Fit Dash Covers: Which Wrinkles Less?
Pre-formed dash covers are vacuum-molded to the shape of a specific dash and need almost no heat shaping. They wrinkle less, install faster, and are the right choice for most daily drivers and restoration cars.
Custom-fit covers are cut from flat material and stitched to match a pattern. They cost less and fit unusual dashes, but they ship with some memory wrinkles and need more careful heat work to lay flat.
If your dash is a common year-make-model, go pre-formed. If you own a low-production classic or a heavily modified interior, plan extra time to relax the material before installation.
Step 1: Prepare the Dash Surface
Adhesive will not stick to dust, silicone dash dressing, or old adhesive residue. Skipping prep is the single biggest cause of bubbles and lifted edges weeks after install.
- Remove everything from the dash: radio, vents, switches if they unclip, and any accessories.
- Vacuum loose debris, then wipe the entire surface with isopropyl alcohol and a microfiber cloth. Let it flash off completely (about 10 minutes).
- If the dash has hairline cracks, fill them with flexible dashboard filler, let it cure, and sand smooth with 220-grit. CoverKing and forum threads alike warn that bumps under the cover telegraph through and look like wrinkles.
- Mask the windshield base and A-pillars with painter’s tape to keep adhesive overspray off the glass and trim.
A good dashboard filler for cracks is any flexible, vinyl-compatible product rated for interior heat cycles. Avoid rigid body filler; it cracks again the first hot summer.
Step 2: Test Fit and Trim the Cover
Never cut without a dry fit first. The cover should drape over the dash with equal overhang on all sides and align with vent and switch openings before any glue touches the surface.
- Lay the cover over the dash and let it settle for a few minutes in the sun if it’s cold outside. Vinyl is more cooperative when warm.
- Mark vent, sensor, and switch openings with a pen from underneath while the cover sits in place.
- Pull the cover off and trim the marked openings with a sharp utility knife. Cut slightly inside the line; you can always trim more.
- Trim the perimeter about a half inch larger than the dash edge so you can tuck and wrap. Final trimming happens after the glue sets.
This is also the moment to check material memory. If a corner keeps springing back, set the cover in the sun for 30 minutes before moving on.
Step 3: Apply Adhesive Correctly
Spray adhesive and contact cement behave differently. The right choice depends on your cover material and how permanent you want the install.
- 3M spray adhesive (High Strength 90): best for vinyl and fabric covers. Spray both surfaces in light, even coats, wait 30 to 60 seconds until tacky, then bond. Repositionable for the first few seconds.
- Contact cement: best for leather and thick padded covers. Brush or roll on both surfaces, wait until tacky to the touch (no transfer to a clean finger), then mate them. Once contact cement touches itself, it bonds instantly and cannot be repositioned.
- Double-sided automotive tape: a temporary option for renters or trial fits. Not recommended as a long-term solution; heat cycles release the adhesive.
Apply the adhesive in two halves. Spray or brush the top half of the dash and the top half of the cover, leave the bottom half dry for now, and you’ll have a much easier time positioning without trapping the cover on itself.
To stick a dashboard cover, the key trick that restoration pros use is to wait for the proper tacky time. If you bond too early, the adhesive stays wet and the cover slides around. If you wait too long, the bond weakens. Test with a clean fingertip.
Step 4: Position the Cover Without Trapping Air
This is the step that prevents 90 percent of bubbles. The cardboard strip method is community-vetted on Factory Five Racing and Corvette Forum threads because it lets you lower the cover onto the dash like a sheet of paper instead of stretching it into place.
- Lay wide strips of thin cardboard across the glued half of the dash, covering the wet adhesive.
- Set the cover on top of the cardboard strips, position it correctly, and smooth the center down by hand.
- Slide the first cardboard strip out from one side. The cover drops onto the adhesive in that strip with no stretching.
- Press from the center outward with a squeegee, then remove the next strip and repeat.
- Work your way across until the entire glued half is bonded, then lift the loose half, glue it, and repeat.
You can feel air pockets as raised areas under your palm. If you trap one, lift the cover back to the nearest edge and re-lay it. Vinyl is forgiving for the first minute or two; leather is not.
Step 5: Remove Wrinkles and Bubbles
Heat relaxes the material and shrinks it flat. The trick is choosing a heat method that softens the cover without scorching or permanently distorting it. Here is the safety comparison our team uses:
- Sun curing (safest): park the car in direct sun for 2 to 4 hours. CoverKing’s own support pages confirm that the first few days of sun heat is how most covers naturally conform. Best for thin vinyl and fabric.
- Steam iron (safer): set the iron to cotton, lay a damp cotton cloth over the wrinkle, and roll the iron across the cloth. Steam penetrates without direct contact. CorvetteForum users have used this on C1 and C2 dash pads with great results.
- Heat gun (highest risk): only on LOW, held at least 8 inches away, and constantly moving. A ffcars.com member warns that holding a heat gun three inches from vinyl put a permanent wrinkle in his cover. Use only as a last resort.
For a leather dashboard, bubbles form when the foam underneath delaminates from heat cycles. To fix leather dashboard bubbles, pierce the bubble with a fine needle, inject a small amount of contact cement with a syringe, press flat, weight it for 24 hours, then steam the area lightly through a cloth.
Work from the center outward, holding your smoothing tool at a low angle and pushing wrinkles toward the nearest edge. Never pull sideways against a wrinkle; that stretches the material and creates a new wave next door.
Step 6: Cure and Final Inspection
Most adhesives need 24 to 72 hours to reach full bond strength. Don’t park in the sun, slam doors, or roll windows during that window.
- Press all edges firmly with a wallpaper seam roller, paying extra attention to corners and around vents.
- Reinstall any switches, vents, and trim you removed.
- Walk around the car and view the dash from the driver’s seat, passenger seat, and outside through the windshield. Wrinkles show up at angles that flat overhead lighting hides.
- If you see a small remaining wrinkle after 48 hours, set the car in direct sun for an afternoon. Material memory relaxes with sustained warmth.
Common Mistakes to Avoid
These are the issues we get asked to repair most often. None of them are inevitable; all of them are preventable.
- Skipping the alcohol wipe. Silicone from old dash dressings rejects new adhesive. The cover peels within a week.
- Bonding before the adhesive is tacky. Wet glue never cures to full strength and the cover slides as it dries.
- Holding a heat gun too close. Vinyl scorches and the wrinkle becomes permanent. Stay at least 8 inches back and keep the gun moving.
- Skipping the cardboard backing trick. Trying to lay the cover flat by hand almost always traps an air pocket somewhere.
- Trimming the perimeter flush before curing. Leave a half inch for the first 24 hours. Material shrinks slightly as the adhesive cures and you may need to tuck more.
- Driving the car before the cure window. Door slams and vibration lift edges that would otherwise bond perfectly.
Do dash covers actually work? When properly fitted, yes. A good cover hides existing UV damage, blocks future sun exposure, reduces glare on the windshield, and can outlast the original dashboard pad by years.
Frequently Asked Questions
What is the best material to cover a car dashboard?
The best material depends on your goals. Vinyl is affordable, easy to clean, and tolerates sun and heat well. Leather looks the most factory-original on classic cars and lasts longer when conditioned. Fabric (carpet-style) reduces glare best but is harder to keep clean. Most OEM-style replacements use padded vinyl with a foam backing because it softens glare and conceals minor surface cracks.
How to fix leather dashboard bubbles?
To fix leather dashboard bubbles, pierce the bubble with a fine needle, inject a small amount of contact cement underneath with a syringe, press the area flat with your palm, weight it for 24 hours, then lightly steam through a damp cloth. If the foam backing has fully separated, the cover needs to come off and be re-bonded with fresh contact cement on both surfaces.
Why are padded dashboards used in cars?
Padded dashboards are used in cars because the foam-backed vinyl softens glare on the windshield, cushions the driver and passenger during impacts, hides minor surface cracks in the underlying dash pad, and gives the interior a more premium look. They became standard in the 1960s and 1970s once manufacturers found ways to vacuum-form vinyl over foam reliably.
What is a good dashboard filler for cracks?
A good dashboard filler for cracks is any flexible, vinyl-compatible product rated for interior temperature swings. Examples include Bondo Dash Patch and similar flexible seam fillers. Avoid rigid body fillers, which re-crack the first hot summer. Clean the crack with isopropyl alcohol, fill slightly proud, let it cure, then sand flush with 220-grit before covering.
How to stick a dashboard cover?
To stick a dashboard cover, clean the dash with isopropyl alcohol, apply 3M High Strength 90 spray adhesive (or contact cement for leather) to both surfaces, wait 30 to 60 seconds until tacky, lay the cover from the center outward using cardboard strips to avoid trapping air, then press flat with a squeegee. Hold edges down for 24 to 72 hours while the adhesive cures.
What are people saying about Dash Cover Company in reviews?
Buyers on restoration forums consistently report that Dash Cover Company’s pre-formed covers fit well out of the box, that the color match is close but not exact on older vehicles, and that customer service is helpful when a pattern needs adjustment. Most complaints focus on shipping times and on expecting the cover to lay completely flat immediately; reviewers agree it needs a few warm days to fully conform.
Do Dash covers actually work?
Yes, dash covers actually work when properly fitted. They block UV radiation that cracks OEM pads, hide existing sun damage, reduce windshield glare, and protect the underlying dash from further deterioration. A poorly installed cover can trap moisture and make things worse, which is why the prep and adhesive steps in this guide matter as much as the cover itself.
What type of adhesive is best for installing dash covers?
The best adhesive depends on the cover material. 3M High Strength 90 spray adhesive is ideal for vinyl and fabric because it is fast, even, and repositionable for a few seconds. Contact cement is better for leather and thick padded covers because it creates a stronger, more permanent bond. Avoid general-purpose white glue and standard double-sided tape; both fail under dashboard heat cycles.
Final Thoughts: A Wrinkle-Free Dash Cover You Can Trust
Learning how to fit a dash top cover without wrinkles comes down to three things: prep the surface until it is genuinely clean, choose the adhesive that matches your cover material, and use heat carefully. Skip any of those, and the cover will tell on you within a week. Take your time with all of them, and the result looks professional enough to belong in a restoration shop.
If you want a custom-fitted cover for a classic or hard-to-find dash, our team at Segal Motor Trimmings can pattern, cut, and ship one to your door. Get in touch, send us photos of your dash, and we’ll spec the right material and adhesive for your vehicle.