
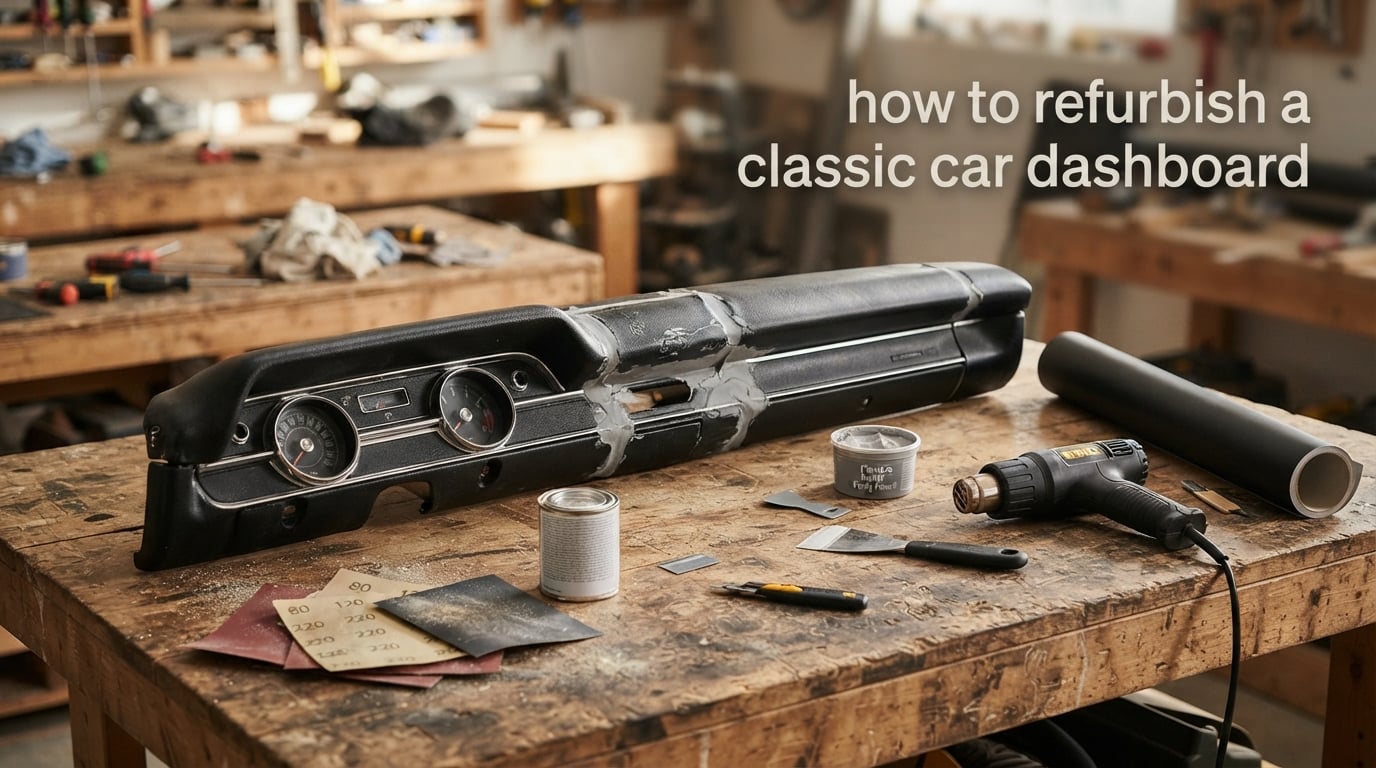
If you have ever slid behind the wheel of a beloved classic and stared down at a cracked, sun-bleached dashboard, you already understand why learning how to refurbish a classic car dashboard matters. That single piece of trim sets the tone for every drive. Our team has spent years restoring vintage interiors, and we have seen firsthand how a sound dash transforms the cabin while a tired one drags the rest of the car down with it.
This guide walks you through the entire process we use in our own shop, from the first inspection to the final reassembly. You will learn how to choose between repair, reskin, and full replacement, what tools you actually need, and the pitfalls that ruin otherwise solid jobs. Whether you are restoring a daily-driver Mustang, a show-quality Camaro, or a quirky Italian two-seater, the decision framework stays the same.
By the end, you will know exactly which path fits your damage level, your skill set, and your budget. Let us save you the trial and error we went through.
Table of Contents
- How to Refurbish a Classic Car Dashboard: The Assessment Phase
- Removing the Dashboard Safely
- Surface Preparation: Stripping, Cleaning, and Priming
- Repair Methods Compared: Filler, Fiberglass, Vinyl Reskin, and Replacement
- Painting and Finishing Your Refurbished Dashboard
- Gauge Cluster, Heater Box, and HVAC Restoration
- Reinstallation and Final Assembly
- DIY vs Professional Restoration: When to Call in Help
- Common Mistakes to Avoid During Dashboard Refurbishment
- Frequently Asked Questions
- What is the best product to restore a car dashboard?
- What can I use to polish my car dashboard?
- How to make an old car interior look new?
- What is the best paint for a car dashboard?
- Can you vinyl wrap a dashboard?
- What is the best glue to restick a leather dashboard?
- How much does it cost to leather wrap a dashboard?
- How to refurbish a classic car dashboard without replacement?
- Conclusion
How to Refurbish a Classic Car Dashboard: The Assessment Phase
Every successful dashboard project begins with a careful assessment. Before you touch a single tool, you need to understand why classic dashboards deteriorate and how badly yours has suffered. Rushing past this step is the number one reason restorations end in disappointment, because the chosen method depends entirely on what you find here.
Why Classic Dashboards Crack and Deteriorate
The science behind the cracks is simple but brutal. Factory dashes from the 1960s through the early 1990s were molded from PVC or vinyl wrapped over a foam-and-metal armature. Manufacturers added plasticizers, oily compounds that keep the vinyl flexible, so the surface could survive decades of cabin heat.
Heat, ultraviolet light, and time evaporate those plasticizers out of the vinyl. Once they are gone, the material becomes brittle and shrinks. As it shrinks, it pulls against the foam and metal underneath, and that tension opens the cracks you see today. Plasticizer loss cannot be reversed by dressings or conditioners; the chemistry is one-way. That is why so many “fixed” dashes crack again in new places within months.
Understanding this cycle is critical. Any repair method has to either reinforce the brittle surface against further shrinkage or replace it entirely with a stable skin.
Damage Levels: Minor, Moderate, Severe
We use a three-tier system to classify dashboard damage, and it lines up with the method we recommend.
Minor damage means hairline cracks confined to one or two areas, with intact color and texture. The vinyl still has some flex when warmed in the sun. This is the only level where body filler and paint gives lasting results.
Moderate damage includes multiple deep cracks, small chunks missing, and visible texture loss across the upper surface. The dash is still structurally sound but cosmetically tired. Reskinning with vinyl or polyurethane usually wins here.
Severe damage shows large missing sections, exposed foam crumbling at the edges, and brittle vinyl that flakes when you touch it. At this point, only full replacement or a complete fabrication rebuild will give you a result worth the labor.
Choosing Your Path: Repair, Reskin, or Replace
Once you have classified the damage, the path forward is usually obvious. Minor damage calls for filler and paint. Moderate damage calls for a reskin. Severe damage calls for either a reproduction dashpad or a custom fabrication in self-skinning polyurethane.
There is one more variable to weigh: originality. Concours judges care about factory components. Daily drivers care about looks and feel. Your goals decide whether you repair, reskin, or source a NOS or reproduction part.
Tools and Materials Checklist
Before you start, gather the right gear. For most DIY jobs you will need a heat gun, a set of plastic trim tools, screwdrivers, sockets, body filler, a selection of sandpaper from 80 to 400 grit, a spray gun or high-quality rattle-can dashboard paint, adhesion promoter, vinyl wrap material, contact cement, and a sturdy workbench. If you are going the fiberglass route, add epoxy resin, chopped strand mat, and proper respirators.
Skip any tool on this list and you will end up improvising, which usually means broken tabs, scratched paint, and poor adhesion. Buy or borrow once and you are set for every future project.
Removing the Dashboard Safely
Removal is where patience pays off. Vintage plastic is brittle, screws are often seized, and hidden clips love to snap. The goal here is to get the dash out in one piece with all mounting points intact.
Pre-Removal Preparation
Start by photographing every angle of the dashboard from the driver’s seat. Take wide shots and close-ups of the gauge cluster, switches, vents, and any factory option holes. These photos become your reference when you are staring at a wiring harness three weeks later wondering which black wire went where.
Label every connector with painter’s tape and a marker. Bag the screws by location and tape the bags to the dash frame. This sounds fussy until you are hunting for a single 7 mm screw at 11 pm.
Disconnecting the Battery and Wiring
Pull the negative battery cable before you unplug anything. Classic car electrical systems are unforgiving, and a stray short can fry a gauge cluster that costs more than your entire budget for the restoration.
Unplug each connector one at a time, labeling as you go. If a connector is stuck, do not yank it. Spray a small amount of contact cleaner into the housing and work it loose with a small pick. Forcing a brittle connector is the fastest way to break a factory wiring harness.
Removing the Gauge Cluster and Switches
The gauge cluster usually comes out after removing a few screws behind the dash face and unbolting the speedometer cable. On most classics, the cluster pulls forward and out toward the steering wheel. Pull gently, watching for the oil and temp lines that may still be attached at the back.
Wrap the cluster in a clean towel and set it aside on a padded surface. Old instrument clusters scratch easily and the bezels are often irreplaceable.
Detaching the Dashpad from the Frame
With the cluster and wiring out of the way, you can finally address the dashpad itself. Most pads are held by screws along the top edge and a series of clips underneath. Remove the visible screws, then work the trim tool around the perimeter to release the clips.
Apply gentle, even heat with a heat gun if the pad feels stiff. Warm vinyl flexes, cold vinyl snaps. The dashpad should lift free with the defrost ducts and mounting brackets still attached. Label those brackets too; they are not symmetrical between left and right.
Surface Preparation: Stripping, Cleaning, and Priming
Whatever repair method you choose, the success of the final finish lives or dies in the preparation. Skipping steps here is like painting over greasy walls; the result looks fine for a month and then fails.
Stripping Old Material
If you are resurfacing, strip every trace of the old vinyl or leather down to the foam or plastic substrate. A heat gun at low setting and a plastic scraper work well. Chemical strippers are faster but they can attack the foam underneath, so use them sparingly and only where the foam is already gone.
If you are filling and painting, leave the original vinyl in place but scuff it thoroughly. Your filler needs tooth to grip, and slick vinyl rejects everything.
Repairing Cracks with Body Filler
For minor damage, work the cracks with a flexible body filler rather than rigid putty. Flexible filler moves with temperature swings and will not telegraph back through the paint. Press the filler firmly into each crack, slightly overfilling so you have material to sand flush.
Let the filler cure fully. Rushing the cure is how pinholes appear in your final coat. Most fillers need at least 30 minutes before sanding; check the label for your specific product.
Sanding Techniques
Sand the filler flat with 180 grit, then refine with 320. Hand-sand the contours so you do not flatten the factory curves. A sanding block helps on flat areas, while your fingertips do better work on the curves around the instrument cluster and speaker grille.
For vinyl reskin work, sand the entire pad with 220 grit to give the contact cement something to grip. Do not sand through to the foam if you can help it.
Priming for Paint or Adhesion
Wipe the sanded surface with a tack cloth and a prep solvent. Apply a flexible adhesion promoter designed for automotive plastics and vinyl. This single coat is the difference between paint that lasts five years and paint that peels in six months.
Follow the promoter with a flexible primer surfacer. Two medium coats are better than one heavy coat. Heavy coats crack when the substrate flexes, especially in cold weather.
Repair Methods Compared: Filler, Fiberglass, Vinyl Reskin, and Replacement
There is no single best method for every dashboard. Each approach has strengths, weaknesses, and a sweet spot. We have used all four and laid them out side by side so you can choose with confidence.
Body Filler and Paint Method
This is the most accessible DIY path. You fill the cracks, sand smooth, prime, and spray a flexible dashboard paint matched to the original color. The materials are inexpensive, the tools fit in a small garage, and a careful owner can produce results that look five years old rather than forty.
The downside is durability. Filler-and-paint works well on minor cracking but tends to fail when the underlying vinyl keeps shrinking. If your dash is moving toward moderate damage, expect to repeat the process in a few years.
Fiberglass Overlay Method
Some owners lay a thin fiberglass skin over the original vinyl. The fiberglass adds rigidity and seals the cracks under a hard shell. Used by boat builders for decades, the technique translates well to dashboards with severe shrinkage.
The chemistry is unforgiving. Polyester and vinyl are not friends; the solvents in the resin attack the original material and can leave you with a bubbled, delaminated mess. If you go this route, isolate the original vinyl with a barrier coat first, and never use polyester resin directly against foam. Epoxy is gentler but slower and more expensive.
Vinyl Reskin Method
Reskinning covers the existing pad with a fresh layer of vinyl, leather, or fabric. Specialty shops vacuum-form a new skin over the original pad; skilled DIYers can hand-wrap a dash with contact cement and a heat gun. The result looks factory fresh and hides every defect underneath.
DIY hand-wrapping is the budget option. It takes practice, but the materials cost a fraction of a professional reskin. Specialty shops charge meaningfully more but deliver show-quality results with no wrinkles or loose edges.
Self-Skinning Polyurethane Method
Self-skinning polyurethane is the gold standard for high-end restorations. Liquid PU is poured into a mold made from the original pad; it foams to fill the structure and cures with a fresh vinyl skin on the outside. The result is a brand-new pad that matches the original exactly.
This method is industrial. You need molds, release agents, and a clean workspace. Most enthusiasts outsource it to shops that specialize in PU reproduction parts.
Full Replacement Method
When the original pad is unsalvageable, you replace it. NOS parts are best for originality but rare and pricey. Reproduction parts from vendors like OPGI, Classic Industries, and National Parts Depot cover most popular American classics and many European models. Quality varies, so research the specific part number before you buy.
A reproduction pad installs like the original. The work is disassembly and reassembly; the hard part is sourcing a part that fits correctly. Forum communities for your specific car are invaluable here.
Painting and Finishing Your Refurbished Dashboard
The final coat is what everyone will see. A great repair with a poor finish looks amateur, while a competent finish hides a lot of shortcuts underneath.
Choosing the Right Dashboard Paint
Dashboard paint has to be flexible. Regular automotive topcoat will crack the first time the dash flexes in summer heat. Use a paint formulated specifically for automotive plastics and vinyl. SEM, Rust-Oleum, and Krylon all make versions that flex with the substrate.
Pick the correct sheen for your era. Most factory dashes were satin, not glossy. A high-gloss dash on a 1968 Chevelle looks wrong even if the color is exact. Test spray on cardboard before you commit to the dash.
Polishing and Conditioning Vinyl
If you are leaving the original vinyl in place, polish it with a vinyl-specific product rather than a generic dashboard dressing. Vinyl cleaners remove the oxidation that makes old plastic look gray and chalky. Follow up with a UV-blocking conditioner to slow the next round of plasticizer loss.
Avoid silicone-heavy dressings on the upper dash. They look great in the driveway and create a glare hazard on the road. Matte or satin protectants are safer and look more factory-correct.
Adhesives for Leather and Vinyl Wraps
Contact cement is the standard for vinyl and leather wraps. Brush it on both surfaces, let it flash off until tacky, then press together. Once contact cement grabs, it does not slide, so align carefully before contact.
For leather wraps, a high-temperature spray adhesive like 3M 08090 gives you more working time and a softer feel. For vinyl, traditional brush-on contact cement produces the strongest bond.
Texture Matching
Factory dashes have a grain pattern that is hard to duplicate. If you are painting over the original vinyl, the texture is already there. If you are filling large areas, you can re-create the grain with a texture additive in your paint or by pressing a grain pad into the final coat while it is still wet.
Some owners skip texture matching entirely and go for a smooth custom look. That can look great on a resto-mod but will look out of place on a concours restoration.
Gauge Cluster, Heater Box, and HVAC Restoration
The components behind the dashpad deserve attention too. A pristine pad with a yellowed, sticky gauge cluster undermines the whole project. Tackle these at the same time so you only disassemble once.
Restoring the Gauge Cluster
Most classic gauge clusters can be disassembled with patience. Remove the bezel, lift out the gauges, and clean the faces with a mild plastic cleaner. Replace burnt-out bulbs with LEDs for brighter, cooler-running illumination.
For severely yellowed gauge faces, a careful respray with a clear plastic-compatible paint works. Avoid spraying the gauge needles; mask them carefully or remove them entirely if the design allows.
Heater Box Refurbishment
The heater box is a common source of musty smells and missing heat. Old foam seals turn to dust, and the core can clog with debris. Disassemble the box, replace the seals, flush the core, and repaint the metal with a rust-inhibiting finish.
While the box is out, replace the blower motor resistor if your heat only works on high. That single part fixes a frustrating common problem.
Wiring Harness Considerations
Original wiring harnesses in 40-year-old cars are tired. Insulation cracks, copper turns green, and brittle plastic connectors crumble in your hands. Consider a reproduction harness from American Autowire, Painless, or Rhode Island Wiring if your original is past saving.
If the original harness is still solid, clean every connector with electrical contact cleaner and inspect each wire as you reconnect it. A few minutes now saves hours of chasing intermittent electrical gremlins later.
Reinstallation and Final Assembly
After all the work to clean, repair, and refinish, reassembly is the easy part if you took photos and labeled everything during removal.
Refitting the Dashpad
Dry-fit the pad before you fasten anything. Make sure the defrost ducts line up, the mounting brackets seat correctly, and the cluster opening is centered. Adjustments are easy with loose screws and impossible once everything is tight.
Tighten the screws in a star pattern rather than around the edges. This keeps the pad from warping and ensures even clamping pressure around the perimeter.
Reconnecting Electrical Components
Reconnect in the reverse order of removal. Start with the gauge cluster, then switches, then the wiring harness. Use your photos to confirm each connector lands in its original spot.
Reconnect the battery only after every connector is seated and every ground strap is reattached. The first power-up should be with the key off; check for any unusual smells or heat before cranking the engine.
Final Checks
Test every switch, every gauge, every light. Turn the key to accessory and confirm the wipers, blower, and radio work. Then start the engine and verify the oil pressure gauge and charging light behave normally.
Sit in the car for a minute and just look. The cabin should feel like a place you want to spend time. That feeling is the real measure of a successful dashboard refurbishment.
DIY vs Professional Restoration: When to Call in Help
There is no shame in calling a professional. We have both done professional work and DIY work, and the right choice depends on your tools, your time, and your tolerance for risk.
When DIY Makes Sense
DIY makes sense when the damage is minor or moderate, you have a weekend to spare, and you already own or can borrow the basic tools. Body filler and paint is well within reach of a careful first-timer. Vinyl reskin is a bigger commitment but still doable with research and patience.
The savings are real. A DIY dashboard refurbishment costs a fraction of a professional reskin, and the work teaches you skills you will use on the rest of the car.
When to Hire a Professional
Specialty work like PU reproduction, full vacuum-formed reskins, and concours-level restorations is best left to shops with the equipment and experience. The tooling costs alone put these methods out of reach for most home garages.
If your car is rare or highly valuable, the risk of an irreversible mistake is not worth the savings. A professional bill is cheaper than a ruined original pad.
Sourcing NOS and Reproduction Parts
For American classics, the reproduction parts industry is mature. OPGI, Classic Industries, National Parts Depot, and Goodmark cover most GM, Ford, and Mopar applications. For European cars, the choices narrow quickly and prices climb.
NOS parts show up on auction sites, in club classifieds, and at swap meets. Buy from sellers with good reputations and clear return policies. A NOS part in damaged packaging is not the bargain it appears to be.
Common Mistakes to Avoid During Dashboard Refurbishment
We have made most of these mistakes so you do not have to.
Rigid filler on flexible vinyl cracks within a season. Skip the heat-gun step and you will snap a brittle pad in half. Mix epoxy or polyester resin directly against foam and the foam dissolves. Forget adhesion promoter on slick vinyl and your paint peels in sheets.
Work in good light, take your time, and respect the materials. The dash is the first thing you see every time you get in the car, and a careful job rewards you for years.
Frequently Asked Questions
What is the best product to restore a car dashboard?
For minor cracking and faded color, a flexible automotive vinyl paint over a quality adhesion promoter gives the most lasting result. Brands like SEM, Rust-Oleum, and Krylon make dashboard-specific coatings that flex with the substrate rather than cracking like standard topcoat.
What can I use to polish my car dashboard?
Use a vinyl-specific cleaner and conditioner rather than a generic dashboard dressing. Vinyl cleaners remove oxidation that makes old plastic look chalky, while a UV-blocking conditioner slows further plasticizer loss. Avoid silicone-heavy products on the upper dash to prevent glare.
How to make an old car interior look new?
Start with a deep clean of all vinyl, carpet, and headliner. Address the dashboard cracks with the appropriate repair method for the damage level. Restore the gauge cluster by replacing bulbs with LEDs and cleaning yellowed faces. Finish with fresh trim pieces and a quality interior dressing on remaining surfaces.
What is the best paint for a car dashboard?
A flexible paint formulated specifically for automotive vinyl and plastics. SEM, Rust-Oleum, and Krylon all produce versions that move with the substrate. Pick a satin sheen to match factory finishes and apply over a flexible adhesion promoter for the longest-lasting result.
Can you vinyl wrap a dashboard?
Yes, vinyl wrapping a dashboard is a popular alternative to painting. Specialty shops vacuum-form a perfect skin over the original pad, while skilled DIYers can hand-wrap using contact cement and a heat gun. The result hides every defect underneath and looks factory fresh when done well.
What is the best glue to restick a leather dashboard?
Contact cement is the standard for leather and vinyl wraps. Brush it on both surfaces, let it flash until tacky, then press together for an immediate strong bond. For a softer feel and more working time, 3M 08090 high-temperature spray adhesive works well on leather specifically.
How much does it cost to leather wrap a dashboard?
Professional leather wrapping depends heavily on the car and the shop. A local upholstery shop typically charges less than a specialty restoration house. The material cost alone is modest; the labor to hand-fit the leather is the main expense. DIY wrapping with a kit saves a large portion of the professional bill.
How to refurbish a classic car dashboard without replacement?
Assess the damage first. Minor cracks respond to flexible body filler and dashboard paint. Moderate damage is best handled by vinyl or polyurethane reskinning over the original pad. Severe damage usually forces replacement, but reskinning with self-skinning polyurethane can salvage even heavily cracked pads.
Conclusion
Learning how to refurbish a classic car dashboard comes down to honest assessment and matching the method to the damage. Minor cracks want filler and paint, moderate damage wants a reskin, and severe deterioration wants replacement or a custom fabrication in polyurethane. The plasticizer loss driving the cracks cannot be reversed, but a sound repair can hold back the clock for years.
Take your time during disassembly and document everything. Choose a method that fits your skill level and budget. Respect the materials and the chemistry. A well-executed dashboard refurbishment makes every drive more enjoyable and adds real value to a classic car you can be proud of for years to come.