
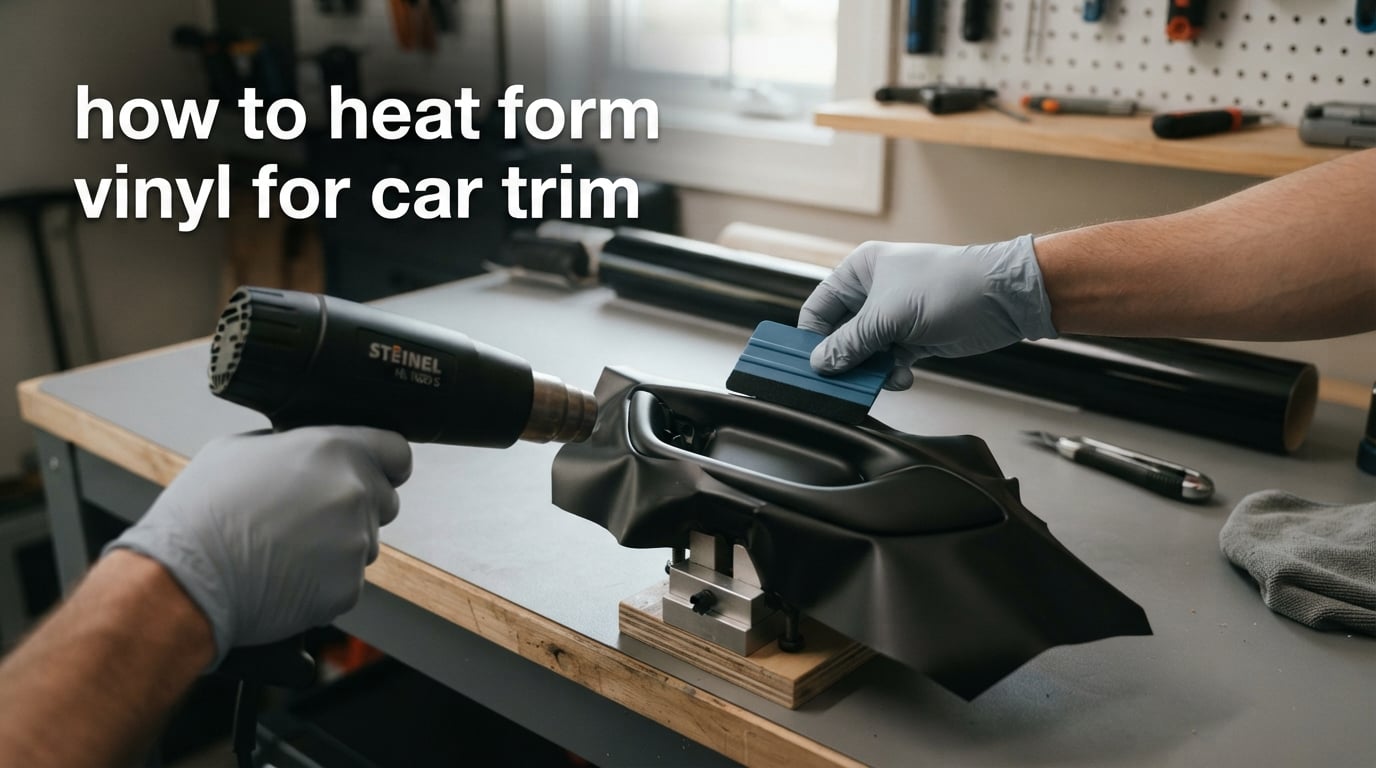
If you have ever tried to wrap a door handle or mirror cap and watched the vinyl buckle, wrinkle, or lift at the edges, the problem usually comes down to one thing: heat forming. Learning how to heat form vinyl for car trim is the difference between a finish that looks like it belongs on a show car and one that starts peeling the first time you hit the car wash.
I have spent the last few months wrapping trim pieces on everything from a daily-driven SUV to a vintage BMW, and the technique I am about to walk you through is the one that finally gave me consistent, professional-looking results. In this guide, you will learn the exact tools to use, the right temperature settings for different vinyl types, a step-by-step process that works on complex curves, and the safety warnings I wish someone had given me before I scorched my first piece of plastic trim.
Table of Contents
- What Is Heat Forming Vinyl for Car Trim?
- Essential Tools and Materials You Need
- Cast Vinyl vs Calendered Vinyl: Which One to Use on Trim
- Preparing the Trim for Vinyl Application
- How to Heat Form Vinyl for Car Trim: Step-by-Step Process
- Temperature Guidelines and Heat Duration by Vinyl Type
- Heat Forming vs Cold Application: When to Use Each
- Trim-Specific Techniques for Complex Curves
- Common Mistakes and How to Avoid Them
- Safety Precautions for Heat Gun Use on Plastic Trim
- Post-Installation Care and Long-Term Maintenance
- Frequently Asked Questions
- Final Thoughts on Heat Forming Vinyl for Car Trim
What Is Heat Forming Vinyl for Car Trim?
Heat forming is the process of using controlled heat to make automotive vinyl wrap soft and pliable so it can stretch and conform to the curves, recesses, and contours of a trim piece. When heat hits the vinyl, the adhesive layer activates and the film itself relaxes, allowing you to mold it around shapes that would otherwise cause wrinkles or lifting.
This matters because car trim is rarely flat. Door handles have recesses, mirror caps curve in two directions, bumpers have compound curves, and interior panels have subtle textures. Without heat forming, you are forcing a rigid sheet into a shape it does not want to hold, and the vinyl will eventually fight back by lifting, bubbling, or shrinking.
Reviewers in detailing communities like r/AutoDetailing and r/CarWraps consistently report that proper heat forming is what separates a wrap that lasts three years from one that fails within months. The technique itself is straightforward once you understand the temperature, duration, and pressure triangle.
Essential Tools and Materials You Need
Before you start, gather everything on this checklist. Nothing kills momentum faster than stopping halfway through a wrap because you are missing a tool.
Heat source: A variable-temperature heat gun is the gold standard. I use a model that runs from 130 to 1200°F so I can dial in the right range for each vinyl type. A hair dryer works in a pinch for small interior pieces, but it lacks the heat output for tight curves on exterior trim.
Squeegee: A medium-hardness squeegee with a felt edge is what most professional installers reach for. The felt prevents scratching while the firm edge pushes air out from under the vinyl.
Vinyl wrap: Cast vinyl is ideal for trim because it is thin, conformable, and holds its shape after stretching. Calendered vinyl is thicker and cheaper but fights you on complex curves.
Cleaning supplies: Isopropyl alcohol (at least 70 percent concentration) and lint-free microfiber cloths are non-negotiable. Any oil, wax, or silicone left on the surface will cause adhesion failure.
Cutting tools: A sharp utility knife with fresh blades and knifeless tape for clean cuts along edges and body lines.
Application fluid: A mix of distilled water and a few drops of baby shampoo or a dedicated application fluid lets you reposition the vinyl before it tacks. This is optional but very helpful for beginners.
Cast Vinyl vs Calendered Vinyl: Which One to Use on Trim
The type of vinyl you choose has more impact on your final result than any other decision. Cast vinyl is manufactured through a process that pours liquid vinyl onto a moving casting sheet, producing a thin, stable film with excellent conformability. Calendered vinyl is made by pressing vinyl through rollers, resulting in a thicker, stiffer film.
For trim work, cast vinyl wins almost every time. It stretches evenly when heated, holds its shape after cooling, and conforms to deep recesses without the memory effect that makes calendered vinyl spring back. Brands like 3M 1080, Avery Dennison Supreme Wrapping Film, and Oracal 970 are cast vinyls designed specifically for vehicle wraps.
Calendered vinyl can work on flatter trim pieces like interior dashboard accents or door sills, but expect a learning curve and more heat forming effort. Specialty vinyls like chrome, carbon fiber, and brushed metallic are usually cast, but they are also more expensive and less forgiving of mistakes.
Preparing the Trim for Vinyl Application
Surface preparation is where most DIY wraps fail before they even begin. The vinyl is only as good as the surface it bonds to.
Start by removing the trim piece whenever possible. Wrapping a door handle while it is still mounted forces you to work around awkward angles and increases the risk of cutting into paint. Most exterior trim pieces pop off with basic trim tools, and the extra 15 minutes of disassembly saves hours of frustration later.
Wash the trim with soap and water first to remove loose dirt, then wipe it down thoroughly with isopropyl alcohol. This step removes any residual oils, wax, or silicone that would prevent the adhesive from bonding. Let the alcohol evaporate completely before applying vinyl; this usually takes two to three minutes.
Set up your workspace in a controlled environment. Aim for 60 to 75°F with low humidity. Direct sunlight heats the trim unevenly and dust sticks to wet adhesive. A garage or shaded workshop is ideal.
How to Heat Form Vinyl for Car Trim: Step-by-Step Process
This is the core technique. Follow these steps in order and adjust based on the specific shape you are wrapping.
Step 1: Measure and cut a piece slightly larger than the trim. Give yourself at least one inch of overhang on every edge. You will trim the excess later, and starting with too little vinyl guarantees misalignment.
Step 2: Position the vinyl and tack one edge. If you are using application fluid, mist the trim lightly. Lay the vinyl over the piece and press one edge into place by hand or with the squeegee. This anchor point keeps the vinyl from shifting.
Step 3: Heat the vinyl to activate the adhesive. Set your heat gun to the temperature range for your vinyl type (covered in the next section). Hold the gun four to six inches from the surface and move it constantly in a circular pattern. Never aim the heat gun at one spot for more than two to three seconds.
Step 4: Stretch and press the vinyl into shape. As the vinyl softens, use your squeegee to press it into the contours. Work from the center outward in overlapping strokes. The vinyl should feel like a soft sheet, not a stiff plastic film.
Step 5: Heat form the edges and recesses. For tight curves around door handles or into bumper recesses, apply a brief burst of heat and use your thumb or the squeegee tip to push the vinyl deep into the recess. The vinyl will hold its shape as it cools.
Step 6: Trim the excess. Once the vinyl is fully conformed and cooled, trim along the factory edges with a sharp utility knife. Pull the blade toward you, not away, and change blades frequently. A dull blade tears vinyl instead of cutting it.
Step 7: Apply post-installation heat treatment. Go over the entire wrapped piece one final time with the heat gun at a slightly lower temperature. This re-activates the adhesive and locks the vinyl into its final shape. Pay extra attention to edges and corners.
Step 8: Let it cure. Do not wash the vehicle or expose the wrap to heavy moisture for at least 24 to 48 hours. The adhesive needs this time to reach full bond strength.
Temperature Guidelines and Heat Duration by Vinyl Type
Temperature is the single most important variable in heat forming. Too cold and the vinyl will not conform; too hot and you will burn, discolor, or over-stretch the film. Here are the ranges I have tested across the most common vinyl types for trim work.
Standard cast vinyl (3M 1080, Avery Dennison SWF, Oracal 970): Set your heat gun between 400 and 500°F. Apply heat in three to five second bursts, keeping the nozzle four to six inches from the surface. This is the sweet spot for most trim applications.
Calendered vinyl: Higher heat helps relax the memory, but you risk shrinkage. Use 450 to 550°F and stretch the vinyl less aggressively. Work in smaller sections.
Chrome and metallic vinyls: These films scratch easily and show heat marks quickly. Stay between 300 and 400°F and use a soft squeegee with felt. Never let the heat gun linger.
Carbon fiber and textured vinyls: Texture can crush under heat and pressure. Use 350 to 450°F and avoid heavy squeegee pressure over textured areas.
Regardless of vinyl type, the duration rule is the same: short bursts, constant movement, and frequent visual checks. If the vinyl starts to gloss or look wet, you are getting close to overheating. Pull the heat gun back and let it cool for a few seconds before continuing.
Heat Forming vs Cold Application: When to Use Each
Cold application means laying vinyl without heat, relying on pressure and the adhesive’s natural tack. It works on flat or gently curved surfaces like dashboard trim pieces, door sills, and flat exterior moldings. The advantage is no risk of heat damage, and the vinyl keeps its original dimensional stability.
Heat forming is necessary whenever you encounter compound curves, recesses, or tight corners. Door handles, mirror caps, bumper trim, and any piece with a 90-degree edge all require heat forming to look right. Cold application on these pieces almost always results in wrinkles or lifted corners.
A good rule of thumb: if you can see the curve from two angles, you need heat. If the surface only curves in one direction, you can usually get away with cold application.
Trim-Specific Techniques for Complex Curves
Different trim pieces present different challenges. Here is how I approach the most common ones.
Door handles: Remove the handle if possible. Heat form the vinyl over the curved back first, then work into the recess around the handle pull. Use your thumb to push vinyl into the deepest parts while the vinyl is warm and pliable.
Mirror caps: These have compound curves in every direction. Cut the vinyl into four quadrants and work each one separately. Heat form each section and overlap the seams slightly, then trim flush with a sharp knife.
Bumper trim and lower moldings: Long, sweeping curves respond well to wide heat sweeps. Keep the heat gun moving in long strokes and use a wider squeegee to maintain even pressure.
Interior trim (dashboard, door panels, center console): These pieces usually have subtle texture and multiple curves. Lower heat (300 to 400°F) prevents warping plastic substrates. A hair dryer often provides enough heat for these applications.
Common Mistakes and How to Avoid Them
Even experienced installers make these errors. Here is how to spot and fix them before they ruin your wrap.
Bubbles and wrinkles: Almost always caused by insufficient heat or air trapped under the vinyl. Reheat the area and work the air out toward the nearest edge with your squeegee. If a bubble persists, prick it with a pin and press flat.
Lifting edges: Means the adhesive did not fully activate or the edge was overstretched. Apply post-installation heat and press firmly. If the edge keeps lifting, a thin bead of 3M Edge Sealer can secure it.
Overheating and discoloration: Vinyl turns glossy, then brown, then burns. If you see gloss, stop immediately and let the piece cool. You may need to cut out the damaged section and patch.
Misalignment: Starting with too small a piece is the usual cause. Always oversize your cut and trim to fit. If the vinyl shifts during application, lift it back with heat rather than pulling cold, which stretches the film unevenly.
Cutting into paint or trim: Use knifeless tape for body lines and curved edges. Always cut on a hard surface; never try to trim while the vinyl is draped over the vehicle.
Safety Precautions for Heat Gun Use on Plastic Trim
Heat guns reach temperatures that can burn skin, melt plastic, and ignite flammable materials in seconds. Treat your heat gun like any other power tool.
Work in a ventilated area. Heating vinyl releases fumes that you do not want to breathe in concentrated form. A garage with the door open is usually sufficient.
Never aim the heat gun at one spot for more than a few seconds. Plastic trim can become brittle, discolored, or warped with prolonged heat. Reddit users in r/AutoDetailing warn that heat guns can draw surface oils out of plastic trim, leaving it prone to cracking weeks later. Use the lowest effective temperature and keep the gun moving.
Wear gloves when handling freshly heated vinyl and trim pieces. The vinyl cools fast but can burn fingers during application.
Keep the heat gun away from wiring, fuel lines, and plastic components behind the trim. A moment of carelessness can melt a wiring harness or damage a sensor.
Post-Installation Care and Long-Term Maintenance
Once your trim is wrapped, a little maintenance keeps it looking fresh for years.
Avoid washing the wrapped trim for at least 24 to 48 hours after installation. This cure time lets the adhesive reach full bond strength. After that, hand washing with a mild soap is safer than automatic car washes, which use high-pressure water and abrasive brushes.
Avoid harsh chemicals, abrasive polishes, and petroleum-based products. If you need to clean something stubborn, use isopropyl alcohol or a vinyl-safe cleaner.
Park in the shade when possible. UV is the primary killer of vinyl wrap. Quality cast vinyls rated for outdoor use will last three to five years, but parking in direct sun shortens that significantly.
If you ever need to remove the wrap, heat it gently with the heat gun and pull at a low angle. The adhesive should release cleanly without damaging the underlying trim or paint, especially if you used cast vinyl.
Frequently Asked Questions
How do I heat vinyl wrap correctly?
Heat vinyl wrap by holding a heat gun four to six inches from the surface and moving it in slow circles. Apply heat in three to five second bursts, then press the vinyl into place with a squeegee while it is still pliable. Never aim the heat gun at one spot for more than a few seconds or you risk burning or discoloring the film.
What is the best heat gun for vinyl wrap?
The best heat gun for vinyl wrap is a variable-temperature model with a range from 130 to 1200°F. Look for one with multiple nozzle attachments, a reliable temperature display, and a comfortable grip. Most professional installers use Wagner or DEWALT heat guns because they hold temperature accurately and are built for extended use.
Can I use a hair dryer to apply vinyl wrap?
You can use a hair dryer for small interior trim pieces and gentle curves, but it lacks the heat output for tight exterior contours. A hair dryer tops out around 140°F, while most vinyl forming requires 300 to 500°F. For door handles, mirror caps, and bumper trim, a heat gun is the right tool.
Is it better to wrap vinyl wet or dry?
Dry application is better for most trim work because wet application can interfere with adhesive activation and cause lifting later. Use a light mist of application fluid only on large flat pieces where you need time to reposition. For curves and recesses, dry application with controlled heat gives the most reliable bond.
What temperature to set a heat gun for vinyl wrap?
Set your heat gun between 400 and 500°F for standard cast vinyl, 450 to 550°F for calendered vinyl, and 300 to 400°F for chrome or metallic films. Always keep the gun moving in a circular pattern and hold it four to six inches from the surface. Test on a scrap piece if you are unsure.
Should I use soapy water for vinyl wrap?
Soapy water works as an application fluid on large flat pieces, helping you slide and reposition the vinyl before it tacks. Mix distilled water with a few drops of baby shampoo in a spray bottle. For trim work with curves and recesses, dry application usually gives better adhesion and cleaner edges.
How to finish edges on vinyl wrap?
Finish edges by wrapping them around to the back of the trim whenever possible. For edges that must be cut flush, use a sharp utility knife and pull the blade toward you. Apply post-installation heat to all edges and press firmly to activate the adhesive. A thin bead of 3M Edge Sealer can prevent lifting on high-stress edges.
Final Thoughts on Heat Forming Vinyl for Car Trim
Heat forming is the skill that turns a vinyl wrap from a temporary experiment into a lasting modification. Once you understand how temperature, duration, and pressure work together, you can wrap any trim piece on any vehicle with confidence.
Start with a small, forgiving project like an interior trim piece before tackling door handles or mirror caps. Practice your heat gun control on scrap vinyl. And remember the golden rule: short bursts, constant movement, and patience pay off every single time.
Now you have everything you need to know how to heat form vinyl for car trim the right way. Grab your heat gun, pick a piece to practice on, and start wrapping.