
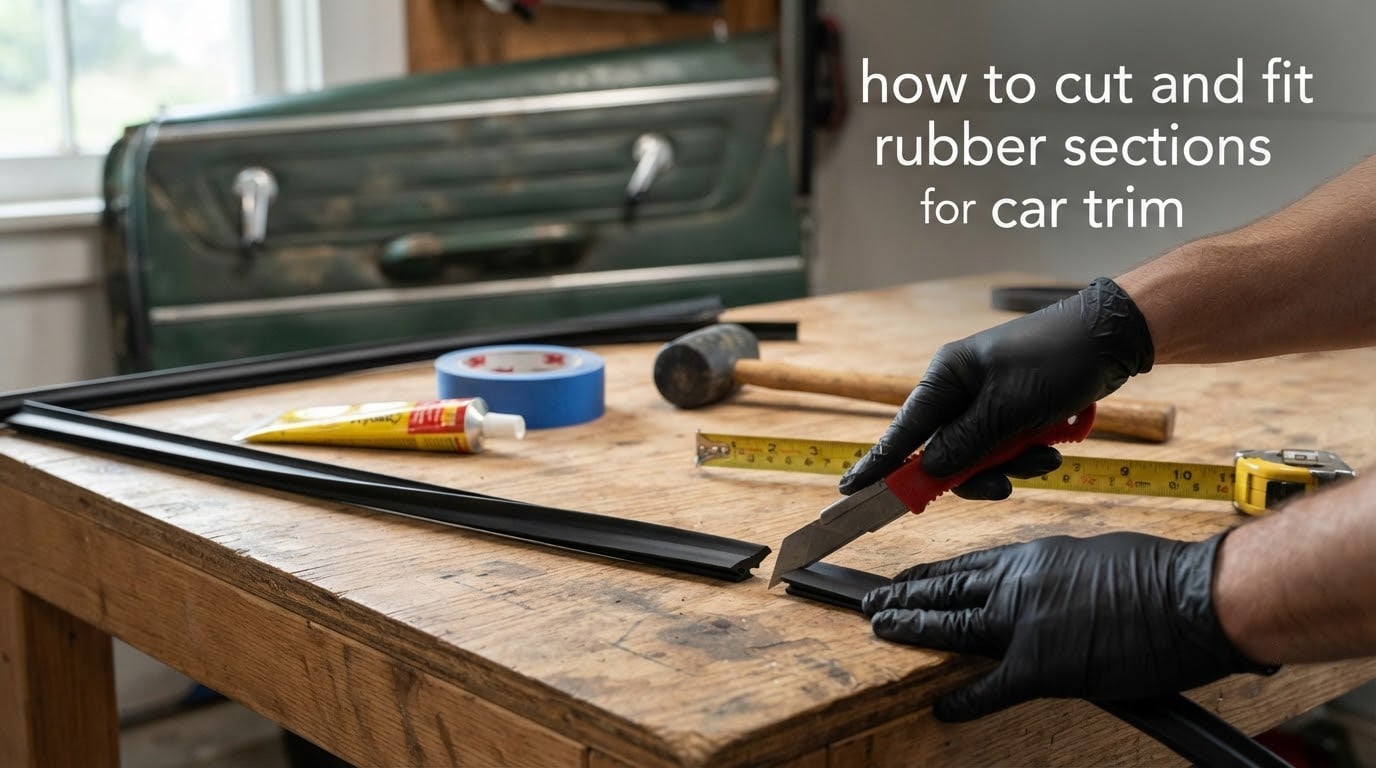
If your door is whistling at highway speed, water is pooling on the floor after rain, or your classic restoration is held together by wishful thinking, you have probably arrived at the same question we get asked every week in the shop: how to cut and fit rubber sections for car trim. We have replaced countless seals on everything from vintage Beetles to daily drivers, and the difference between a tidy install and a leaky mess almost always comes down to careful measuring, sharp tools, and the right adhesive for the job.
Car rubber trim refers to the rubber seals, weather stripping, and gaskets installed around windows, doors, windshields, and sunroofs to create a watertight and weatherproof seal. This guide walks you through the whole process, from gathering tools to troubleshooting common fit problems, so you can get a quiet, dry, and factory-fresh finish on your first attempt.
Table of Contents
- Tools and Materials You’ll Need
- Safety Precautions Before You Start
- How to Measure and Mark Rubber Sections
- Cutting Techniques for Different Rubber Profiles
- How to Cut and Fit Rubber Sections for Car Trim: Step-by-Step Fitting
- Choosing the Right Adhesive and Sealing the Trim
- Vehicle-Specific Tips: Windshield, Door, Window, and Sunroof
- Common Mistakes and Troubleshooting
- Frequently Asked Questions
- Final Thoughts
Tools and Materials You’ll Need
Before you make a single cut, lay everything out on a clean bench. We have learned the hard way that a missing blade or the wrong adhesive mid-job ruins more weekends than bad technique ever does.
Here is the kit we reach for on most trim jobs:
- Sharp utility knife or razor blade with snap-off segments
- Rubber-grip scissors or tin snips for thicker profiles
- Sharp aviation snips for T-moulding and metal-edged trim
- Measuring tape and a fine-tip marker or china pencil
- Masking tape and painter’s tape (green or blue, low-tack)
- Contact adhesive from a quality brand (we prefer the brush-on kind)
- Cyanoacrylate (super glue) for spot bonds only, never full seams
- Urethane windshield sealant for glass-to-rubber bonds
- Heat gun on a low setting for expanding old metal trim
- Rubber mallet or dead blow hammer
- Plastic trim removal tools and a window scraper
- Soapy water in a spray bottle
- Clean microfibre cloths and isopropyl alcohol
- Petroleum jelly for sliding seals into channels
Beginners often ask if they can skip the heat gun or the rubber mallet. You can, but expect bent metal trim and dented door frames. A basic heat gun costs less than a single replacement panel and saves hours of frustration.
Safety Precautions Before You Start
Rubber trim work looks gentle, but you are handling sharp blades, chemical adhesives, and hot air. A few minutes of prep protects both you and the car.
Wear nitrile gloves when working with contact adhesive. The solvents pull moisture out of your skin fast, and a slip while wearing a glove is far less likely than a slip with bare hands on a utility knife.
Park the car in a shaded, well-ventilated area. Adhesive fumes build up quickly in a closed garage, and direct sunlight warms rubber until it stretches and misbehaves while you fit it.
Disconnect the battery if you are working near airbags or wiring harnesses behind door panels. A shorted wire is a small price compared to a deployed airbag or a fried ECU.
Always pull the parking brake and chock the wheels. Doors and tailgates can swing unexpectedly when seals are removed, and a falling hatch on your head is no joke.
How to Measure and Mark Rubber Sections
Measuring is the part everyone wants to skip, and it is the part that decides whether the seal ends up flush or short by three millimetres with a gap you can see from across the driveway.
Use a soft measuring tape and follow the path the seal will actually take, not a straight line between two points. Curved windows and door frames need you to bend the tape along the channel, then read the total.
Add a small allowance for the cut. Most EPDM and rubber seals relax slightly after being cut, so leave an extra 3 to 5 mm at each end and trim to fit only after the seal is dry-fitted in place. Cutting a little long and trimming back is always safer than cutting short and starting over.
Mark your cut line with a china pencil or a fine-tip marker on the back side of the seal. A silver Sharpie shows up well on black EPDM and wipes off later with isopropyl alcohol if you change your mind.
For corners, mark the inside of the bend and cut slightly outside the line. Sharp inside corners tear over time, so a tiny radius extends the life of the seal.
Pro tip from our bench: dry-fit every length before you touch the adhesive. Lay the seal in its channel, walk around the door or frame, and confirm both ends land squarely where they need to. Five minutes here saves an hour of scraping cured glue off paint.
Cutting Techniques for Different Rubber Profiles
Not all rubber trim is the same, and the profile you are cutting changes everything from blade choice to angle. We see three profiles most often: T-moulding, U-channel, and bulb seal.
T-moulding is the classic decorative trim with a barbed stem that presses into a slot. Cut it with a fresh utility knife blade on a piece of scrap timber. Score the back of the T first, then deepen the cut in two or three passes. Trying to cut it in one stroke twists the moulding and leaves a jagged edge.
U-channel wraps around a glass edge or metal flange. Use rubber-grip scissors or aviation snips for clean cuts. Snip small bites rather than crushing the whole channel at once. A crushed channel will not seat properly and will leak no matter how much sealant you pile on.
Bulb seal has a hollow tube along its length, often used on door and trunk weatherstripping. Cut it with a sharp utility knife at a 90 degree angle to the bulb. Slicing at an angle lets the bulb collapse and lose its memory, which is how you end up with a flat seal that leaks.
For EPDM rubber specifically, keep the blade wet. A quick dip in soapy water reduces friction and stops the rubber from dragging and tearing as the cut progresses. This trick alone has saved us dozens of ruined seals on classic restorations.
Heat can help on cold days. A few seconds with a heat gun on low warms EPDM just enough to make a clean cut without cracking. Hold the gun at least 15 cm away and keep it moving so you do not scorch the rubber or the paint beside it.
Forum members with deep experience on Rennlist and MR2 forums consistently recommend T-moulding sourced from glass suppliers over splicing a too-short moulding. A clean factory splice will always outperform a hand-spliced joint, and the supply cost difference is small.
How to Cut and Fit Rubber Sections for Car Trim: Step-by-Step Fitting
This is the core of the job. We will walk through the order we use for a door and window seal, then point out the variations for windshields and sunroofs.
Step 1: Remove the old trim. Start at one end and pull steadily, keeping tension parallel to the surface. If the rubber is brittle and tearing, soak it with hot (not boiling) water for a few minutes to soften the adhesive. Several restoration threads on gbodyforum.com recommend pouring just-boiled water along stubborn roof rubbers before pulling.
Step 2: Clean the channel. Scrape every trace of old adhesive and rubber with a plastic scraper. Follow up with isopropyl alcohol and a microfibre cloth. Any grease left behind weakens the new bond and lets water creep under the seal.
Step 3: Dry-fit the new seal. Lay it in the channel without adhesive first. Confirm the ends meet where they should, the corners sit flat, and the bulb or T compresses evenly. Adjust your cuts now if needed.
Step 4: Mask the paint. Run a strip of painter’s tape along both edges of the channel. We learned this one the messy way; contact adhesive that touches cured paint is a long afternoon with a detailing clay bar.
Step 5: Apply adhesive. Brush contact adhesive onto both the channel and the back of the seal. Wait until the adhesive is tacky to the touch but does not transfer to a knuckle, usually 2 to 5 minutes. This is the most-skipped step, and the one that makes the biggest difference.
Step 6: Set the seal in place. Start at one end and work along the channel, pressing the seal into the adhesive with even thumb pressure. Avoid stretching the rubber. A stretched seal shrinks back over the next day and leaves gaps at the corners.
Step 7: Roll or tap the seal. Use a rubber mallet or a dead blow hammer with a block of wood to seat the seal without denting the surrounding metal. Work in short sections so the adhesive does not skin over before you finish.
Step 8: Remove the masking tape. Pull the tape while the adhesive is still slightly soft. Once it cures, tape removal can lift the edge of the new seal.
Step 9: Let it cure. Most contact adhesives reach handling strength in a few hours and full bond strength in 24 hours. Avoid slamming doors or driving through a car wash during this window.
Choosing the Right Adhesive and Sealing the Trim
Walk into any auto parts shop and you will find a wall of tubes promising the strongest bond in the world. The honest answer is that each adhesive has a job it does best.
Contact adhesive is our default for door, window, and trunk seals. It stays slightly flexible after curing, which lets the rubber move with the body as temperatures change. Apply to both surfaces, let it tack up, then press together.
Cyanoacrylate (super glue) works for tiny spot bonds only, like a loose end tab or a chipped corner. A full seam of super glue turns brittle and cracks the first time the door flexes. Forum threads on mr2.com are unanimous on this point: do not run a full bead of cyanoacrylate along a rubber seam.
Urethane windshield sealant is the right choice for any seal that bonds glass to the body. It stays flexible, resists UV, and is what every glass installer uses at the factory. Drive time for urethane is typically several hours; check the label before moving the car.
For gaps and small leaks after fitting, a thin bead of clear silicone can help, but never use silicone where you will ever want to paint. Silicone contaminates paint for weeks and causes fish-eyes that no detailer can polish out.
Masking tape is not just for paint protection; it also holds a seal in place while adhesive cures on vertical surfaces like a windshield pillar. Run a strip of painter’s tape across the seal every 20 cm and leave it on overnight.
Vehicle-Specific Tips: Windshield, Door, Window, and Sunroof
Each opening on a car has its own quirks. A few of the patterns we see most often in our shop:
Windshield: Windshield seals are usually one long piece with locking strips. Run the seal around the entire opening before locking the strip in. The glass should sit flush with the adjacent panels, not proud. On classic cars, this is where most leaks start, because a proud seal catches wind and channels water straight into the cabin.
Door and window: The belt line seal at the top of the door takes more abuse than any other seal on the car. It flexes every time the window goes up and down. Replace both the outer belt line and the inner scraper seal at the same time, or you will be back inside a month chasing a fresh leak.
Sunroof: Sunroof seals shrink and harden faster than any other rubber on the car. A soft cloth and a mild cleaner, applied twice a year, extends their life significantly. When you fit a new sunroof seal, leave the sunroof cracked open for the first 24 hours so the adhesive does not glue the panel shut.
Roof gutters and trim: Older vehicles often have roof drip rail trim that the original factory bonded with butyl rubber. Use the same material when you re-fit. Aftermarket silicone will not stick to aged butyl and the trim will lift within a season.
Common Mistakes and Troubleshooting
Even careful installs sometimes need a second pass. Here are the issues we see most often and how to fix them without starting from scratch.
Gap at the corners. The seal shrunk after cutting, leaving a visible gap. Heat the ends gently with a heat gun and stretch them into position, then hold with masking tape while the adhesive sets. If the gap is wider than 2 mm, recut and re-fit rather than fighting it.
Paint damage from adhesive. Pull the adhesive off the paint immediately with a soft cloth and isopropyl alcohol. Once it skins over, switch to a plastic scraper and detailing clay. Always, always mask the paint before brushing adhesive.
Brittle old rubber tearing during removal. Soak the section with hot water for two minutes, then try again. If it still tears, cut the rubber into short sections with the utility knife and lift each piece out. Slow, but safer than prying.
Seal will not seat in the channel. A few sprays of soapy water on the channel lets the rubber slide into place. Once positioned, the water evaporates and the adhesive grabs. Do not use soapy water as a substitute for adhesive; it is a positioning aid only.
Bent metal trim. Heat the trim gently with a heat gun until it warms, then reshape with your hands or a soft mallet. Going hot risks the paint. A forum favourite trick on bimmerforums.com is to warm, then press into shape with a wood block rather than metal, which dents the panel underneath.
Door still leaks after fitting. Check that the door latch is still striking the striker squarely. A door that drops 2 mm after the seal change will leak no matter how good the seal is. Loosen the striker bolts, realign, and retest with a sheet of paper; it should hold the paper firmly but let it slide.
Frequently Asked Questions
What is the rubber trim around a car window called?
The rubber trim around a car window is most often called weather stripping or a window seal. Specific profiles have their own names: the T-shaped decorative edge is T-moulding, the seal that runs along the top of the door is the belt line seal, and the strip inside the door that the glass slides against is the window channel or scraper seal.
How do I reattach rubber trim on a car door?
Clean the channel with isopropyl alcohol, mask the paint with painter’s tape, brush contact adhesive on both the channel and the back of the seal, wait until the adhesive is tacky, then press the seal into place starting at one end. Hold it with masking tape overnight while the adhesive cures.
What is the best glue for rubber car trim?
Contact adhesive is the best choice for most rubber car trim because it stays flexible after curing. Cyanoacrylate super glue is fine for small spot bonds but turns brittle along a full seam. Urethane sealant is the right choice for any seal that bonds glass to the body, such as a windshield gasket.
Can I paint my car’s rubber trim?
Yes, you can paint rubber trim with a flexible coating designed for automotive plastic and rubber. Clean the surface with isopropyl alcohol, apply a light coat of adhesion promoter, then two to three thin coats of trim paint. Standard paint will crack and peel within weeks on flexible rubber.
Final Thoughts
Learning how to cut and fit rubber sections for car trim is one of those jobs that rewards patience more than talent. Measure carefully, cut slightly long, mask the paint, and let the adhesive tack up before you press the seal home. Follow those four habits and most DIYers will get a result that looks and feels factory-fresh.
If you are tackling a classic restoration, source seals from a supplier that specialises in your vehicle rather than the closest hardware store. The profile, hardness, and finish of OEM-spec rubber makes a bigger difference than any technique tweak.
We hope this guide saves you a Saturday afternoon of trial and error. Take your time, prep the surfaces, and your car will be quiet, dry, and ready for whatever weather 2026 sends your way.