
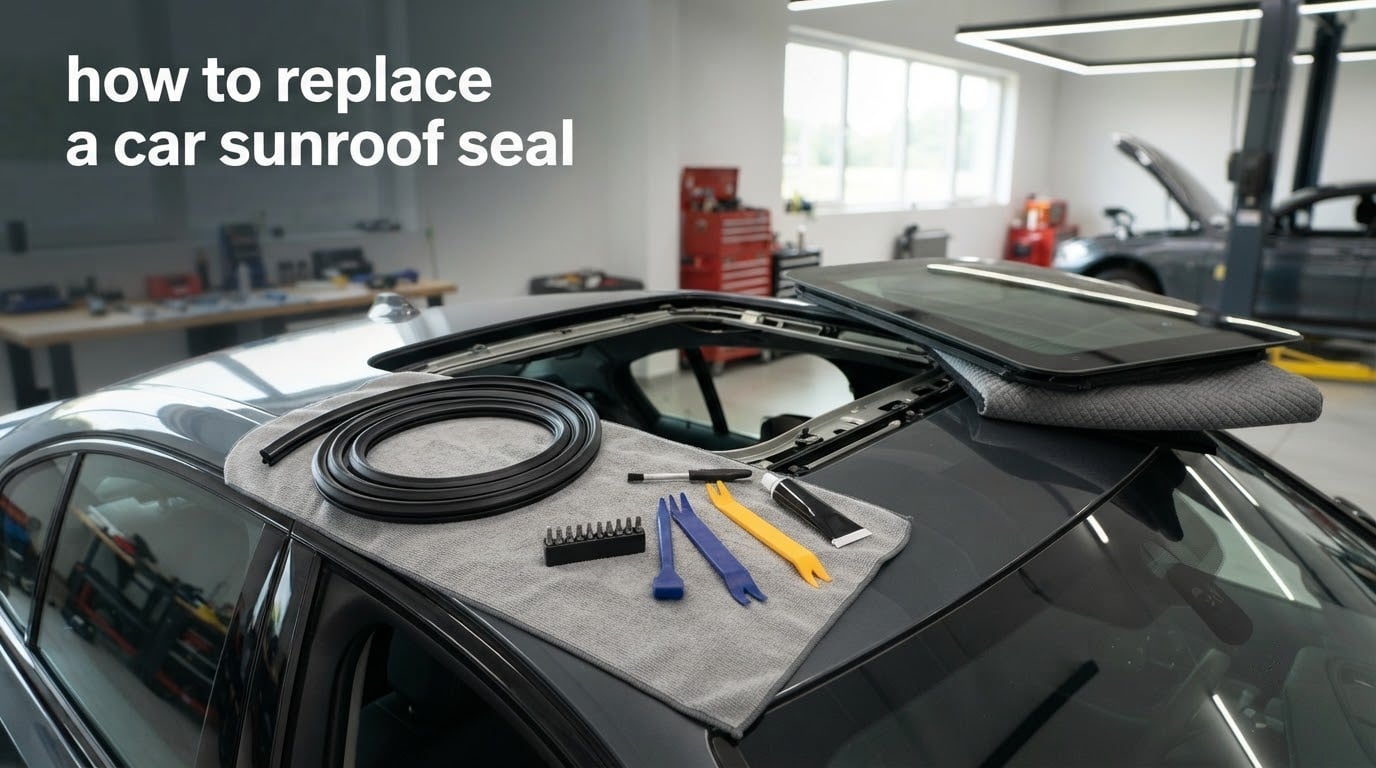
A failing sunroof seal is one of those repairs that dealerships love to overcharge for, and one that careful DIYers can absolutely handle at home. We have replaced seals on everything from vintage Porsche 944s to late-model BMW E60s, and the basic workflow is almost identical regardless of make.
This guide covers how to replace a car sunroof seal from start to finish. You will learn what tools you need, how to choose between push-fit and adhesive seals, and how to test the new install so it does not leak on the first rainstorm.
Table of Contents
- Signs Your Sunroof Seal Needs Replacement
- Tools and Materials You Will Need
- Push-Fit vs Adhesive Sunroof Seals
- Step 1: Prepare the Sunroof and Mark Alignment
- Step 2: Remove the Sunroof Glass Panel
- Step 3: Remove the Old Seal
- Step 4: Clean the Mounting Surface
- Step 5: Install the New Seal
- Step 6: Reinstall the Glass and Test for Leaks
- Sunroof Initialization Procedure (BMW and Some European Models)
- Clean the Sunroof Drain Tubes While You Are There
- Troubleshooting: Why the Sunroof Still Leaks After Replacement
- When to Call a Professional
- Sunroof Seal Maintenance Schedule
- Frequently Asked Questions
- Can you replace a sunroof seal yourself?
- How much does it cost to replace a seal on a sunroof?
- Does Safelite replace sunroof seals?
- What is the best sealant for a leaking sunroof?
- How long does it take to replace a sunroof seal?
- Why is my sunroof seal sitting proud?
- Do you need glue for sunroof seal replacement?
- How often should you replace sunroof seals?
- Final Thoughts
Signs Your Sunroof Seal Needs Replacement
A sunroof seal rarely fails without warning. The rubber compresses and shrinks as it ages, and the first signs are usually moisture and noise rather than a visible gap.
Common symptoms include water stains on the headliner near the front of the sunroof, a musty odor after rain, whistling or wind roar above 45 mph, and visible cracking or peeling along the weatherstrip edge. Reviewers on the IH8MUD Forum and r/Acura report that dripping onto the dashboard from the overhead console is often the first clue, especially after the car has been parked outside overnight.
Another giveaway is if you can see daylight between the glass and the rubber when the sunroof is closed. A healthy seal compresses evenly and shows no gap at all. If your seal feels hard, dry, or has lost its original rounded profile, replacement is the only real fix.
Tools and Materials You Will Need
Lay everything out before you start. Half the frustration of this job comes from hunting for a trim tool while a glass panel is balanced on your knee.
- Replacement sunroof seal (OEM part preferred; universal fits are available but less precise)
- Torx bit set, typically T20 and T25
- Plastic trim removal tools (a metal screwdriver will crack painted trim)
- Goo Gone or similar citrus adhesive remover
- Isopropyl alcohol (90 percent or higher) and clean microfiber cloths
- 3M Super Weatherstrip Adhesive or 3M Emblem and Trim Adhesive
- Black silicone sealant for the corner joint
- Silicone grease for the finished seal
- Masking tape and a fine-tip marker
- Compressed air or a wet/dry vacuum for drain tubes
You will also want a helper for the moment you lift the glass panel off. A sunroof glass panel weighs 15 to 20 pounds on most sedans, and dropping it onto a headliner is an expensive mistake.
Push-Fit vs Adhesive Sunroof Seals
The first decision you will face is whether your vehicle uses a push-fit seal or an adhesive-backed seal. Get this wrong and the new part will not sit correctly even if you install it perfectly.
Push-fit seals rely on a tight channel and a small lip that grips the sunroof aperture. They are common on European vehicles from the 1990s and early 2000s, including many Porsche, BMW, and Volvo models. The advantage is that they can be removed and refitted without reapplying glue, which makes future replacements easier.
Adhesive seals are bonded into the channel with weatherstrip adhesive. They are common on later-model Japanese and domestic vehicles, and they typically seal better against driving rain. The trade-off is that removal takes longer and you will need to clean the channel thoroughly before installing the replacement.
To find out which type your car uses, check the part description from your dealer or trusted parts supplier. The 5series.net community, for example, recommends the push-fit OEM seal for the BMW E60 because the aftermarket adhesive versions tend to compress unevenly over time.
Step 1: Prepare the Sunroof and Mark Alignment
Park on level ground and switch off the ignition. Open the sunroof to its vent position so you can access the front mounting bolts without straining the drive cables.
Place a strip of masking tape along the edge of the glass where it meets the roof opening. Use a fine-tip marker to draw a line across the tape onto both the glass and the body. This line is your alignment reference when you reinstall the glass, and it saves you from chasing a misaligned seal later.
Use a plastic trim tool to remove any interior trim panels that block access to the front glass bolts. On most vehicles this is a single overhead console panel held by plastic clips. Pull straight down, never at an angle, or the clips snap.
Step 2: Remove the Sunroof Glass Panel
Locate the Torx bolts at the front and rear of the glass panel. There are usually two bolts at the front and two at the rear, accessed through holes in the panel itself or behind small plastic covers.
Have your helper support the glass from outside as you remove the final bolts. Lift the panel straight up and set it on a soft blanket on the roof of the car. Do not lay it on concrete, and do not let the inner edge rest on the headliner.
If your vehicle has a sliding shade panel, leave it closed during this step. It gives you a flat working surface and prevents debris from falling onto the headliner.
Step 3: Remove the Old Seal
Start at one corner and work the old seal out of its channel by hand. Most push-fit seals will peel out with steady pulling, but older adhesive seals may need a plastic trim tool to break the bond.
Take a photo of how the old seal sat in the channel before you remove it completely. Some seals have a specific orientation, with the felt side facing the interior. Reversing this is a common mistake forum users on r/944 and Rennlist report, and it always leads to leaks.
Do not yank the seal if it resists. Work slowly along its length, freeing each section before moving on. Tearing the seal mid-removal can damage the channel lip and force you into a body shop visit.
Step 4: Clean the Mounting Surface
Once the old seal is out, inspect the channel closely. You will likely see old adhesive residue, especially on adhesive-bonded vehicles.
Apply Goo Gone to a microfiber cloth and work the residue off the channel. Let it sit for 30 seconds on stubborn spots before wiping. Follow up with isopropyl alcohol to remove the oily film the Goo Gone leaves behind. The channel must be completely clean and dry before the new adhesive can bond.
While the channel is exposed, take five minutes to clean the sunroof drain tubes. The drain tubes run from each corner of the sunroof tray down through the A-pillar and out behind the front wheel well. Clogged drains cause water to back up into the headliner even with a perfect seal. Blow compressed air through each corner opening, then finish with a wet/dry vacuum at the wheel-well exit.
Step 5: Install the New Seal
Dry-fit the new seal first. Lay it into the channel without adhesive and walk around the entire perimeter, checking that it sits flush and that no section is twisted or stretched. A twisted seal will compress unevenly and leak within months.
For adhesive seals, apply a thin bead of 3M Super Weatherstrip Adhesive into the channel using the brush applicator. Work in two-foot sections so the adhesive does not skin over before you seat the seal. Press the new seal into place starting at the center of the rear edge and working toward the front corners.
For push-fit seals, apply silicone grease lightly to the channel lip before pressing the new seal in. The grease helps the seal slide into place and prevents the rubber from sticking to itself. Press evenly along its length with your thumbs, never with a tool, or you risk cutting the rubber.
Do not stretch the seal to make it fit. A stretched seal will contract over time and pull away from the corners. If you need to compress it to make it reach, you have the wrong part.
Step 6: Reinstall the Glass and Test for Leaks
Lift the glass panel back into the opening with your helper, lining up the marks you made in Step 1. Start the front Torx bolts by hand to make sure the threads are not cross-threaded, then torque them evenly in a cross pattern. Do not fully tighten until all four bolts are seated, or the panel will bind.
Cycle the sunroof through full open and full close using the switch. Listen for any grinding or hesitation. On BMW and some European models, you will need to run the sunroof initialization procedure before the anti-trap function works correctly. Close the sunroof fully, then press and hold the tilt button for about 20 seconds until you hear a small click from the motor.
Test the seal with a garden hose before driving the car. Spray water along every edge of the closed sunroof for at least three minutes while a helper sits inside looking for drips. Pay extra attention to the rear corners, which are the most common leak points.
Sunroof Initialization Procedure (BMW and Some European Models)
After any work that disturbs the sunroof glass, BMW and a few other European manufacturers require you to reinitialize the sunroof motor so the anti-trap function knows the new seal thickness.
Close the sunroof completely. Press and hold the tilt-up button for 20 to 25 seconds. The motor will cycle through a brief learning routine and the sunroof will move slightly. Release the button when the motion stops. Test the sunroof by placing a rolled-up towel in the opening and closing it. If the anti-trap reverses correctly, the initialization worked.
Forum members on 5series.net note that skipping this step is one of the most common causes of post-installation complaints, because the motor keeps fighting the new seal thickness.
Clean the Sunroof Drain Tubes While You Are There
Even with a brand-new seal, a clogged drain tube will cause water to pool in the sunroof tray and find its way into the cabin. Replacing the seal is the perfect time to clean the drains.
Locate the four drain holes at the corners of the sunroof tray. Insert a stiff piece of weed trimmer line or a flexible plastic rod down each hole to break up any blockage. Follow up with compressed air to push debris out the other end.
Pour a small cup of water into each corner of the tray and confirm it exits cleanly at the wheel-well drains. If water backs up, work the channel again until it flows freely.
Troubleshooting: Why the Sunroof Still Leaks After Replacement
If your new seal leaks on the first rainstorm, the issue is almost always one of four things: a pinched or twisted section of seal, a clogged drain tube, an uneven seal at the corners, or a sunroof tray that is sitting out of level.
Press along the suspect edge with your thumb and feel for any section that is not flush. A twisted seal can be hard to spot visually but will compress differently under your finger. If you find one, lift that section and reseat it with fresh adhesive.
If the seal looks fine but water still drips onto the headliner, the drain tubes are almost certainly blocked. Re-clean them with compressed air and test with water as described above. Reviewers on the IH8MUD Forum report that more than half of post-replacement leaks come from neglected drain tubes rather than the seal itself.
On some vehicles, particularly the Porsche 944, owners on the Porsche Club GB forum note that a new seal can sit slightly proud of the roofline for the first six months. This is normal compression settling and rarely causes a leak once the seal relaxes into shape.
When to Call a Professional
Most standard sunroofs are within reach of a patient DIYer, but a few situations call for a shop.
If your vehicle has a panoramic glass roof, the seal is part of a bonded assembly that requires special tools and sealant to reassemble correctly. Same for any vehicle with a power sliding sunshade that runs through the seal channel. Dealer-only parts on some European models also make sourcing the right seal difficult without a parts department connection.
Safelite, despite handling many automotive glass jobs, generally does not service sunroof seals. Their technicians focus on windshield and side glass replacement. For sunroof seal work you will want either an independent auto glass shop with sunroof experience or a dealer service department.
Sunroof Seal Maintenance Schedule
A quality sunroof seal should last 8 to 10 years with basic care. The biggest enemies are UV exposure, dried-on grime, and ice in winter.
Every three months, wipe the seal down with a damp microfiber cloth and apply a light coat of silicone grease. The grease keeps the rubber flexible and prevents it from sticking to the glass, which is what causes tears when you open a sunroof that has been parked in the sun.
Avoid washing the seal with harsh degreasers or petroleum-based cleaners. They dry out the rubber and shorten its life. If you park outside, consider a windshield sunshade that extends back over the sunroof panel, which reduces UV exposure on the rubber.
Frequently Asked Questions
Can you replace a sunroof seal yourself?
Yes. Most standard sunroofs use a push-fit or adhesive seal that can be replaced with basic hand tools in two to three hours. Panoramic glass roofs and bonded sunroof assemblies are best left to a shop.
How much does it cost to replace a seal on a sunroof?
A replacement sunroof seal typically costs between thirty and one hundred fifty dollars depending on the vehicle. Doing the work yourself saves the labor charge a dealer would add, which is where most of the expense comes from on a dealership quote.
Does Safelite replace sunroof seals?
Generally no. Safelite focuses on windshield, side, and rear glass replacement and does not usually service sunroof weatherstrips. For sunroof seal work, contact an independent auto glass shop or your dealer service department.
What is the best sealant for a leaking sunroof?
3M Super Weatherstrip Adhesive is the most widely recommended adhesive for adhesive-bonded sunroof seals. For the corner joints, a bead of black silicone sealant adds a secondary water barrier without reacting with the rubber.
How long does it take to replace a sunroof seal?
Plan on two to three hours for a first-time replacement on a standard sunroof. The seal itself takes about thirty minutes to install, but the bulk of the time is spent removing trim, cleaning the channel, and reinstalling the glass panel carefully.
Why is my sunroof seal sitting proud?
A new seal sitting slightly above the roofline is normal for the first few weeks or even months as the rubber compresses under use. If the seal is sitting visibly unevenly, check that it was not twisted or stretched during installation.
Do you need glue for sunroof seal replacement?
Only if your vehicle uses an adhesive-bonded seal. Many European vehicles use a push-fit design that relies on a tight channel and compression alone. Check the part description from your dealer to confirm which type you have before buying adhesive.
How often should you replace sunroof seals?
Most sunroof seals last between eight and ten years with basic maintenance. Replace sooner if you see visible cracking, persistent leaks, or if the rubber has hardened and lost its original rounded profile.
Final Thoughts
Knowing how to replace a car sunroof seal turns a frustrating leak into a single Saturday afternoon project. The keys are taking time on the cleaning step, marking your alignment before disassembly, and giving the new seal a real water test before driving the car.
For OEM and aftermarket sunroof weatherstripping, our team at Segal Motor Trimmings stocks fitments for most domestic and import vehicles. Reach out before you start the job and we can confirm the right part number for your specific model.