
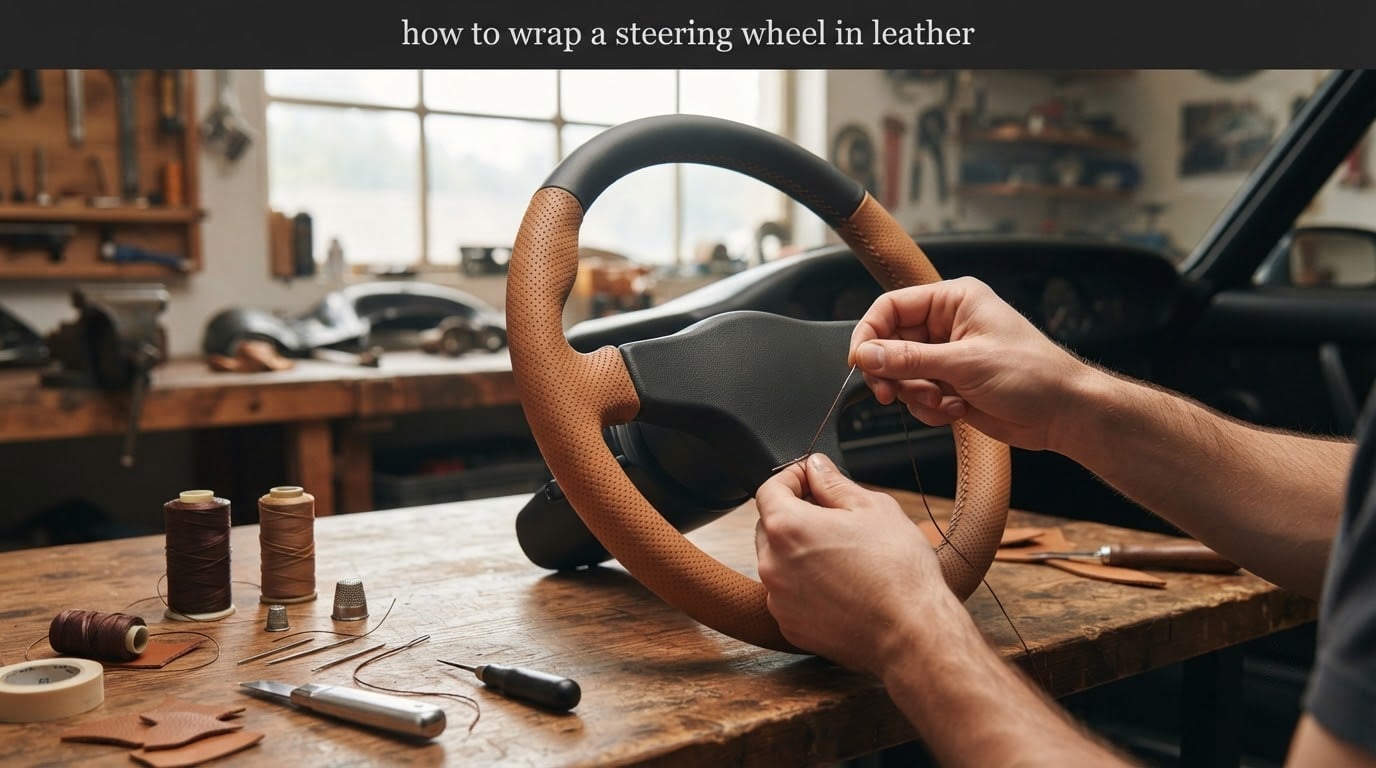
Wrapping a steering wheel in leather is a DIY process where thin leather or synthetic material is cut, fitted, and stitched around a car’s steering wheel to restore worn surfaces or customize the interior look. Our team has guided hundreds of car owners through this project, and the same rules keep coming up: measure twice, prep the wheel properly, and choose a leather weight you can actually pull tight without buckling.
If you want a fresh, grippy, OEM-looking wheel without paying a trim shop several hundred dollars, this guide walks you through every stage. We cover the tools, the leather options, the template stage, the actual wrap, the stitching choices, and the mistakes that waste weekends. Everything here is grounded in real workshop projects and real forum threads from r/upholstery and r/Leathercraft.
Table of Contents
- Why Wrap a Steering Wheel in Leather Instead of Replacing It
- Tools and Materials You Will Need
- Choosing the Right Leather for Your Wrap
- How to Prepare the Steering Wheel Before Wrapping
- Measuring and Making Your Steering Wheel Template
- Cutting and Prepping the Leather Panels
- How to Wrap a Steering Wheel in Leather: Step-by-Step
- Stitching Techniques: Cross-Stitch and Diamond Stitch
- Finishing the Wrap and Quality Check
- DIY vs Professional Wrap: Cost and Time Comparison
- Common Mistakes and How to Avoid Them
- Frequently Asked Questions
- Final Thoughts on Wrapping Your Steering Wheel in Leather
Why Wrap a Steering Wheel in Leather Instead of Replacing It
A factory replacement wheel often runs several hundred dollars before installation, and that price does not include programming the airbag clockspring or refinishing the trim. Wrapping the existing wheel keeps the original airbag, the original controls, and the original feel, while refreshing the part your hands actually touch.
Reviewers who finished their own wraps consistently report three wins. First, grip improves, especially on long drives where a hard plastic wheel makes palms sweaty. Second, the interior looks noticeably newer without the cost of a full re-trim. Third, the work is reversible, so if you sell the car you can strip the wrap and return the wheel to stock.
The honest trade-off is time. A first-time DIYer usually spends eight to fourteen hours spread across a weekend, and that is before any curing or finishing time. We think that is a fair exchange when the alternative is a trim shop bill, but it is worth knowing what you are signing up for before you cut your first panel.
Tools and Materials You Will Need
You can do this job with a fairly modest kit, but skipping tools tends to create the sagging and misalignment issues you see in forum complaint threads. Here is the full list our team puts together before starting.
- Leather panels: 2 to 3 square feet of automotive-grade leather in your chosen weight (2 to 3 oz is the sweet spot for steering wheels).
- Contact adhesive or double-sided tape: 3M Super 77 or Polyken 108-FR tape, the latter being the go-to for most upholstery shops because it does not bleed into leather.
- Waxed polyester thread: Size 92 or 138, in a color that matches or contrasts your leather.
- Curved needles: Glover’s needles in sizes 4 and 6 handle the tight radius around the rim.
- Leather hole punch: A diamond chisel or rotary hole punch set to your stitch spacing (commonly 4 mm or 5 mm).
- Stitching awl: For opening consistent holes and easing the needle through thicker leather.
- Sharp scissors and a leather knife: Scissors for curves, knife for straight cuts.
- Edge beveler and burnisher: Optional, but they create the rounded edges that separate a DIY wrap from a professional one.
- Masking tape and cling wrap: For making your template directly on the wheel.
- Cleaning supplies: Isopropyl alcohol, microfiber cloths, and a soft brush.
- Marker and ruler: A silver or white pen shows up on dark leather for marking stitch lines.
If you are on a tight budget, skip the edge beveler and burnisher, and substitute a heavy-duty stapler for the inner spokes if your wheel design allows it. The rest of the kit is hard to fake.
Choosing the Right Leather for Your Wrap
The leather you choose drives every other decision in the project, from stitch pattern to hole spacing. There are three main categories our team recommends considering, each with very different behavior in your hands.
Full-grain or top-grain genuine leather is the most durable option and ages with a patina that synthetic covers never match. It is also the least forgiving to work with because thicker cuts resist stretching around the rim. Most successful DIY wraps use 2 to 3 oz chrome-tanned leather, which is supple enough to pull tight without cracking.
Synthetic leather (PU or vinyl) is cheaper, easier to cut, and behaves predictably for first-time wrappers. The downside is heat. In a closed car on a summer day, vinyl can become tacky and even transfer dye onto your palms. If you live in a hot climate, plan for perforated synthetic or genuine instead.
Alcantara is the soft, suede-like material found in many performance cars. It offers unbeatable grip in dry conditions, but it stains easily and is not a beginner-friendly material to stitch. Our team only recommends Alcantara to wrappers who have already finished at least one leather project.
For most people wrapping their own wheel, perforated genuine leather in the 2 to 3 oz range hits the best balance of grip, durability, and stitchability. The perforations also make hand sewing easier because the needle passes through with less force.
How to Prepare the Steering Wheel Before Wrapping
Preparation is where most first attempts go wrong. The wheel needs to be surgically clean, lightly scuffed where the wrap will sit, and free of any oils that would sabotage your adhesive.
Start by disconnecting the battery and waiting ten minutes before touching the airbag clockspring. On most modern cars this is the yellow connector behind the airbag module. Refer to your service manual for the exact sequence, and never reconnect power until the airbag is fully seated. This step protects both you and the system from an accidental deployment.
Decide whether you are wrapping the wheel in place or removing it. Removing the wheel gives you far better access to the back side and the spokes, and most forum members who finished clean projects removed the wheel. You will need a steering wheel puller and a torque wrench to reinstall it to the correct spec, usually around 30 to 40 ft-lbs.
Once the wheel is out or accessible, scrub every square inch of the rim with isopropyl alcohol. Pay special attention to the thumb rest zones at ten and two o’clock, where body oils build up. Let it dry completely before you start taping.
Measuring and Making Your Steering Wheel Template
Good templates are the single biggest difference between a wrap that looks like it came from the factory and one that looks homemade. There are two routes, and both work.
The first route is paper templates. Measure the diameter of your wheel (most passenger wheels are between 14 and 15 inches), then cut long rectangular paper panels and tape them to the rim. Mark the inside edge, the outside edge, and the seam lines with a pen. Pull the paper off and transfer the shape onto cardstock for a reusable pattern.
The second route, used heavily on the evolutionm.net DIY thread, is cling wrap and masking tape. Wrap the wheel in cling film first to keep the adhesive off the leather, then apply masking tape over the top. Draw your seam lines directly on the tape, peel the panel off, and flatten it on your cutting mat. This method captures every curve of your specific wheel, including the transition into the spokes.
For a standard three-spoke wheel you will need four panels: top, bottom, and two side sections. For flat-bottom or D-shaped wheels you will need an additional fifth panel for the flat section. Mark each panel with a small identifier (T for top, B for bottom, L and R for the sides) before cutting, so you do not lose orientation.
Cutting and Prepping the Leather Panels
Lay your panels face down on the back side of the leather and trace them with a silver pen. Cut with a sharp leather knife for long edges and scissors for curves, keeping the blade at a low angle so you do not compress the leather.
Once each panel is cut, mark your stitch line. The standard rule is 3 to 4 mm from the edge for a steering wheel, which keeps the seam visible but not bulky. Use a ruler and a scratch awl to scribe a clean line all the way around each panel.
Punch your stitching holes along the line using a diamond chisel or a pricking iron set to your chosen spacing. A 4 mm spacing reads as a finer, more OEM pattern, while 5 mm is faster to sew and looks bolder. Whatever you choose, keep the spacing consistent across every panel, or the finished wrap will look uneven where the seams meet.
If you are using perforated leather, you can stitch through the existing perforations, which saves the punch step but limits you to one stitch spacing. For solid leather, punching your own holes gives you more control over the final look.
How to Wrap a Steering Wheel in Leather: Step-by-Step
This is the core of the project. Work slowly, check your tension every few inches, and do not be afraid to back out and redo a section. Pulling the leather tight is easier now than after you have stitched ten inches of it.
- Dry-fit the panels first. Tape each panel to the wheel with masking tape and check the alignment of your seams. Adjust your template before you touch adhesive.
- Apply adhesive to the back of one panel. Spray Polyken 108-FR tape or brush contact adhesive evenly on both the leather back and the wheel surface. Wait the recommended tack time, usually two to five minutes, until the adhesive feels dry but still grabs.
- Position the panel and press it into place. Start at the center of the panel and work outward to the edges, smoothing with your palm to avoid trapped air bubbles.
- Stretch the leather around the rim. Pull the wrap evenly so it hugs the contour of the wheel. If you see ripples, lift the section and reapply tension. The wrap should be drum-tight at this point.
- Stitch the seam. Use a saddle stitch with two needles and waxed thread. Pull each stitch snug but not so tight that it puckers the leather. The seam should sit flat against the wheel.
- Repeat for each panel. Work around the wheel in the order you dry-fitted, keeping your seam lines aligned with the panel edges.
- Finish the spoke transitions. The most difficult section is where the rim leather meets the spoke covers. Cut small relief notches if needed and use a bit more adhesive in this area.
- Reinforce the back side. Most wraps include a back panel in matching leather or Alcantara. Repeat the adhesive and stitch process for this panel before moving to finishing.
Step 7 is where most first-timers struggle. The transition into the spokes is a sharp curve, and standard panels do not naturally follow it. Small relief cuts on the back of the leather, hidden by the seam allowance, let the material lay flat without bunching.
Stitching Techniques: Cross-Stitch and Diamond Stitch
Your stitch pattern changes the look of the finished wheel more than any other choice. There are two patterns our team recommends for DIY wrappers, with honest difficulty ratings for each.
Cross-stitch is the simpler pattern and the one most OEM wheels use. You stitch two parallel lines along each seam, with each stitch crossing over the previous one in an X shape. It reads as classic and understated. Difficulty is moderate: count on six to eight hours of stitching for a full wheel.
Diamond stitch is the pattern most often shown in custom builds and forum project photos. The stitches form repeating diamonds between two parallel seam lines. It looks striking, but every diamond has to line up with the next, which is challenging for hand stitching. Difficulty is high, and most first attempts look uneven until the second or third panel.
For your first wrap, choose cross-stitch. Once you have completed one wheel, you will know whether you want to attempt diamond stitch on the next project. Forcing a diamond pattern onto a wrap you are still learning almost always shows up as misaligned diamonds at the spoke transitions.
Finishing the Wrap and Quality Check
Once the stitching is done, the wrap needs a few finishing touches to look complete. Trim any excess seam allowance so it does not show through on thin leather. Burnish the edges with beeswax or edge finish to seal the fibers. Check every stitch by running your finger along the seam and confirming nothing is loose.
Reinstall the wheel if you removed it, torque the center nut to spec, and reconnect the battery. Wait another ten minutes before turning the ignition on, to let the airbag system reinitialize.
Sit in the car and grip the wheel at ten and two. The wrap should feel snug with no movement when you twist it. Check for any lifting at the spoke transitions, which is the most common place for early failure. If you spot lifting, lift the edge carefully, apply more adhesive, and press it back down with a roller or the back of a spoon.
DIY vs Professional Wrap: Cost and Time Comparison
Honest numbers help here. A professional leather wrap from a trim shop typically runs in the $129 to $199 range for a standard wheel, plus $50 to $80 if you want the airbag horn pad recovered to match. A DIY wrap costs a fraction of that in materials, but your time is the real investment.
| Option | Typical Cost Range | Time Required | Skill Level |
|---|---|---|---|
| DIY with full materials kit | Modest material spend | 8 to 14 hours over a weekend | Intermediate |
| Pre-cut DIY kit | Small material spend | 4 to 6 hours | Beginner |
| Professional trim shop | Premium service spend | 1 to 3 days turnaround | Expert |
| Factory replacement wheel | Premium parts spend | 2 to 4 hours installation | Intermediate |
The pre-cut kit option is the lowest-effort DIY route. Most major leather wrap kits include four pre-shaped panels, thread, needles, and adhesive. The trade-off is fit: pre-cut kits are universal, so the seams rarely line up perfectly with your wheel’s spoke design. If the wheel is your daily driver and you care about fit, full custom panels are worth the extra cutting time.
Choose a professional wrap when you want a guaranteed result, when the wheel is a rare or vintage piece, or when your time is the constraint. Choose DIY when you want to learn a new skill, when the budget is the constraint, or when you want a wrap that is uniquely yours.
Common Mistakes and How to Avoid Them
Forum threads on r/upholstery and r/Leathercraft surface the same handful of mistakes on every wrap project. Knowing them upfront saves real time.
- Skipping the dry fit. Taping panels to the wheel without adhesive catches alignment problems before they become permanent.
- Pulling the leather unevenly. Tension should come from both hands at once, working outward from the center of each panel.
- Using the wrong adhesive. Standard spray adhesive can bleed through leather and leave dark spots. Polyken 108-FR tape is the safer choice.
- Stitching before the adhesive has cured. Pulling on the seam while the glue is still wet causes the leather to slide and bunch.
- Forgetting to disconnect the battery. Airbag deployment during a steering wheel project is rare but serious. Always disconnect power and wait.
- Choosing diamond stitch too early. Master cross-stitch on your first wrap, then move to advanced patterns.
Reviewers report that the single biggest time-waster is redoing a panel after the adhesive has cured. Plan to redo at least one panel on your first wrap, and budget the time for it.
Frequently Asked Questions
How do I wrap my steering wheel in leather?
Start by removing the wheel (with the battery disconnected), clean it thoroughly with isopropyl alcohol, make a paper or tape template, cut leather panels from 2 to 3 oz chrome-tanned material, dry-fit the panels, then attach them with contact adhesive and stitch them in place using a cross-stitch or diamond pattern.
How much does it cost to re-wrap a leather steering wheel?
A DIY wrap costs a small amount in leather, thread, adhesive, and tools, while a professional trim shop typically charges a premium service rate for the same wheel. Pre-cut DIY kits cost even less but often have universal fit compromises.
How to sew a leather wrap on a steering wheel?
Use a saddle stitch with two curved needles and waxed polyester thread. Punch consistent holes with a diamond chisel, then pass the needles through each hole in alternating directions, pulling each stitch snug but not tight enough to pucker the leather.
What type of leather is best for a steering wheel wrap?
Chrome-tanned genuine leather in the 2 to 3 oz weight range is the most popular choice for steering wheel wraps. It is supple enough to stretch around the rim, durable enough for daily use, and accepts perforations cleanly.
Can I wrap a steering wheel without removing it?
You can wrap the rim without removing the wheel, but the spoke covers and back panel are far easier to fit with the wheel off. Most DIYers who finish clean projects remove the wheel for full access and reinstall it afterward with a torque wrench.
How long does a leather steering wheel wrap last?
A well-executed leather wrap using quality materials typically lasts several years of daily use. Direct sun exposure, sweat, and skipped maintenance shorten the lifespan, while conditioned leather in a garage-kept car can last even longer.
Final Thoughts on Wrapping Your Steering Wheel in Leather
Learning how to wrap a steering wheel in leather is one of the most rewarding DIY projects a car owner can take on. You save money compared to a trim shop, you get a wheel that fits your grip and your style, and you walk away with a skill that transfers to door panels, shift boots, and other interior trim projects.
If you are starting your first wrap, plan a full weekend, choose 2 to 3 oz chrome-tanned leather, and start with a cross-stitch pattern. Disconnect the battery, make a careful template, and do not rush the spoke transitions. The wrap you finish will outlast the time you put into it, and every time you grab the wheel afterward you will feel the difference.
For more on stitching patterns, leather selection, or specific vehicle applications, our team is happy to help you think through your project before you cut your first panel.