
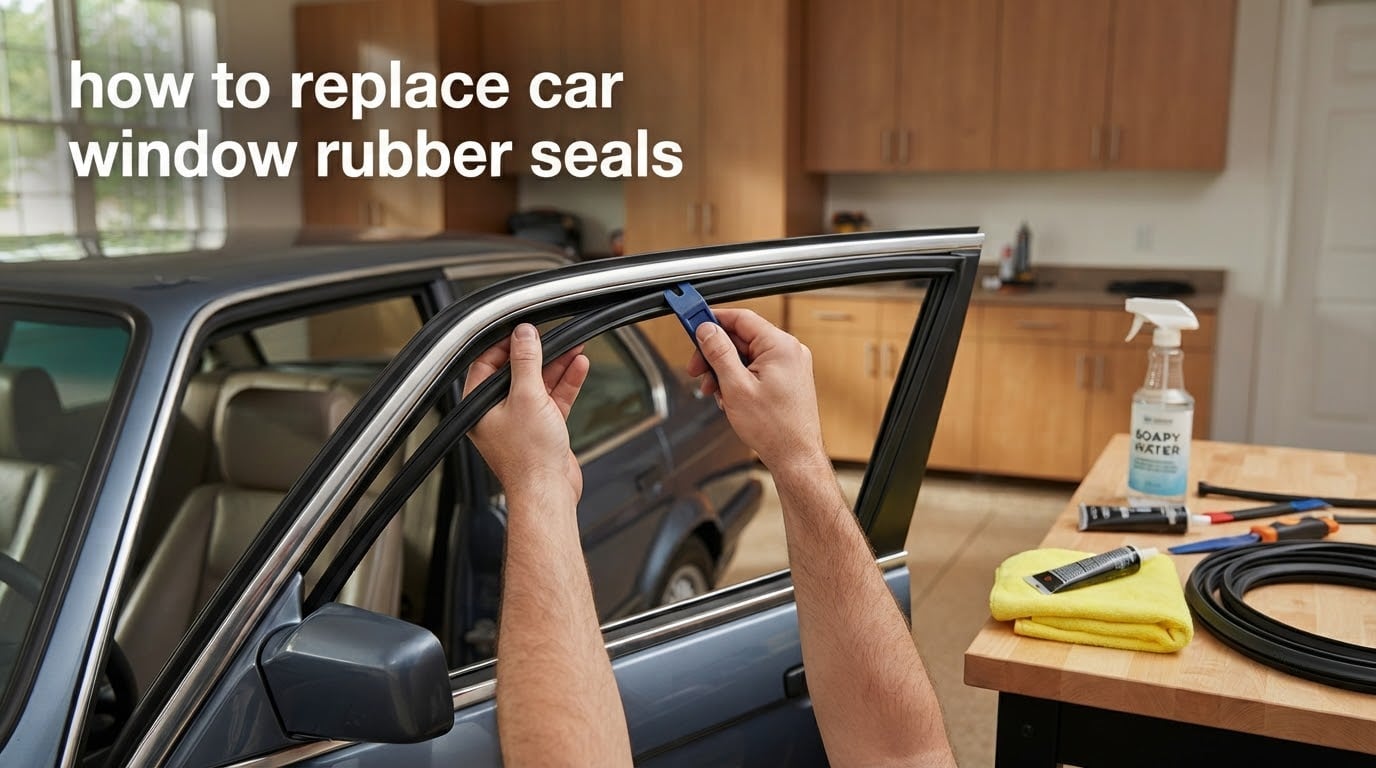
Learning how to replace car window rubber seals yourself can save you a trip to the dealer and a surprisingly large bill. I have spent the last few weekends working through weatherstripping jobs on a BMW E46, a Honda Accord, and an older Chevrolet truck, and the process is far more approachable than most guides make it sound.
This guide walks you through the exact process I use: identifying which seal you actually need, removing the old one without breaking clips or scratching glass, prepping the channel, installing the new seal using either the rope method or a direct clip-on approach, and testing for leaks. I will also cover the cost breakdown, the tools you really need, and the mistakes that DIYers run into most often.
If you have noticed water pooling on the door card after a rainstorm, wind roar at highway speed, or visible cracking along the rubber trim, you are dealing with a failed window seal. Let us get it sorted.
Table of Contents
- What Are Window Rubber Seals and When to Replace Them
- Tools and Materials Needed (Complete Checklist)
- Step 1: Identify Your Seal Type and Access Method
- Step 2: Remove Door Panel (When Required)
- Step 3: Remove the Old Seal and Weatherstripping
- Step 4: Clean and Prepare the Channel and Frame
- Step 5: Install the New Seal (Multiple Methods Covered)
- Step 6: Test for Leaks and Proper Operation
- Troubleshooting Common Installation Mistakes
- Cost Breakdown: DIY vs Professional Replacement
- Frequently Asked Questions
- Can you replace the rubber seal around car windows?
- How much does it cost to replace a car window rubber seal?
- How do I replace the rubber weatherstripping on my car windows?
- Can you replace weather stripping on a car yourself?
- What is the best glue to use for weather stripping on cars?
- How long does it take to replace window weatherstripping?
- Conclusion: Replacing Car Window Rubber Seals the Right Way
What Are Window Rubber Seals and When to Replace Them
Car window rubber seals are the flexible strips of rubber, EPDM, or silicone that create a watertight, airtight barrier between your window glass and the body of the car. They also support the glass, dampen vibration, and keep dust and exhaust out of the cabin.
You need to replace them when any of the following show up: water leaking onto the door card or floor, new wind noise that tracks with speed, visible cracking, hardening, or shrinking of the rubber, the window rattling in the frame, or a foggy interior because outside air keeps sneaking past the seal.
There are four main types you will run into:
- Belt molding (outer and inner): The visible trim along the top and sides of the door window, where it meets the painted body. Outer belt molding sits outside; inner belt molding sits inside the door frame.
- Glass run channel: The felt-lined channel inside the door that the glass slides up and down in. A worn channel causes chattering, slow operation, and water dripping inside the door.
- Door weatherstrip: The big rubber that runs along the door shell and seals the door against the body when it is shut.
- Quarter window, vent window, and rear window seals: Fixed-glass seals (often glued or rope-installed) on coupes, two-doors, classic cars, and SUVs with rear quarter glass.
The most common replacement is belt molding plus a section of glass run channel. Quarter window and rear window seals are less frequent but follow a similar process with the rope method.
Tools and Materials Needed (Complete Checklist)
Before you touch anything, gather these. Having everything on hand prevents the classic mistake of having a seal half-installed with no way to seat it.
- Replacement seal matched to your exact vehicle (year, make, model, body style, door position)
- Trim removal tools (plastic pry tools, no-scratch variety)
- Small flat-blade screwdriver or pick for clip release
- Torx, Phillips, and security bit set (depends on your door panel)
- 3M weatherstrip adhesive (black or yellow tube) for glued applications
- Dawn dish soap and water in a spray bottle for soapy-water lubrication
- Clean microfiber towels and a soft brush
- Isopropyl alcohol and a scuff pad for old-adhesive removal
- 1/4 inch nylon rope or paracord (only for rope method on fixed glass)
- Heat gun or hair dryer to soften new rubber before installation
- Small flashlight and a mirror for inspecting the channel
- Painter’s tape to protect paint during prying
- Replacement retainer clips (always buy extras – they break)
- Glass cleaner and a fresh razor blade (single edge, holder)
- A helper if you are doing the rope method on a quarter or rear window
Optional but very useful: rubber conditioner or silicone spray to dress the new seal after installation, and a roll of paper shop towels for the inevitable soapy-water mess.
Step 1: Identify Your Seal Type and Access Method
Most failed seals are diagnosed by symptom and location. Look at where the problem actually is before ordering parts.
If water drips onto your shoulder or the headliner after a rainstorm and the car is a sedan or coupe with frameless windows, the outer belt molding is the most common culprit. If you can see daylight or feel air rushing past the inside edge of the door window, suspect the inner belt molding.
If the window chatters as it goes up and down, or you see shredded black felt on the door card, the glass run channel felt has failed. If water pools inside the door and soaks the speaker or window motor, you have a failed door weatherstrip plus a likely glass run channel issue.
For classic cars and fixed quarter or rear windows, the symptoms are obvious: water inside the cabin, fogging on the rear glass, or visible cracking where the rubber meets the body.
Once you know which seal you need, decide on the access method. Modern clip-on belt molding on most post-2000 vehicles does not require door panel removal – you can pull the molding from outside with trim tools. Older push-in seals, glued seals, and any work involving the glass run channel usually require removing the door panel.
Quick decision matrix:
- Outer belt molding on a modern car (1995 and newer): no door panel removal needed
- Inner belt molding, glass run channel, or door weatherstrip: door panel removal required
- Quarter window or rear window: usually rope method without door panel removal, but with glass removal
- Windshield gasket: rope method with a helper, plus adhesive
Step 2: Remove Door Panel (When Required)
Door panel removal is the part most DIYers dread, but it is straightforward if you go slow and label everything. Hidden clips and electrical connectors are the two things that cause trouble.
First, disconnect the negative battery terminal if your car has power windows. You do not want the window moving while your hand is inside the door.
Locate every fastener on your door panel. Most use a combination of plastic push-clips along the perimeter, screws behind the door handle, screws behind the interior pull handle, and one or two screws inside the armrest storage compartment. Check your model’s service manual or a model-specific forum thread – the locations vary.
Use a plastic trim tool to pop the panel loose starting from the bottom. Pry outward gently; if you feel strong resistance, stop and look for a missed screw. Pulling hard on a panel that still has a fastener attached snaps the clip and cracks the plastic.
Lift the panel straight up off the window ledge once all fasteners are out. Behind the panel you will see a foam moisture barrier glued to the door shell. Cut through the perimeter of this barrier carefully with a razor – you will need to re-seal it later with new butyl tape or 3M seam tape.
Disconnect the electrical connectors for the window switch, door lock, and mirror. Press the release tab and pull. Do not yank by the wires.
Set the panel somewhere safe and lay out every screw on a labeled tray or take photos as you go. Reassembly is much faster with a reference.
If you are doing this on a vintage car or classic, the door panel may be held by a set of small Phillips screws around the perimeter with no hidden clips. Even simpler – but do not assume. Always check for the moisture barrier before pulling anything.
Step 3: Remove the Old Seal and Weatherstripping
With the door open (or panel removed), start at one end of the old seal and work your way along. Most modern belt molding pulls straight off with firm, even pressure. Grab near a clip with your fingers or trim pliers wrapped in painter’s tape and pull along the axis of the seal – never at a sharp angle.
If the seal does not want to come, the clips are likely stuck or the rubber has bonded to the paint over decades. Apply gentle heat from a hair dryer to soften the rubber and try again. Do not use a heat gun on high – you will scorch the paint and the rubber.
For glass run channels, the process is different. You usually need to remove the door glass first. Mark the glass position with painter’s tape before loosening the regulator bolts, then lower the glass into the door and slide it forward and out through the access hole. Once the glass is out, the channel pulls free from the door frame.
For quarter and rear window seals, remove the interior trim panel first, then disconnect any defroster lines and remove the garnish moldings. The glass and seal are usually removed together as a unit. Lay the whole assembly on a padded workbench, then peel the old rubber off the flange.
Tips from my own installs:
- Save one unbroken retainer clip as a pattern when you go to order replacements – aftermarket clips look identical but the dimensions vary.
- If the rubber tears during removal, do not pull harder. Cut the torn section with a razor and remove the rest in pieces.
- For very old seals glued with contact cement, warm the rubber with a hair dryer and slide a wooden wedge behind it. Wood is less likely to scratch paint than metal.
Place every part you remove in labeled bins or bags. You will be reassembling in reverse order, and one missing bolt can stall the whole job.
Step 4: Clean and Prepare the Channel and Frame
A new seal will not seat properly if the channel is dirty, oily, or has old adhesive on it. Spend the time here – it is the difference between a leak-free install and a callback to yourself.
Wipe the entire channel with isopropyl alcohol and a clean microfiber towel. For stubborn adhesive residue, use a plastic scraper (a plastic razor works great) or a soft scuff pad. Avoid metal tools that can gouge the channel.
For quarter and rear window flanges, scrape all old glazing compound and adhesive back to bare metal. Then wipe with alcohol and let dry completely. Any moisture trapped under the new seal will condense and cause fogging.
Inspect the channel for corrosion. A little surface rust is normal; deep pitting means the channel needs treatment or replacement. Treat light rust with a rust converter and a coat of primer before installing the new seal.
Check the retainer clip locations. If any clips broke during removal, install the replacements now – it is much easier than doing it after the new seal is in place.
Lay the new seal next to the old one and compare length and profile. Many aftermarket seals ship slightly longer than OEM. That is intentional – the extra length lets you trim to fit on installation. Do not pre-trim.
Step 5: Install the New Seal (Multiple Methods Covered)
There are three reliable ways to install a new car window rubber seal. Pick the one that matches your application.
Method 1: Direct clip-on installation (most modern belt molding)
Start at one end of the run – usually the bottom-rear corner of the door window. Line up the first clip with the receiving slot in the door frame and press it in by hand. Apply firm, even pressure along the run, pressing each clip into place as you go.
If the seal feels stiff, lay it in the sun for ten minutes or warm it with a hair dryer. Warm rubber seats much more easily than cold rubber. Do not over-stretch the seal as you go – stretching causes the corners to gap later.
When you reach the corners, work slowly and use a trim tool to tuck the rubber into the corner without cutting or pinching. If a corner fights you, remove the last six inches and reseat – a partial install creates wrinkles you cannot fix later.
Method 2: Adhesive installation (glued-on seals, especially classic cars)
Apply a thin bead of 3M weatherstrip adhesive to the clean, dry flange. Lay the seal in place and press along the entire run. For quarter and rear window seals, the rope method (below) is usually combined with adhesive.
Use the smallest bead that still gives full coverage. Excess adhesive squeezes out and makes a mess. Mask both sides of the flange with painter’s tape before applying to keep the bead clean.
Method 3: Rope method (fixed quarter, rear, and windshield glass)
Lay a 1/4 inch nylon rope or paracord in the groove of the new seal all the way around the perimeter. Leave 12 to 18 inches of rope hanging out at each end.
Apply a thin bead of adhesive to the flange and set the seal and glass together into the opening. With your helper outside pressing the glass and seal firmly against the body, you pull the rope from inside the car. The rope pulls the inner lip of the rubber over the body flange, seating the seal.
Work from both ends toward the middle so the seal seats evenly. Go slowly. If you pull too fast, the seal can wrinkle and you will have to start over.
Once the rope is fully out, walk around the car and press the outer lip of the seal against the body. Then leave the car alone for 24 hours so the adhesive can cure before you test with water.
Step 6: Test for Leaks and Proper Operation
Do not reinstall the door panel or interior trim until you have tested the new seal. Water leaks are far easier to fix with the seal exposed.
Park the car so the door window is in direct sunlight. Spray the entire perimeter of the new seal with a garden hose on the gentle setting. Do not use a pressure washer – the force can blow past a properly installed seal and give you a false negative.
From inside the car, have a helper watch for water intrusion along the seal. Check the corners first – they are the most common leak point. Run the hose for at least five minutes per door to be sure.
If you see any water at all, dry the area and press the seal more firmly into the channel. Re-test. If the leak persists at a corner, lift the rubber slightly with a trim tool, apply a small additional bead of adhesive under it, and press back down.
Next, test the window operation. Run the glass up and down several times slowly. The window should move smoothly with no catching, chattering, or unusual resistance. If you hear a scrape, the channel may not be seated properly or the glass may have shifted out of alignment.
Finally, take the car on a 20-minute highway drive and listen for wind noise. New seals often run quieter than you expect – if you still hear roar, check that the door weatherstrip (the larger seal around the door shell) is also in good shape. Many people replace window seals and then realize the door seal is the actual source of noise.
Troubleshooting Common Installation Mistakes
Most failed seal jobs come from a small set of predictable mistakes. Here are the ones I see most often, and how to fix them.
Water leak at the corners: Almost always a seating issue. The seal is not fully tucked into the corner. Re-lift the corner with a trim tool, warm the rubber with a hair dryer, and press it firmly into the corner. A small dab of adhesive under the corner adds insurance.
Window chattering or slow operation after install: The glass run channel is misaligned or the felt has bunched. Realign the channel so the glass sits centered, and trim any felt that is hanging into the glass path.
Wind noise at highway speed: The seal is not compressed evenly, or the door weatherstrip is also failed. Inspect the seal for gaps by holding a piece of paper against the seal while the door is shut – if you can pull the paper out easily, that spot needs more compression.
Seal came loose from the flange after a few days: Either the surface was not clean enough, or you did not let the adhesive cure. Remove the seal, clean the flange with alcohol, and reinstall with a fresh bead of 3M adhesive. Wait a full 24 hours before testing.
Retainer clips keep snapping during reassembly: You are forcing the seal instead of seating it. Warm the rubber with a hair dryer, then press the clips in by hand using your thumb. If a clip still snaps, replace it – a missing clip means the seal will pull away within a few months.
Glass scratched during install: A piece of debris got trapped under the seal. Remove the seal, blow out the channel with compressed air, wipe the glass with a clean microfiber towel, and reinstall.
Cost Breakdown: DIY vs Professional Replacement
The cost of replacing car window rubber seals depends heavily on the vehicle, the seal type, and whether you go OEM or aftermarket. Here is what a realistic DIY install looks like compared to a shop job.
For a typical sedan outer belt molding, aftermarket seals run from low-cost generic to mid-range brand-specific kits. A single outer belt molding from an auto parts store or online retailer is widely available. A full set of four (front and rear, both sides) is the smarter buy if you plan to do all the windows.
Glass run channels and full door weatherstrips are more involved because they often require removing the glass. Parts costs scale up here, especially for OEM channels on European models.
Quarter and rear window seals for classic cars are the priciest. A single OEM seal can run several hundred dollars from a dealer, with labor adding more on top. Many classic owners use aftermarket reproductions at a fraction of the price.
DIY total cost is roughly the parts cost plus basic tools you likely already own. If you have to buy trim tools, adhesive, and a tube of sealant, add a small amount for consumables.
Professional installation varies wildly by region and shop. A simple belt molding swap at an independent shop is usually the cheapest route. Glass run channel or full quarter window seal replacement at a dealership is the most expensive, because of the labor hours and the OEM parts markup.
The honest math: a DIY belt molding swap takes about 1 to 2 hours per door once you have done one. A glass run channel or quarter window takes much longer, especially the first time. If your time is tight or the seal is on a complex modern vehicle, paying a shop for the labor and doing the parts sourcing yourself can split the difference nicely.
Frequently Asked Questions
Can you replace the rubber seal around car windows?
Yes. Most window rubber seals – belt molding, door weatherstrip, and many fixed-window seals – can be replaced by a careful DIYer with basic hand tools, the correct replacement part, and a few hours of work. The most common difficulty is door panel removal and getting corners seated properly. Windshield and rear window gasket replacements are more involved but still doable with a helper and the rope method.
How much does it cost to replace a car window rubber seal?
Aftermarket belt molding and door weatherstrip are the cheapest seals to replace, with parts typically running from low double digits per seal. Glass run channels and quarter window seals cost more, especially for European OEM parts where a single channel can run into three-digit territory. Professional labor adds the largest variable, ranging from a modest fee for a quick belt molding swap to several hours of book time for a full glass run channel replacement.
How do I replace the rubber weatherstripping on my car windows?
Start by identifying which seal has failed – belt molding, glass run channel, door weatherstrip, or fixed-window seal. Remove the door panel if needed, pull the old seal off, clean the channel or flange with isopropyl alcohol, then install the new seal using the clip-on, adhesive, or rope method appropriate for the application. Test with water before reassembling interior trim.
Can you replace weather stripping on a car yourself?
Yes for most modern cars and many classics, as long as you have the correct replacement part and basic trim tools. Belt molding on cars from the mid-1990s onward is usually a simple pull-off, push-on job. Quarter window, rear window, and windshield gaskets are more involved and benefit from a helper for the rope method.
What is the best glue to use for weather stripping on cars?
3M weatherstrip adhesive (black or yellow tube) is the long-standing favorite among DIYers and professionals. It stays flexible, bonds well to clean rubber and painted metal, and tolerates the temperature swings a car sees. Contact cement works for some applications but tends to get brittle. Avoid super glue or rigid epoxies – they crack under flex and will pull the seal loose.
How long does it take to replace window weatherstripping?
A simple outer belt molding swap takes 30 minutes to an hour per side once you have done one. Door weatherstrip and glass run channel jobs run 2 to 4 hours per door including door panel removal and reinstallation. Quarter or rear window gasket replacement is typically a full afternoon, and windshield gasket replacement can run a full day including cure time for the adhesive.
Conclusion: Replacing Car Window Rubber Seals the Right Way
Knowing how to replace car window rubber seals puts a real repair in your hands instead of a dealer appointment. The job comes down to three things: matching the correct replacement seal to your exact vehicle, taking the time to clean and prep the channel, and choosing the install method that fits the application – direct clip-on for modern belt molding, adhesive for older glued seals, and the rope method for fixed quarter, rear, and windshield glass.
Start with the failed seal that is causing your worst symptom, work slowly, test with water before reassembling interior trim, and address any related seals (door weatherstrip, glass run channel felt) while you are in there. The next time a rainstorm rolls through, your cabin will stay dry and quiet.