
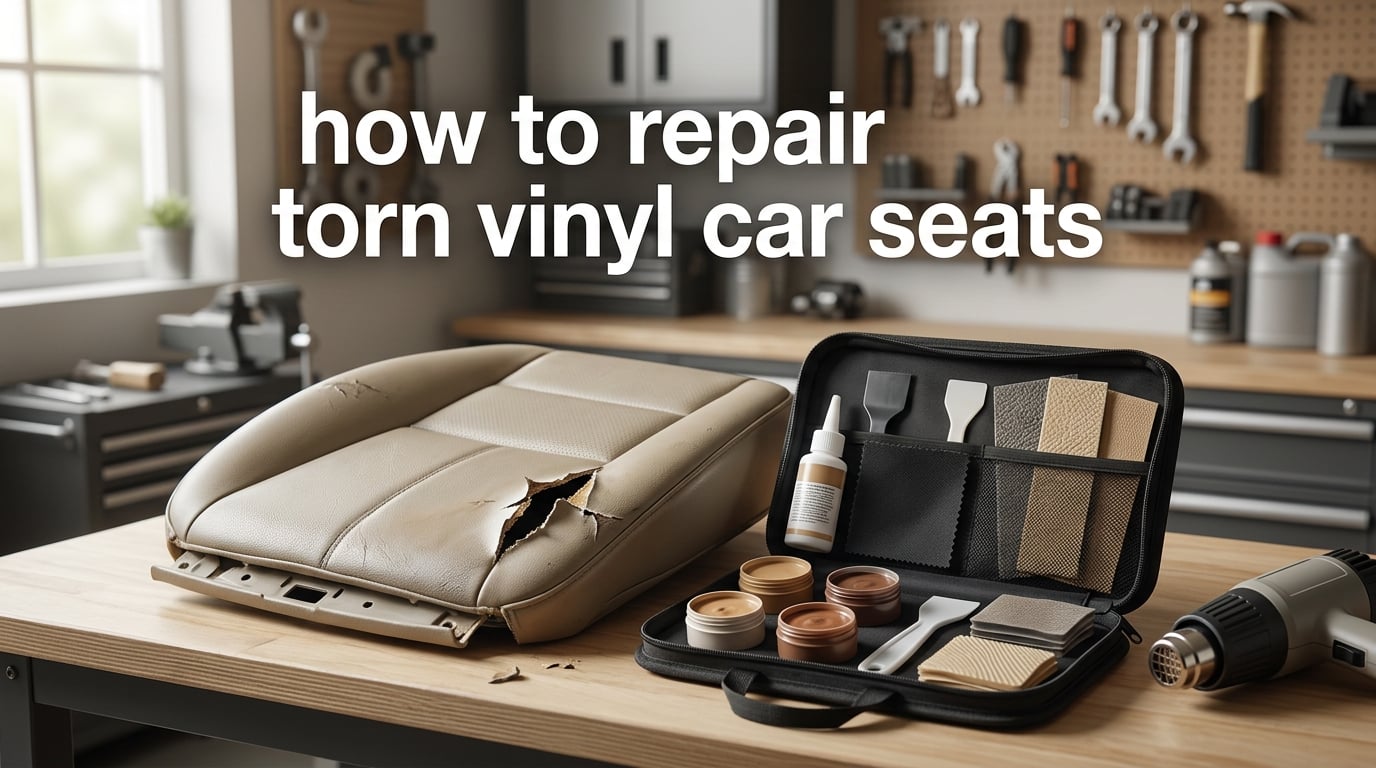
Torn vinyl seats are an annoying fact of vehicle ownership — sunlight dries the vinyl, body weight stretches the seams, and a single sharp edge can split the surface open. The good news is that most driver-seat bolsters, side panels, and stitched seams can be brought back from rough shape with the right kit and a steady hand.
I have spent more weekends than I care to admit pulling apart cracked vinyl in our shop, and I will walk you through the exact process we use on older vehicles that come through Segal Motor Trimmings. In this 2026 guide you will learn how to repair torn vinyl car seats from the first sweep of the workbench to the final color coat, including the safety steps most beginners skip.
Repairing vinyl is one of those skills that pays for itself the first time you use it, and a careful DIY job can leave a tear that is genuinely hard to spot at arm’s length. We will start by grading your damage, then move into tools, safety, and a full repair walkthrough that you can complete in a single afternoon.
Table of Contents
- How to Repair Torn Vinyl Car Seats: Assess the Damage First
- Tools and Materials You Will Need
- Critical Safety Warnings Before You Start
- Preparing the Damaged Area for Repair
- Installing the Backing Fabric
- Filling the Tear With Flexible Compound
- Replicating the Original Vinyl Grain
- Color Matching and Final Finishing
- Repair vs Replace: When DIY Is Not Worth It
- DIY vs Professional Repair Cost Comparison
- Common Mistakes to Avoid
- Preventing Future Tears: Maintenance Tips
- Frequently Asked Questions
- Final Thoughts
How to Repair Torn Vinyl Car Seats: Assess the Damage First
Before you touch any adhesive, take ten minutes to inspect the tear and decide which repair path fits. Most vinyl seat damage falls into one of four categories, and each one calls for a slightly different approach.
A small puncture is the easiest case — usually a clean slit under two inches long with the surrounding vinyl still soft and intact. A seam tear happens where stitching has failed or the seam is overstretched; these often run three to six inches along the stitch line. A larger gash is anything over six inches, where the foam underneath is visible or the vinyl edges have curled inward. Finally, a worn or cracked area is the early stage of damage: the surface looks dry, may show hairline cracks, and has not yet split open.
I always ask three questions when I look at a seat. Where is the tear relative to the airbag seam? Has the foam been damaged or just the vinyl cover? Is the surrounding vinyl still supple or has it gone hard and shiny? Your answers decide whether you patch, fill, or replace — and they also decide whether to keep going or hand the job to a pro.
Repair Method at a Glance
Each method suits a different kind of damage. Here is the breakdown we use when customers ask which approach is right for their car.
- Vinyl patch kit: Best for small punctures and clean slits under two inches. Fastest fix, lowest cost.
- Flexible compound fill: Best for seam tears and moderate gashes up to six inches. Most forgiving on color and grain.
- Backing fabric plus color coat: Best for larger gashes and worn areas. Closest to a professional result.
- Reupholstery: Reserved for damage where the foam is crushed, the seam is structural, or the airbag stitch line is involved.
Tools and Materials You Will Need
Lay everything out before you start, because the moment a vinyl adhesive touches the air the clock is ticking. A mid-grade repair kit covers about 80% of what you will use, but a few extra items make the difference between a repair you can see and one you cannot.
Core Repair Kit Items
- Vinyl repair kit with color-matched compound and graining paper
- Backing fabric — thin denim, canvas, or the dedicated repair backing cloth sold in kits
- Loctite Vinyl Fabric and Plastic Repair Flexible Adhesive (or equivalent flexible vinyl adhesive)
- RTV silicone in black or matching color for cosmetic fill
- Contact cement for bonding the backing fabric in place
- Sharp scissors and a fresh utility knife blade
- Tweezers with a fine tip for tucking backing fabric into the tear
Finishing and Prep Items
- Isopropyl alcohol (at least 70%) and clean lint-free cloths
- Fine grit sandpaper (400 to 600 grit) for scuffing the repair edges
- Heat gun on a low setting, or a hair dryer as a gentler option
- Release agent — beeswax, Vaseline, or purpose-made spray — for the graining pad
- SEM Color Coat or similar flexible vinyl paint in the matched shade
- Clear vinyl sealant and a vinyl conditioner for finishing
- Painter’s tape and clean shop rags for masking the work area
Do not substitute standard super glue or a hard epoxy for the flexible vinyl adhesive. Those bonds are rigid and will crack the moment the cushion flexes under your weight. The flexibility of the bond is just as important as the bond strength itself.
Critical Safety Warnings Before You Start
Most vinyl seat repairs are safe to do in a ventilated garage, but a few situations call for a stop-the-job moment. I would rather lose a small repair than have a customer come back with a worse problem, so please read these warnings before you cut anything.
Airbag seams are a hard stop. Most modern cars have side airbags stitched into the seat bolster or back. Repairing a tear that runs across an airbag seam can interfere with how the bag deploys in a crash. If your tear crosses a stitch line on the outer side of the seat back or the outboard bolster, take the seat out and look for the airbag label sewn into the seam before you do anything else. If you see airbag warnings, repair the cover off the seat — or take it to a trim shop that knows airbag-equipped upholstery.
Ventilate when you use solvents. Isopropyl alcohol, contact cement, and most vinyl paints give off fumes that you do not want to breathe for an hour. Open the garage door, set up a fan, and keep your head out of the work area when you apply anything wet.
Wear gloves and eye protection. RTV silicone and contact cement bond skin fast, and a stray fleck of adhesive in your eye will end the day. Nitrile gloves and a pair of safety glasses cost almost nothing and save a trip to urgent care.
Disconnect the battery if you remove the seat. Modern seats are full of sensors — weight sensors, occupancy sensors, heating elements. Pulling the seat out without disconnecting the battery can throw fault codes that cost you a scan tool visit to clear.
Preparing the Damaged Area for Repair
Good prep is the difference between a repair that lasts years and one that peels up in a month. Spend the time here and the rest of the job goes much faster. We treat prep work like the foundation of a building — it has to be clean, dry, and stable for everything on top of it to hold.
Step 1: Clean Around the Tear
Wipe the area with isopropyl alcohol on a lint-free cloth and let it dry fully. Household cleaners leave a residue that interferes with adhesion, so resist the urge to use an all-purpose wipe. If the seat is greasy from years of use, clean a wider area so you are not grinding old conditioner into the new repair.
Step 2: Trim the Loose Vinyl
Use a sharp blade to trim any flaps or curled edges back to the clean edge of the tear. Do not cut away more than you have to — every bit of original vinyl you keep makes color matching easier. If the edges are curled inward, coax them back out with tweezers before you trim.
Step 3: Scuff the Repair Edges
Lightly scuff an eighth inch of the vinyl on either side of the tear with 600-grit sandpaper. You are not trying to remove material — you are giving the adhesive something to bite into. Wipe away the dust with a dry cloth before you move on.
Step 4: Mask the Work Area
Run painter’s tape along the tear so any compound that overflows stays off the surrounding vinyl. A clean edge is much easier to achieve when the boundary is already marked for you.
Installing the Backing Fabric
Backing fabric is what holds the repair together mechanically. Without it, the tear has nothing solid to bridge across, and even the best compound will eventually sag under body weight. Think of the backing as a small patch behind the vinyl that carries the load so the compound only has to look pretty.
Step 1: Cut the Backing
Cut a piece of backing fabric about one inch wider and longer than the tear on every side. Round the corners so it does not snag when you slide it under the tear. Thin denim works in a pinch, but purpose-made repair backing is a tighter weave and easier to slide into place.
Step 2: Slip It Behind the Tear
Use tweezers or a small flat tool to work the backing under the tear. Lift one edge of the vinyl slightly and slide the fabric in along the length of the damage. Center it so at least a half inch of fabric sits under solid vinyl on every side.
Step 3: Bond the Backing in Place
Apply a thin bead of contact cement through the tear onto the backing, then press the vinyl edges down onto the fabric. Hold pressure for about a minute so the bond sets up. If the gap is too narrow for the cement tip, use a toothpick to spread a thin layer on the backing where it meets the underside of the vinyl.
You should now have a stable bridge with no visible hole through the seat — only a thin seam where the tear used to be. That seam is what the next step fills.
Filling the Tear With Flexible Compound
The fill step is where most beginners rush. Take your time here, and the finished repair becomes much harder to spot. The goal is to fill the seam level with the surrounding vinyl and leave slightly more than you think you need — you will sand the excess down in the next phase.
Step 1: Mix the Compound
If your kit uses heat-set compound, follow the brand’s mixing ratio. Most vinyl kits call for the color paste to be blended into the base until the shade matches the existing seat under good light. Hold the mixed compound next to an inconspicuous area of the seat to confirm the color before you apply.
Step 2: Apply the First Layer
Press a thin layer of compound into the seam with the palette tool from your kit. Work from one end to the other so you do not trap air. The first layer is the bond coat — keep it thin and let it cure before adding more.
Step 3: Build Up to the Surface
Apply subsequent thin layers, allowing each to cure per the kit instructions. Two to four passes is typical for a small tear; larger gashes may need six or more. Stop just above the surrounding vinyl so you have a little material to sand and shape in the finishing phase.
Step 4: Heat-Set If Your Compound Requires It
Some heat-curing compounds set firm only when warmed with a heat gun. Hold the gun at least six inches away and move it constantly — vinyl scorches quickly, and a scorched repair is harder to fix than the original tear. If you are unsure, use a hair dryer instead. The slower cure is more forgiving.
Replicating the Original Vinyl Grain
Grain is the texture you feel when you run your fingers across the seat. Replicating it is what makes a careful repair nearly invisible. The graining pad from your kit carries the pattern from a piece of vinyl that matches the original texture, and a thin layer of release agent keeps the compound from sticking to the pad.
Step 1: Choose the Right Graining Pad
Hold each pad in your kit against an unbroken area of the seat and pick the one whose pattern lines up with the surrounding vinyl grain. The matched pad will look almost invisible when you place it on the seat — if it stands out as a different texture, try another.
Step 2: Lightly Coat the Pad With Release Agent
Apply a whisper-thin smear of beeswax, Vaseline, or the kit’s release spray to the face of the pad. Too much release agent will leave dimples in the cured compound; too little and the pad sticks and ruins the texture. A fingerprint-coating is about right.
Step 3: Press the Pad Into the Cured Compound
Once the compound has cured but is still slightly soft, press the graining pad into the repair and hold it steady for the time listed in your kit instructions. Do not slide or twist — you want a clean impression, not a smudge. Lift the pad straight up.
If the grain impression is faint, the compound cured too far. You can sand the surface back down and add a fresh thin layer to re-impress. If the pad sticks, you used too little release agent — clean the pad, reapply release, and try again on a fresh layer.
Color Matching and Final Finishing
Color is what the eye sees first, even before texture. A perfect texture match in the wrong color will still read as a repair from across the parking lot. Color-matched flexible vinyl paint — SEM Color Coat being the most-used brand in trim shops — bridges the gap between the patch and the original seat.
Step 1: Blend Color Outside the Repair
Spray a light coat of SEM Color Coat over the repair and feather it out into the surrounding vinyl. Light passes from a distance are better than one heavy pass from up close — heavy coats sit on the surface and crack as the vinyl flexes.
Step 2: Let Each Coat Cure Fully
Most flexible vinyl paints call for ten to twenty minutes between coats and a full cure of a few hours before you sit on the seat. Slow curing produces a more flexible finish, which is what you want on a working bolster.
Step 3: Seal and Condition
Once the color has fully cured, apply a thin layer of vinyl conditioner to the whole seat — not just the repair. This evens out the sheen between the repaired area and the rest of the surface and keeps the vinyl pliable so it does not crack again a few months down the road.
Step 4: Inspect After 24 Hours
Come back the next day and look at the repair in daylight. Any spots that read as too glossy or too matte can be lightly buffed with a soft cloth. Touch-up color can be added if the tint drifted during curing.
Repair vs Replace: When DIY Is Not Worth It
Not every tear is a good DIY candidate. Knowing when to stop saves you time, money, and frustration, and in some cases it is the only safe choice. Take a step back from the seat and ask these questions before you commit to a repair.
The tear runs through an airbag seam. Repairs on airbag-equipped seats must keep the deployment path clear. If the airbag label is anywhere near the damage, stop and call a trim shop that handles airbag-equipped vehicles.
The foam underneath is crushed or missing. A repair fills vinyl — it does not rebuild foam. If your fingers sink into the seat where the tear is and the foam is gone, you are really looking at a reupholstery job, not a patch.
The surrounding vinyl is hard and brittle. If the vinyl around the tear cracks when you flex it gently, new cracks will appear next to your repair within months. The whole panel needs to be replaced or recovered.
Multiple tears meet at one spot. Concentrated damage usually means the underlying structure has failed. A repair on top of a failed structure only delays the next tear.
The damage is in your line of sight on a leased vehicle. If your lease return inspection will fail over a visible repair, budget for a professional fix instead. We see this a lot — a hand-sized repair that needs to be cut out and replaced before turn-in.
DIY vs Professional Repair Cost Comparison
Cost is where DIY really wins, but only when the repair is the right size. Here is a side-by-side view of what you can expect to spend in our shop versus doing it yourself at home, using only real numbers from current trim and kit pricing.
- Small puncture under 2 inches: Mid-grade vinyl kit for the DIY path; minor shop repair billed at the lower end of the trim-shop range.
- Seam tear 3 to 6 inches: Kit plus backing fabric and RTV silicone at home; standard upholstery repair in a shop.
- Larger gash over 6 inches: Full backing, compound, color coat, and heat gun setup for DIY; major panel repair or recover in a shop.
- Full bolster or panel recover: Vinyl yardage, foam, thread, and tools you likely do not own at home; single-panel upholstery job at a trim shop.
The pattern is straightforward: small tears are very DIY-friendly, mid-size tears are a judgment call, and large or structural repairs almost always cost less in labor than they do in your weekend. A professional mobile vinyl repair service, which is the typical middle option, often charges per tear and can be a smart compromise for a single seam on a leased vehicle.
Common Mistakes to Avoid
I have made most of these mistakes myself, and I have watched customers bring in cars that show every one of them. Skipping the list below is the fastest way to turn a repair into a redo.
Rushing the prep. A dirty or oily surface is the number one reason a repair peels up. If you cannot remember the last time you wiped the area with alcohol, the answer is that you have not.
Using the wrong adhesive. Super glue, hot glue, epoxies, and wood glues all harden rigid. Vinyl flexes every time you sit down, and a rigid patch cracks within weeks.
Skipping the backing. Without backing fabric, even the best compound sags under body weight. The fabric is what makes the repair structural.
Overfilling the tear. Trying to fill the whole gap in one pass traps air and leaves a dimpled surface. Thin layers always cure better than one thick pour.
Color matching under bad light. Garage fluorescents lie about color. Hold the mixed compound against the seat in daylight near a window before you commit.
Ignoring the airbag seam. Covering this in the safety section above is not paranoia — it is the one warning that matters above all the others. If the tear crosses an airbag stitch line, the seat cover must come off the frame for a proper repair.
Preventing Future Tears: Maintenance Tips
A careful repair can last the life of the car, but only if the surrounding vinyl stays healthy. A few small habits keep the rest of the seat from joining the repair zone.
Condition the vinyl twice a year with a quality vinyl conditioner. UV and dry heat pull the plasticizers out of vinyl over time, and a dry surface cracks far more easily than a conditioned one. Parking in the shade or using a windshield shade cuts the UV load on the dashboard and the seat tops at the same time.
Watch how you get in and out. Twisting into the seat while wearing belt buckles, keys, or rivets on back pockets is the leading cause of bolster tears in our shop. A small microfiber towel thrown over the bolster before you climb in costs almost nothing and prevents most punctures.
Finally, do not overload the seat with weight that the car was not designed to carry. Sandbags in winter, dogs on long trips, and heavy tools in the rear seat all push the foam past its recovery point. Once the foam is crushed, the vinyl on top is the next thing to fail.
Frequently Asked Questions
How much does it cost to repair a ripped vinyl car seat cover?
A DIY vinyl repair kit covers a small to mid-size tear at a modest parts cost. Professional mobile vinyl repair services typically charge per tear and price higher than a DIY kit but less than a full upholstery shop. Full reupholstery of a single seat panel is the most expensive option and is reserved for large or structural damage.
What type of glue is best for repairing vinyl seats?
A flexible vinyl-specific adhesive such as Loctite Vinyl Fabric and Plastic Repair works best for bonding vinyl. For cosmetic fills, RTV silicone in a matching color sits on top of the adhesive and shapes the repair. Avoid rigid adhesives like super glue or standard epoxies because they crack as soon as the seat flexes under body weight.
What is the best tape to repair vinyl seats?
For a temporary hold during a repair, painter’s tape or specialty vinyl repair tape keeps edges aligned while the adhesive cures. Self-adhesive vinyl patches work for very small clean punctures. Neither replaces a proper backing-fabric-and-compound repair, and tape alone tends to peel within weeks on a working bolster.
How can I repair a rip in my fabric car seat?
Fabric seat repairs use a different process than vinyl because the cloth is flexible and does not need a sealed backing layer. A torn fabric cover is usually re-stitched with upholstery thread, sometimes over a small patch of matching cloth on the underside. If the foam underneath is exposed, a backing patch goes in first, the same way it does on a vinyl repair.
How long does a DIY vinyl car seat repair last?
A repair done with proper prep, a flexible adhesive, backing fabric, and color-matched paint typically lasts for years on a daily-driver seat. Repairs done with rigid glue or no backing tend to fail within months. Avoid parking in direct sun and condition the vinyl twice a year to extend the life of any repair.
Can I repair a tear that crosses an airbag seam?
Repairs near an airbag seam require removing the seat cover from the frame so the airbag deployment path stays clear. If your tear runs across an airbag stitch line on the outboard bolster or the seat back, the cover should come off the seat for the repair, or the seat should be taken to a trim shop experienced with airbag-equipped upholstery. The airbag label sewn into the seam marks whether the seat has a side airbag.
Final Thoughts
Knowing how to repair torn vinyl car seats is one of those skills that pays back faster than almost any other car-care technique. A single weekend, a mid-grade kit, and a careful walk-through of the steps above can take a seat that looks finished and turn it into one you are happy to put a customer in.
If your damage is small, well-defined, and away from the airbag seam, the DIY path is genuinely the right one. If the tear is large, the foam underneath is gone, or the airbag stitch line is involved, parking it at a trim shop is the smarter move. Either way, working clean, working with flexible adhesive, and conditioning the vinyl twice a year will keep the rest of the seat from joining the repair.