
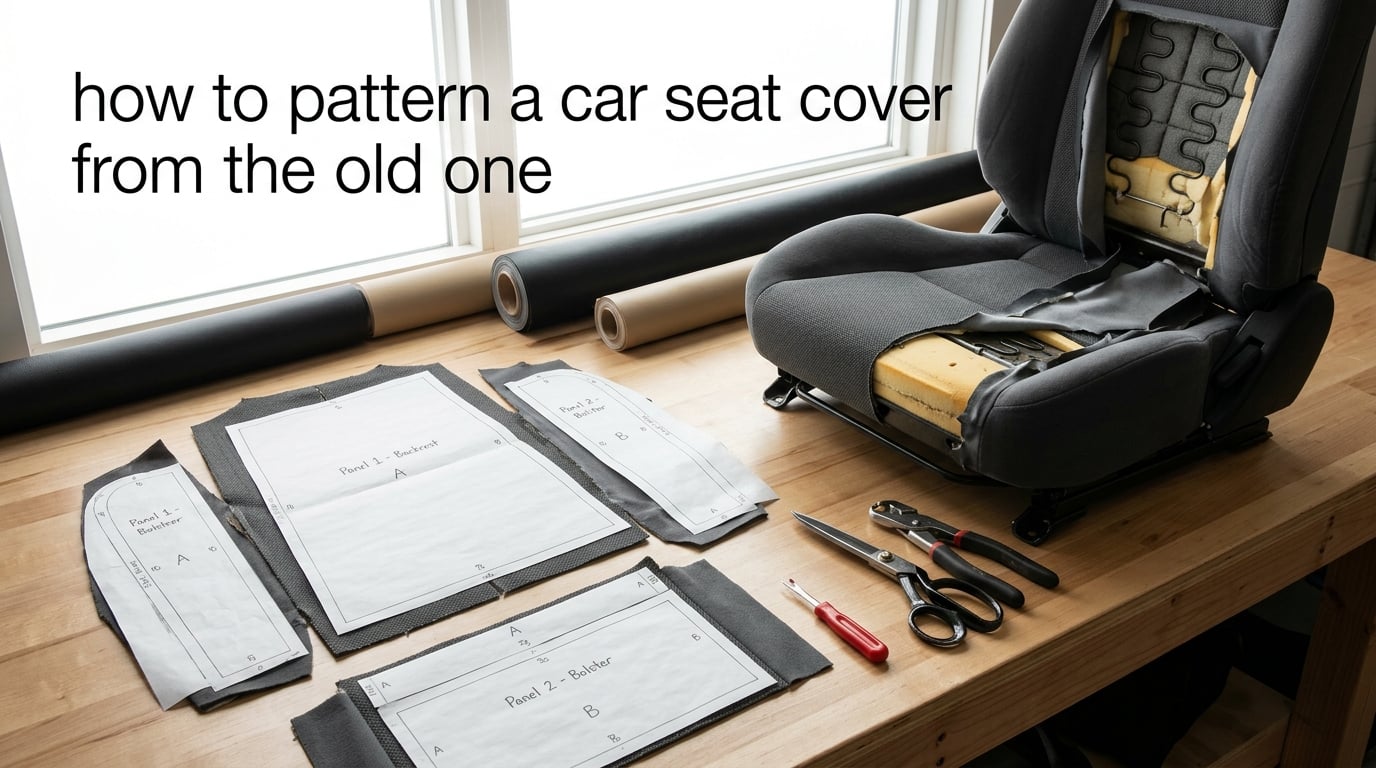
Patterning a car seat cover from the old one means carefully taking apart the existing cover, labeling every panel, and using those flat pieces as templates to cut a brand new cover from fresh fabric or vinyl. It is the most accurate DIY method for vintage, classic, or imported seats where aftermarket covers simply do not fit. In this guide, I walk you through the full process I use in our shop, from stripping the old cover to reinstalling the new one with hog rings.
If your pre-made replacement cover does not match the shape of your seat, patterning from the original is the only reliable path to a factory-fit finish. The technique works on bucket seats, bench seats, and even motorcycle or boat cushions. With patience, a few basic tools, and the right vinyl, a first-timer can complete the job in a weekend.
Table of Contents
- Tools and Materials You’ll Need
- Choosing the Right Fabric: Stretch Vinyl vs Construction Vinyl vs Leatherette
- Step 1: Removing the Seat From the Vehicle
- Step 2: Stripping the Old Cover Without Ripping It
- Step 3: Marking and Labeling Each Panel
- Step 4: Flattening Panels and Adding Seam Allowance
- Step 5: Transferring Patterns to New Fabric
- Step 6: Sewing Panels, Boxing, and Piping
- Step 7: Re-installing the Cover With Hog Rings
- Alternative Method: Patterning a Seat Without Removing It
- Common Beginner Mistakes and How to Avoid Them
- Frequently Asked Questions
- Final Thoughts
Tools and Materials You’ll Need
Gathering the right tools before you start saves hours of frustration mid-project. I split our team checklist into two budget tiers so you can pick what fits your wallet.
Basic tier (under most budgets):
- Flathead screwdriver and needle-nose pliers
- Sharp fabric scissors and a utility knife
- Marker pen and masking tape
- Seam ripper (small and large)
- Basic hog ring pliers with a starter pack of hog rings
- Measuring tape and a straight edge ruler
- Sharpie, paper, and a clipboard for panel numbering
Pro tier (recommended for repeat jobs):
- Heavy-duty hog ring pliers (Koolspring or similar)
- Industrial sewing machine that handles Tex 70 thread and vinyl
- Rotary cutter with a fresh blade
- Pattern tracing paper or Swedish tracing paper
- Dacron padding and sew foam for cushion rebuild
- Air-powered staple gun with stainless steel staples
You can absolutely complete this project with the basic tier. The pro tools simply speed things up and give a cleaner stitch line. For most DIYers, we recommend starting with the basics and only upgrading if you plan to upholster again.
Choosing the Right Fabric: Stretch Vinyl vs Construction Vinyl vs Leatherette
The vinyl or fabric you pick will decide how forgiving your cover is to sew. Stretch vinyl drapes over contours easily, while construction vinyl holds shape and resists sag. Leatherette gives the look of leather without the cost.
| Material | Stretch Factor | Best For | Difficulty to Sew |
|---|---|---|---|
| Stretch vinyl (EverSoft, Morbern) | High – 4-way stretch | Tight contours, classic cars | Beginner friendly |
| Construction vinyl (Naugahyde) | Low – minimal stretch | Truck seats, daily drivers | Intermediate |
| Leatherette | Very low | Budget builds, boats | Advanced |
If this is your first upholstery job, I always recommend stretch vinyl. The forgiving nature of the material hides minor pattern errors and pulls smoothly over foam without bunching. Construction vinyl looks sharper long-term but punishes small mistakes. Save leatherette for when you have a few covers under your belt.
Step 1: Removing the Seat From the Vehicle
Yes, you need to pull the seat out to pattern a car seat cover from the old one. The seat comes out first, then the cover comes off the seat. Trying to pattern with the seat still bolted in is the most common reason DIYers lose their template halfway through.
Disconnect the battery before you touch any electrical connections. Modern seats often have side airbag sensors, heating elements, and occupant sensors that you do not want to trigger with a stray screwdriver. Move the seat to a clean, well-lit workspace with a flat surface large enough to lay panels out.
Step 2: Stripping the Old Cover Without Ripping It
The single biggest mistake I see is ripping the old cover during removal. If the cover tears, you lose your template and you are back to square one. Go slow and let the seam ripper do the work.
Start at the bottom of the seat where the cover is hog-ringed to the seat frame or undertray. Cut the hog rings with your pliers rather than yanking them. Work around the perimeter, then flip the seat over and undo the back side. Slip the seam ripper under each stitched seam and gently pop every stitch.
Forum users on thesamba.com and driveaccord.net consistently report that the easiest method is simply to use the old seat material as the pattern. The trick is preserving it intact through this step. If you feel resistance, stop and look for a missed hog ring or stitch.
Step 3: Marking and Labeling Each Panel
Every panel gets a number, a grain arrow, and a position label before you separate any pieces. This is the step that separates a cover that fits from one that ends up in the bin.
Use masking tape to write a number on each panel as you remove it. I use a simple convention: top panels start with 1, side panels with 2, bottom with 3, and so on. Mark the grain direction with a small arrow on the back of every piece. DriveAccord forum veterans stress this point – without grain markers you will lay the new fabric the wrong way and the cover will warp the first time it warms up.
Take photos of the seat from every angle before you remove a single piece. Photos help you remember which panel sat where once you have a pile of fabric on the bench. Store all panels in a labeled box in order – do not trust your memory.
Step 4: Flattening Panels and Adding Seam Allowance
To make a car seat cover pattern, lay each labeled panel flat, press out the curl with a warm iron on low heat, and add 1/2 inch to 1 inch of seam allowance around every edge that originally joined another panel. Hog-ring edges get 1/2 inch only, since they wrap under the seat frame.
Press each panel flat against pattern paper or Swedish tracing paper. Trace the outline with a marker, then draw a second line 1/2 inch to 1 inch outside the first. That second line is your cutting line. Mark notches at any curved seam to help you match panels during sewing.
The seam allowance range depends on your skill level. Beginners should add a full inch so they have room to recut if a piece comes up short. Experienced sewers can drop to 1/2 inch and save fabric.
Step 5: Transferring Patterns to New Fabric
Lay your pattern pieces on the wrong side of the new vinyl, following the grain arrow you marked. Pin or weight the patterns down, then trace around each one with a chalk marker or silver Sharpie.
Grain direction is non-negotiable here. Vinyl and fabric stretch more across the grain than along it. If your arrow on the pattern points along the warp, the new piece must follow the warp on the new fabric. Cut with sharp scissors or a rotary cutter and resist the urge to pull or stretch as you go – stretched vinyl relaxes over time and the cover ends up sagging.
For curves and tight corners, snip into the seam allowance rather than cutting a smooth curve. These relief cuts let the seam lay flat when you turn the cover right-side out. Save every scrap – small pieces work well for piping and welts.
Step 6: Sewing Panels, Boxing, and Piping
Sew your panels with a walking foot or Teflon foot, using Tex 70 bonded nylon thread and a leather or vinyl needle. Test on a scrap first – vinyl sticks to a standard foot and pulls the panel out of alignment.
Build the cover in three sections: the top plate, the boxing strips around the perimeter, and any piping or welts along the seams. Sew the top plate seams first, then attach the boxing strip, then add piping last so it lays flat over the seam line.
If you want pleats, mark them on the top plate before you sew the boxing on. Pleats should run in the direction the original cover had them – usually front to back. For a factory finish, add a single line of piping along every visible seam.
Step 7: Re-installing the Cover With Hog Rings
Drop the new cover over the foam and pull it into position. Pull the edges down to the seat frame and secure them with hog rings every 2 to 3 inches. Pull the cover snug as you go – loose areas look baggy the first time someone sits down.
Use new hog rings rather than reusing the old ones. Old rings weaken when you pry them open and often snap during installation. Stainless steel rings resist corrosion under the seat where moisture collects. Hog ring pliers come in dedicated upholstery models – do not try to crimp them with regular pliers.
Once the cover is on, check every seam and pull line. Sit on the seat a few times to let the foam compress, then check the fit again. Trim any extra hog-ring tail and you are done.
Alternative Method: Patterning a Seat Without Removing It
Yes, you can pattern a seat without taking it apart, but you trade accuracy for convenience. The method works for simple bucket seats with no integrated airbags or electronics.
Drape a large sheet of clear plastic or pattern paper over the seat. Press it into every contour and tape it down. Trace the seat outline with a marker, then lift the plastic off and add your seam allowance. This approach gives you the outer shape but not the individual panels, so you cannot replicate pleats, piping channels, or built-in stretch zones.
Forum threads on theupholsteryforum.com note that this method works for quick bench-seat covers and slip-ons but fails for tightly tailored classic car interiors. If your goal is a factory-fit restoration, removing the seat is still the gold standard.
Common Beginner Mistakes and How to Avoid Them
After watching our team and forum users make every mistake in the book, here are the four errors that cause most first-timer failures.
Skipping panel numbering. Mix up two side panels and the cover will not fit. Always number before you separate.
Wrong grain direction. A panel cut on the bias will stretch and sag. Check every arrow before you cut.
Tearing the old cover during removal. Slow down and cut every hog ring. The old cover is your template – protect it.
Choosing the wrong vinyl. Stretch vinyl forgives mistakes. Construction vinyl does not. Start with stretch for your first job.
Frequently Asked Questions
How to make a car seat cover pattern?
To make a car seat cover pattern, strip the old cover off the seat, label every panel with a number and a grain arrow, lay each panel flat, then trace around it on pattern paper. Add 1/2 inch to 1 inch of seam allowance on every joining edge, then transfer the pattern to your new fabric.
Can I design my own car seat covers?
Yes, you can design your own car seat covers. The most accurate DIY method is to take apart the original cover and use each panel as a template for the new fabric. With basic sewing skills, a pattern tracing, and stretch vinyl, a beginner can produce a factory-fit replacement cover in a weekend.
What fabric is best for car seat covers?
Stretch vinyl is the best fabric for most DIY car seat covers because it forgives minor pattern errors and drapes cleanly over contours. Construction vinyl like Naugahyde holds shape longer but is harder to sew. Leatherette looks like leather but requires advanced skill.
How do you make car seat covers?
To make car seat covers, remove the seat from the vehicle, strip the old cover off the foam, label each panel, flatten the panels, add seam allowance, trace them onto new vinyl, sew the panels together with Tex 70 thread, add boxing and piping, then reinstall the cover with hog rings.
How to pattern a seat without taking it apart?
To pattern a seat without taking it apart, drape clear plastic or pattern paper over the seat, press it into every contour, tape it down, and trace the outer outline. Add seam allowance around the edge and cut your fabric. This method works for slip-on covers but cannot replicate pleats or built-in stretch zones.
Can I create my own seat cover?
Yes, you can create your own seat cover. The technique of patterning from the old cover is the most reliable DIY approach, and works for car, boat, motorcycle, and van seats. With patience, a basic sewing machine, and the right vinyl, the project is well within reach of a first-timer.
Final Thoughts
Patterning a car seat cover from the old one is a skill every DIY upholsterer should have in their toolbox. The process rewards patience: take your time removing the old cover, label everything, respect the grain, and the new cover will drop on like it came from the factory. Start with stretch vinyl on a daily-driver seat before you commit to a classic restoration, and remember that the old cover is your most valuable template until the new one is on the seat.