
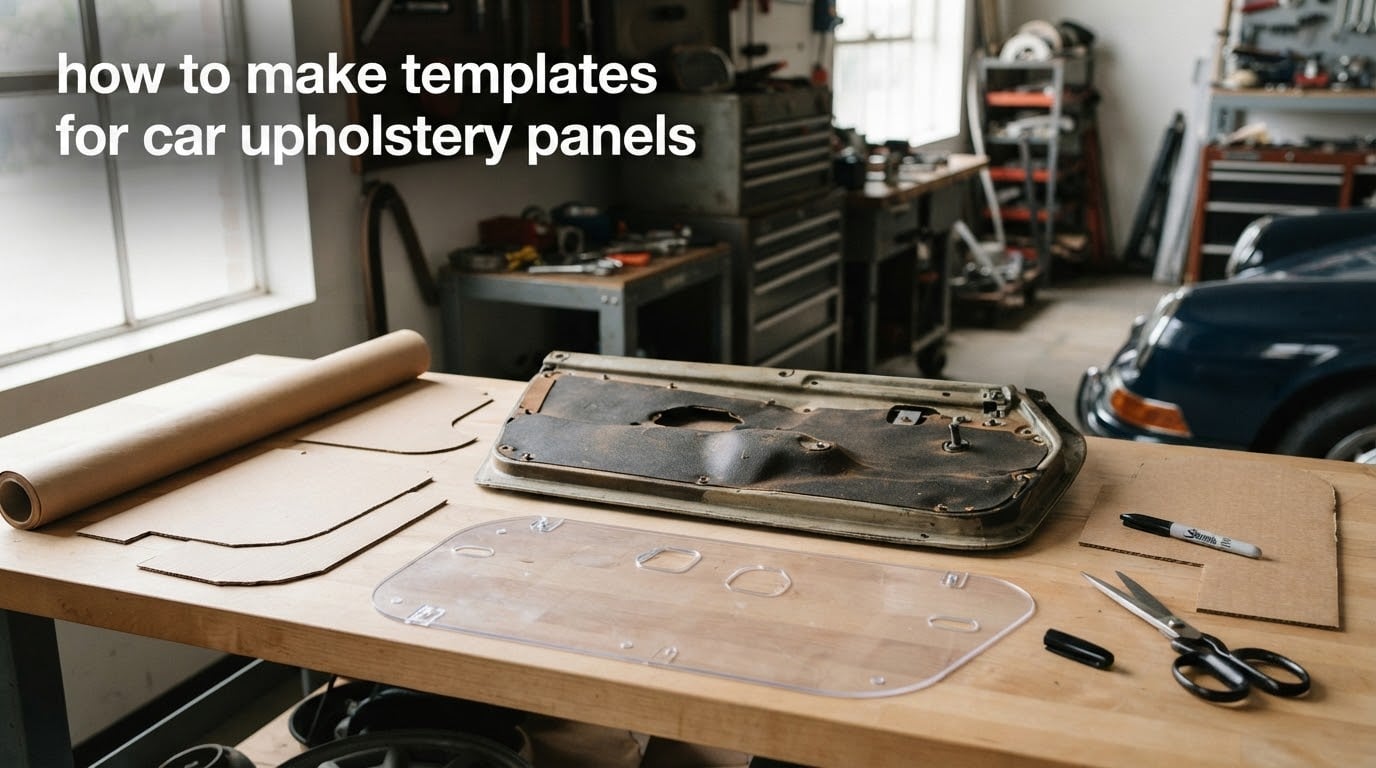
If you have ever pulled off a worn door panel and stared at the bare metal underneath, you already know the moment of truth. The new fabric is on the table, the foam is ready, and the only thing standing between you and a clean fit is a pattern. Without a template, you are guessing. With a good one, the work almost lays itself out.
Our team has spent years making templates for classic cars, customs, and daily drivers that needed a second life. We have ruined good fabric, cut corners that did not close, and learned the slow way. This guide is everything we wish we had known before we started, all in one place, focused on the craft of how to make templates for car upholstery panels that fit the first time.
Table of Contents
- What Are Templates and Why They Matter in Auto Upholstery
- Essential Materials and Tools for Template Making
- How to Make Templates for Car Upholstery Panels: Step-by-Step Process
- Template Making Techniques by Panel Type
- Handling Curves, Corners, and Complex Shapes
- Template Preservation, Storage, and Reuse
- Common Template Mistakes and How to Avoid Them
- Digital and Modern Template Tools
- Choosing the Right Template Material for Your Project
- Frequently Asked Questions
- Conclusion
What Are Templates and Why They Matter in Auto Upholstery
An upholstery template is a physical pattern that matches the exact shape and size of a panel, pocket, or cushion. It can be cut from cardboard, clear plastic, kraft paper, or muslin. Its only job is to be a faithful copy you can lay on top of new material, trace, and cut.
Templates matter because car interiors are full of compound curves, hidden seams, and transitions that look simple until you try to cover them. A door panel that looks like a flat rectangle may have a sculpted armrest, a slightly bowed face, and a return lip around the speaker. Without a template, you would need to freehand each shape and hope it lands. With one, every piece is repeatable.
The benefits stack up quickly. You save material by cutting right the first time. You can pattern match stripes across a left and right seat. You can reuse a template years later for a repair. And you can hand the work to someone else and expect the same fit, which is why even seasoned shops template everything.
Essential Materials and Tools for Template Making
The good news is that you do not need a fancy shop to start. Most of the supplies are already in a garage or a craft drawer. Here is what we keep on hand before any template job.
Template substrates: cardboard from appliance boxes, clear plastic sheets from craft stores, brown kraft paper, and lightweight muslin fabric. Each one has a job it does best, and we cover that comparison below.
Marking tools: a sharp pencil for paper and cardboard, a fine-tip Sharpie for clear plastic and dark surfaces, chalk or a chalk marker for fabric transfer, and a silver pen for marking on dark vinyl.
Cutting tools: a sharp utility knife with fresh blades, heavy-duty scissors for paper and muslin, and aviation snips if you are trimming fiberboard backers.
Measuring tools: a flexible vinyl tailor’s tape, a rigid metal ruler, a small torpedo level for checking straight lines on curved panels, and a compass or template curve for transferring arcs.
Fasteners and adhesives: painter’s tape, masking tape, binder clips, and a glue stick for paper joins. Hot glue works in a pinch but can leave residue on plastic.
Here is a quick comparison of the four template materials we reach for most often.
| Material | Best For | Reusable | Notes |
|---|---|---|---|
| Cardboard | Flat panels, B-pillars, kick panels | Limited | Cheap, easy to cut, softens if it gets wet |
| Clear plastic | Curved seats, door panels, see-through verification | Yes | Lets you see registration marks under the template |
| Brown kraft paper | Headliners, large one-piece patterns | Limited | Great for big layouts, tears along folds |
| Muslin fabric | Final test fit, complex shapes, sewn panels | Yes | Acts as a sewn mock-up you can tweak |
How to Make Templates for Car Upholstery Panels: Step-by-Step Process
The core workflow is the same whether you are templating a headliner or a small armrest. Work through these six steps and you will have a pattern that is ready to cut.
Step 1: Measure the Original Panel or Space
Start by taking three measurements on every dimension: the longest point, the shortest point, and the depth of any curves. For an existing upholstered panel, measure the panel itself, not the foam, because foam compresses and changes shape under the cover.
Sketch a quick reference drawing with overall dimensions and callouts for any landmarks like mounting holes, pocket openings, or seam transitions. This drawing becomes the cheat sheet you tape to your template later.
Step 2: Create a Rough Mock-Up
Do not jump straight to your best template material. Cut a quick rough out of cheap cardboard or brown paper first. The goal of the mock-up is to confirm the overall shape, not to be pretty.
Tape the rough mock-up in place on the panel using painter’s tape. Trim and re-tape until the shape looks right when you stand back. Walk around the car and look at it from the driver’s seat, the passenger’s seat, and from outside. Panels that look correct close up can look twisted from the right angle.
Step 3: Refine the Template on the Chosen Material
Once the rough mock-up is right, transfer it to your final template material. For cardboard, lay the mock-up on top and trace with a pencil. For clear plastic, clamp the mock-up to the plastic and cut with a fresh utility blade. For muslin, pin the rough pattern on and cut around it with a 1/4 inch allowance for sewing tests.
This is the step where most beginners get nervous and over-trim. Leave the trim for step four. Your goal here is to cut the template just slightly oversized so you can fine-tune at the panel.
Step 4: Add Seam Allowances and Registration Marks
Every fabric seam needs extra material to sew through. For most automotive vinyl and upholstery cloth, add a half inch seam allowance on hidden edges and a quarter inch on edges that tuck under a trim piece or under the foam.
Registration marks are small notches, holes, or arrows you cut into the template at landmarks like corners, dart points, or where a stripe must line up with a neighboring panel. They are how you guarantee that when you transfer the template to fabric, every piece ends up in the same place.
Step 5: Test Fit Before Cutting Final Fabric
Lay the refined template on the panel and check it again. Look for daylight between the template and the panel surface, which means the template is not sitting flat. Look for wrinkles in the template, which means you are missing a curve. Mark anything off with a pencil, remove the template, and trim only what you marked.
Repeat the fit, mark, trim cycle until the template sits flat, follows every curve, and reaches every anchor point. This step is the difference between a professional result and a rework.
Step 6: Transfer the Template to Fabric or Vinyl
Lay your finished template on the back of the new material. Mark the outline with chalk, a chalk marker, or a silver pen for dark vinyl. Add your registration marks to the fabric so you know where to sew and where to align stripes.
Cut along the marked lines with sharp scissors or a rotary cutter. Do not cut on top of carpet or rough surfaces, which dull blades and pull the fabric. Cut on a clean table or cutting mat.
Template Making Techniques by Panel Type
Different panels reward different approaches. What works for a flat kick panel wastes time on a curved seat back. Here is how we adjust the process for each common panel type.
Seat Covers and Cushions
Seat covers are usually two or three pieces per cushion: a face, a side, and sometimes a back panel. Use the original cover as your starting reference if it is intact. Slit the original cover along the seams and flatten each piece to use as a master pattern.
If the original is missing, drape clear plastic over the foam and trace the shape with a Sharpie. The plastic lets you see the foam underneath so you can follow contours precisely. Add seam allowances before you cut the fabric.
Door Panels
Door panels are usually built around a fiberboard or ABS plastic base. The base itself is your template for the foam and fabric backing layers. Lay clear plastic over the base, trace the perimeter, and add seam allowances where the fabric wraps to the back.
Pay special attention to the cutouts for the armrest, speaker, window switch, and pull strap. Cut these openings slightly undersize in the template, then trim the fabric to fit once it is glued to the board.
B-Pillar Covers
B-pillars are narrow and often angled, which makes them awkward to template with paper. We use a two-step method. First, lay painter’s tape over the entire pillar to capture the surface. Second, press brown paper over the tape and trace the shape with a pencil.
Round any sharp inside corners with a quarter inch radius so the vinyl does not crease when it is wrapped. B-pillar covers almost always split at the top where the seatbelt passes through, so include that split in your template.
Kick Panels and Small Trim Pieces
Kick panels are small and flat, which makes them the easiest first project for a beginner. A piece of cereal-box cardboard is usually enough. Measure the opening, draw the perimeter, add half inch seam allowances on all sides, and you have a pattern.
Cut a quick rough out, fit it in the kick panel area, refine the shape, and only then transfer to fabric. The whole process for one kick panel takes under an hour once you have done one.
Headliners and Large Flat Panels
Headliners are too big to template in one piece on most cars. Split them into three sections: a left half, a right half, and a rear section behind the back glass. Use brown kraft paper for each section because it is cheap and lays flat.
Roof contours are gentle, but pay attention to the bow at the front header and the recess around the rear window. Mark these on each template section so the pieces meet cleanly when sewn together.
Handling Curves, Corners, and Complex Shapes
The places where templates fail are almost always corners or curves. A template that looks perfect on a flat table can refuse to lay down on the actual panel. Here is how we deal with the trouble spots.
Boxed Corners vs Rounded Box vs Angled Ear
Boxed corners are the simplest. The fabric folds into a clean square at the corner, which is easy to sew but leaves a sharp point that can wear. Rounded box corners replace the point with a small curve, which looks better and lasts longer but takes more fabric and a slightly more careful seam.
Angled ear corners cut off the corner at a 45-degree angle, which is the easiest for thick foam because the corner can be folded without bunching. Pick the corner style that matches the panel you are replicating and add it to the template before you cut fabric.
Heat Molding for Formed Panels
Some panels have raised shapes like stripes, ribs, or emblems molded directly into the original vinyl. To replicate these, cut the template flat and then heat-form the new vinyl over the original panel using a heat gun. Work in slow passes, heating and pressing the vinyl into the recess until it copies the shape.
Heat molding takes practice. Start on a scrap piece of vinyl so you can learn how the material responds without ruining your final fabric.
Compound Curves and Compound Angles
A compound curve bends in two directions at once, like the top of a steering wheel or the front of a bucket seat. Cardboard cannot template a compound curve cleanly because it wants to stay flat. Switch to clear plastic or muslin for these surfaces.
For very tight compound curves, sew the fabric panels together first and then fit the sewn assembly over the foam. The seams themselves become the way you control how the fabric lays around the curve.
Template Preservation, Storage, and Reuse
A good template is worth keeping. Years later, when a small tear needs a repair or a matching panel needs to be redone, that template will save you hours. Here is how we store them so they survive.
Label every template with the car make, model, year, panel name, and date. Use a silver pen for plastic templates and a black marker for paper ones. Tape the label to the template itself, not to the storage bag, because the bag will eventually disappear.
Store templates flat in a large drawer or hang them on a wall with hooks through a registration hole. Avoid folding templates because the fold line becomes a permanent memory in the material and shows up as a wrong shape next time.
If a template gets wet, warped, or torn, recreate it from the original panel while the original is still available. Do not try to copy a damaged template, because the damage will be carried forward into the next panel.
Common Template Mistakes and How to Avoid Them
We have made every mistake below at least once, often more than once. Save yourself the fabric and learn from our errors.
Forgetting seam allowance. It is easy to template the panel perfectly and forget the extra material needed to sew. Add your seam allowances as a final step before you mark fabric, and write the allowance amount on the template itself.
Ignoring grain direction. Fabric stretches more across the grain than along it. Templates that ignore grain will produce covers that sag in odd places. Mark the grain direction on every template and align the same mark on the fabric before you cut.
Skipping the test fit. The most common shortcut is to skip the test fit and go straight to fabric. Every skip costs at least one panel of fabric. Always fit the template on the actual panel before you cut final material.
Pattern matching errors. When you have a stripe, plaid, or feature that needs to line up across two panels, mark the position of that feature on both templates. Use the same registration mark on each piece so the stripe lines up when both panels are installed.
Cutting the template too tight. Templates that are cut to the exact panel size never allow for fabric thickness and foam compression. Cut every template slightly large and trim it back only after the test fit.
Digital and Modern Template Tools
The old way of taping paper and cutting cardboard still works, but there are a few modern options worth knowing about. We use them on certain jobs, especially when the car is hundreds of miles away or when the customer wants to email us measurements.
Photo-based measurement uses a DSLR or a modern phone camera to capture the panel from multiple angles, with a ruler in the frame for scale. The photos are loaded into a basic image editor, the outlines are traced over the photo, and the result is printed at full scale as a paper template.
For very complex shapes, low-cost photogrammetry apps can build a 3D model of the panel from a series of overlapping photos. The 3D model can be unwrapped into a flat pattern that you can print and use like any other paper template. This is not a beginner tool, but it is a real option when the shape is too tricky for hand templating.
Most home projects do not need digital tools. The traditional process is faster, cheaper, and more accurate for the kind of panel replacements most DIYers tackle. Reach for digital tools only when the car is remote or the panel is unusually complex.
Choosing the Right Template Material for Your Project
With four common template materials and dozens of panel types, the right pick depends on the job. Use this framework to decide.
If the panel is mostly flat, like a kick panel or a console lid, cardboard is the right choice. It is cheap, easy to trim, and you can throw it away when you are done. For curved panels where you need to see registration marks through the template, clear plastic earns its keep. For huge one-piece templates like a headliner, brown paper is hard to beat because you can buy it by the yard. For sewn mock-ups and final test fits, muslin is the material that shows you exactly how the finished fabric will behave.
Reusability matters too. If you expect to make the same panel again for a repair or a matching second panel, invest the time in a clear plastic template. It will outlast cardboard and paper by years and gives you a reference you can hand to the next person who works on the car.
Skill level is the last filter. If you are new to upholstery, start with cardboard and paper. They are forgiving, cheap to replace, and let you focus on getting the shape right before you worry about producing a permanent template.
Frequently Asked Questions
How can I make my own fabric wall panels?
To make your own fabric wall panels, build a wooden frame to your desired size, staple a layer of batting over the frame, stretch your chosen fabric over the batting, and staple the fabric to the back of the frame. The same templating principles used for car panels apply: measure twice, cut once, and tension the fabric evenly across the frame.
What is the best material for car seat upholstery?
The best material for car seat upholstery depends on your priorities. Vinyl is the most durable and easiest to clean, leather wears in well and looks upscale, cloth breathes the best for hot climates, and neoprene is tough enough for work trucks. For most daily drivers, a quality automotive vinyl gives the best balance of durability, comfort, and ease of sewing.
How to DIY reupholster car seats?
To DIY reupholster car seats, start by removing the seats from the car, then strip the old cover off the foam to use as a pattern. Make a template from cardboard or clear plastic if the old cover is missing, cut new fabric with seam allowances, and sew the panels together with a heavy-duty sewing machine. Stretch the sewn cover over the foam and secure it to the seat base with hog rings or staples.
How hard is it to reupholster car seats?
Reupholstering car seats is a moderate difficulty project. Beginners can handle flat panels like kick panels and headliners within a weekend, while compound-curved pieces like bucket seat faces take practice and patience. The hardest part is rarely the sewing; it is making templates that fit the foam cleanly without wrinkles or sags.
How much seam allowance do I need for car upholstery?
For most automotive upholstery projects, a half inch seam allowance on hidden seams and a quarter inch on edges that tuck under a trim piece is the standard range. Thick materials like boat vinyl may need a half inch on every seam so the sewing machine can grip the layers. Always test your seam allowance on a scrap piece before you cut your final fabric.
Can I reuse upholstery templates?
Yes, upholstery templates can be reused many times if you store them properly. Clear plastic templates are the most reusable because they do not warp, tear, or absorb moisture. Label every template with the car make, model, year, and panel name, and store it flat in a dry place so it survives for years of future repairs.
Conclusion
Learning how to make templates for car upholstery panels is the foundation of every clean interior job we do. The pattern is the part of the work that determines whether the final cover looks factory or homemade, and it is the part that is easiest to practice without expensive tools.
Start with a small flat panel like a kick panel, work through cardboard and brown paper until the process feels natural, then graduate to clear plastic for the curved work. Keep your templates labeled and flat, take your time on the test fit, and remember that a perfect pattern is the cheapest tool in your shop. With the process in this guide, you have everything you need to template seats, doors, pillars, and headliners with confidence on your next project in 2026 and beyond.