
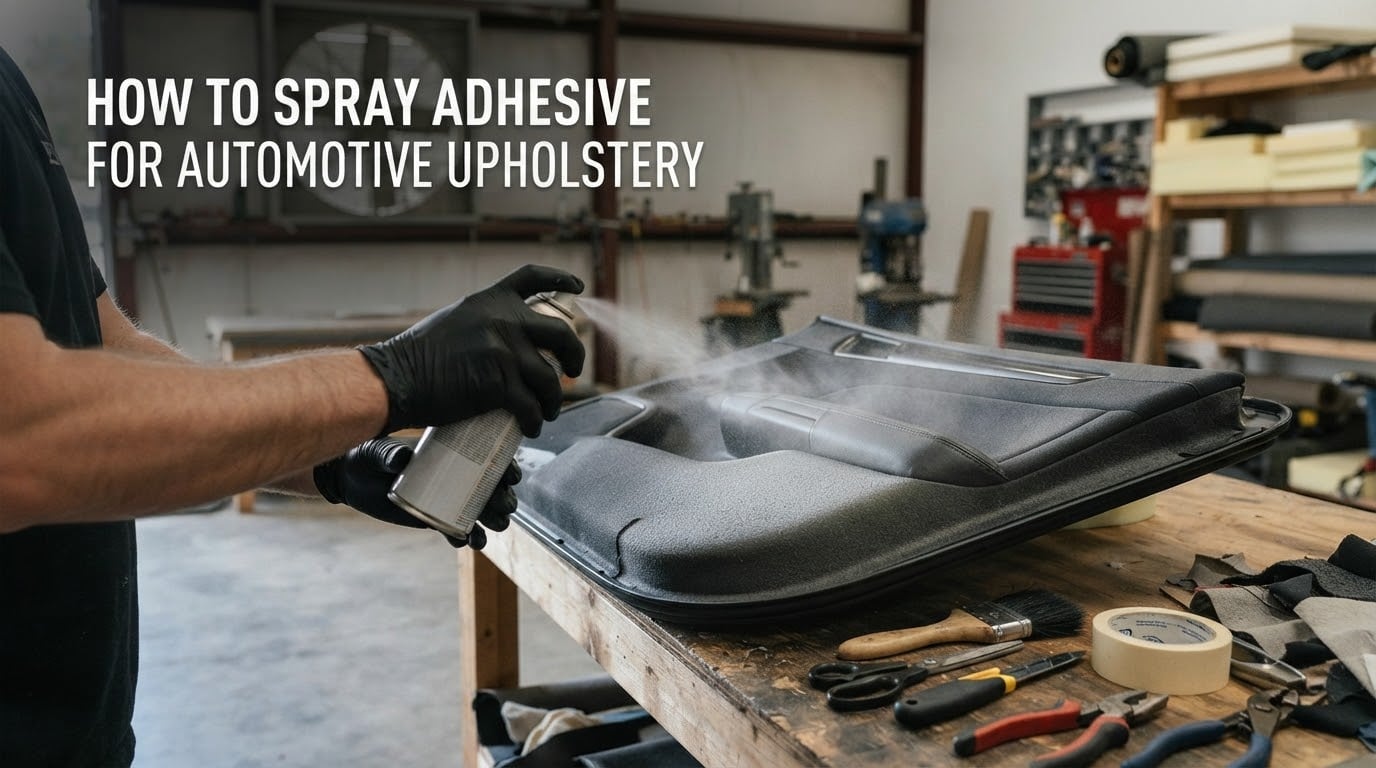
Spray adhesive is an aerosol-applied bonding agent that creates a strong, even bond between automotive fabrics, foam, vinyl, and headliner material — and using it the right way is what separates a sagging repair from a factory-looking finish. We have spent years rebuilding automotive interiors at our shop, and the truth is that most DIY failures come down to rushed surface prep, the wrong adhesive chemistry, or ignoring tack time. This guide walks you through exactly how to spray adhesive for automotive upholstery, from choosing the right can to finishing a headliner that will not peel on a hot July afternoon.
Table of Contents
- How to Spray Adhesive for Automotive Upholstery
- Understanding Spray Adhesive Types for Auto Upholstery
- Essential Tools and Materials Checklist
- Step-by-Step: Surface Preparation for Auto Interiors
- Step-by-Step: How to Apply Spray Adhesive to Automotive Upholstery
- Automotive-Specific Applications: Headliner, Seats, Door Panels, and Carpet
- Safety and Ventilation Best Practices
- Common Mistakes and Troubleshooting
- Environmental Factors: Temperature and Humidity Effects on Bonding
- Product Selection Guide: Solvent-Based vs Water-Based for Cars
- DIY vs Professional: When to Call an Auto Upholstery Shop
- Frequently Asked Questions
- Final Thoughts on How to Spray Adhesive for Automotive Upholstery
How to Spray Adhesive for Automotive Upholstery
Spraying adhesive inside a car is different from spraying it on a craft table. The cabin is a sealed plastic and metal box, the temperatures swing from freezing winters to 160°F dashboards in summer, and the surfaces — foam, vinyl, carpet backing, headliner fabric — all behave differently. The rest of this article breaks down the type of adhesive, the prep, the spray technique, and the per-surface applications so your repair lasts.
Understanding Spray Adhesive Types for Auto Upholstery
Not every spray adhesive can take the heat of a parked car. Automotive interiors are exposed to direct sunlight through the windshield, body heat from the engine bay, and repeated flexing every time someone slides into a seat. A general-purpose craft adhesive will usually fail within a season under those conditions.
There are three families of spray adhesive that show up in professional auto upholstery work:
- Solvent-based contact adhesives: The pro-shop standard. They flash off quickly, develop high initial tack, and remain flexible after curing. They hold up to the 150°F+ interior temperatures a closed car reaches in summer. The trade-off is strong fumes and the need for real ventilation.
- Water-based (low-VOC) adhesives: A safer option for home garages. They have lower odor and easy cleanup, but they usually need a longer flash-off and they do not tolerate high heat as well. They are a reasonable pick for door panels and trunk liners that sit in shaded areas of the cabin.
- High-temperature specialty adhesives: Formulated specifically for headliners and dashboards. They cost a little more, but they are what professional restorers reach for when a sagging headliner cannot come back for a second visit.
Within those families you will also see terms like contact adhesive, contact cement, and high-tack spray adhesive. For car work, they are mostly interchangeable — the key spec to look for is heat resistance on the can, plus a VOC level you can work with safely in a closed garage.
Essential Tools and Materials Checklist
Before you pull the trigger on a single spray pass, lay out everything you need. Stopping mid-job to find a scraper or a respirator is how mistakes happen.
- Automotive spray adhesive (solvent or water-based, depending on ventilation)
- Disposable nitrile gloves and a NIOSH-approved respirator with organic vapor cartridges
- Safety glasses and a long-sleeve shirt or coveralls
- Drop cloth or old cardboard to protect paint, glass, and trim
- Low-tack masking tape and plastic sheeting for overspray control
- Scraper, plastic putty knife, and stiff bristle brush
- Isopropyl alcohol or a dedicated interior degreaser
- Clean microfiber towels and lint-free rags
- Roller or smoothing tool for final press-down
Skip the respirator and you will smell the adhesive for the rest of the day, even after the car is back together. It is the single tool most first-timers undervalue.
Step-by-Step: Surface Preparation for Auto Interiors
Surface prep is where most automotive spray adhesive jobs win or lose. Adhesive needs a clean, dry, slightly textured surface to grab onto. If you skip degreasing, the bond fails. If you skip drying time, you trap solvents and the bond fails a few weeks later.
Follow this sequence every time:
- Remove the part when you can. Pull the headliner board, the door panel, or the seat cover off the car. Working flat on a bench gives you even coverage and keeps overspray off your paint.
- Strip old adhesive and foam. Scrape off any loose adhesive with a plastic putty knife. A stiff bristle brush knocks off the soft foam residue. Avoid metal scrapers on vinyl or plastic — they leave scratches.
- Degrease the substrate. Wipe the bonding surface with isopropyl alcohol or an interior-safe degreaser. Body oils from hands, silicone dressings, and Armor All-style products are all bond killers. Two passes usually beat one.
- Let it dry completely. Give the surface at least 10 to 15 minutes of dry time, longer in a humid garage. Any moisture left under the adhesive will turn into steam under summer heat and bubble the bond.
- Mask everything that should not get sprayed. Cover paint, glass, chrome, and switchgear. Overspray on a windshield is annoying but recoverable; overspray on a leather-wrapped steering wheel is a different problem.
- Test spray on a scrap piece. Two seconds on cardboard tells you the spray pattern, the fan width, and whether the can is actually mixing properly. A can that spits instead of mists will give you a lumpy bond.
Prep takes longer than the spray step itself, and that is by design. A clean, dry substrate is half the work.
Step-by-Step: How to Apply Spray Adhesive to Automotive Upholstery
Once the surface is ready, the actual spray pass is fast. The technique is what controls the result.
- Shake the can for a full minute. The solids inside settle fast. A poorly shaken can sprays thin at first and globs at the end — that uneven coat is what causes delamination.
- Hold the can 8 to 10 inches from the surface. Too close and the adhesive puddles; too far and you get a dry, dusty coat with poor tack. Most automotive spec sheets call for 20 to 25 cm, which lines up with 8 to 10 inches.
- Spray in a smooth, overlapping pattern. Move the can parallel to the surface, not in arcs. Overlap each pass by about 50%. Keep the can moving — parking in one spot is how you get runs.
- Apply two light coats, not one heavy one. Coat the substrate, wait for the flash-off (usually 30 to 60 seconds depending on the can), then apply a second coat. Many pros also spray a light coat on the back of the fabric for the strongest bond.
- Watch for the tack window. Tack time is the short period after flash-off when the adhesive feels sticky but does not transfer to your glove. That is the moment to lay the fabric down. Bond too early and the solvents stay trapped; bond too late and the adhesive has already kicked.
- Press from the center out. Lay the material down and smooth it with a roller or your hand (gloved) from the center toward the edges. This pushes out air and ensures full contact. Apply firm, even pressure for 30 seconds.
- Let it cure before stressing the bond. Most automotive spray adhesives reach handling strength in 1 to 2 hours and full bond strength in 24 hours. Do not reinstall the part the same minute you finish.
The pattern, distance, and tack window are the three knobs that control the result. Get those right and the chemistry does the rest.
Automotive-Specific Applications: Headliner, Seats, Door Panels, and Carpet
Each surface inside a car has its own quirks. Treating them all the same is one of the fastest paths to a callback.
Headliner. A sagging headliner is the most common DIY complaint we hear. The roof of a car gets the most direct sun and the highest cabin temperatures, so the adhesive has to be high-heat rated. Spray the headliner board in sections, working front to back, and bond the fabric while the adhesive is still in its tack window. A helper makes this much easier — one person holds the fabric taut, the other smooths it down. Do not stretch the fabric; let it drape and press from the middle out.
Seats. Seat foam is porous, so it drinks adhesive if you spray too heavy. Two very light coats with full flash-off between them is the trick. For seat covers, spray both the foam and the back of the cover. If you are rebonding foam to a seat pan, mask off any seat heater elements and wiring before you spray — solvent-based adhesive on a heating element is a future problem.
Door panels. Door panels combine hard plastic, foam, and fabric on one part. Mask off the switchgear and any plastic trim that should stay adhesive-free. The thin foam pad on the back of a door panel usually wants a single light coat; the fabric cover wants two.
Carpet. Floor carpet and trunk liner take a beating from feet, cargo, and moisture. Solvent-based adhesive is usually worth the extra ventilation here for the heat resistance. Spray the floor pan, not just the carpet backing, and roll the carpet out from the center of the cabin toward the edges. If your car has a removed seat, take the opportunity to spray both sides of any sound deadening pad at the same time.
Safety and Ventilation Best Practices
Spray adhesive is convenient, but it is also chemistry in a pressurized can. Treat it with respect.
- Work in a garage with the door open and a box fan pulling air out, not in.
- Wear a NIOSH-approved respirator with organic vapor cartridges. A dust mask does not filter solvent fumes.
- Eliminate ignition sources. No smoking, no welding, no running engine in the bay.
- Keep the can away from heat above 120°F. A can left on a blacktop driveway in summer can vent.
- Store spare cans upright and at room temperature.
If you feel lightheaded or your eyes sting, you are past the safe exposure line. Get fresh air before you keep spraying.
Common Mistakes and Troubleshooting
Even with good technique, things go wrong. Knowing what to look for saves the part.
- Bubbles under the fabric. Usually trapped air or solvent. Pop the bubble with a pin, reheat with a hairdryer, and re-roll. If it has cured, lift the fabric, spray a light coat on both surfaces, and rebond.
- Edges peeling up. The classic sign of insufficient edge coverage. Spray an extra pass on any seam or perimeter, and roll those edges twice.
- Headliner sagging again in a week. Almost always wrong adhesive for the heat. Switch to a high-temperature headliner adhesive and redo the section.
- Tacky surface that never dries. Too much adhesive, not enough flash-off, or cold weather. Pull the part apart, let both surfaces flash off fully, and re-bond with lighter coats.
- Overspray on glass or paint. Wipe immediately with a clean microfiber and a small amount of the manufacturer’s recommended cleanup solvent. Once it cures, you are into polishing compound territory.
Environmental Factors: Temperature and Humidity Effects on Bonding
The climate around the car matters as much as the climate inside it. Most automotive spray adhesives are formulated to perform between roughly 60°F and 90°F. Outside that window, the chemistry starts to misbehave.
In a cold garage — say below 55°F — the adhesive gets thick, the spray pattern worsens, and flash-off slows down. Warming the cans in a room-temperature space for a few hours before use helps. In hot weather above 90°F, the adhesive flashes off too fast, the tack window shrinks to almost nothing, and you end up bonding after the adhesive has already kicked. Working in the morning or in a shaded, ventilated bay is the fix.
Humidity is the other silent variable. High humidity slows solvent evaporation and can leave moisture trapped under the bond. If your garage is damp, run a dehumidifier for a day before you start, and avoid spraying on rainy days even if the garage is technically enclosed.
Product Selection Guide: Solvent-Based vs Water-Based for Cars
Choosing between solvent-based and water-based comes down to three questions: how hot does the surface get, how much ventilation do you have, and how permanent does the bond need to be.
- Choose solvent-based when: The part is in direct sun (roof, dashboard, rear deck), you want the fastest tack, and you can ventilate the garage properly.
- Choose water-based when: The part is shaded, you are working indoors or in an apartment garage, and you want easy cleanup with water.
- Choose high-temp specialty when: The surface will see 140°F or higher — which is basically every horizontal surface inside a closed car in summer.
For a first DIY interior job, we lean solvent-based with proper ventilation. The performance gap in heat resistance is significant, and the working time is more forgiving for a beginner. Water-based is the right call for door panels and small trim pieces in a closed garage.
DIY vs Professional: When to Call an Auto Upholstery Shop
There is real satisfaction in finishing your own interior work, and a headliner or door panel is a fair DIY project with patience. There are also jobs where calling a shop saves you money.
If the headliner foam is delaminated across the entire roof, if the seat has sprung springs as well as torn fabric, or if you are restoring a classic car where the original pattern and stitching matter — that is shop work. A professional shop has the patterns, the sewing machines, and the chemistry to match the factory look. We take on those projects at our trim shop every week, and the difference shows in how the part sits five years later.
For one-off repairs, a small budget, and a learning mindset, the DIY path is realistic. Treat the chemistry with respect, take your time on prep, and the repair will hold.
Frequently Asked Questions
What is a good spray adhesive for auto upholstery?
A good spray adhesive for auto upholstery is a solvent-based, high-heat-resistant contact adhesive formulated for foam, fabric, vinyl, and headliner material. Look for cans rated to at least 140 degrees F, with a wide fan spray pattern and a tack time of 30 to 90 seconds. Water-based low-VOC options work for shaded door panels and trunk liners, but high-temp specialty adhesives are the safer pick for headliners and dashboards that see direct sun.
What are the instructions for using spray adhesive?
Shake the can for one minute, hold it 8 to 10 inches from the surface, and apply two light coats with a 30 to 60 second flash-off between them. Spray both the substrate and the back of the fabric, wait for the adhesive to become tacky without transferring to your glove, then press the materials together from the center out. Let the bond cure for 24 hours before putting the part back into service.
What spray adhesive do upholsterers use?
Professional upholsterers reach for solvent-based high-tack contact adhesives designed for automotive and marine interiors, plus dedicated high-temperature headliner adhesives for roof panels. Brands favored in trim shops are typically those withstanding 140 degrees F or higher, with adjustable fan nozzles and consistent atomization. Many shops also keep a water-based low-VOC can on hand for small shaded parts.
What is the best adhesive for car interior upholstery?
The best adhesive for car interior upholstery is one that matches the surface to the conditions it lives in. For headliners, dashboards, and rear decks exposed to direct sun, a high-temperature solvent-based contact adhesive is the strongest choice. For door panels, carpet, and trunk liners in shaded areas, a water-based low-VOC adhesive is easier to live with and still bonds well. The key spec to compare across products is heat resistance, followed by spray pattern and flash-off time.
Final Thoughts on How to Spray Adhesive for Automotive Upholstery
Knowing how to spray adhesive for automotive upholstery is mostly about respecting the chemistry and the cabin environment. Pick the right adhesive for the heat that surface will see, prep the substrate until it is truly clean and dry, and apply two light coats at the right distance and tack window. Do those things, give the bond a full 24 hours to cure, and your repair will hold through summers and winters alike.
When you are ready to start, pull the part off the vehicle, lay out the checklist, and work in a ventilated space. If you get stuck on a torn seat spring, a fully delaminated headliner, or a classic interior where the original stitching matters, our trim shop is always glad to take a look. Otherwise, take your time, follow the steps above, and enjoy the satisfaction of an interior you put together yourself.