
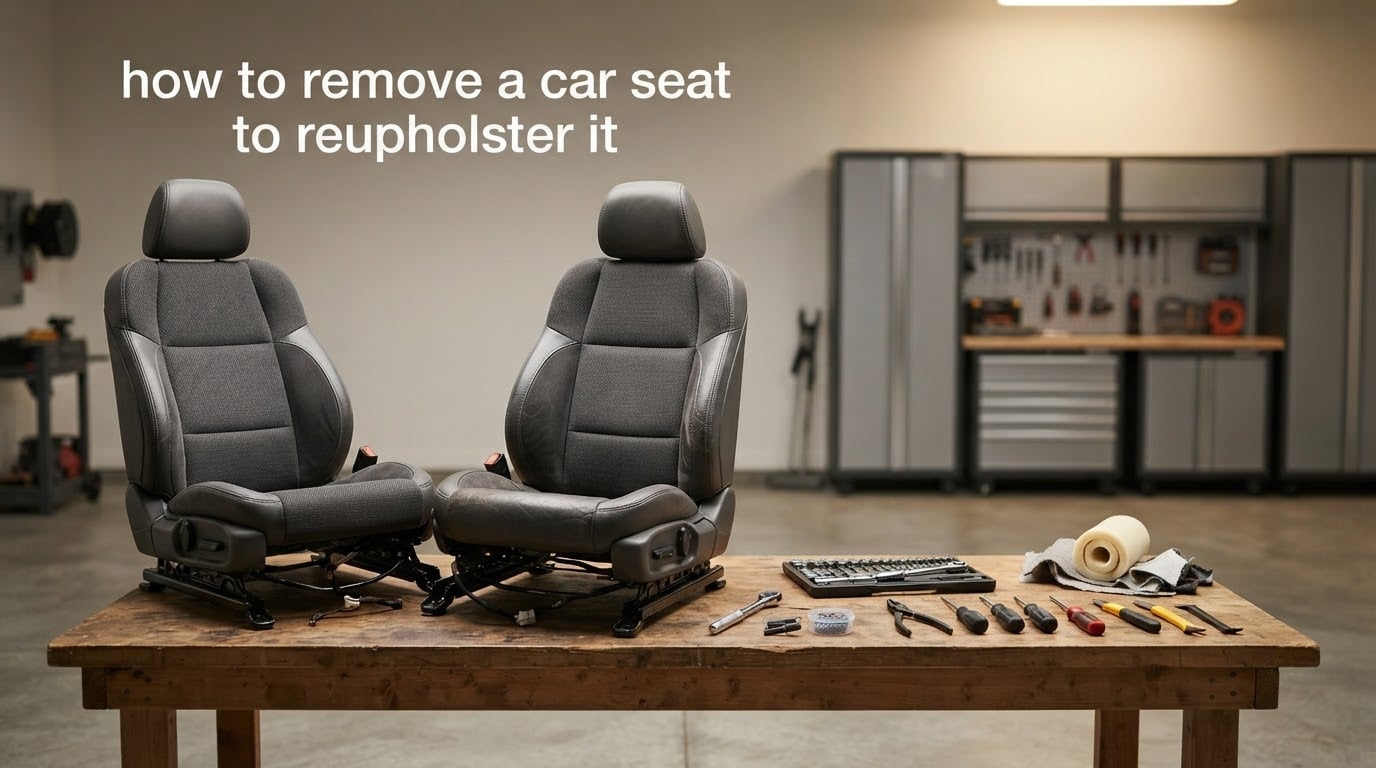
Learning how to remove a car seat to reupholster it is the first real test of any DIY upholstery project, and the difference between a clean job and a damaged interior usually comes down to this step. I have pulled dozens of seats over the years for clients here at Segal Motor Trimmings, and the ones that come out smoothly almost always follow the same careful sequence.
You can absolutely reupholster a car seat yourself, as long as you respect the seat frame, the airbag wiring, and the upholstery fabric you are working with. In this guide, I will walk you through the entire process from prepping the cabin to setting the re-covered seat back on the floor, including the safety steps that most online guides skip.
Table of Contents
- Why You Need to Remove the Car Seat Before Reupholstering
- Before You Start: Safety and Preparation
- Tools and Materials Needed
- Step 1: Remove the Seat from the Vehicle
- Step 2: Disassemble the Seat
- Step 3: Remove the Old Upholstery
- Step 4: Create a Pattern from the Old Upholstery
- Step 5: Prepare Your New Upholstery
- Step 6: Install the New Upholstery
- Step 7: Reassemble and Reinstall the Seat
- Troubleshooting Common Issues
- DIY vs Professional Reupholstery
- Frequently Asked Questions
- Final Thoughts
Why You Need to Remove the Car Seat Before Reupholstering
Removing the seat from the vehicle is non-negotiable if you want a clean reupholstery job. Trying to staple and stretch new fabric around a seat that is still bolted into the cabin leads to wrinkles, missed hog rings, and broken clips. Once the seat is out, you can flip it over, access the underside, and work the material with both hands.
I always tell customers the same thing: the removal step is where you learn the most about your specific car. Torx head bolts hide under the rails, plastic clips snap in places you cannot see, and sometimes the seat belt pretensioner lives underneath the cushion. Knowing what is there before you start sewing saves you a redo.
Removing the seat also protects your dashboard and door cards. Hog rings and staples fly when you cut them out, and gravity pulls every loose thread down into the carpet. Take the seat out, take it to a bench, and the mess stays contained.
Before You Start: Safety and Preparation
Most guides on how to remove a car seat to reupholster it skip the safety section, but this is the step that separates a successful DIY from a trip to the dealership. Modern seats are not just foam and fabric anymore. They carry wiring for airbags, seat heaters, occupant sensors, and memory modules. Treat the seat as an electronic component until you have confirmed it is not.
Disconnect the Battery First
Before you touch a single connector, pop the hood and disconnect the negative terminal of the battery. Wait at least 10 minutes for the SRS capacitor to bleed down. Side airbags live inside the seat back on most cars built after 2002, and they will deploy if you ground the wrong wire while the system is live.
Check for Seat-Mounted Airbags
Look for an “SRS” or “AIRBAG” tag stitched into the side of the seat cover. If the vehicle has side curtain or seat-mounted airbags, the yellow SRS connector sits under the seat, usually wrapped in bright yellow tape. Never cut a yellow wire. Disconnect the connector at its housing only, and never unplug it with the battery connected.
Heated Seats and Power Seat Controls
Heated seats add two extra wires running through the cushion to heating pads between the foam and the upholstery. Power seats add a thick harness that controls the motor, the position sensors, and the memory module. Photograph the wiring before you unplug anything. I keep a phone full of these reference shots because every connector is different.
Work in a Clean, Flat Space
Lay out a moving blanket or a piece of cardboard on your workbench. The seat frame has sharp spring ends that will chew up a kitchen table. Set aside a magnetic tray for the Torx bolts and a labelled bag for the plastic clips. You will thank yourself at reassembly.
Tools and Materials Needed
You do not need a professional shop to remove a car seat for reupholstery, but you do need the right tools. Most of these are common workshop items, and the specialty bits are worth buying once and reusing for years.
- Socket wrench set with metric and imperial sockets, including Torx head bolts (commonly T40, T45, and T50)
- Ratchet extension, at least 3 inches long to reach the front rail bolts
- Flathead and Phillips head screwdrivers
- Pry tool or trim removal tool for plastic side clips
- Needle nose pliers for the seat belt anchor (if removing rear seats)
- Work gloves and safety glasses — old hog rings can fly when cut
- Phone or camera for photographing wiring connectors before unplugging
- Masking tape and a marker for labelling bolts by location
- Moving blanket or padded workbench surface
- Vacuum cleaner for the carpet under the seat once it is out
For the reupholstery side, keep a separate list ready. You will want hog ring pliers, a staple gun, a seam ripper, and your replacement seat covers or fabric. Most people find that the tools they bought for removal end up being the same tools they need for installation.
Step 1: Remove the Seat from the Vehicle
This is the core of how to remove a car seat to reupholster it. Take your time here. A stripped bolt on the seat track can turn a Saturday project into a week of parts hunting.
Slide the Seat to Expose the Bolts
Push the seat all the way back to expose the front pair of Torx head bolts on the seat tracks. Remove those, then slide the seat all the way forward to reach the rear pair. On most vehicles, four bolts hold the entire seat down, two per side. On trucks with bench seats, you may have six or more.
Disconnect Electrical Connectors
Before you lift the seat, reach under and find every wiring harness attached to it. Press the release tab on each connector and pull straight out, never by the wires. Common connectors include the seat belt buckle switch, the occupant detection sensor, the heated seat pads, and the side airbag inflator. Lay the connectors on the floor so they do not snag as you lift.
Lift the Seat Out
With the bolts out and the wiring disconnected, grab the seat at the front and rear of the frame and tilt it back. Carry it out of the car as a single unit, with a helper if it weighs more than 40 pounds. Set it down on your padded workbench with the backrest hanging slightly off the edge so you can access the underside.
Common Bolt Troubles
If a bolt refuses to budge, stop applying force and reach for penetrating oil. Spraying PB Blaster or a similar product on the threads and waiting 10 minutes usually frees a rusted bolt. For stripped heads, switch to a Torx socket one size larger than what should fit. It will grip the rounded edges and back the bolt out without drilling.
Step 2: Disassemble the Seat
Now that the seat is on the bench, you can take it apart piece by piece. The goal here is to separate the cushion, the backrest, the headrest, and any side panels so you can reach every staple and hog ring holding the upholstery.
Remove the Headrest First
Most headrests have two release buttons at the base of the posts. Press them both at the same time and pull straight up. If they are stuck, a firm upward tug with the buttons held usually breaks them free. On older vehicles, you may need to remove a small plastic cover at the base to expose a single bolt.
Detach the Side Panels and Recliner Handles
Plastic side panels cover the recliner mechanism and sometimes the airbag inflator. Pry these off with a trim tool, working slowly around the edges to avoid snapping the clips. Set the recliner handle aside if it unbolts separately. Keep every screw and clip in your labelled bag.
Separate the Backrest from the Base
On most seats, two hinge bolts connect the backrest to the bottom cushion. Remove these with your socket wrench. Have a helper hold the backrest as you pull the last bolt, because the back will fall backward. Some vehicles use a quick-release hinge instead, which just pops apart once you push the right tab.
Track and Recliner Hardware
If you plan to replace the foam or repaint the frame, remove the seat tracks and the recliner mechanism now. Both usually unbolt from the frame with four to six bolts each. Lay them out flat and photograph their orientation before removing them. Reinstalling a track backward is a common mistake that I see every month.
Step 3: Remove the Old Upholstery
This is where you finally see the bones of the seat. Removing the old upholstery is mostly a battle with hog rings, staples, and plastic clips. Take your time so you do not tear the old cover. A torn cover is harder to use as a pattern.
Flip the Seat Over and Find the Fasteners
Turn the cushion upside down on your bench. You will see a row of metal rings, staples, or plastic clips holding the bottom edge of the cover to the seat frame. The number varies by vehicle, but expect 8 to 20 fasteners per cushion.
Cut or Pry the Hog Rings
Hog rings are C-shaped metal fasteners that loop through the cover and around a wire on the frame. Hog ring pliers will both install and remove them, but a pair of side cutters works faster for removal. Slide one jaw under the ring and snip. Watch your eyes. These little rings go airborne when cut.
Pull Out the Staples
For staples, use a flathead screwdriver or a dedicated staple lifter to pry them up from the frame. Work from one end to the other so you do not bend the frame wire. If you plan to reuse the original cover as a pattern, slide the staple lifter under the staple and rock it up gently to avoid tearing the fabric.
Release the Plastic Clips
Plastic clips usually have a small tab that you press with a flathead screwdriver. They pop out with a soft click. If a clip breaks, do not panic. Most upholstery shops sell replacement clips by the bag for a few dollars. Save the broken one as a sample so you know which type to order.
Inspect the Foam and Springs
With the cover off, run your hand over the foam. If it has compressed flat or crumbled in places, replacing it now will make your new upholstery look better and last longer. Check the seat springs for any that have popped loose or broken. A quick splint with wire and a couple of new hog rings fixes most spring problems.
Step 4: Create a Pattern from the Old Upholstery
The cleanest way to make a pattern is to use the old upholstery as a template. It already has the seams sewn, the curves cut, and the dart placements marked from years of use. Lay it flat on a large table and peel the pieces apart at the seams.
Mark Each Panel
Use a washable marking pen and small pieces of masking tape to label each panel: “back left,” “front right,” “side bolster,” and so on. Take a photo of the back side of the cover before you separate the panels so you can refer back to it during reassembly.
Press the Panels Flat
Most upholstery fabric has memory. If you try to trace a wrinkled panel, your new cover will be misshapen. Iron each panel flat on a low setting, or weigh it down with books overnight. Vinyl and leather can be warmed slightly with a hair dryer to relax the wrinkles.
Transfer the Pattern to New Material
Lay each flattened panel on top of your new upholstery fabric and trace around it with a chalk marker. Add a half-inch seam allowance on every edge. For directional fabrics like grain leather, make sure all the panels run the same direction. Cutting one panel upside down will make the finished seat look mismatched.
Step 5: Prepare Your New Upholstery
With your pattern pieces cut, you are ready to start sewing. If you have never run a sewing machine before, do a few test passes on scrap fabric to dial in your tension. Upholstery thread is thicker than regular thread, and most home machines need the tension turned down a notch.
Cut Your Fabric
Cut along the chalk lines with sharp fabric scissors or a rotary cutter. A rotary cutter on a cutting mat gives the cleanest edges and is what professional upholsterers use. Avoid using a kitchen knife, which tears more than it cuts on most fabrics.
Sew the Panels Together
Pin the panels with the right sides together and sew along the marked seam lines. Use upholstery thread and a heavy-duty needle, usually size 18 or 20. For vinyl or leather, a walking foot on your sewing machine will keep the layers feeding evenly. Sew a test seam on scrap pieces first to dial in the stitch length.
Add Piping if Desired
Piping, also called welting, gives a finished, factory-style edge along the seams. You can buy pre-made piping or make your own by wrapping cording in a strip of your fabric and sewing it into the seam. Add piping to the main seams for a classic look, or skip it for a sleeker modern style.
Prepare the Foam
If you are replacing the foam, wrap the new foam in a thin layer of batting before covering it. Batting smooths out minor imperfections and helps the fabric slide into place during installation. Spray adhesive holds the batting in place while you work.
Step 6: Install the New Upholstery
Installing the new cover is the reverse of removal, with a few extra tricks to make the fabric look smooth and factory-tight. Work from the centre of each panel outward, and check for wrinkles as you go.
Start at the Centre
Drape the new cover over the foam and align the centre seams first. Tack the centre to the frame with a single staple or hog ring, then move to the sides. This anchors the cover so you can pull it taut without stretching it off-centre.
Pull and Staple in Stages
Pull the fabric toward the edges and add a staple every two inches along the underside of the frame. Keep the tension even. Too tight and the foam will compress. Too loose and you will see wrinkles in the finished seat. Stop and check from the front after every few staples.
Use Hog Rings for Wire Frames
If the original cover used hog rings, replace them with new ones of the same size. Hog ring pliers make this fast and consistent. Slide the ring through the fabric, hook it over the frame wire, and squeeze the pliers. A properly installed hog ring pulls flush with no gap.
Tuck and Clip the Corners
Corners are where most DIY projects fall apart. Fold the fabric like you are wrapping a present, then staple the folded edge to the underside of the frame. A small flathead screwdriver helps push the fabric into tight corners before you staple. Plastic clips go on last over the folded edges to hide the staples.
Warm the Vinyl Trick
On a sunny day, leave the covered seat in direct sunlight for 30 minutes before installing it. The warmth softens vinyl enough to relax the wrinkles without damaging the foam. This is a tip I picked up from old-school upholstery shops and it still works on modern materials.
Step 7: Reassemble and Reinstall the Seat
With the new upholstery installed, you are on the home stretch. Reassembly is the reverse of disassembly, but pay attention to the wiring and the torque specs to avoid future headaches.
Reattach the Tracks and Recliner
Bolt the seat tracks and recliner mechanism back onto the frame using the bolts you set aside earlier. Tighten them to the manufacturer torque spec, usually around 30 to 40 foot-pounds. A torque wrench is worth the investment here. Overtightening can crack the frame, and undertightening lets the seat shift while driving.
Reconnect the Backrest and Headrest
Reattach the backrest hinge bolts with your helper holding the back steady. Slide the headrest posts back into the receivers until they click. Test the recliner handle to make sure the mechanism is engaging properly. If the handle feels loose, the internal spring has likely popped off and needs to be rehooked.
Carry the Seat Back to the Car
Lower the seat into the cabin at the same angle you removed it. Tilt it back so you can reach under and plug in the wiring connectors. Each connector has only one orientation, so do not force them. Listen for the click of each one locking into place.
Bolt the Seat Down
Slide the seat back and align the front rail holes with the floor mounts. Hand-thread the bolts first to avoid cross-threading, then torque them to spec. Repeat with the rear bolts. Test the seat by rocking it side to side. If there is any play, the bolts are not tight enough or one was missed.
Reconnect the Battery
Once the seat is bolted down and the wiring is reconnected, reconnect the negative terminal of the battery. Turn the ignition on and check that the airbag light goes through its self-test and turns off. If the airbag light stays on, there is a connector that did not seat properly. Unplug it and try again.
Troubleshooting Common Issues
Even with a careful plan, things go wrong on car seat removal projects. Here are the issues I see most often and the fixes that have worked for me.
Stripped or Rusted Bolts
A stripped Torx bolt is one of the most common frustrations. Reach for a Torx socket one size larger than the bolt should take, or use a left-handed drill bit to back it out. Penetrating oil left overnight will free a rusted bolt 9 times out of 10. As a last resort, weld a nut onto the stripped head and back it out with a wrench.
Broken Plastic Clips
Plastic clips under the seat snap all the time, especially in older vehicles where the plastic has become brittle. Order a replacement clip assortment before you start, and save the broken clips as samples. A broken clip usually will not affect the seat’s function, but it can let the trim panel rattle at speed.
Compressed or Damaged Foam
Foam that has lost its shape makes a brand-new cover look saggy after a few months. Replace foam that has compressed more than half its original thickness. Heat from a hair dryer or steamer can restore minor compression in leather seats, but the fix is temporary.
Airbag Light Stays On
If the airbag light stays lit after reinstallation, the most common cause is an unseated connector under the seat. Lift the seat, press each connector in until it clicks, then cycle the ignition. A persistent airbag light requires a scan tool to clear, but the seat itself should be safe.
DIY vs Professional Reupholstery
Deciding whether to DIY or hire a pro depends on the seat, your tools, and your patience. A simple cloth bench seat in an older truck is a great starter project. A leather seat with heating, ventilation, and 18-way power adjustment in a luxury SUV is not.
DIY works best when the original upholstery uses hog rings and staples that you can replicate, when the foam is still in good shape, and when you are comfortable using a sewing machine. A pre-made seat cover kit makes the project much faster and removes the need for pattern-making.
Professional reupholstery makes sense for modern seats with integrated airbags and complex wiring, for exotic materials like Nappa leather, and for anyone who wants a factory-perfect result. Most shops quote per seat, and the price varies widely based on material and vehicle. The most expensive part is usually the labor, not the fabric.
If your goal is a weekend refresh on a daily driver, DIY will save you a meaningful amount of money. If your goal is a show-quality finish on a classic car, a professional upholsterer is worth every penny. Knowing which one you need is half the battle.
Frequently Asked Questions
Can I reupholster a car seat myself?
Yes, you can reupholster a car seat yourself if you have basic hand tools, patience, and a sewing machine for fabric work. DIY works best on older seats with hog rings and staples, simple cloth or vinyl materials, and minimal electrical features. Modern seats with airbags, heaters, and power controls add complexity, but they are still doable with careful planning.
What tool do I need to remove car seats?
You need a socket wrench set with Torx bits (T40, T45, T50 are most common), a ratchet extension, screwdrivers, and a trim removal tool for plastic clips. A pair of side cutters helps with stubborn hog rings later on. Disconnect the battery before you start, and photograph every wiring connector before unplugging it.
How to remove upholstery from car seat?
To remove upholstery from a car seat, first take the seat out of the vehicle, then disassemble the backrest and headrest. Flip the cushion upside down and cut the hog rings or pry out the staples that hold the cover to the frame. Work slowly around the edges so the old cover stays intact and can be reused as a pattern for the new one.
Is it cheaper to reupholster car seats or buy new ones?
Reupholstering is usually cheaper than buying new factory seats, especially for older vehicles where OEM replacements are hard to find. DIY reupholstery with a seat cover kit costs a fraction of what a shop would charge. Buying new factory seats makes sense when the frame or foam is damaged, or when the car is under warranty and the seats are still available from the dealer.
Final Thoughts
Knowing how to remove a car seat to reupholster it is the foundation of every successful interior restoration. Take the time to disconnect the battery, label every connector, and pull the seat out cleanly. The actual reupholstery work is mostly patience, but the removal step sets you up to do it right.
If you have a daily driver with worn cloth seats, this is a project you can finish in a weekend with a basic tool set and a seat cover kit. For older classics or trucks with cracked vinyl, a full removal-and-recover is often the only way to bring the interior back to life. Either way, doing it yourself saves real money and gives you a finished seat that fits exactly the way the original did.
Ready to start? Gather your tools, clear a workspace, and begin with the battery. The rest is just bolts, fabric, and time. If you get stuck on a step, our team at Segal Motor Trimmings is always happy to talk through the specifics of your vehicle.