
I still remember the first time I closed the door of a properly sound-deadened car after years of driving loud panels and buzzing trim.
The hush was almost uncomfortable, like the cabin had been sealed off from the road. That single experience convinced me that learning how to fit sound deadening under car carpet is one of the most rewarding upgrades any DIYer can tackle.
In this guide, I will walk you through every step we use in our shop to silence a floor pan, from choosing the right materials to reinstalling the last piece of trim.
Table of Contents
- What Is Sound Deadening and How Does It Work
- Why Install Sound Deadening Under the Carpet
- Tools and Materials You Will Need
- Sound Deadening Materials Compared
- Safety Precautions Before You Begin
- How to Prepare the Cabin for Installation
- How to Fit Sound Deadening Under Car Carpet
- How Much Sound Deadening Material Do You Need
- Common Mistakes to Avoid
- Maintenance Tips After Installation
- Frequently Asked Questions
- Conclusion
What Is Sound Deadening and How Does It Work
Sound deadening is a process of adding dense, vibration-absorbing materials to vehicle panels to reduce noise, vibration, and harshness (NVH) inside the cabin.
Most floor installations rely on constrained layer damping (CLD), which sandwiches a viscoelastic material such as butyl rubber between two stiff layers. When the metal floor pan flexes from road impacts, the butyl shears and turns that mechanical energy into a tiny amount of heat, quieting the panel.
A second layer, usually mass loaded vinyl (MLV) or closed cell foam, is added on top to block airborne noise and to insulate against engine and exhaust heat.
Key Material Types Explained
Butyl-based mats are the workhorse for the first layer because they stick aggressively to clean metal and stay flexible across a wide temperature range. Mass loaded vinyl is heavy and dense, so it acts like a sound barrier. Closed cell foam is lightweight and adds thermal insulation without much weight gain.
Why Install Sound Deadening Under the Carpet
Installing sound deadening under the carpet targets the largest uninterrupted metal surface in your vehicle: the floor pan.
The floor carries noise from the tires, suspension, exhaust, and drivetrain directly into the cabin, and it sits inches from your feet on every drive. Treating it gives you more quiet per square foot than almost any other panel.
There are three concrete benefits. First, road noise drops noticeably, especially coarse asphalt rumble. Second, vibration from the transmission tunnel and firewall is damped, so the cabin feels more solid. Third, the underlay adds thermal insulation that keeps summer heat from radiating up through the carpet and keeps cabin warmth in during winter.
Beyond Quieter Rides
A properly treated floor also makes any audio system sound better, because the speakers stop fighting panel resonances. If you have ever turned the volume up to drown out the noise, treating the floor lets you listen at lower volumes with clearer detail.
Tools and Materials You Will Need
Gathering everything before you start is the difference between a smooth weekend project and a stalled car sitting on your driveway for a month. Here is the checklist we use on every floor job.
Hand Tools
- Socket and ratchet set (metric and SAE) with extensions
- Trim removal tool set (plastic, not metal, to avoid scratches)
- Torque wrench for seat bolts
- Utility knife with fresh blades
- Roller or hard rubber hand roller
- Heat gun (for stubborn adhesive)
- Drill with small bits (only if your seats are riveted)
Cleaning and Prep Supplies
- Degreaser or wax and grease remover
- Microfiber towels
- Isopropyl alcohol for final wipe-down
- Nitrile gloves
- Shop vacuum
- Masking tape and a marker
Sound Deadening Materials
- Butyl-based CLD mat (enough for 60 to 80 percent coverage of the floor pan)
- Closed cell foam or mass loaded vinyl for the second layer
- Spray adhesive or contact cement rated for automotive interiors
- Acoustic underlayment or jute padding if desired
Sound Deadening Materials Compared
Not every material is right for every car or budget. Here are the four options we recommend most often.
- Butyl CLD mat — first layer on metal. Heavy. Excellent heat tolerance.
- Mass loaded vinyl (MLV) — sound barrier over CLD. Heavy. Good heat tolerance.
- Closed cell foam — thermal layer. Light. Good heat tolerance.
- Spray-on damping — complex shapes and cavities. Medium weight. Excellent heat tolerance.
How to Choose
If you want the most effective floor, start with butyl CLD over 60 to 80 percent of the metal, then add a thin layer of closed cell foam for thermal insulation. MLV is the next step up for the budget that allows the weight.
On classic restorations, we often layer Noico 80 mil butyl with Second Skin Luxury Liner Pro, which has become a popular pairing in owner builds on ih8mud and similar forums.
Safety Precautions Before You Begin
Disconnect the battery before you remove seats, especially if your vehicle has side airbags in the seats or powered seat controls.
Wear nitrile gloves when handling butyl mats, and work in a ventilated area when spraying contact adhesive. Keep a fire extinguisher within reach if you are using a heat gun to soften old adhesive.
Park on a level surface, chock the wheels, and never work under a vehicle supported only by a jack. Use jack stands any time the car needs to be lifted.
How to Prepare the Cabin for Installation
Preparation is the step most DIYers rush, and it is also the step that decides whether your deadening sticks for the next decade or peels off by next summer.
Step 1: Remove the Seats
Start with the front seats. Unbolt them at the four corners with your socket set, tilt each seat back, and disconnect any wiring harnesses for seat heaters, occupancy sensors, or airbags.
Set the seats on a clean blanket outside the car so you do not scratch the bolsters. If your rear bench is a one-piece design, you can usually leave it in place and work around it, but a removable bench makes life easier.
Step 2: Remove Interior Trim
Pull the door sills, B-pillar trim pieces, center console, and any kick panels with a plastic trim tool. Keep every fastener in labeled bags so reassembly goes back together cleanly.
If your vehicle has seat-mounted airbags, wait at least five minutes after disconnecting the battery before unplugging the yellow airbag connector.
Step 3: Pull the Carpet
Fold the front seats forward and roll the carpet back toward the rear of the cabin. On most cars, the carpet comes out as a single molded piece once you release it from under the door sills and around the seatbelt anchors.
Step 4: Clean the Floor Pan
Vacuum every bit of debris, then wipe the metal down with a wax and grease remover. Follow with a final pass using isopropyl alcohol so the butyl has a perfectly clean surface to bond to.
This is the step that forum users consistently call out as the difference between adhesion that lasts and adhesion that fails in the first heat wave.
How to Fit Sound Deadening Under Car Carpet
Now that the metal is bare and clean, the actual installation is straightforward. Plan on a full weekend for a sedan, longer for an SUV with a third row.
Step 1: Dry Fit the First Pieces
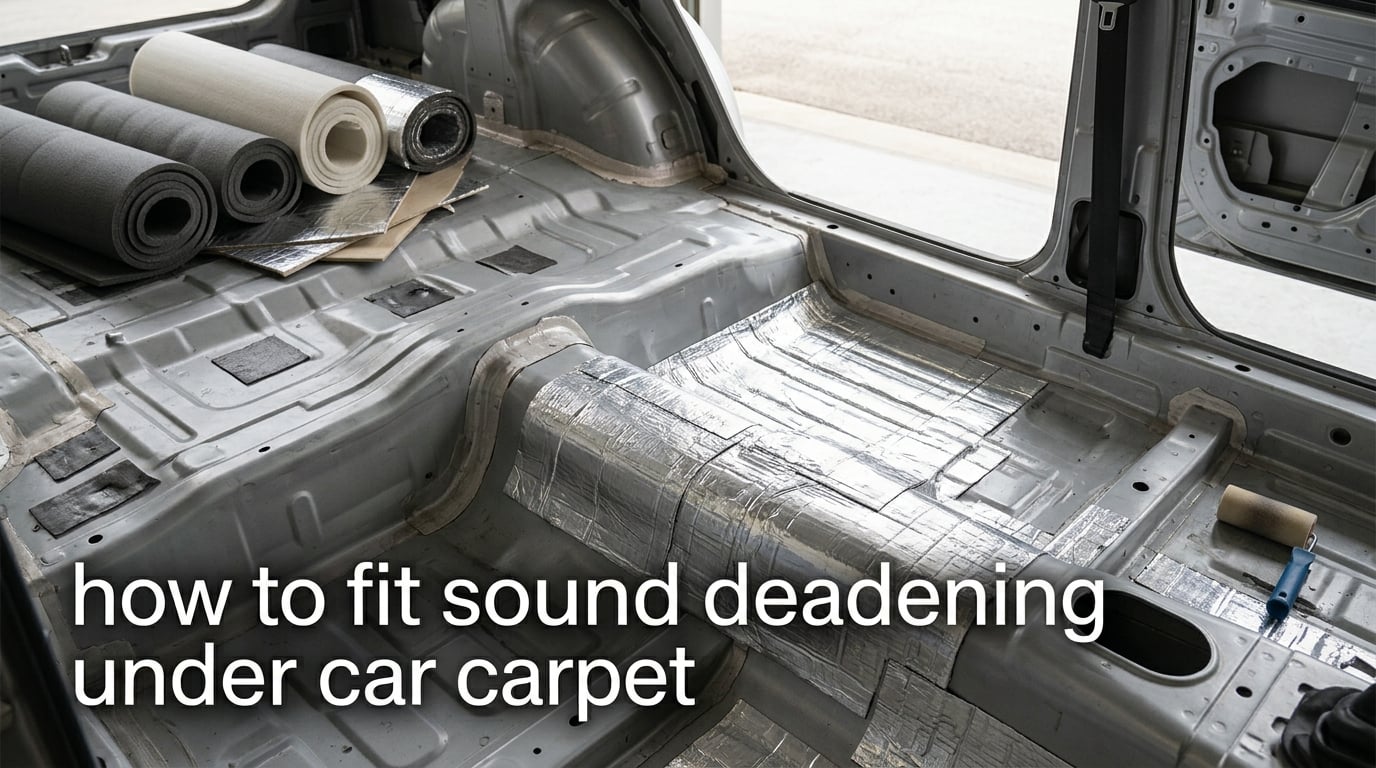
Lay your butyl sheets on the floor pan without peeling the backing. This lets you cut custom shapes for the transmission tunnel, foot wells, and seat mounting points. Use a utility knife and a straightedge for clean edges.
Step 2: Apply the Butyl CLD Layer
Peel the backing from each piece, press it firmly onto the metal, and work it from the center outward with your roller. Air pockets under the mat are the main cause of adhesion failure, so spend extra time here.
Aim for 60 to 80 percent coverage of the flat floor pan. Full coverage is unnecessary and adds weight without measurable noise benefit. Focus extra material on the transmission tunnel and firewall foot wells, where road and engine noise are loudest.
Step 3: Add the Insulation Layer
Once the butyl is rolled flat, lay closed cell foam or mass loaded vinyl on top. Use a spray adhesive rated for automotive interiors to hold it in place.
If you want the absolute best result, add a layer of Luxury Liner Pro or a similar foil-faced product over the foam. The foil face reflects radiant heat from the transmission tunnel back down rather than up into the carpet.
Step 4: Reinstall the Carpet
Drop the carpet back in, lining up the seat mounting holes, seatbelt anchors, and shifter cutouts. Tuck the edges under the door sills and dash.
Do not fully bolt anything down until you have tested fit the seats and verified nothing pinches or buckles.
Step 5: Reassemble Trim and Seats
Reinstall the kick panels, B-pillar trim, door sills, and center console in reverse order. Torque the seat bolts to the factory specification, typically 30 to 40 foot-pounds for most cars.
Reconnect the battery last and verify that seat heaters, occupancy sensors, and any airbag warning lights behave normally before driving.
How Much Sound Deadening Material Do You Need
Material quantity depends on the size of your floor and how much coverage you want. The estimates below assume 60 to 80 percent coverage on flat areas.
- Compact sedan — about 25 sq ft of floor, 9 to 12 butyl sheets, 25 sq ft of foam or MLV.
- Mid-size sedan — about 32 sq ft of floor, 12 to 15 butyl sheets, 32 sq ft of foam or MLV.
- Two-row SUV — about 45 sq ft of floor, 16 to 22 butyl sheets, 45 sq ft of foam or MLV.
- Three-row SUV or van — 60 or more sq ft of floor, 22 to 30 butyl sheets, 60 or more sq ft of foam or MLV.
- Pickup cab — about 35 sq ft of floor, 13 to 18 butyl sheets, 35 sq ft of foam or MLV.
Add about 10 percent extra for mistakes and tricky shapes around the transmission tunnel and pedals.
Common Mistakes to Avoid
After watching dozens of first-time installers work on their own cars, I can group the most common failures into a short list.
Skipping the degrease step is the number one cause of peeling. Butyl needs surgically clean metal to bond properly. Even fingerprint oils can cause lifting over time.
Applying material over rust or under corrosion treatment is another classic mistake. Address any rust before you cover it, or you will trap moisture and accelerate the problem.
Stacking too many heavy layers adds weight that can change how your suspension rides. Two to three layers is plenty for most daily drivers.
Forgetting to seal the firewall pass-throughs means engine noise still leaks in around grommets and wiring. Add a bead of seam tape or acoustic sealant where cables pass through the firewall.
Climate-Specific Tips
In hot climates, choose butyl products rated for high temperature so the adhesive does not soften in the engine bay. In cold climates, warm the rolls indoors before installation so the material flexes easily and conforms to curves.
Maintenance Tips After Installation
Once the carpet is back in, your sound deadening should last the life of the vehicle. The only maintenance is keeping the floor dry.
If you ever spill liquid that soaks through the carpet, lift the carpet as soon as you can and dry both sides. Standing water trapped between layers is the one thing that can degrade even the best installation.
Inspect the edges of the carpet every couple of years to make sure the underlay has not shifted. A small bead of spray adhesive can re-secure any lifted corners.
Frequently Asked Questions
Can you put soundproofing under carpet?
Yes. Putting soundproofing under the carpet is one of the most effective ways to quiet a vehicle cabin because the floor pan is the largest uninterrupted metal surface. A layer of butyl-based damping on the metal plus closed cell foam or mass loaded vinyl on top will noticeably reduce road noise, vibration, and heat transfer.
Where is the best place to install sound deadening in a car?
The floor pan, transmission tunnel, and firewall are the highest-impact areas. Doors and the trunk come next. Treating the floor and doors together usually gives the biggest improvement in cabin quietness for the time and material invested.
Can you carpet over sound deadening?
Yes. Automotive carpet can be installed directly over properly cured butyl damping, closed cell foam, or mass loaded vinyl. Use a light spray adhesive on the top layer to keep the carpet from shifting, and avoid any material that off-gases strongly in enclosed cabins.
What to put under carpet to reduce noise?
A combination works best: a butyl constrained layer damping mat bonded to the metal floor pan, topped with closed cell foam or mass loaded vinyl for airborne noise. Adding a jute or felt underlay under the carpet itself gives an extra layer of absorption without much weight.
Conclusion
Learning how to fit sound deadening under car carpet is one of those projects that rewards careful preparation. Strip the interior, clean the metal to a surgical finish, lay butyl damping on every flat panel, add foam or MLV on top, and reinstall the carpet and trim in reverse order.
Take your time with surface prep, plan your material quantities using the estimator above, and the result will be a quieter, cooler, and more comfortable cabin that feels like a different car.
If you want a complete interior kit tailored to your vehicle, our team at Segal Motor Trimmings can help you spec the right carpet, underlay, and insulation layers for your specific restoration.