
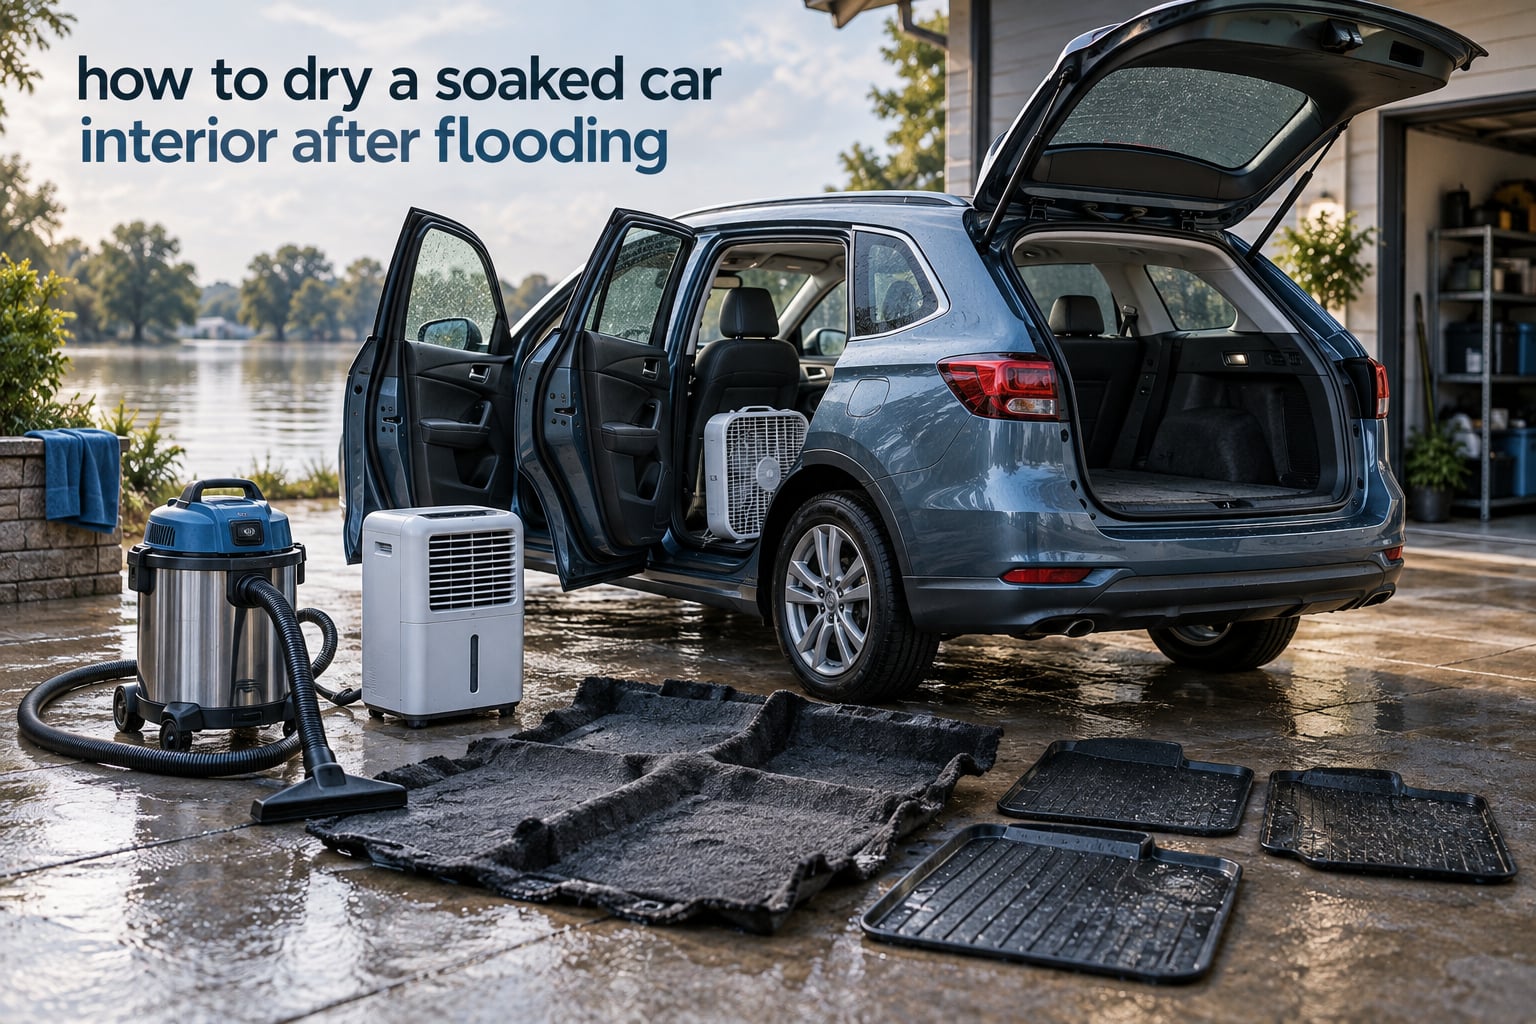
Water does not soak into a car the way it soaks into a towel. Every day I have seen these cars come back, the pattern is the same: the visible water was never the problem. The water sitting in the foam under the carpet, in the seat frames, behind the kick panels, and in the connectors under the dash is what causes rust, a musty smell, and an airbag light nobody can explain.
That is why the first 48 hours decide whether a flood-damaged interior is a weekend project or a write-off. The work is not complicated: cut power, get the water out, get the air moving, get the surfaces clean, and then look hard at everything electrical. What makes it hard is the temptation to start the car and drive it to a shop, and the fact that most of the moisture is not where you are looking.
This guide walks through how to dry a soaked car interior after flooding, in the order that actually matters. I have pulled the sequence from owner forums, restoration write-ups and the standard recovery checklists that insurance adjusters work from, then filled in the details those guides tend to skip: where the drain plugs hide, how to verify that the carpet is actually dry, and what to do in the three weeks after you think you are finished.
One rule runs through everything below. If you take only one action after a flood, disconnect the battery.
Table of Contents
- How to Dry a Soaked Car Interior After Flooding
- Before You Touch Anything: Safety Rules That Come First
- Step 1: Assess the Water Level and Photograph Everything
- Step 2: Disconnect the Battery and Cut Power
- Step 3: Pull the Standing Water Out
- Step 4: Remove Wet Items So They Can Dry Flat
- Step 5: Dry the Cabin With Airflow and Dehumidifiers
- Step 6: Clean and Disinfect the Interior
- Step 7: Stop Mold and Odor Before They Start
- Step 8: Inspect Electrical and Mechanical Systems
- Flood Recovery Timeline: What to Do and When
- Tool and Equipment Checklist
- When to Call a Professional Instead of Doing It Yourself
- Insurance Claim Basics and While You Wait for the Adjuster
- Hidden Damage Signs That Show Up Weeks Later
- Repair or Total Loss: How the Decision Gets Made
- How to Stop the Next One From Happening
- Frequently Asked Questions
- How do I dry out a damp car interior quickly?
- Is a car ruined if it gets flooded?
- How long does it take to dry a car interior after a flood?
- Can you fix water flood damaged cars yourself?
- Should I disconnect the battery after my car floods?
- Can I use a space heater or hairdryer to dry my car?
- Does insurance cover a flooded car interior?
- Does ozone treatment remove flood smell for good?
- Bottom Line on Drying a Soaked Car Interior After Flooding
How to Dry a Soaked Car Interior After Flooding
Seven steps, in order. Disconnect the battery, photograph the waterline, pull the standing water with a wet and dry vacuum and the floor drain plugs, remove the wet carpet and mats so they can dry flat, run fans and a dehumidifier until a moisture meter reads dry, clean and disinfect every surface, then inspect the wiring, oil and air intake before you turn the key.
- Do not start the engine. If water reached the intake, running it can bend the rods.
- Disconnect the negative battery terminal first, then the positive, and leave them off.
- Photograph the waterline and all damage before you move anything, for the insurance file.
- Extract the water with a wet and dry vacuum, then open every floor drain plug you can find.
- Pull the carpet, underlay and mats out so water-laden material dries on both sides.
- Move air and pull moisture with fans and a dehumidifier until readings confirm dryness.
- Clean, disinfect and inspect the wiring, connectors, engine oil and cabin air filter before reassembly.
Each of those steps has a trap attached to it, and the rest of this guide is mostly about the traps.
Before You Touch Anything: Safety Rules That Come First
Flood water is a mixture of road salt, sewage, fuel residue, and whatever the current picked up. Gloves, eye protection, and a respirator rated for mold are not optional if the water reached the seats or the carpet padding. The rule people break most often is treating flood water like rainwater.
Never start the engine if water may have reached the intake
Water is denser than air and heavier than oil, so it pools at the bottom of an engine bay and in the low points of the intake tract. If the water came over the door sills and you have no idea how deep it got, the engine is treated as a hydrolock risk. Mechanics answering questions on r/MechanicAdvice repeat the same instruction without exception: no starter, no fuel, no ignition, no matter how far the car seems to drive.
A hydraulic lock does not always end the engine. In many cases the pistons move enough to squeeze the water past the rings and the car runs. But the water carries silt that ends up in the bearings, the oil galleries and the cylinder walls, and that damage appears weeks later as a knock that a mechanic cannot explain. Moving the car even 50 metres is a gamble you do not need to take while the battery is still connected.
Hybrids and EVs need extra caution around high-voltage systems
An electrified vehicle adds a second hazard layer. The traction battery and the orange high-voltage cabling are sealed, but a cabin full of water means water can reach the underbody connectors and the modules mounted below the floor. If your vehicle has been submerged to sill level or deeper, treat the high-voltage system as live and do not attempt to service it yourself.
Practically, that means no jumping leads, no charger connected to a wall outlet from a flooded vehicle, and no energising of any system until a qualified technician has inspected the underside. Many hybrids also keep a 12-volt system alive with a relay, so pulling the battery terminal on a hybrid may not fully de-energise the car. Owners on r/Cartalk who have dealt with flooded hybrids report that a dealer or specialist check was the only step they trusted before the first crank.
Step 1: Assess the Water Level and Photograph Everything
Before you start moving parts, establish how deep the water actually got. Look for a tide line on the door panels, the seat frames, the dashboard and the inside of the trim. That line tells you what the water touched and roughly how long it sat there, and it is the single most useful piece of evidence you will have for an insurance claim.
Water that stopped just above the carpet surface is a very different problem from water that reached the seat bases. In the first case you are dealing with a wet floor and damp padding. In the second, the foam under the carpet, the seat foam and the wiring beneath the trim are all full, and the job moves well beyond a shop vac and a fan.
Photograph everything in wide shots first, then close-ups. Capture the waterline, the saturation of the carpet, the condition of any visible wiring, the odometer, and the VIN plate. Take a slow video walking the length of the car. Insurers repeatedly rely on dated images to separate pre-existing wear from flood damage, and a file built in the first hour is worth a great deal later.
Step 2: Disconnect the Battery and Cut Power
Disconnect the negative terminal first, then the positive. Reversing the order can cause a short across the tool if the spanner touches the bodywork, and on a modern car that short is exactly the event you are trying to avoid.
Use the correct tool, usually a 10 mm or 13 mm spanner, and a cloth over the terminal to stop the spanner arcing. Loosen the clamp, lift the negative cable off and set it somewhere away from the positive post. Then do the positive. Some people wrap the cable end in a plastic bag and zip it to something solid in the engine bay so it cannot flop back onto a terminal while you work.
Battery disconnection kills the obvious circuits, but not everything. Airbag modules, seat belt pretensioners, some body control modules and, on hybrids, high-voltage contactors retain power or stored data. The window and door modules on a car that has been wet can also short while the car sits with the battery disconnected if water is still pooling inside the doors.
Leave the battery off for the whole drying process, not just the first hour. A restored battery will happily power a system with a corroded connector under the seat and turn a small problem into a failed module. Reconnect it only when the interior is dry and the electrical checks in Step 8 are done.
Step 3: Pull the Standing Water Out
Standing water under the carpet and inside the seat bases is the volume that causes the most damage, and it is the easiest water to remove. A wet and dry vacuum is the tool that comes up in almost every recovery guide, and it is the single piece of equipment worth buying or borrowing if you own nothing else for this job.
Open all the doors and windows, then take up the visible water from the footwells and the sills. Work the vacuum nozzle along the seams of the mats and along the edges where the carpet meets the sill, because water migrates into those channels and sits at the bottom. Empty the drum before it fills and loses suction, and go over the same area twice.
Where the drain plugs are and why they get missed
Floor drain plugs are the small round or oval caps, usually plastic or metal, that sit in the lowest point of a footwell, the rocker panel, or under a removable cargo-liner trim piece. They exist so condensation from the air conditioning can escape. In a flood they become the escape route for most of the water, and if you never open them, the carpet stays saturated no matter how many fans you run.
Almost nobody finds them on the first attempt, because their location is not standardised the way a tyre size is. The useful approach is to work by interior layout rather than by make and model:
- Sedans and hatchbacks usually have one or two in the front footwells, under the rubber mats, often close to the door. Check the rear footwell corners too.
- Pickups and SUVs with a rear bench commonly have plugs under the rear seat rails, in the underlay, or beneath a plastic access panel in the cargo area.
- Cargo areas with a false floor hide plugs in the side walls of the boot, behind the trim, or under the spare wheel well liner.
- Convertibles and cars with removable rear carpets often have several more than you would guess, because the carpet is a loose piece with more than one low point.
Feel with your fingers as well as look. A plug that is missing leaves an open hole, and an open hole is the giveaway. If the carpet is out and you still see water sitting in a seam after vacuuming, the plug is either still in place or blocked with silt. Owners on the 4x4Earth forum who lifted their carpets for floor pan work describe exactly this: the water stayed put until the plugs came out and the silt was flushed from the holes.
Open every plug you find, then rinse the channels with a hose or a bottle of water so the silt clears, and vacuum the runoff as it appears. Then check the body shell itself. Rust bubbling along a rocker panel seam or a floor pan means the water reached the metal, and that changes the repair plan considerably.
Step 4: Remove Wet Items So They Can Dry Flat
Wet carpet dries fastest when it is out of the car. Saturated carpet pad stacked in the footwell dries at maybe one tenth the rate of the same pad hanging over a fence, and the trapped water under the pad is the source of the damp carpet smell that owners fight for months.
Start with the easy removals. Rubber floor mats come out in seconds and should be washed, then hung separately. Trimmings held by screws or clips can come out with basic tools. Any trim you remove, bag and label, because getting it back in the right place is faster than matching it by eye later.
The carpet itself is the valuable removal. On most cars it is held along the sills by screws or plastic retainers, and the seat rails may need to come out to free it. This is the step people skip, and it is the step that determines whether you ever get the foam dry. Owners on r/MechanicAdvice describe pulling the seats and carpet specifically so they could check the wiring and the floor pan underneath, and that inspection is only possible with the interior stripped.
If the carpet is bonded to the pad and you do not want to separate them, roll it loosely rather than folding it, and stand it on edge with airflow reaching both faces. Never leave a soaked rug folded in a sealed garage. That is a mold culture.
Seat bases are the other trap. Foam does not release water quickly, and the bolts and rails underneath hold a layer of water and silt that will drip out weeks later. If you can lift the seat, do it. If you cannot, plan to run fans directly at the seat base for days.
Step 5: Dry the Cabin With Airflow and Dehumidifiers
Extraction gets the water out. Drying is what happens next, and it is slower than most people expect. The goal is to move air across every wet surface and pull moisture out of the air, so you need both a fan and a dehumidifier working together. A fan alone circulates moisture without removing it, and a dehumidifier alone cannot move enough air to dry a large volume.
Set up fans and a dehumidifier correctly
Place the dehumidifier inside the cabin, close and door open, and position it so the intake and outlet have clear air. Run fans at both open doors or windows and inside the cabin pointing across the wet areas, not just at the roof. The single most common mistake is closing the car up with one fan in the middle; that stirs damp air without exhausting it.
Remove or raise the wet carpets so air can reach the floor pan. Keep the battery disconnected, the windows open where practical, and the car in shade if you can, because direct sun on wet upholstery can set protein-based stains and does little for the trapped water under the pad.
Verify dryness with a moisture meter
Touch is a poor test. Wood and foam feel damp long after they are dry to a meter. A pin-type or pinless moisture meter reading gives you a defensible number, and it takes about a minute to learn to use.
Take a baseline reading on a dry interior surface in the same vehicle, such as the parcel shelf, then compare. For most foam, carpet and seat materials you want readings within a few points of that dry reference before you reassemble. Test the carpet edge, the middle of the pad, under the seat rail, inside a door pocket, and inside the boot side wall, because the corners are always the last to dry. Recheck daily, because foam releases water in stages and the last 10 percent takes as long as the first 90 percent.
If you do not own a meter, a cheap hygrometer in the cabin still tells you something useful. If the relative humidity inside the car stops falling and holds steady at a high level, there is still a wet source hidden somewhere and the drying is not done.
Why household heaters are a poor idea
People ask about using a space heater, a hairdryer, or a heat gun, and the answer is to avoid all three inside the cabin. Open flame and combustion heaters add carbon monoxide risk in a poorly ventilated space. Forced heat drives moisture into the seat foam and headliner faster than the air can carry it out, and it can bake adhesives, warp plastics, and shrink vinyl trim.
What works is airflow, moderate ambient warmth, and humidity removal. A warm, dry, moving air stream dries foam. A hot still one does not.
Step 6: Clean and Disinfect the Interior
Drying is not cleaning. Flood water carries silt, oil, sewage contamination and mold spores, and any of those left in the foam keeps the smell coming back no matter how dry the carpet gets.
Start at the bottom and work up. Vacuum out silt before it turns to mud, because grit abrades the fibres when you scrub. Carpets and mats that came out of the car can be washed off gently with a hose and a pH-neutral cleaner while they are still out, then dried on a rack or over a fence. Forum advice from 4x4Earth includes rinsing removed carpets to shift the embedded mud, and it is the only reliable way to get silt out of the fibre.
For fixed upholstery and hard surfaces, a diluted detergent solution applied with a brush, followed by a clean damp cloth, handles most of the soil. For disinfection, a solution mixed at the dilution stated on the label is the safe choice; undiluted bleach, vinegar and ammonia mixtures damage fabric, trim and metal, and ammonia near bleach produces a toxic gas. Ventilate the car with the doors open while you work, and wear gloves.
Do not forget the details people skip: the glovebox, the door pockets, the seat rails, the boot side walls, the sun visor, the headliner seams, and the area under the battery tray. Mould that is allowed to establish in a seat rail rarely comes out without the seat being disassembled.
Step 7: Stop Mold and Odor Before They Start
Mold begins to grow in damp organic material within roughly 24 to 48 hours, and it starts with a smell long before you can see anything. The odor people describe as a damp carpet smell in a car that supposedly dried days ago is almost always mold in a hidden layer: under the carpet pad, in the seat foam, or in the insulation behind a kick panel.
The 24 to 48 hour window
Treat the first two days as a race. Every hour the car sits wet, more of the foam and underlay is committed to mold. The actions that win that race are unglamorous: carpet out, water out, air moving, dehumidifier running, and no seats back in until a meter says the foam is dry.
After cleaning, a commercial mold inhibitor or an anti-fungal upholstery treatment applied to dry carpet pad and seat foam gives you a margin. Reapply after the seats go back in if the foam was soaked, and check them at six months and annually afterwards, because one humid summer can restart the cycle.
Ozone treatment: what it can and cannot fix
Ozone is offered for flood odor and it does kill odor-causing organisms on exposed surfaces, so the smell can disappear for a while. Owners on r/Cartalk report genuinely mixed results, and the reason is structural. Ozone does not dry anything, it does not reach the inside of a seat foam, and it cannot reach mold growing under a carpet pad, behind a trim panel, or inside a seat rail. A sealed cabin with water still in it makes the treatment even less useful.
If you use it, ventilate the car thoroughly afterwards before anyone drives, and never run the generator, heater or any combustion appliance in a space where ozone is being applied. It is a finishing step on a genuinely dry, genuinely cleaned interior, not a substitute for either.
Step 8: Inspect Electrical and Mechanical Systems
The interior is only half the car. Water that came through an open window may never have reached the engine bay, and water that came through a door certainly did. Once the cabin is dry and stable, work through the mechanical and electrical checks before you attempt the first start.
Milky oil and hydrolock
Pull the oil dipstick and look at both the dipstick and the filler cap. Milky, milky-brown or frothy oil that forms a milky film on the cap means water is in the crankcase. Check the coolant reservoir and the radiator for cloudy, milky fluid, which points to coolant mixing into the oil through a failed head gasket or a cracked cylinder head. Neither is something you crank the engine to find out about.
Check the air filter housing and the intake snorkel for water, and the cabin air filter for silt and debris. A wet air filter element will restrict airflow and can carry contamination into the intake. Replace it rather than trying to clean it.
Check the transmission fluid level and colour on automatics, and look for a burnt smell or a slipping pattern. Water in an automatic transmission is one of the most expensive flood consequences and is far cheaper to catch with a dipstick check in the first day than with a rebuild in the third month.
Connectors, contact cleaner and the airbag light
With the battery disconnected, pull up the carpet and inspect the wiring under the dash, under the seats, in the door boots and along the rockers. Look for green, white or blue-green corrosion on connector pins, for swollen or split insulation, and for water still sitting in the connector housings.
Clean corrosion off with an electronic contact cleaner and a soft nylon brush, working carefully, and let the connectors dry completely before they go back together. Forum advice from r/MechanicAdvice and 4x4Earth consistently credits contact cleaner on wet connectors with preventing the delayed failures that otherwise show up weeks later, and it is cheap insurance on every connector you can reach.
If the airbag warning light comes on after reconnecting the battery, the SRS module has logged a fault. It may be a reset that clears on its own, or it may be a seat belt pretensioner or side impact sensor that has water in it. Do not ignore it and do not assume it is the battery; read the stored codes and find out which circuit flagged before you drive the car normally.
Other faults that appear after a flood include windows that will not go up, a blower motor that runs slow, headlights that flicker, a horn that misbehaves, and comfort or memory seat settings that reset. Each one points at a specific module or harness and is worth testing one at a time with the battery connected and the car parked outside.
Flood Recovery Timeline: What to Do and When
Here is how the recovery usually divides up. The first day is about safety and extraction, the second and third about drying, the first two weeks about cleaning and inspection, and everything after that about monitoring for the damage that only shows up late.
- First hour: Do not start the engine. Disconnect the battery, photograph the waterline and all damage, open the doors and windows.
- First 6 hours: Extract standing water with a wet and dry vacuum, find and open the drain plugs, pull the mats and the carpet, start fans and a dehumidifier.
- 24 to 48 hours: Carpet and loose trim washed and drying flat, cabin under airflow, connectors inspected and treated with contact cleaner, first mold check for smell.
- Day 3 to day 7: Foam drying out, replaced cabin air filter, seats refitted only once a meter confirms dryness, oil and coolant checked, plug scan of every electrical module.
- Week 2 to week 4: Interior reassembled, detailing and disinfection completed, first careful start of the engine with an oil change shortly after, full electrical re-scan.
- Month 2 onwards: Monthly checks for warning lights, slow electrics and new smells, and a look under the carpet at six months to check the underlay and floor pan for corrosion.
Deep flood water that reached the seat bases typically takes one to three weeks of active drying to reach a defensible dryness reading. Shallow water that never soaked the pad can finish in a few days.
Tool and Equipment Checklist
You can do most of this with a short list. The first group is worth buying if you do not have it, the second group is worth borrowing, and the third is what protects you.
- Wet and dry vacuum with a crevice or brush attachment. The most useful single item in this whole list.
- Dehumidifier sized to the cabin volume. A small consumer unit works for a two-door, a larger one for an SUV.
- Two to four air movers or box fans, plus a power lead long enough to reach them.
- Moisture meter, pin-type for foam and timber, pinless for a quick sweep of large areas.
- Contact cleaner and a soft nylon brush for connectors.
- Basic hand tools: socket set, trim tools, screwdrivers, and a pair of long handled pliers for the battery clamp.
- Utility knife, zip ties and painter plastic for bagging and labelling removed parts.
- Protective equipment: waterproof gloves, eye protection, a mould-rated respirator, and an N95 for the dusty stages.
Extraction is the part worth renting rather than buying. If you only need a wet and dry vacuum for one job, a day hire is cheaper than buying one, and it means the machine goes back to someone who needs it tomorrow.
When to Call a Professional Instead of Doing It Yourself
Do it yourself when the water stayed below the seat bases, the carpet came out without damage, the engine bay is dry, and the car starts and runs normally. That is a long weekend of work and it produces a good result for most cars.
Call a professional when any of these apply:
- Water came above the door sill line or the seat bases are full of water and silt.
- Water rose above the exterior mirror line, which usually means intake and underbody involvement.
- There is a hydrolock risk, milky oil, or cloudy coolant.
- Water reached the high-voltage system of a hybrid or EV, or the vehicle is a salvage auction purchase with an unknown waterline.
- The airbag light, SRS code, or multiple electrical faults are present.
- The carpet or underlay is already moulded, stained, or starting to delaminate.
- The vehicle was submerged in sewage or chemical water rather than clean flood water.
A professional brings thermal drying, extraction of the seat foam, injection drying under the carpet, a proper multi-meter electrical scan, and the assessment an insurer will take more seriously. The value is not only the equipment. It is the written report that separates flood damage from the wear the vehicle already had, which is usually the difference between a fair claim and a disputed one.
Insurance Claim Basics and While You Wait for the Adjuster
Cover depends entirely on how the water got in. Flooding from rising water is normally excluded by standard comprehensive motor policies in most markets, though a growing number of insurers now offer it as an optional extra. Water damage that enters through a broken window or an open door during a storm is a different category, and many comprehensive policies cover that. Read the definitions section, not the summary.
Notify your insurer as soon as the car is safe and stationary, and ask before you start any repair or discard any part. Sorting the interior without authorisation is the fastest way to lose a claim. Most insurers will send an assessor, and some will work from photos and video before anyone visits.
While you wait, do the things that do not affect the evidence:
- Keep photographing. Date-stamped images of the drying progress and any change in condition are useful.
- Keep receipts for extraction, dehumidifier hire and any parts you buy.
- Keep every item you remove, bagged and labelled, even if you are sure it is scrap.
- Do not drive the vehicle, and do not let anyone else drive it.
- Keep a written log with dates, who you spoke to and what was agreed.
- Protect the car from further rain with a breathable cover, never a tarp pressed against wet paint.
- Do not throw away contaminated water into a storm drain without checking local rules.
If the insurer disputes the classification as flood rather than accidental water damage, that argument is usually settled by the waterline photographs, the depth of water in the cabin, and whether the vehicle was parked or driving. A careful log and a photo file from hour one do more for your position than anything written later.
Hidden Damage Signs That Show Up Weeks Later
Corrosion is a slow process, and the symptoms it produces are often mistaken for unrelated faults. After a flood, check for these on a schedule rather than waiting for them to announce themselves.
- New electrical gremlins: warning lights that appear with no obvious cause, windows that refuse to go up, a blower motor that only works on high speed, or seat and mirror memory that forgets its settings.
- Intermittent smell: a damp or musty smell that returns after the interior dried. Usually means water is still in a hidden cavity, commonly a door, a seat rail, or the body shell.
- Rust bubbling at seams: orange or white bubbles along rocker panel seams, the floor pan, brake lines or under the battery tray.
- Soft or swollen carpet pad: the underlay becomes spongy and starts to delaminate from the carpet as the trapped silt dries and moves.
- Uneven braking or a pulling pedal: a warning that rust has reached brake components or steering hardware.
- Coolant leaks or overheating: a fresh water-coolant loss often means corrosion has eaten a radiator or a hose fitting.
- Sagging or mismatched trim: swollen door cards, headliner droop, or trim that no longer lines up because the substrate behind it warped.
Have the electrical systems re-scanned at 30 days, 90 days, and six months, and keep a note of the date and the codes cleared. Delayed corrosion on a connector that was never treated is the most common cause of the faults in that first list.
Repair or Total Loss: How the Decision Gets Made
The insurance industry generally treats a vehicle as a total loss when the repair cost reaches roughly 70 to 80 percent of its actual cash value. Flood damage is unusual because the repairers price it slowly: hidden corrosion keeps appearing, and each appearance adds cost to a job that looked straightforward at the start.
Get a written repair estimate that itemises the interior work, the electrical scan, the mechanical teardown and the contingency for corrosion. An estimate that only prices carpet, seats and a dehumidifier will not survive the first month of ownership.
Before agreeing to a total loss, check the difference between an actual cash value payout and a replacement vehicle. An ACV payout gives you what the car was worth on the day of the loss, which after a flood is often well below what a comparable vehicle costs. Buyers of flood-damaged vehicles pay later in a different market, so a used-car quote for a similar clean car is the honest comparison.
Also know what a salvage title does. A vehicle declared a total loss is usually titled salvage or flood damaged, and that branding follows the vehicle for the rest of its life, cutting its resale value sharply. Some buyers will not touch one. A properly dried car with a clean title is generally worth more than a car that was dried better but carries permanent branding.
How to Stop the Next One From Happening
Once the car is dry and the electrical checks are clean, a few measures reduce the odds of a repeat.
- Keep the cabin air filter fresh. It is the cheapest part on the car and it is a real barrier against flood water and mold spores entering the ventilation.
- Fit a sill or body drain cover on cars that live in flood-prone areas, and make sure the factory drain plugs are present rather than lost.
- Never leave windows or the sunroof open in a forecast storm, even briefly.
- After heavy rain in an area with known drainage problems, check the footwells and the boot liner the same day.
- Keep the battery and terminals clean and the terminals protected from corrosion, because a weak battery in standing water is a common failure.
- Treat the underbody and the drain plugs as part of routine servicing, not as something to inspect after a flood.
- Use a breathable car cover rather than a plastic one if the car is stored outside near a flood-prone watercourse.
A monthly five-minute check of the cabin after a flood, and a seasonal one otherwise, is enough to catch a small leak long before it becomes a mold problem.
Frequently Asked Questions
How do I dry out a damp car interior quickly?
Disconnect the battery, vacuum up all standing water with a wet and dry vacuum, open the floor drain plugs, and remove the carpet and mats so they dry flat. Then run two or more fans with the doors open alongside a dehumidifier inside the cabin. Confirm dryness with a moisture meter compared against a dry reference surface in the same car, then clean and disinfect before the seats go back in.
Is a car ruined if it gets flooded?
Not always. If the water stayed below the seat bases, the carpet can be extracted and dried, the cabin air filter replaced, and the electrical connectors cleaned, usually restoring the interior fully. The car is likely beyond saving when water rose above the door sills into the engine bay, the oil is milky, the coolant is cloudy, or high-voltage components on a hybrid or EV were submerged.
How long does it take to dry a car interior after a flood?
Shallow water that never soaked the carpet pad can dry in two to three days with fans and a dehumidifier. Water that reached the seat bases usually needs one to three weeks of active drying before a moisture meter confirms the foam is dry. Foam releases its water in stages, so the final 10 percent of drying takes as long as the first 90 percent, and mould can start within 24 to 48 hours.
Can you fix water flood damaged cars yourself?
You can fix the interior yourself if the water stayed below the seat bases and the engine bay is dry. That means extraction, drain plugs, carpet removal, airflow drying, cleaning, and an electrical inspection. Leave engine, transmission, SRS and high-voltage work to a technician, and get a written assessment before driving the car again if the airbag light is on or any fluid looks contaminated.
Should I disconnect the battery after my car floods?
Yes, and this is the first action to take. Disconnect the negative terminal first, then the positive, and leave the battery disconnected for the entire drying process. It prevents shorts in saturated wiring, stops modules from cycling, and avoids energising a system that has water in it. Some modules and hybrid high-voltage contactors may still hold power, so treat the vehicle as live until a technician checks it.
Can I use a space heater or hairdryer to dry my car?
Avoid it. Combustion heaters add a carbon monoxide risk, and forced heat drives moisture deeper into seat foam and headliner while drying the surface only. It can also warp plastics, shrink vinyl trim and bake adhesives. Warm moving air with a dehumidifier removes moisture; hot still air in a closed cabin just relocates the problem.
Does insurance cover a flooded car interior?
It depends on how the water entered. Water rising from outside is treated as flooding and is excluded by many comprehensive policies, though some insurers sell flood cover as an extra. Water entering through a broken window, an open door, or a failed sunroof during a storm is often covered as accidental damage. Check the definitions in your policy, notify the insurer before starting repairs, and photograph the waterline immediately.
Does ozone treatment remove flood smell for good?
Not always. Ozone kills odor-causing organisms on exposed surfaces and the smell can disappear temporarily, but it does not dry anything and cannot reach inside seat foam, under a carpet pad, or behind a trim panel where the mold actually grows. It only helps on an interior that is already genuinely dry and clean, and the car must be aired out thoroughly afterwards.
Bottom Line on Drying a Soaked Car Interior After Flooding
The outcome of a flood is decided long before the detailing starts. Cut the power, document the waterline, get the standing water out, get the carpet out, and keep air moving until a meter says the foam is dry. Everything after that, the cleaning, the connector treatment, the oil and coolant checks, is what stops a dried car from becoming a car that fails three months later on a corroded harness nobody looked at.
Two things decide the rest. How deep the water got, and how long it sat. Shallow water that never soaked the pad is a weekend of careful work. Water above the sill with a hydrolock risk or a submerged high-voltage system belongs in a shop, and a written professional assessment is what makes an insurance claim settle cleanly.
Whichever path you are on, keep the drying going until a moisture meter agrees, keep the carpet out until it does, and check the car again at 30 days, 90 days, and six months. Most of the damage that shows up later in a recovered flood car was visible, or measurable, on day one.
If you are still deciding what to do in the first hour, do not start the engine. Disconnect the negative terminal and take a photograph of the waterline. Everything else in this guide follows from those two actions.