
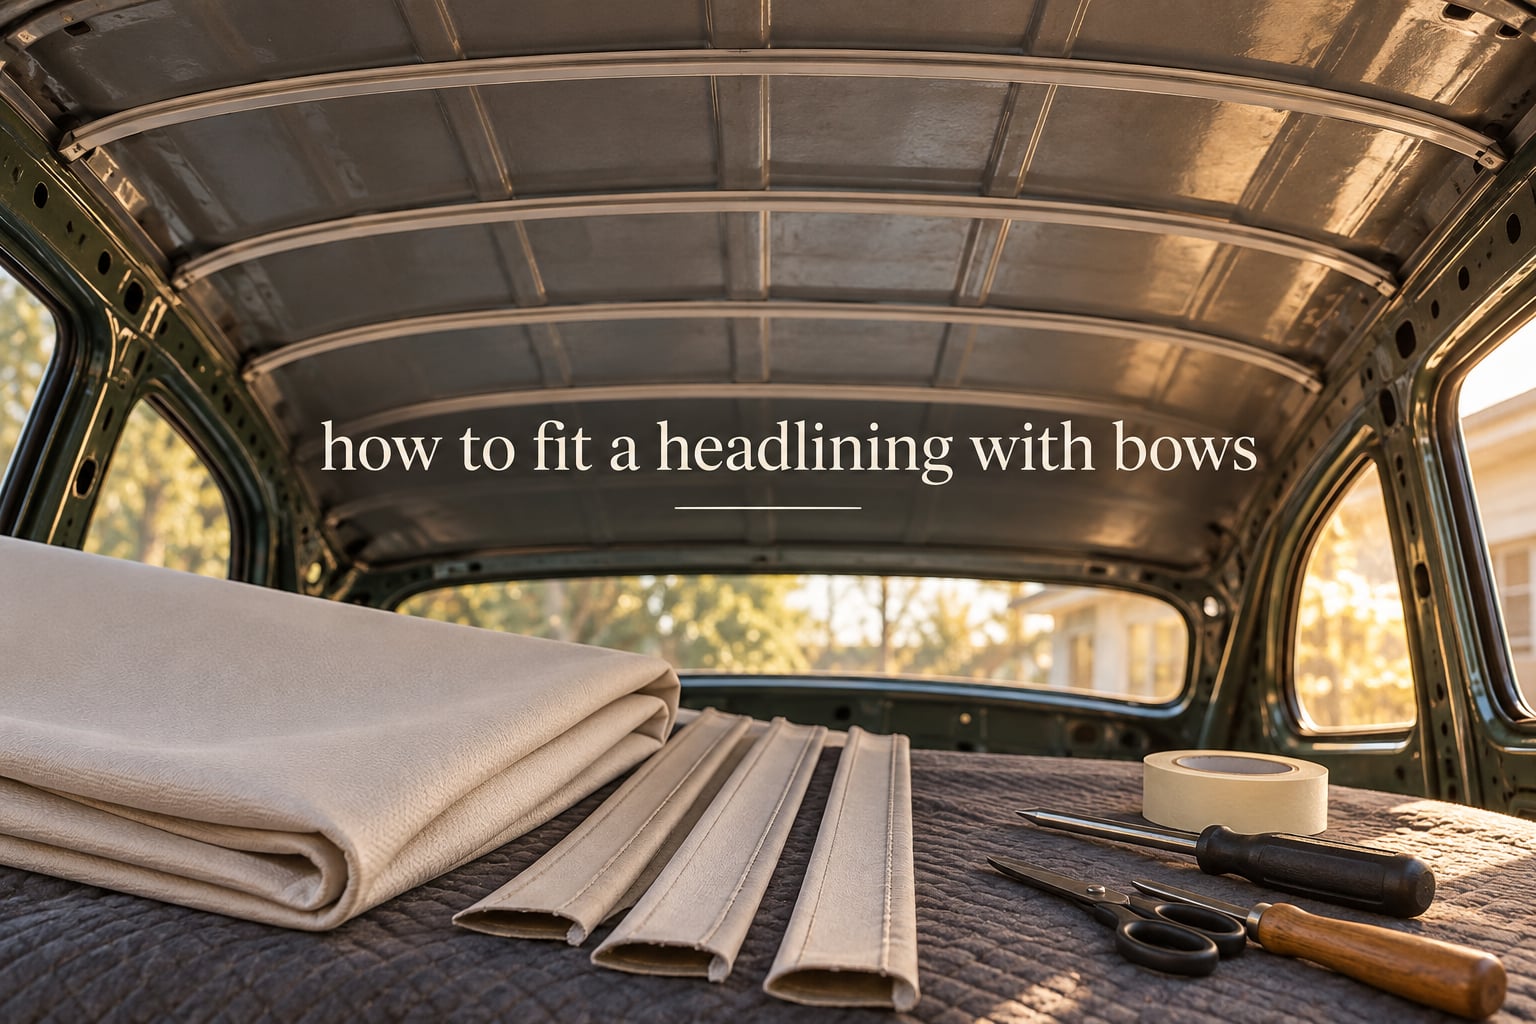
Fitting a headlining with bows is a rear-to-front job where the lining is tensioned by hand onto curved steel bows seated in receivers punched through the roof metal. Document every bow and its hole before you remove anything, cut the bow tunnels so the bows can slide free, fit the paper-wrapped centre rod first, then work forward with even tension.
Last updated October 2026.
Most of what circulates about this job lives in forum threads that are ten to fifteen years old, and half of them sit behind bot walls you cannot even read. This guide pulls the sound advice out of those threads and lays it out in one sequence, with the failure points named up front.
Table of Contents
- How to fit a headlining with bows: the short version
- What a bow-type headliner actually is
- Tools and materials you need
- Before you start: document the original bow layout
- Removing the old headliner and its bows
- Restoring the bows and the paper-wrapped centre rod
- Preparing the new headlining: centre line and bow tunnels
- Step-by-step bow type headliner installation
- Wrinkle control and checking bow spacing
- Common mistakes that ruin a bow type headliner install
- Headliner troubleshooting: symptom, cause and fix
- Time, skill level and DIY versus professional
- Frequently Asked Questions
- How do you install a headliner?
- What are the steps to apply a new headliner to a car?
- Do the bows have to go back in the same holes they came out of?
- What is the best way to reattach a sagging headliner?
- What is the best adhesive to reattach a headliner?
- How long should the bow tunnel or sheath be on a headliner?
- Why do my headliner seams end up crooked after installation?
- What do I use to poke holes in my headliner for Starlights?
- How do I cover a hole in a headliner?
- What kind of material can I use for a headliner?
- Can I fit a replacement headliner without removing the roof?
- What is the average cost to replace a car headliner?
- How do I do a custom headliner?
- Key takeaways
How to fit a headlining with bows: the short version
Here is the whole sequence in ten lines before any detail. If you only remember one thing, remember step 3.
- Photograph and number the roof before touching anything. Wide shot, then one close-up of every bow receiver hole on both sides.
- Label each bow with masking tape and a marker as it comes out, one label per bow, tied to the bow with wire.
- Strip the interior down: sun visors, mirror, pillar trim, dome light, coat hooks, top strips, windlass, rear window trim.
- Remove the bows rear to front, starting with the most pronounced curve at the back, and bag each one with its label.
- Restore the bows — wire brush, de-rust, prime, paint, and re-wrap the centre rod in brown paper.
- Lay the new headlining out finished side down and mark the centre line from front to rear.
- Cut the bow tunnel exits two to three inches in from each end, leaving the full-length sheath closed through the centre.
- Fit the centre rod first, then the curved bows working from the rear forward into their original holes.
- Tension evenly — rear first, then the middle, then the front edge, pulling both sides equally each time.
- Tuck into the headliner channels and metal tangs with a nylon tucking tool, then refit the windlass and trim.
One member on the early 911s registry forum described the finished result simply: the bows sat upwards and straight, and the liner was pulled to the back after the front was fitted, then pulled at the sides in the door openings. That order matters more than any tool in the kit.
What a bow-type headliner actually is
A bow-type headliner is an interior roof lining held up by a series of curved steel bows that slot into receivers punched in the roof metal, with the fabric sewn into stitched tunnels so each bow sits inside its own tunnel. The bows carry the load. The fabric only tensions around them.
Because each bow has its own curve and each side often offers two or three candidate holes, a bow in the wrong hole tilts and the lining sags, puckers and shows a permanent wrinkle down the seam. That single fact is the reason the original holes matter so much.
| Type | How the roof is supported | What you will feel |
|---|---|---|
| Bow type | Curved steel bows in sewn fabric tunnels, seated in receivers in the roof metal | Visible bow ends at the pillar and rear window trim, a defined centre rod at the dome light |
| Rod or strut type | Thin straight steel rods or fibreglass struts clipped to a header rail | No bow ends, no tunnels, fabric clipped rather than stitched |
| Noseroof | Bonded or glued directly to a shaped inner roof panel | No removable liner at all, replacement means cutting a new bonded panel |
The terminology is not used consistently across the classic car world, which is why so many people describe a bow-type install and then buy rod-type clips. Some cars use a hybrid: a straight paper-wrapped centre rod at the dome light between two curved bows, which is why you will see centre rod, centre brace and bow used almost interchangeably in the forum posts.
Tools and materials you need
Nothing here is specialist. Almost every item is something already in a home workshop, with two exceptions: a nylon window-seal installation tool about three-quarters of an inch by eight inches with tapered ends, and body filler squeegees, which are the fastest way to move tension in fabric without creasing it.
| Item | Purpose | Quantity |
|---|---|---|
| Nylon window-seal installation tool | Tucking fabric into the headliner channels and under the pinch weld at the windscreen | 1 |
| Body filler squeegees | Spreading tension in small areas without creasing the material | 2 to 3 |
| Masking tape and marker | Numbering and labelling bows and receivers at removal | 1 roll each |
| Wire or cable ties | Attaching a label to its bow so numbers never get separated | 10 |
| Brown paper | Re-wrapping the centre rod so rust does not transfer to the new material | 1 sheet |
| Trim cement or 3M trim adhesive | Bonding the edge into the channel where barbs alone will not hold | 1 tube |
| Upholstery thread and needle | Sewing or repairing bow sheaths, dead straight | 1 set |
| Wire brush, coarse paper, primer, vinyl paint | Restoring the bows before refitting | 1 set |
| Utility knife and scissors | Cutting tunnel exits and the X-cut at light fixtures | 1 set |
| Sound deadening sheet (optional) | Laid over the roof metal before the liner goes on; a little helps, returns drop off quickly | 1 to 2 sheets |
| Socket set and trim tools | Removing visors, mirror, dome light, hooks and the windlass | 1 set |
The one product worth buying properly is a replacement windlass. A new one costs very little and it is the only thing permanently clamping the front edge, so it is worth doing at the same time as the liner.
Before you start: document the original bow layout
The single habit that separates a good install from a sagging one is written down before the first screw comes out. Almost every forum answer to the question do the bows have to go back in the same holes is the same: yes, because the bends are the same. On camaros.net the accepted answer is that the bows are generally reinstalled in the holes they were removed from, since the bends are identical.
Some cars have up to three candidate holes per side, and the curvature differs meaningfully between them. Put a bow in the hole next to its own and it will sit visibly lower, which reads as a dip in the roof and a crease in the lining running towards the back.
Here is the record to keep. Spend twenty minutes on it and you will not need to guess later.
- Number each bow from the rear forward as one, two, three and so on. Write the number on masking tape and wrap the tape round the bow itself.
- Note the curve — which way each bow bows, and whether it is the most pronounced one in the car.
- Mark each receiver hole on the roof metal with tape and marker, one colour per hole, before you remove a single bow.
- Photograph both sides at a raking angle, so the bow line is visible in the frame, and again straight down.
- Bag and tag each bow with wire ties as it comes off, and record the hole number on the bag.
- Measure the bow spacing centre of bow to centre of bow, front to rear, in inches and millimetres.
- Check the rear edge anchor — a cardboard flap or strip sewn into the back edge of the original liner clips into the reinforcement brace tabs at the rear window. On a 1955 two-door sedan, forum members identify exactly this flap.
If you are buying a replacement headlining rather than reusing the original, this log is your compatibility check. Bow spacing, sheath position and the presence of a cardboard rear strip all have to match the car, and no two suppliers measure the same way.
Removing the old headliner and its bows
Removal is quick compared with the refit, and it is the stage where information is destroyed. Anything not recorded now is gone for good.
Start with the trim. Sun visors, the rear view mirror, the A pillar and pillar trim, the dome light, coat hooks, the top strips along the rear window, the windlass, and the rear window trim panel. Bag the screws by location rather than by size — a thin bag per area, labelled, saves an hour of hunting later.
Then take the screws at the bow ends out. Note the hole each one came from before the bow moves, because the bow will drop the moment the last screw is out.
Remove the bows starting at the most pronounced curve at the rear and working forward. On corvaircenter.com the sequence is the centre rod and brace first, then all the curved bows, most pronounced at the rear. A shortcut worth knowing comes from forwardlook.net: take one clip off each side so the bow can slide into the liner instead of fighting it. It saves real time on a car with tight receivers.
With the bows out, pull the old headlining down, then scrape every trace of old adhesive from the roof edge, the channel and around each receiver. Leftover adhesive is the main reason a new liner fails to sit flat in the channel, and it is also the main reason new material tears when you try to pull it tight.
Restoring the bows and the paper-wrapped centre rod
Bows rarely need replacing. They need cleaning. The routine that works, straight from the Corvair build, is to buff or sand the rust off the curved bows, clean them, then prime and paint each one.
The centre rod is different. It is a straight rod, it carries the dome light, and it sits against the lining where any rust transfers straight into the new material and leaves a brown stripe. Wrap it in brown paper before it goes back in, and tape the ends. This is one of those small steps that costs nothing and prevents a permanent stain.
While the bows are bare, check each one for a crack at the receiver end and check the roof metal for rust around every hole. A hole that has corroded and grown will not take the bow back properly, and no amount of tension will fix a loose receiver.
Preparing the new headlining: centre line and bow tunnels
Lay the new headlining out on a clean floor, finished side down, and mark the centre line from the front edge to the rear. That line is your reference for the centre rod, and every seam you check later runs against it.
Now the cut that trips up most first-timers: the bow tunnel exits. Leave the sheath sewn closed through the middle and cut an opening at each end so the bow can slide out of the tunnel and into its receiver, while the fabric still hangs far enough to reach the channels. Two to three inches in from each end is the working figure from the Corvair guide. A member building a Doka headliner on thesamba.com arrives at the same place from the other direction, cutting the sheath back to roughly 175mm, or seven inches, from each side.
Why cut them at all? Because a tunnel closed at the end traps the bow, and a bow that cannot slide cannot seat squarely. Why leave the middle closed? Because the closed middle is what holds the lining’s relationship to the centre rod and keeps the seams from drifting.
If you are sewing or modifying the sheaths yourself, three rules matter more than the rest.
- Sew them dead straight. The Doka builder is blunt about it: as close to absolutely straight as possible, because any deviation shows as a wrinkle once it is installed, and quality thread is worth using.
- Sew them to your recorded spacing. A seam that does not line up with a bow receiver is the single biggest cause of a sagging centre.
- Keep the cutback consistent on both sides. A tunnel that enters 2 inches early on one side skews the whole panel.
If the replacement headlining does not arrive with usable sheaths, sewing your own is entirely reasonable. That is the standard route for a custom or short-nose rebuild, and it is a Saturday job with a sewing machine and a straight edge.
Step-by-step bow type headliner installation
Work from the back of the car forward, always. Pull the rear in first, then the front, so the lining squares up against the bows instead of ballooning between them. Starting at the back is the one piece of advice repeated most consistently across the chevy talk, Corvette, Nova and Doka threads.
Step 1. Seat the centre rod. Offer the paper-wrapped rod into its centre receiver, line it up with your marked centre line, and bend the metal tangs over the rod to hold it.
Step 2. Fit the rear-most curved bow. Bow one goes into the hole it came out of. Slide the fabric into the tunnel, ease the bow through the cut exit, and press each end into its receiver.
Step 3. Tension the rear before you move on. Pull the rear edge into the channel at the rear window and the back of each side rail, working out from the centre with equal pull on both sides. Anchor the rear centre first, then work outwards. Do not leave the rear loose and come back later.
Step 4. Work forward one bow at a time. Rear to front, each bow in its logged hole, each one followed immediately by tensioning that section. The curve of each bow should sit upwards and straight, the same as it did before removal.
Step 5. Fit the front bow last. By now the tension from every bow behind it is pulling the front edge forward, and this is the hardest moment in the whole job. Most people find the front pinch-weld tuck and the rear edge are the two places the work goes wrong.
Step 6. Anchor the front in a triangle, not a line. The strategy that works is centre front first, then mid-way along both sides, then back to the re-tighten the centre. That distributes the pull instead of concentrating it in the middle of the windscreen seal.
Step 7. Tuck into the metal tangs section by section. Use the nylon window-seal tool. Work along the channel at the front, then the side rails, then the rear, and tuck as you go rather than at the end.
Step 8. Cut the light fixture openings. Loosen the tangs under the fixture so you can feel the cutout outline by hand, then make an X-cut from the centre outwards, leaving a deliberate safety margin around the hole. The tangs get bent back over the edge afterwards to hold the cut material down.
Step 9. Bond and clamp the front edge. Where the barbs will not hold the material, use trim cement in the channel and fit a new windlass to clamp the edge. This is the fallback that turns a stubborn install into a permanent one.
Step 10. Refit the trim. Rear window trim, pillar trim, dome light, coat hooks, visors, mirror, then the windlass covers on last. Check the dome light cutout is centred on the rod while you are at it — the early 911s registry thread describes centring the liner on the dome light location as the point where everything else lines up.
Sound deadening goes under the liner, never over it. A little is genuinely helpful and the returns fall away fast, so do not spend the afternoon layering it.
Wrinkle control and checking bow spacing
Wrinkles come from tension in the wrong direction, not from too little tension. Before pulling harder, ask where the pull should come from.
Pull the rear in before the front and the wrinkles travel towards the rear, where the rear window trim and top strips hide them. Pull the front first and they end up in the middle of the roof where nothing hides them.
The direction of each seam tells you the diagnosis. If your seams lean progressively further back as they approach the windscreen, the liner is skewed, and the cause is upstream: either the sheaths were sewn off-square, or a bow is in the wrong hole and sitting low. Re-tensioning will not cure a geometric error.
To check bow spacing against the original, measure centre to centre on the fitted car and compare it to the log you made at removal. The tolerance is tight. Then sight along each bow from the door opening: it should read as a straight, upward curve with no visible twist.
Where the material refuses to grip the barbs, stop fighting it. Trim cement in the channel plus a new windlass is a documented, permanent fix rather than a workaround, and it is what most trimmers do anyway.
Common mistakes that ruin a bow type headliner install
- Not recording the holes. The bow goes into the next hole along, or the same hole on the wrong side, and the roof dips. This is the most reported problem on the forums and the easiest to prevent at zero cost.
- Not numbering the bows. Identical-looking bows with different curves get shuffled during cleaning and paint, then refitted in the wrong order.
- Cutting the tunnel exits too short. The bow cannot seat in the receiver and the lining pulls out of square at that bow.
- Installing front to back. Every bow you fit adds tension to the front edge, and the last bow cannot be seated. Work rear to front.
- Pulling the front before the rear. Wrinkles end up in the worst visible place.
- Leaving the seams off the bow receivers. This is the technical heart of a sagging centre and the reason a fresh liner goes slack within a year.
- Forcing the front pinch-weld tuck. Almost no access under the windscreen seal, and tearing the material there means starting again.
- Skipping the tang-relax step before cutouts. Cutting a fixture hole without loosening the tangs distorts the material around it.
- Rushing the bow restoration. Bare metal against new fabric leaves rust shadows and makes the final tension unpredictable.
- Leaving old adhesive in the channel. The new liner lifts out of the channel and the windlass is doing all the work.
Headliner troubleshooting: symptom, cause and fix
| Symptom | Likely cause | Fix |
|---|---|---|
| Sagging centre, liner dips between two bows | Seam not aligned with the bow receiver, or a bow in the wrong hole | Re-seat the bow in its logged hole; if the seam is off, tension in a sequence that pulls the seam onto the receiver before the section is anchored |
| Bows lean further back toward the front of the car | Front edge pulled before the rear, so tension has nowhere to go | Release the front, pull the rear into the channel first, then re-tension the front in the centre-midside-centre triangle |
| Material will not grip the metal tangs or barbs | Vinyl or material too stiff, or old adhesive in the channel | Use trim cement in the channel and a new windlass; clean the channel before refitting |
| Wrinkles running diagonally across the roof | Tension pulled from the centre outwards rather than evenly across a section | Release the section, then pull both corners with equal force before anchoring the middle |
| Seams visibly skewed towards the rear | Sheaths sewn off-square, or tunnel cutbacks unequal on the two sides | Correct at the flat stage: mark the centre line and re-stitch the sheaths straight before fitting |
| Torn material at the windscreen seal | Forcing the pinch-weld tuck with no access and no lubricant | Use the tapered nylon tool and work in short sections; a torn front edge usually means replacing the liner |
| Cutout for the dome light off centre | Liner not squared to the centre rod before the front was tensioned | Square the liner on the centre line and the rod, then re-cut the opening |
| Liner lifts out of the side rail in traffic | Channel fouled with old adhesive, or barbs bent flat during removal | Clean the channel, bend the barbs back up, and add trim cement along the rail |
| Brown streak along the centre rod line | Centre rod refitted bare, rust transferring into the new material | Wrap the rod in brown paper and tape before refitting; the streak itself will not lift out |
| Rear edge sagging below the rear window trim | Cardboard rear anchor strip missing or not clipped into the reinforcement brace tabs | Sew a replacement hem or card strip into the rear edge and clip it into the brace tabs |
Time, skill level and DIY versus professional
A quality bow type headliner install is comfortably more than a one-day job, and that is before the bows are restored. Buffing, sanding, cleaning and painting the bows takes longer than most people budget for.
As a rough guide for a car with four or five bows, allow a full day for removal and bow restoration, a second day for cutting the sheaths and laying the liner out, and a long half day to a full day for the fit itself. The fit is the part that cannot be rushed, because it is all tension management.
The skill needed is not sewing or upholstery. It is pattern recognition, patience and the willingness to release a section and pull it again in a different direction. People who sew regularly often find the mechanical side harder than expected.
Hand it to a trimmer if the roof metal is rusty around the receivers, if you cannot source a second set of pre-restored bows, or if the front pinch-weld area has been damaged. A professional-looking install is worth a professional on those three situations, and forum owners say the same without hesitation. For a straight car with sound metal and a good bow set, this is a very achievable weekend and a half.
Frequently Asked Questions
How do you install a headliner?
Remove the trim, sun visors, mirror, dome light, coat hooks and windlass, then take out the bows from the most pronounced curve at the rear forward, noting each hole. Restore and prime the bows, lay the new liner out finished side down, mark the centre line and cut the bow tunnel exits two to three inches in from each end. Fit the paper-wrapped centre rod first, then the curved bows rear to front, tensioning each section as you go before tucking into the channels and refitting the windlass.
What are the steps to apply a new headliner to a car?
The order is always rear to front. Document and number the bows, strip the interior, remove bows and centre rod, de-rust and prime them, mark the centre line on the new lining, cut the tunnel exits, fit the centre rod, then each curved bow from the rear forward. Pull the rear edge into its channel before the front, anchor the front centre first, then mid-way along both sides, then re-tighten the centre, then tuck the edges into the metal tangs and clamp with a new windlass.
Do the bows have to go back in the same holes they came out of?
Yes. Each bow has its own curve, and each side of the roof often has two or three candidate receiver holes, so a bow seated in the wrong hole sits lower and tilts the lining. Photograph and mark the holes before removal, label each bow with masking tape as it comes off, and bag it with its hole number so nothing gets shuffled during cleaning and painting.
What is the best way to reattach a sagging headliner?
A sagging centre is nearly always geometric, not adhesive. The cause is seams that do not line up with the bow receivers, or tension pulled front-first. Re-seat any bow sitting in the wrong hole, release the section, and pull the rear edge into its channel first before re-tensioning the front. For an edge that will not hold at all, use trim cement in the channel and a new windlass to clamp it permanently.
What is the best adhesive to reattach a headliner?
Trim cement or 3M trim adhesive applied inside the headliner channel is the standard choice, used with a new windlass at the front edge. It bonds the material to the channel where the metal barbs alone will not hold. For the fabric itself, do not rely on adhesive to fix a sag; the tension has to come from the bows being seated correctly in the right holes.
How long should the bow tunnel or sheath be on a headliner?
Leave the sheath sewn closed through the middle and open it at each end so the bow can slide free and seat in its receiver. Two to three inches in from each end is the common working figure, and building a sheath from scratch for a custom liner, a cutback of roughly 175mm or seven inches from each side achieves the same result. The closed middle section is what keeps the lining related to the centre rod.
Why do my headliner seams end up crooked after installation?
A seam that leans progressively towards the rear as it approaches the windscreen was already crooked at the flat stage. Either the sheaths were sewn off-square, or the tunnel cutbacks are unequal on the two sides, or a bow is seated in the wrong hole and sitting low. Correct it before fitting by marking the centre line and re-stitching straight, because no amount of tension will straighten a geometric error.
What do I use to poke holes in my headliner for Starlights?
Use a sharp awl or a heated piercing tool rather than scissors, working from the finished side so the cut edges point away from the cabin. Punch from the liner side outwards in small increments, support the area underneath with scrap material, and test each hole against the light body before enlarging. In a bow type liner, check the position does not sit where a bow tunnel runs beneath.
How do I cover a hole in a headliner?
Cut a patch from matching material, oversized by at least an inch all round, with a grain or pile direction matched to the surrounding liner. Feather the patch edge, bond it to the backing of the headliner with trim cement rather than the face, and let it cure fully before stretching the area. A patch on the hidden backing side is invisible once the liner is tensioned back onto the bows.
What kind of material can I use for a headliner?
Use automotive-grade fabric that is strong enough to hold tension but pliable, and resistant to ultraviolet fading and roof heat. Many builders specify a material with a foam-backed or perforated structure for sound deadening. Whatever you choose, it must be capable of being pulled tight onto the bows and tucked into a narrow channel without splitting at the folds.
Can I fit a replacement headliner without removing the roof?
On most cars with an intact roof and unopened roof metal, yes. Cut the old liner free around the edges and at every bow, leave the trim, channels and receiver holes in place, and fit the new lining over the top into the same channel. The bows stay captive, so the install is quicker but you lose the chance to inspect and restore the metal underneath, which is a real loss on a car that has been open to the elements.
What is the average cost to replace a car headliner?
The figure varies widely by region, by car, and by what is included. Quotes usually separate parts from labour, and labour depends on whether the roof pad, sun visors, dome light and rear window trim are all being replaced along with the lining itself, and whether the job is charged hourly or per panel. Getting two or three written quotes with the trim list spelled out gives a far more useful comparison than a headline number.
How do I do a custom headliner?
Measure the old liner unstretched and use it as the pattern, then mark the centre line and the bow spacing you logged at removal before cutting anything new. Sew the bow sheaths yourself with upholstery thread, keeping them dead straight and aligned to the receiver positions, with the ends cut back so the bows can slide out. Replace the rear cardboard anchor strip with a tight hem or a new card piece, then fit the liner rear to front.
Key takeaways
Knowing how to fit a headlining with bows comes down to three habits: record the bow layout before you remove anything, cut the tunnel exits so the bows can seat, and tension the car from the rear forward. Get those right and the fitting itself is patience rather than skill.
The failures people complain about years later all trace back to one of them — a bow in the wrong hole, a seam off its receiver, or a front edge pulled before the rear was anchored. None of those need specialist equipment to prevent.
Start with the twenty-minute documentation pass. Photograph the roof, mark the holes, number the bows, measure the spacing. Everything after that is straightforward work in a sensible order.