
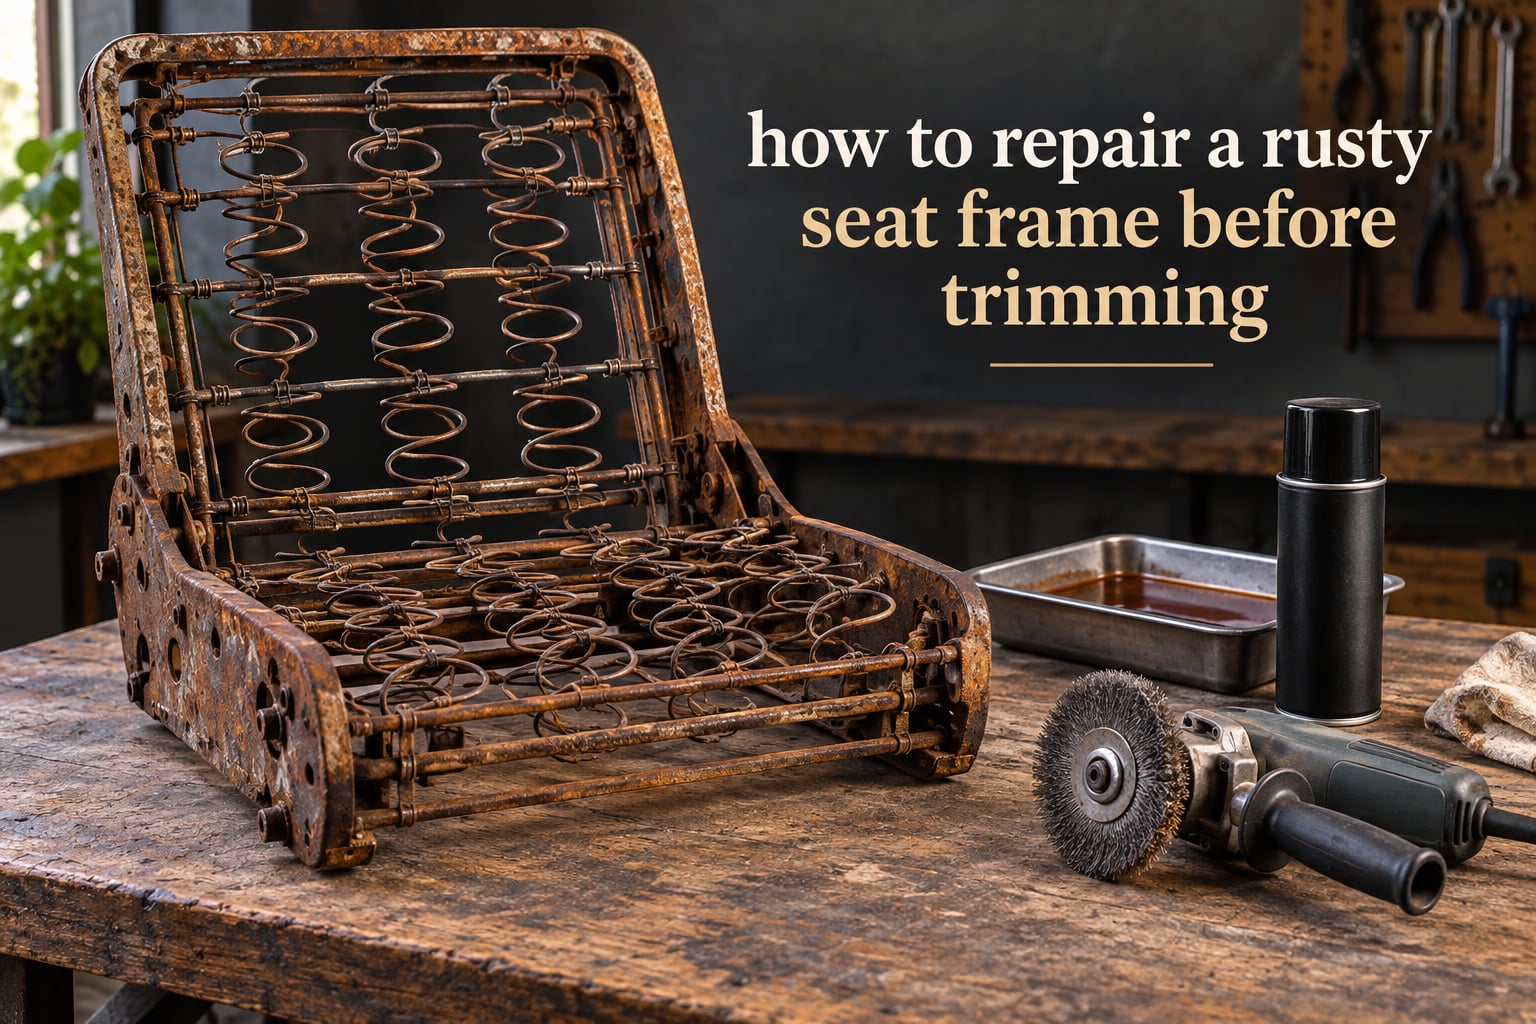
If you have taken the trim off a seat and found orange-brown scale on the springs, rails and listing rods, relax. Almost every rusty seat frame that comes across our bench can be saved. The rule is simple: remove the rust or neutralise it chemically, then seal the bare metal, and do all of it before the new trim goes on.
That last part is the one people get wrong. Rust trapped under fresh upholstery is invisible, untreated and guaranteed to spread. Once the trim is stapled and stitched down, nobody can reach the pitted areas around the springs or the anchor points where the listing rods pull through. Prep the frame first and the trimmer gets a clean, paintable, structurally sound frame to work with.
This guide walks through the full process, the decision between removal and neutralisation, the seven restoration methods and what each one actually achieves, and the one blasting mistake that ruins tilt mechanisms. It is written for the classic and vintage car owner who wants the job done properly without a blast cabinet in the garage.
Table of Contents
- How to repair a rusty seat frame before trimming
- The short answer: which method should you use?
- Is your rusty seat frame repairable? Surface rust, pitting or perforation
- Remove the rust or convert it? Choosing your approach
- Rust removal methods compared
- Blasting a seat frame without wrecking the tilt mechanism, recliner or sliders
- Sealing the frame: epoxy primer, direct-to-metal chassis black and rust encapsulator
- Myth-busting: what WD-40 and latex-based rust converters will not do
- Seat base, riser and slider specific notes
- What the trimmer takes on once your frame arrives
- Tools, products and shop options
- Frequently Asked Questions
- Can a rusted frame be repaired?
- What is the best thing to put on a rusty frame?
- Does WD-40 remove rust from a car?
- How expensive is it to fix frame rust?
- Should I remove the rust or neutralize it?
- Do I need to sandblast before reupholstering seats?
- How hard is it to reupholster car seats?
- How long does it take to reupholster a car seat?
- Conclusion
How to repair a rusty seat frame before trimming
Eight steps, in this order. Strip it, judge it honestly, clean it, remove or convert the rust, protect the moving parts, seal the metal and check your work before anything is stapled down.
- Strip the seat completely. Remove the trim, hog rings, listing rods, foam, foam crumb and any rodent debris. Note every washer and clip as it comes off.
- Assess the metal. Decide whether you are looking at surface rust, pitting or perforation before you touch a tool.
- Degrease the frame. Wash off upholstery adhesive, old wax, grease and foam residue so nothing interferes with adhesion.
- Remove the rust mechanically or chemically. A wire wheel, flap wheel and abrasive, or a phosphoric acid treatment, or both in sequence.
- Neutralise what rust remains. Convert, etch or encapsulate any scale you could not physically remove.
- Protect the working parts. Tilt mechanism, recliner, seat sliders and springs need masking, cleaning and re-greasing.
- Seal the metal. Epoxy primer, then direct-to-metal chassis black or satin enamel, or powder coat.
- Inspect before trimming. Check the anchor points, run the mechanism, confirm nothing is stiff or gritty, then hand it over.
The short answer: which method should you use?
For most frames with surface rust and light flaking scale, a wire wheel or flap wheel on an angle grinder, followed by a phosphoric acid product, followed by epoxy primer and chassis black, is the right route. It is cheap, it works in a home garage and it is what a working trimmer would recognise as a proper job.
Blasting gives a better result but carries risk. It reaches the pores of the metal and strips everything at once, but media can lodge in the tilt mechanism and slider rails unless you mask, disassemble or clean them out afterwards. Owners who have blasted complete frames report the mechanism coming out fine as long as they blew it out with air or a hose, cleaned it with a pressure washer or brake cleaner, and re-greased the rails.
Zinc plating is the specialist route and the most durable by a distance. It is also the one most people delegate. Soaking in a liquid rust remover, or running an electrolytic tank, suits deeply pitted springs where abrasive tools would struggle to reach the corrosion.
What nobody should do is spray a water displacer on the frame and call it done. That is a temporary measure, not a restoration.
Is your rusty seat frame repairable? Surface rust, pitting or perforation
Yes, unless the metal is perforated or the mounting studs are gone. The decision is based on how far the corrosion has gone into the steel, not on how much of it you can see.
| Condition | What it looks like | Structural? | Verdict |
|---|---|---|---|
| Surface rust | Even orange-brown tint, no texture, wipes off on a cloth | No | Repairable. Wire wheel, phosphoric acid, epoxy primer, chassis black. |
| Flaking scale | Rough patches that shed, dull red oxide, pitted beginnings | Usually not | Repairable. Abrade or blast back to bright metal, then seal. |
| Deep pitting | Crater-like holes, rust blooms inside spring coils, soft metal under a hard shell | Possibly | Repairable if the section is not the load path. Expect soak or electrolysis. |
| Perforation | Holes through the pan, cracked bracket, stripped or missing stud mount | Yes | Weld in a repair or a donor panel, or replace the frame. |
Run a flat blade or a screwdriver along the rusted rolled edge at the bottom of the pan. If it flexes, cracks or the tip punches through, you are in the last row of that table. Owners on the Mustang forums describe a shop measuring and cutting a replacement rolled edge as the cleanest fix once the pan is that far gone.
Surface rust on a seat frame is not a safety problem in the way structural perforation is, but it is a durability problem. A frame left in the same condition under new trim will look worse in three years than the original did in thirty.
Remove the rust or convert it? Choosing your approach
Remove it if you want a show finish, if the frame will be visible through the trim, if you can reach it with an abrasive, or if the corrosion is more than a surface film. Convert it if the frame is a tangled assembly of springs, rods and small brackets where hand work is impractical.
The honest trade-off is this. A rust converter does not remove iron oxide, it chemically turns the remaining scale into a stable, inert coating that will not spread. It is a sound approach on thin, even surface rust. It is not a substitute for removing heavy scale, and any coating sitting on top of a loose, flaky layer will eventually let that layer go.
On the r/classicmustangs forum, owners split cleanly on this. One poster wanted the rust genuinely gone and found a product like Ospho unsatisfying for that goal. The top reply went the other way: a rust converter and black paint, or a wire brush on a drill, and a frame that looks factory-fresh afterwards.
Both answers are right for their own frame. The test is the assessment table above, not your enthusiasm for a product.
Rust removal methods compared
Seven methods, ranked by what they remove, what they need and where they go wrong. Cost is expressed as a relative tier because real quotes depend entirely on your region and the shop.
| Method | Cost tier | Time | Equipment | How much rust it removes | Downside |
|---|---|---|---|---|---|
| Flap wheel and wire wheel | Low | 1 to 3 hours per seat | Angle grinder | Surface rust and loose scale | Leaves deep pitting; tiring on a full frame |
| Phosphoric acid prep and etch | Low | 30 minutes active, plus dwell time | Stiff brush, rinse access | Thin even rust; etches and protects the surface | Must be rinsed and dried; no structural bite |
| Rust converter or neutraliser | Low | Under an hour plus cure | Brush or spray | Converts remaining scale in place | Leaves the rust in place, only neutralised |
| Rust encapsulator | Moderate | 1 to 2 hours plus cure | Brush or spray, full PPE | Seals rust rather than removing it | Builds film over scale; best on light rust |
| Bead or media blasting | Moderate to high | Afternoon per seat | Blast cabinet or shop | Everything, down to clean metal in the pores | Media residue in mechanisms; risk of distortion |
| Electrolysis or evaporative soak | Low | 1 to 3 days of dwell time | Plastic tub, or a battery and a tank | Deep pitting inside spring coils and corners | Slow; must be dried fully before coating |
| Zinc plating | High | Shop turnaround | Outsourced plating shop | Strips to bare metal, then coats the steel | Most expensive route; requires disassembly |
One documented walkthrough on the MGB & GT Forum used a flap wheel on a 4-inch angle grinder, a wire wheel and sandpaper, then brushed on a phosphoric prep and etch product, scrubbed it with a stiff bristle brush, rinsed it, and finished with a rattle can of chassis paint. The result was reported as coming out well, and it is a good template for a garage job.
For the soak route, owners report filling a plastic tank with an evaporative rust remover, submerging the frame for a few hours, flushing with clean water, drying it fully and painting. The solution can be saved and reused across frames. Some people go further and use an electrolytic tank, which pulls the corrosion off rather than dissolving it, at the cost of a day or more of setup.
Blasting a seat frame without wrecking the tilt mechanism, recliner or sliders
You can blast a seat frame with a tilt mechanism fitted, but you cannot skip the masking and the post-blast clean. Media left in a pivot is what turns a good day into a replacement mechanism.
- Strip everything soft first. No trim, no foam, no listing rods, no foam crumb. Media packs into anything that traps it.
- Mask or remove the mechanism. Heavy-gauge tape and a plug, or take the recliner and tilt assembly off entirely if the mounting allows.
- Plug the slider rails. Seat tracks are the other common hiding place. Mask the ends, or remove the sliders and blast them separately.
- Choose the media deliberately. A blend of glass bead and aluminium oxide cuts well. Walnut shell is a softer option if you are worried about warping thin steel.
- Keep the pressure sane. High pressure on a pan will bow it, and a bowed pan will not take trim properly.
- Clean the residue out completely. Compressed air through every pivot and rail, then a pressure washer, then brake cleaner or a parts washer, then an ultrasonic cleaner if you have access.
- Re-grease before you reassemble. Fresh grease on the slider rails, the tilt pivot and the spring ends.
- Prime immediately. Bare blasted steel starts flash-rusting within hours indoors, and rust inhibitor over freshly blasted metal is a wasted coat.
A factory seat trimmer’s advice quoted on the MGB & GT Forum warned against sandblasting for exactly this reason: the grit gets into the tilt mechanism. A direct counter from another owner was that they had blasted frames including the mechanisms with no problems afterwards, using air or a hose and then good primer and satin black. Both experiences are real, which is why the masking and cleaning steps are not optional.
Sealing the frame: epoxy primer, direct-to-metal chassis black and rust encapsulator
Paint is what stops rust returning. Everything before this step is preparation; the coating is the only thing standing between the repaired frame and the same corrosion in two years.
- Epoxy primer first on bare or blasted metal. It bonds to clean steel and it will not let the frame rust through from behind.
- Epoxy primer over light rust that remains. Many epoxy primers are designed to wet and encapsulate residual scale rather than require perfectly bright metal underneath.
- Rust encapsulator where you cannot get to the metal. An encapsulating coating can go over rust, which is why blasting is optional rather than mandatory for many frames.
- Direct-to-metal chassis black over the top. A self-etching chassis paint cuts the number of coats and gives a factory finish on hidden structure.
- Satin black enamel for a tougher, more even finish. Useful on springs and rods that will be handled during trimming.
- Powder coat if you want to stop thinking about it. Requires full disassembly and a cure cycle, but it is the toughest DIY-durable option.
Do not use a rust-inhibiting spray in place of a real coating. Treat products sold as cavity and rust inhibitors as supplementary protection inside boxed sections, not as the finish on a seat frame.
Pay attention to the surfaces that touch wet conditions: the underside of the pan, the floor contact points, the slider rails and the riser. Those are where return rust starts, and where you can still reach the frame on a later job.
Myth-busting: what WD-40 and latex-based rust converters will not do
WD-40 does not remove rust. It is a water and moisture displacer with a light lubricating oil, designed to keep water out of a joint. On a seat frame it will slow surface rust slightly and then let it continue, and the film it leaves is not a coating.
Latex-based rust converters are the second common mistake. A number of well-known products in that category are a latex film that physically contains the rust rather than a chemical conversion. They work on light, even surface rust. On a frame with flaking scale or pitting, the film can peel away with the rust underneath it, and the trapped moisture keeps working.
What works better is a phosphoric acid treatment. Rust is iron oxide, roughly Fe2O3. Phosphoric acid reacts with it and converts it into a stable iron phosphate coating, which is inert, adherent and, as a bonus, etches the bare steel so the paint grabs. Detailed explanations on owner forums make the point that this is the step that moves people from I have heard of it to I will do it.
One home remedy repeatedly offered on the Jag-lovers forum is phosphoric acid sourced from a swimming pool supply shop, used in a plastic wading pool, with the frame soaked for a day, washed off and painted. It is cheap and it does the same job as the branded version. Read the label, dilute as directed and wear gloves and eye protection.
Seat base, riser and slider specific notes
The base and riser are the wettest part of a seat assembly. Water tracks down the back of the seat, sits in the pan and pools at the bottom of the riser, which is why the rolled edge along the base is the first thing to go.
Check the square holes in the base and the seat base mounting studs. Studs and carriage bolts corrode at the thread, and a stripped stud is a much bigger job than a rusted surface because the mount can be the load path. Clean the threads, replace the hardware and treat the stud itself before it goes back in.
Sliders need the same attention as the frame. Clean the rails, check for pitting, and grease them properly. A slider that jams puts a side load through the frame, and a frame that has just been restored is a bad place to be fighting a sticking mechanism later.
Watch for rodent nests. Old foam, paper and nesting material hold moisture against the steel and are the fastest route to a perforated pan.
What the trimmer takes on once your frame arrives
A clean, sealed frame shortens the trim job and improves the result. The upholsterer is not restoring the structure, only covering it, so anything left undone on the metal is left undone forever.
We like to receive a frame where the hog ring anchor points are intact or freshly welded, the listing rods and sanchor wires are either new or sound, the paint is dry and chipped-free, and the mechanism runs freely. Listing rods are what create pleat depth, so their anchor points matter more than almost any other small detail on the frame.
We also ask that the frame arrives free of loose media, blasting dust and old foam crumb. Grit under a new cover works its way into the foam and shows up as an imprint in the vinyl months later.
Prepping the frame yourself is the part most people can do. The skills involved are metal prep and painting, not upholstery, and the time you invest there is time the trimmer does not charge you for.
Tools, products and shop options
Assemble the kit before you strip the seat, not after. Half-finished chemical treatment and a rusty frame is the worst outcome, because it traps moisture under a coating.
- Stripping: hog ring pliers or a hog ring cutter, a staple gun for removal staples, a flat blade and a trim nailer.
- Personal protection: nitrile gloves, eye protection, a particulate respirator for grinding and blasting, and a mask for rodent debris.
- Degreasing: automotive degreaser or brake cleaner, a stiff nylon brush, clean water and somewhere to let the frame dry fully.
- Mechanical removal: 4-inch angle grinder, flap wheel, wire cup wheel, 80 to 120 grit abrasive, and a file for the rolled edge.
- Chemical treatment: phosphoric acid prep and etch, a rust converter or neutraliser, an encapsulating rust coating, epoxy primer, and satin black enamel or direct-to-metal chassis paint.
- Protection and finishing: masking tape and plugs, masking plugs for the slider rails, a quality grease for the pivots and rails, and a cover for the finished frame while the trim is fitted.
- Shop options: media blasting and zinc plating are both worth pricing up locally before you commit. A plating quote per frame varies widely by region, and one owner on a classic Jaguar forum reported getting a quote to de-rust and plate two rear spring frames that was low enough to make the shop route look sensible, and eventually paying a smaller amount in another currency to have the same job done.
On a per-frame basis, converters, encapsulators and paint sit at the cheap end. Blasting sits in the middle. Plating is the expensive route, and it is the one that most reliably ends the conversation about the frame. The forum consensus is that owners prioritise a frame they never have to think about again over a frame done for the least money.
One more tip nobody mentions: keep your hands and rags off the finished frame. Oils from your skin, plus dust, is exactly the film that traps moisture against fresh paint. Handle the frame by the rails, wear clean gloves for the final inspection, and cover it before it goes back inside the car.
Frequently Asked Questions
Can a rusted frame be repaired?
Yes, unless the metal is perforated or a mounting stud has failed. Surface rust and flaking scale are treated by wire wheel or blasting, phosphoric acid, epoxy primer and chassis black. Deep pitting inside spring coils can be soaked or electrolytically cleaned. Perforated pans and broken bracket or stud mounts need welding in a repair or a donor panel, or a replacement frame.
What is the best thing to put on a rusty frame?
Epoxy primer over clean or lightly rusted metal, then direct-to-metal chassis black or satin black enamel. Where you cannot reach bare metal, a rust encapsulating coating first, since it can be applied over residual rust. Follow with fresh grease on the tilt pivot, recliner and slider rails. Paint is the step that stops the rust coming back under the new trim.
Does WD-40 remove rust from a car?
No. WD-40 is a water and moisture displacer with a light lubricating oil, not a rust remover or a coating. It can slow surface rust on a seat frame slightly, but the corrosion continues underneath and the oily film is not a barrier. Use a phosphoric acid product, a rust converter, or a proper epoxy primer and chassis paint instead.
How expensive is it to fix frame rust?
The garage route is the cheapest: wire wheel, phosphoric acid, epoxy primer and chassis black cost little more than a tin of paint and an afternoon. Encapsulating coatings and powder coat sit in the middle. Media blasting is priced per seat by a local shop. Zinc plating is the most expensive option and the one most owners hand off, but it is the most durable finish and the one that ends the question.
Should I remove the rust or neutralize it?
Remove it when the frame will be visible under clear trim, when the rust is more than a surface tint, or when a blasting cabinet is available. Neutralise it when the frame is a tangled assembly of springs and small brackets that an abrasive cannot reach, and the remaining rust is a thin even film. Never neutralise flaking scale, because the coating goes with it and the rust keeps working underneath.
Do I need to sandblast before reupholstering seats?
No. An encapsulating rust coating can be applied over residual rust, which is why many frames are treated mechanically and chemically rather than blasted. If you do blast, strip all trim and foam first, mask or remove the tilt mechanism and recliner, plug the slider rails, blast at moderate pressure, then clean every pivot and rail with air, a pressure washer or brake cleaner, and an ultrasonic cleaner if you have one.
How hard is it to reupholster car seats?
Cutting and sewing a seat is the skilled part, and the frame repair is the part most owners can do themselves. Prepping the metal needs a grinder, brushes, gloves, eye protection and a respirator, plus somewhere to dry the frame fully. If the hog ring anchor points are sound and the mechanism runs freely, the frame is ready for the trimmer. Broken anchor points, a bowed pan or a perforated bracket are job-shop work.
How long does it take to reupholster a car seat?
A full frame strip, degrease, mechanical prep, phosphoric treatment, sealing and dry is a day to a day and a half for a pair of front seats, longer if you soak the frames. Blasting adds an afternoon per seat. Electrolytic or evaporative soaking runs a day or more of dwell time. The upholstery work itself is quoted separately and depends on the material and the shape of the seat.
Conclusion
To repair a rusty seat frame before trimming, strip it bare, judge whether the corrosion is surface, pitted or perforated, remove or convert the rust, and seal the metal before a single staple goes in. A wire wheel, a phosphoric acid treatment, epoxy primer and chassis black will handle the majority of frames, and blasting or plating is only worth it when the frame itself or a visible finish demands it.
Send the frame to us clean, dry, sealed and free of grit, with the mechanism greased and the anchor points solid. That is the whole job from our side of the bench, and it is the reason your new trim looks the same in five years as it does today.