
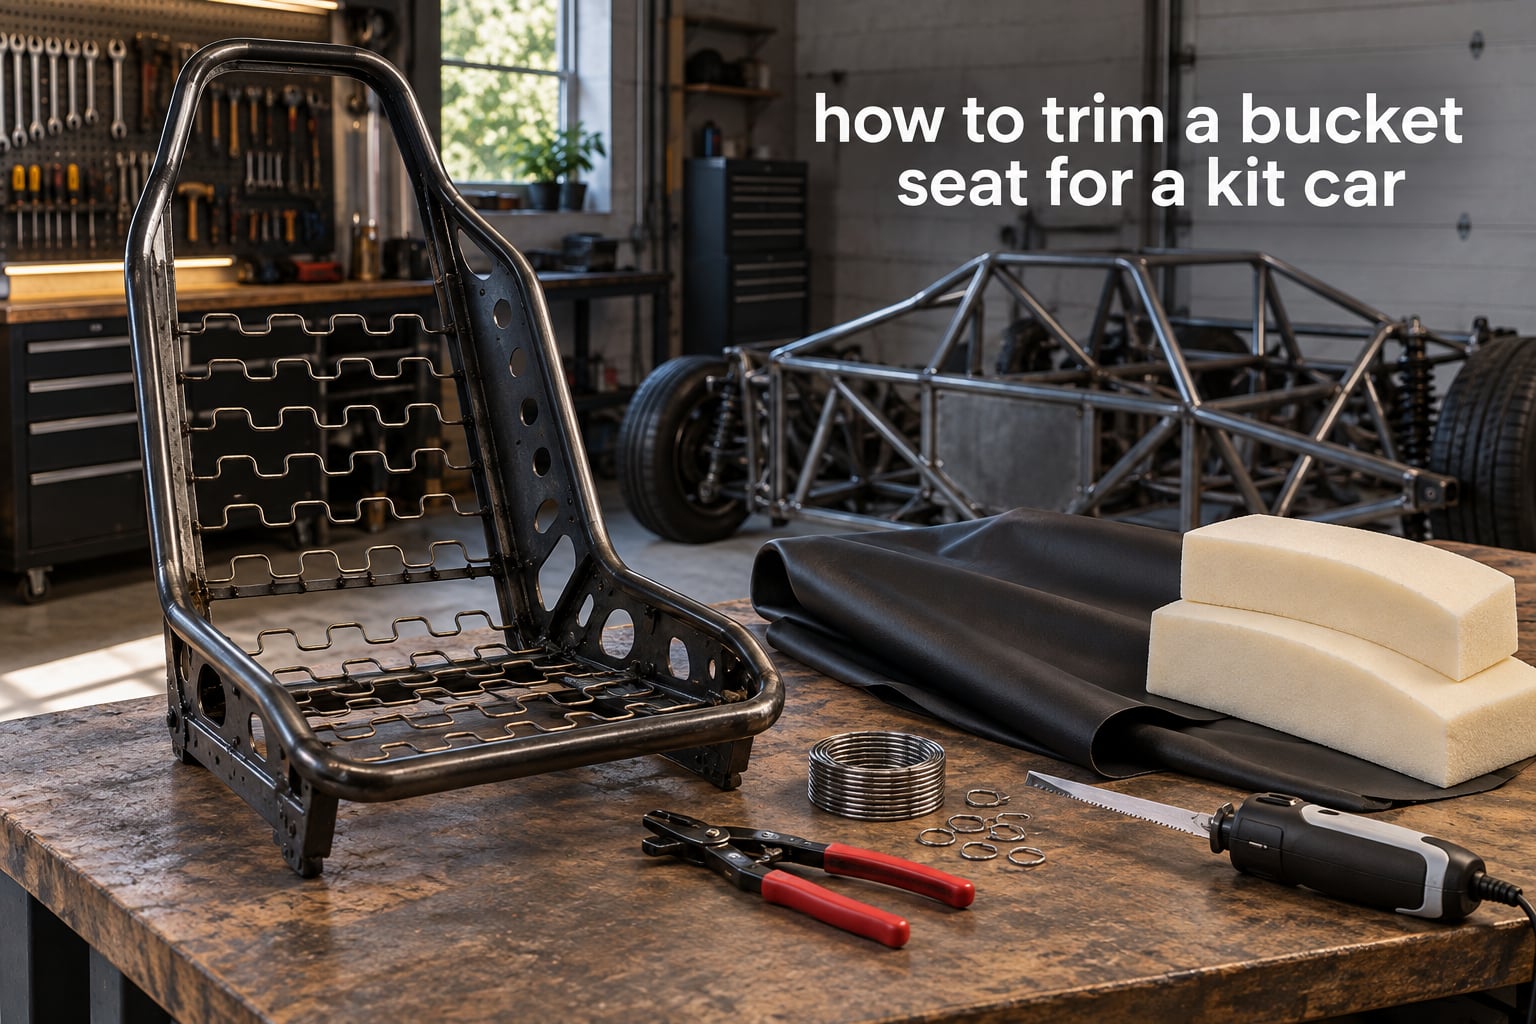
Trimming a bucket seat for a kit car is an upholstery job, not a chrome or body-trim job. You strip the seat back to its frame, reshape or rebuild the foam, make a paper pattern from the old cover, cut and sew a new one, then staple and hog-ring it back on under tension. The reason it is harder on a kit car than on a restored original is that the seat you are trimming is usually a donor shell that was never shaped for your floor pan.
This guide is written for a first-timer with a homebuilt chassis and a seat that does not quite suit it. It covers the whole sequence, the tools and quantities, the mistakes that cost people a cover, and the honest time it takes.
Here is the whole job in eight steps, and every one of them is explained further down.
- Set the seat rake, height and fore-aft position before you trim anything.
- Strip the seat down and cut the hog rings, staples, clips and covers away.
- Reshape the existing foam, or rebuild the bolsters from foam blocks.
- Make a paper or card pattern from the old cover, adding the seam allowance to the pattern.
- Cut the new material, respecting panel direction and vinyl stretch.
- Sew the cover: centre panels, pleats, closure flap, then piping and welt.
- Fit the cover to the foam, then to the frame, then staple and hog-ring it.
- Sit in the finished seat for an hour, then drive the car and check it again.
Updated for October 2026.
Table of Contents
- What “trim” means here, and why a kit car seat is different
- Tools and materials you need for a bucket seat retrim
- Step 1: Set the seat rake, height and fore-aft position first
- Step 2: Strip the seat down and remove the hog rings
- Step 3: Reshape or rebuild the foam and the bolsters
- Step 4: Make a paper pattern from the old cover
- Step 5: Cut the new material and respect the stretch direction
- Step 6: Sew the cover: centre panels, pleats, welt and flap
- Step 7: Fit the cover to the foam, then to the seat frame
- Step 8: Final fit check in the car
- Fitting and mounting the seat in a kit car chassis
- Vinyl vs fabric vs leather: how the material changes the job
- Common beginner mistakes and how to recover
- How long it takes, and when to hand it to a shop
- A time-ordered checklist for the whole job
- Frequently Asked Questions
- How do I reupholster bucket seats?
- How do I remove hog rings from upholstery?
- How do I make my own seat foam?
- How much does it cost to reupholster a bucket seat?
- How can I make a DIY bucket seat?
- Can you put a bucket seat in any car?
- Can you adjust bucket seats?
- How tight should a car seat cover be when it is stapled?
- Do I need an industrial machine to sew vinyl car seats?
- What is a hog ring plier?
- Wrap up your bucket seat trim with a plan, not a guess
What “trim” means here, and why a kit car seat is different
Two different jobs share the word trim, and the search results for this question are split straight down the middle between them.
Upholstery trimming means recovering the seat: removing the old cover, working the foam and sewing a new one. That is what this guide covers. Trim in the other sense means the chrome or plastic capping strips and finishing bullets on a seat back or seat skirt, which is a different job entirely on steel-backed and plastic-backed shells. Forum threads on that subject usually end with the advice that plastic-backed seats are thicker and take different terminations than steel ones.
What makes a kit car job different is the seat itself. A restoration starts from a seat that already fits its car. A kit car usually starts from a donor seat, and the questions that come with it are about geometry: does the seat back clear the body or the hoop, does the base meet the floor pan or the transmission tunnel, and can the driver still reach the pedals at full stretch.
That geometry has to be settled before the cover is cut. Rake and height change the shape of the seat back, the way the cover wraps the bolsters, and how much material you need. Trim first, mount later, and you will sew the cover twice.
Before you buy anything: put the seat in the car, sit in it, and drive the car, even if it means borrowing a seat and bolting it to the floor pan. A seat that is comfortable and clear should be the seat you trim.
Tools and materials you need for a bucket seat retrim
You can trim a bucket seat with a domestic sewing machine, a sharp knife, a stapler and a pair of hog ring pliers. Everything else makes the job faster or less wasteful. Below is what one seat needs, and what changes when you build a pair.
| Item | Quantity per seat | Pair of seats | Notes |
|---|---|---|---|
| Upholstery vinyl, four-way stretch | 7 to 9 linear yards | 16 to 20 yards | Measure on the actual seat, not the donor supplier estimate |
| High-density foam for the base | one sheet | two sheets | Cut oversize, then carve to shape |
| Bolster foam blocks | 2 to 3 blocks | 5 to 6 blocks | Glued up and carved, not bought pre-shaped |
| Hog rings | 1 box | 1 box | Have spares, they bend on the frame edge |
| Staples, short leg | 1 box | 1 box | Use the leg length that matches your tacking strip |
| Upholstery staples for the cover edge | 1 box | 1 box | Avoid ones that pierce the foam deeply |
| Thread | 1 large spool | 2 spools | Bonded nylon for the heavy seams |
| Welt cord, 6 mm | 8 to 10 linear yards | 18 to 20 yards | Only if you are piping the bolsters |
| Foam spray adhesive | 1 can | 2 cans | For bolsters and panels, not for the cover |
| Clips and J-style seat clips | as required | as required | Order by the clip profile your frame uses |
The tool list is shorter than the material list, and most of it you can borrow:
- A hog ring plier, plus side cutters for cutting the old rings off.
- An electric carving knife for foam. This is the one tool worth buying new.
- An upholstery stapler, a tacking strip or listing wire, and a hammer for the strip.
- A walking foot or a jeans foot, and a needle thick enough for vinyl.
- A self-healing cutting mat, a rotary cutter and a long straight ruler.
- Pattern paper, a tape measure, a marker pen and a permanent label for every panel.
- A steamer or a heat gun to release wrinkles at fitting.
Tool verdict we would repeat: an electric knife, not a grinder with a flapper disc. Builders on the Ontario Rodders T-bucket upholstery thread tried the grinder first and called it far too awkward for foam contouring, then finished the whole job with the electric knife and a sanding block.
Step 1: Set the seat rake, height and fore-aft position first
Set the seat rake, height and fore-aft position before you cut anything, and confirm the driver can reach the pedals and the shifter with the seat in that exact position. Bolt the seat to the frame or floor pan, sit in it, and drive it. If the position is wrong, everything downstream is wasted work.
On a kit car the three adjustments interact. Raising the base pushes the seat back further into the body, and adding rake pushes the shoulder area into the hoop or the rear deck. Most builders find the fix is a seat riser, a trimmed floor pan, or a cut and re-welded seat back.
Mark the final position with a scribe line on the floor pan before you remove the seat. It takes a minute and it tells you where the brackets need to land when you put it back.
For builders who want to build the seat from nothing, the honest answer is that the floor pan, the riser and the frame geometry are the hard part. The upholstery is the part that forgives you.
Step 2: Strip the seat down and remove the hog rings
Remove hog rings by cutting each ring once with side cutters at the frame edge, then pulling the loose leg straight out through the cover. Do not try to unwind the wire or unhook the loop with pliers; the ring is designed to be destroyed, and the remaining leg pulls out of the hole it made.
Work in a deliberate order. Photograph the finished seat from several angles first, so you can reference the seam layout later. Then:
- Mark every panel and seam line with a marker pen before anything comes off.
- Remove the seat belt anchor hardware and note the plate position, so you can weld a tab back in the same spot.
- Take the rear panel off, and note which clips are reusable and which are the J-style type.
- Cut the hog rings along the base and back rails.
- Pull the cover off the foam, working in the direction the cover was applied.
- Pull staples out with a flat blade and a claw, and take the listing wire with them.
Note whether the cover was stapled to a tacking strip, wrapped over wire, or clipped. That one detail determines how you reinstall it, and it is the fastest way to lose a seat you are trying to save.
Take photographs at every stage. A seat that has been apart for two hours will not remember how it was assembled, and the photographs are the only record of the seam layout.
Step 3: Reshape or rebuild the foam and the bolsters
Reshape seat foam by cutting it with an electric knife, building flat areas up with glued blocks, and then carving the whole thing to the shape you want. Carve the centre of the seat slightly dished rather than flat, and shape the bolsters so they are round, not square.
There are two routes here, and most builders end up doing both.
Reshaping existing foam
If the foam is sound but flat or lumpy, carve it. A kitchen knife or an electric carving knife works; a saw does not, because it tears the cell structure. Take thin cuts, and check your progress against the seat frame rather than against your first cut.
The classic failure is planning for two inches of foam and needing three. One builder on the Ontario Rodders thread planned the seat around 2 inches, found the height wrong, and had to cut the supporting wood back out. Measure the stack height at the centre, at the bolsters and at the side edges, and write the numbers down.
Rebuilding the bolsters from blocks
Bolsters look factory-correct when they are built from glued blocks, carved round, and then skinned in a single piece of material.
- Glue two or three blocks of high-density foam edge to edge, alternating the bond line so it does not cut through.
- Use foam spray adhesive between layers and let it tack up fully before carving.
- Carve the block into a wedge, then round the top edge.
- Glue the block to the seat base before the cover goes anywhere near it.
The Ontario Rodders build used one inch blocks glued up, trimmed and sanded to shape, which is the standard approach and it works. Sand the shape under bright light; lumps show through a tight cover and hide under a slack one.
Which foam grade goes where
| Grade | Where it goes | Why |
|---|---|---|
| C45 or similar firm grade | Seat base and the bolsters that take body weight | Holds shape, does not bottom out under a driver |
| C35 or softer grade | The back panel, where a hard edge presses into the shoulder blades | Gives a little, so the foam gives before you do |
| Thin pad foam | Over the top of the base, under the cover | Levels the surface so the cover does not bridge a hollow |
Naming the grade matters. A supplier will sell you what you ask for, and “high density” is not a specification.
Step 4: Make a paper pattern from the old cover
Make the pattern by flattening the old cover panels, taping the seams, and tracing around them onto paper or card with the seam allowance added to the pattern itself. Add the allowance now, not at the machine, because a seam allowance added twice is the single most common way to waste a cover.
Pattern each panel separately, and write its name, its grain direction and its position on the seat directly on the pattern before you cut it. The Ontario Rodders build used poster board and acetate templates with a half inch seam allowance, which is exactly the right idea in a material you can cut and re-cut cheaply.
Three rules make patterning repeatable:
- Mark the centre line of every panel and carry the mark onto the new material before you cut. An off-centre seam cannot be corrected after sewing; the whole panel has to be redone.
- Mark the direction of stretch on the pattern, not in your head. Construction vinyl stretches along the length, along the cross, and more again on the bias, so an off-bias pattern wastes material and still pulls oddly when you staple it.
- Number the panels and lay them out in sewing order before you start.
If the old cover is a reproduction cover for a different seat, use it as a starting point and adjust the pattern to your foam, not the other way around. The foam is what the cover has to fit.
Step 5: Cut the new material and respect the stretch direction
Cut upholstery vinyl on a self-healing mat with a rotary cutter and a long straight edge, and always cut on the same grain as the pattern. Cut each panel oversized by an inch or two, mark the centre line and the stretch direction on the wrong side, and only then trim to the line.
Four-way stretch vinyl largely removes the direction problem, because it stretches in every direction, and it is the reason we recommend it for a first build. Standard construction vinyl does not, and it is cheaper per yard. If you use construction vinyl, respect the bias, and expect the pattern to waste more material.
Before you cut, work out whether the panel will sit under tension. Panels that will be pulled tight over a bolster want the stretch to run across the pull. Panels that lie flat, like a back panel, can be cut anywhere.
Warning: a single slipped cut in a full hide is unrecoverable. Spread the material flat, weight the corners, and cut in one pass per panel rather than nibbling at it.
Step 6: Sew the cover: centre panels, pleats, welt and flap
Sew the cover by joining the front centre panel to the back first, then adding the bolsters and side panels, then the skirt, then the closure flap, then the piping. Work in that order and every seam is a straight, accessible stitch before the next one closes it up.
Machine and needles
You do not strictly need an industrial machine, but you do need a walking foot and a thick needle. A domestic machine with a jeans foot and an upholstery needle will sew four-way stretch vinyl, in short passes, at moderate stitch length. Thick construction vinyl on a domestic machine will usually wander, skip or chew, and a bad stitch there is permanent because the needle holes do not close.
This is the fork in the road most first-timers hit: fabric forgives a bad stitch, vinyl does not. If you are buying one machine for this job, buy a used industrial straight-stitch machine with a compound walking foot rather than a new domestic.
Pleats
Pleats are marked, not guessed. Lay the pleat lines out at even spacing, mark them on both the centre panel and the side panel, and sew them before you cut the panels out. The Ontario Rodders build laid pleats at 1 1/8 inch spacing, which is a useful starting point for a bucket seat centre panel. Sew foam into the pleat so it holds its shape instead of collapsing into the seam.
Piping and welt
Welt cord is the corded rolled edge that finishes a seam and defines the bolster edge, and it is the most visible cosmetic upgrade on a seat. It is also the step most guides skip.
- Cut your welt strips long enough to include the seam allowance, and stretch the strip slightly as you sew it round the cord.
- Sew the welt to the cover panel first, cord out, then sew the joined panel into the seam.
- Use listing wire rather than cord on any edge that will be stapled, so the cover has something solid to grab.
Skip the piping only if the seat is a budget retrim in a plain fabric. On vinyl, the bolster edge without welt looks unfinished from any distance.
Closure flap
Leave a closure flap on the underside of the seat base or under the front edge, with J-style clips or staples for the last inch of fit. A cover with no closure cannot be tensioned, and tension is what keeps a cover from pucker.
Step 7: Fit the cover to the foam, then to the seat frame
Pull the cover over the foam first, work the pleats into place, then pull the cover down onto the frame and tension it evenly from the centre outwards. Staple the centre first, then work outwards in opposing pairs, then finish at the back panel.
On tension: a car seat cover should be snug enough that it does not move when you push the side bolster with your palm, and not so tight that the vinyl is visibly stretched or the pleats have flattened. If the cover has to be dragged hard to reach a staple, the pattern was too small. If it is bagging in the middle, the pattern was too large or the seam allowance is wrong.
Reinstall in the reverse order of removal. Tacking strip and listing wire go back on first, then the staples, then the hog rings, then the clips, then the belt anchor plate.
On hog rings, close them with pliers by pressing the legs together until they collapse onto the ring. Twist the free end to the line of the ring, not around it, and trim it. If a ring will not close cleanly, it is the wrong size for the plier; forcing it is how frames get marked.
Steamer or heat gun at this stage. A burst of steam before you staple flattens the last of the wrinkles and gives you a better final tension.
Step 8: Final fit check in the car
Check the finished cover in the car, not on the bench. Sit in it for an hour, then drive it, then look at the cover again. The hour is the important part: a cover that looks taut when you first staple it can bag out after twenty minutes of sitting.
Look for four things after the drive:
- Bolsters that stay put and do not collapse forward.
- Seams that have not rolled or puckered along the centre panel.
- Hog rings that have not worked loose or cut into the cover edge.
- Any point where the cover is pinched between foam and frame.
Anything that has moved gets un-stapled and re-tensioned, not patched. Most fit problems are tension problems, and a patch on a tension problem just hides it until the patch fails.
Fitting and mounting the seat in a kit car chassis
You can put a bucket seat in almost any car, but a production seat rarely bolts straight into a homebuilt chassis without a little fabrication. The usual gaps are the floor pan contour, the transmission tunnel, and the back of the seat hitting the body or the hoop.
Install a production seat by welding small tabs to the frame and bolting the seat through them, rather than welding the seat directly. A builder on the dfkitcar forum tack-welded bolts and steel spacers to a sign post so a reclining seat could be bolted on and removed again for frame access. That approach costs minutes and saves the seat later.
Checklist for a kit car install:
- Clearance between the seat back and the body, hoop or deck, at full rake.
- Clearance between the outer bolster and the door skin or the transmission tunnel.
- Legroom at the pedals with the seat fully forward, and reach with the seat fully back.
- Belt anchor points on the frame, not on a bracket that will fold in a crash.
- No sharp floor pan edge where a passenger’s knee can find it.
- A removable bolt pattern, so the whole seat lifts out for floor pan work.
On mid-engined cars, builders have cut and re-welded the seat back and shoulder wing to gain legroom clearance. That is a bigger job than trimming, so do it before the cover goes on.
Vinyl vs fabric vs leather: how the material changes the job
| Material | Stretch | Machine | Mistake recovery |
|---|---|---|---|
| Four-way stretch vinyl | Stretches in all directions, so panel direction stops mattering | Domestic with a walking foot is fine | Poor; needle holes do not close |
| Construction vinyl | Stretches along length and cross, more on bias | Walking foot; expect to fight it on thick hides | Poor; short runs of holes are permanent |
| Woven fabric | Very little | Domestic machine, standard foot | Good; seams can be unpicked and resewn |
| Leather | Little, and it is expensive to waste | Walking foot, leather needle | Poor; hide cost makes a mistake expensive |
For a first build, four-way stretch vinyl is the forgiving choice in the only dimension that matters: you can pattern less precisely and still get a fit. Fabric is the forgiving choice in every other dimension, because a bad seam comes out.
Common beginner mistakes and how to recover
Most of the mistakes on this job are recoverable, and all of them are avoidable. Here are the ones that actually happen.
- Seam allowance added twice. The panel comes out too small and will not reach the frame. The documented recovery is to rip the seam out and re-sew it, which is exactly what happened on the Ontario Rodders build. Mark the allowance on the pattern so it happens once.
- Pattern reference marks lost. The pleats do not match and you only find out at the stapling stage. Mark every reference on the pattern, on the material and on the finished panel before you sew.
- Off-centre seam. Not correctable. Cut a new panel.
- Foam shaped with a grinder. Uncontrollable, and it tears the foam. Finish with the electric knife and a sanding block.
- Cover pucker when it is stapled. Almost always a tension or pattern-size problem, not a technique problem. Re-staple from the centre outwards in opposing pairs and take the tension up gradually.
- Wrong webbing. Seat webbing and back webbing have different stretch. Using the wrong one makes the seat harder to tension than it should be.
- Hog rings bent on the frame edge. Keep spare rings, and close them with pliers rather than twisting with a wrench.
One recurring theme in the build logs is that the cover, not the foam, is what fails first. A seat that survived a year of use was usually rebuilt because the cover wore out, not because the shape was wrong. Buy better material on the second attempt.
How long it takes, and when to hand it to a shop
Plan on weekends, not a single evening. Strip down and assessment is a day, foam work is a day, patterning and cutting is a day, sewing is one to two days, and fitting takes another. Add fit and mount time in the car. A complete interior including door panels and carpet has taken builders several evenings each.
Cost splits into material, tools and labour. A shop quote is dominated by labour hours on the sewing and the foam work, and a first build usually costs more in materials than the quote it avoided, because mistakes get bought twice.
Hand it to a shop when: you are sewing thick hide on a domestic machine with no walking foot, the seat back is a bonded or composite shell that will crack if you re-weld it, the foam is beyond reshaping and needs rebuilding entirely, or you need the car back on the road in a week. Trim the pattern, get the panels cut, then let a shop run the machine.
A time-ordered checklist for the whole job
Print this list and work down it. Each line is in the order it needs to happen, not the order it is tempting to do it in.
- Mount the donor seat and drive it. Confirm rake, height, clearance and legroom.
- Photograph the seat from every angle.
- Mark panels, seams, stretch direction and the centre line on the old cover.
- Remove the belt hardware, the rear panel and the clips.
- Cut the hog rings with side cutters and pull the legs out.
- Strip the cover and pull all staples and listing wire.
- Assess the foam. Mark what gets carved and what gets built up.
- Carve with the electric knife; glue up bolster blocks and carve them round.
- Glue bolsters to the base and let the adhesive fully tack.
- Flatten and tape the old cover panels; trace patterns with allowance added.
- Label every pattern with name, centre line and stretch direction.
- Cut the new material on the correct grain, oversized first.
- Sew the centre panel to the back; add the pleats with sew foam.
- Sew the welt and cord to the panels, then join the bolsters and side panels.
- Sew on the closure flap and leave the final edge open for tensioning.
- Pull the cover over the foam, line up the pleats and staple from the centre outwards.
- Re-tack the listing wire, staple the edges and close the hog rings.
- Refit the belt anchor, the clips and the rear panel.
- Steam the cover, put the seat back in the car and sit for an hour.
- Drive, then re-inspect bolsters, seams, rings and pinch points.
Frequently Asked Questions
How do I reupholster bucket seats?
Strip the seat to the frame, cut the hog rings and staples, reshape or rebuild the foam, pattern the old cover onto paper with the seam allowance added, cut new material on the correct grain, sew the panels, then staple and hog-ring the cover back on under tension from the centre outwards. Finish with an hour of sitting in the seat and a drive before you call it done.
How do I remove hog rings from upholstery?
Cut each ring once with side cutters at the frame edge, then pull the remaining leg straight out through the cover. Do not unwind the wire or lever the loop open with pliers, because the ring is designed to be cut. Photograph the cover layout before you start so the seams can be matched later.
How do I make my own seat foam?
Build flat areas up from glued blocks of high-density foam and carve the whole shape with an electric knife. Glue blocks edge to edge with foam spray adhesive, let it fully tack, then carve a wedge and round the top edge for bolsters. Plan the stack height at the centre, at the bolsters and at the side edges before you cut anything.
How much does it cost to reupholster a bucket seat?
The cost splits into material, tools and labour, and a shop quote is mostly labour on the foam work and the sewing. A first attempt usually spends more on material than the quote it replaced, because errors get bought twice. Shops are cheaper per seat on a pair than on a single seat, so plan the whole interior at once.
How can I make a DIY bucket seat?
Build a base panel, bolt or weld a seat frame to it, tension seat webbing across the frame, add a firm foam base and carved bolster blocks, then trim a cover to fit. Set the rake, height and fore-aft position in the car before you cut any material, because changing the geometry later means sewing the cover again.
Can you put a bucket seat in any car?
Almost any car, but a production seat rarely bolts straight into a homebuilt chassis. You will usually need to check floor pan contours, transmission tunnel clearance and seat back clearance against the body or hoop, and weld small tabs to the frame so the seat can still be removed for floor pan work.
Can you adjust bucket seats?
Yes, on three axes: rake, height and fore-aft position, using rails, spacers or risers. On a kit car the three interact, because raising the base pushes the seat back into the body and adding rake pushes the shoulder area into the hoop. Mark the final position on the floor pan with a scribe line before removing the seat.
How tight should a car seat cover be when it is stapled?
Snug enough that the cover does not move when you push the bolster with your palm, but not stretched. Staple the centre first, then work outwards in opposing pairs to take the tension up evenly. If you have to drag hard to reach a staple the pattern is too small, and if it bags in the middle the pattern or the seam allowance is wrong.
Do I need an industrial machine to sew vinyl car seats?
Not strictly. A domestic machine with a walking foot and a thick upholstery needle will sew four-way stretch vinyl in short passes. Thick construction vinyl will usually wander or chew on a domestic machine, and since a bad stitch in vinyl is permanent, a used industrial straight-stitch machine with a compound walking foot is the better first purchase.
What is a hog ring plier?
A hog ring plier is the tool that closes hog rings. A hog ring is a multi-legged wire fastener that pierces the cover and the frame in one go, so it replaces staples where an edge gets handled hard. The pliers press the legs together until they collapse onto the ring, then you twist the free end to the line of the ring and trim it.
Wrap up your bucket seat trim with a plan, not a guess
To trim a bucket seat for a kit car, settle the seat geometry in the car first, then strip, carve foam, pattern with the seam allowance already on the pattern, cut on the correct grain, and sew in a fixed order. Tension from the centre outwards and finish with an hour in the seat before you drive it.
Most of the difficulty on this job is not sewing. It is deciding the seat geometry before you cut, and adding the seam allowance once instead of twice.