
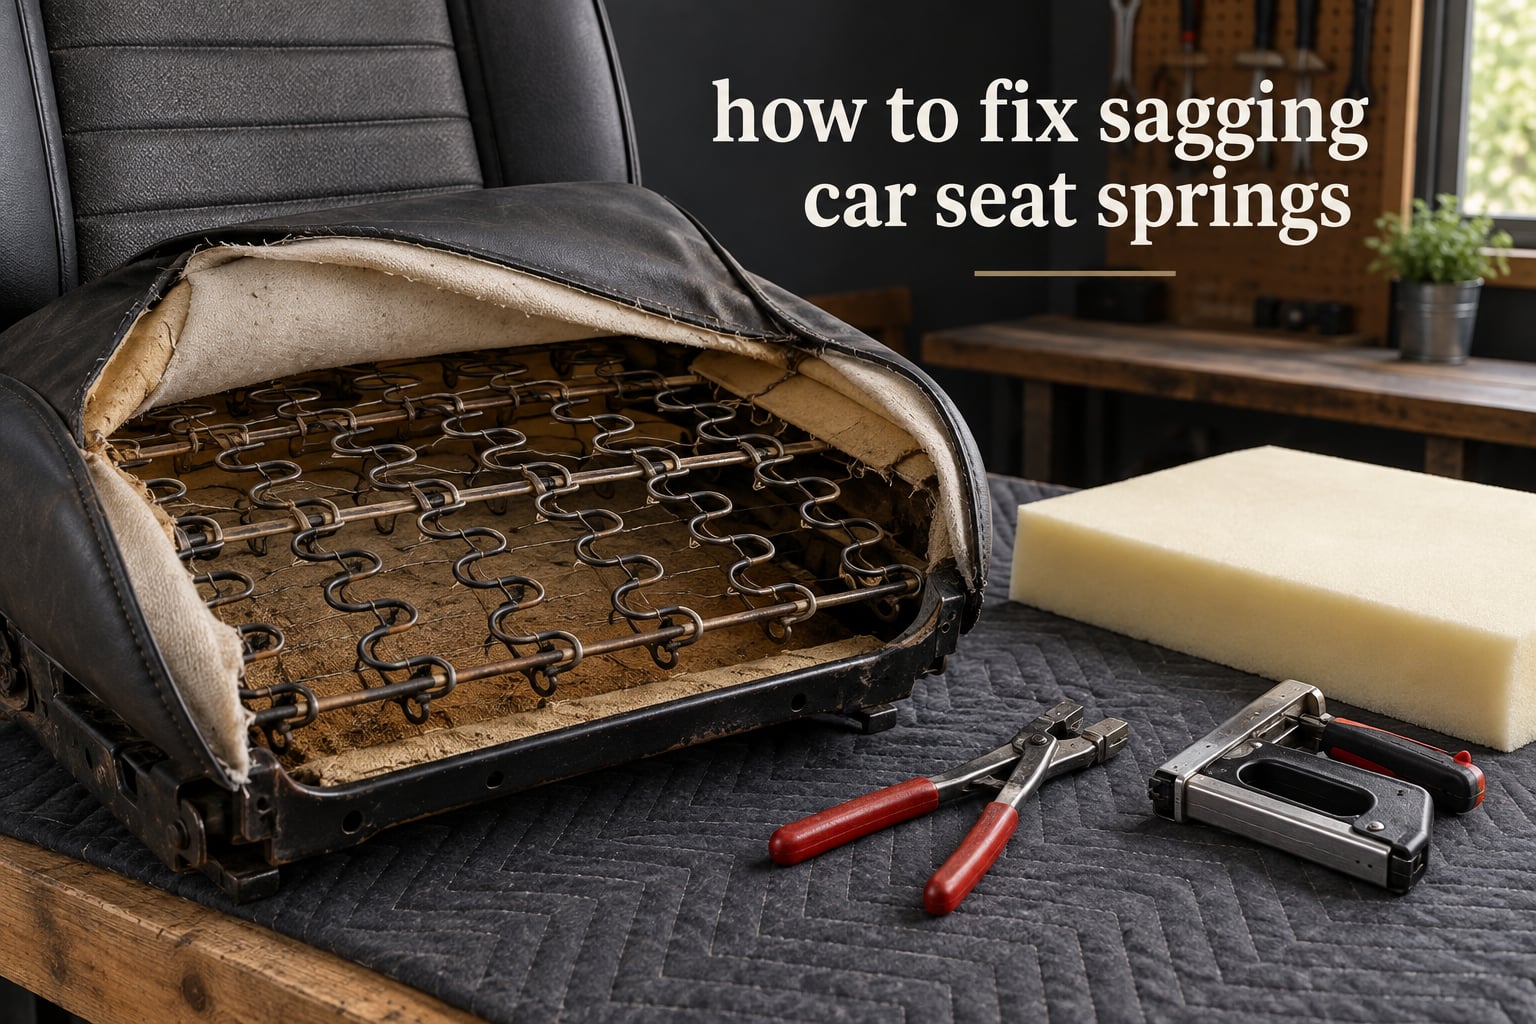
A sagging car seat is one where the cushion no longer supports your weight at the height it used to. Foam compresses permanently, springs lose tension, clips crack, and frames take a set. The fix depends entirely on which of those three has failed.
Most people search for how to fix sagging car seat springs, then discover there are no springs under the cushion at all. Many modern seats are full-foam designs with a wire grid or nothing beneath the pad, so the word “spring” points at the wrong component half the time.
Here is the direct answer: if the cushion feels soft and mushy with no rebound, the foam has collapsed and you need new padding. If you hear metallic creaking, can see a broken coil, or the seat sits unevenly on one side, the springs, clips, or frame are at fault. If both symptoms are present, you will likely do foam and spring work together.
Below we walk through diagnosing which part has actually failed, the full teardown and refastening cycle for hog rings and springs, three fixes that take under half an hour, and honest guidance on when repair stops making sense. We have pulled seats apart enough to know that the diagnostic step saves more time than any other part of the job.
Table of Contents
- What Actually Makes a Car Seat Sag: Foam, Springs, or Frame?
- How to Diagnose What’s Really Sagging
- Symptom to Likely Cause to Fix
- Seat Construction Type to Fix
- Safety Checklist Before You Pull a Seat Apart
- Tools and Materials You’ll Need
- How to Fix Sagging Car Seat Springs in 6 Steps
- 3 Quick Fixes That Take Under 30 Minutes
- How to Tighten a Sagging Leather Car Seat
- Repair or Replace: How to Decide
- Frequently Asked Questions
- How do I fix a sagging car seat?
- How can I tighten a loose spring?
- Do I have to remove the whole seat cover to reach the springs?
- Can I slide foam under the cushion instead of stripping the seat?
- How do I tighten saggy leather car seats?
- Is it okay for a car seat to wiggle?
- Why does my new foam pad sag again after a year?
- Should I repair the seat or replace it?
- Final Thoughts on Fixing Sagging Car Seat Springs
What Actually Makes a Car Seat Sag: Foam, Springs, or Frame?
Three separate systems sit under the cushion, and each one fails in a different way. Working out which one has let go before you buy a single part is the difference between a 30-minute job and a weekend.
Foam fatigue
Seat foam is polyurethane, and it compresses permanently under repeated cyclic load. Heat, sunlight through the glass, and body weight all accelerate it. The tell is a dip that stays put after you stand up, a soft feel with no rebound, and a passenger seat that still looks new while the driver seat looks tired.
Members on the grassrootsmotorsports.com Corolla thread found exactly this: they pulled the driver seat apart expecting bad springs and found springs in good shape. The OP grafted a two-inch slab of craft store foam under the existing cushion and the sag disappeared. The same thread notes that many modern seats have no suspension at all, which is why “sagging springs” is frequently a misdiagnosis.
Springs and perimeter wire
Older and many classic seats use coil springs or a perimeter wire frame clipped into the seat frame. Over decades the coils lose tension, the perimeter wire stretches into a longer shape than it was made to hold, and the cushion drops. A wire that no longer sits flat, or a spring with a visible gap between coils, means the suspension is stretched even if nothing has snapped.
Watch for metallic creaking over speed bumps and a cushion that rocks when you shift your weight. If you press firmly and the seat feels hollow rather than firm, the suspension is no longer carrying load.
Spring clips and frame welds
Springs and perimeter wire are held by small spring clips, and those clips are the most common failure point on any seat. The rebuild documented on hotrod.com shows the real-world case: a bench seat with cracked spring clips and a broken perimeter frame, not merely weak springs. Welding a cracked perimeter frame buys you time and nothing more.
A one-sided sag is a strong hint here. Foam wears fairly evenly, so if the driver side of the cushion has dropped a full inch more than the passenger side, suspect a cracked frame weld or a single broken clip rather than tired foam.
How to Diagnose What’s Really Sagging
Run through this checklist before you remove anything. It takes about five minutes and tells you which repair tier you need.
- Compare the driver seat to the passenger seat. A visible height difference points to springs, clips, or frame rather than foam.
- Press hard in the center of the cushion. If it feels hollow and stays depressed, the suspension has relaxed. If it feels dense and slow to recover, the foam has collapsed.
- Press along each side separately. A side that drops noticeably more than the other suggests a cracked frame weld or a single broken clip.
- Move the seat track through its full travel and listen. Creaking or clunking under load means hardware or clips, not foam.
- Check whether the seat rocks side to side with nobody sitting in it. A rock usually traces to track hardware or a frame joint.
- Look under the seat with a flashlight for a visible gap in the coil springs or an obviously stretched perimeter wire.
- Sit in the seat, get out, and see whether the dip remains. Permanent indentation is foam fatigue.
Symptom to Likely Cause to Fix
| Symptom | Likely cause | Fix |
|---|---|---|
| Soft, mushy cushion, no rebound | Foam fatigue | Graft a slab of high-density foam or rebuild the cushion |
| Seat sits lower than the passenger side | Spring tension lost or perimeter wire stretched | Tension the springs, replace stretched wire, or refasten hog rings |
| One side sits much lower than the other | Cracked frame weld or a broken spring clip | Replace the clip; treat welding the frame as a temporary measure |
| Metallic creaking over bumps | Loose clips, stretched wire, or a frame joint | Re-tension and replace the affected clip or wire |
| Cushion bottoms out with no support at all | Broken spring plus collapsed foam | Full cushion rebuild with new foam and new suspension |
| A new foam pad sags again within a year | Wire grid cutting into the foam from below | Lay a cardboard barrier over the grid before the foam |
Seat Construction Type to Fix
| Seat type | What you will find | What to do |
|---|---|---|
| Full-foam, no suspension | Solid molded pad, sometimes a wire grid underneath | Foam replacement only, plus a cardboard barrier if a grid is present |
| Foam on a wire grid | Flat welded wire under the pad | Cardboard barrier, then graft foam above it |
| Foam on a coil spring grid | Individual springs clipped to a frame | Cardboard barrier, graft foam, replace broken springs |
| Spring-only base with a separate foam pad | No foam glued to the base, pad sits on top | Tension the springs and re-hook the pad |
| Deluxe combined base | Foam and spring base built as one unit | Full rebuild; the foam cannot be separated cleanly |
Safety Checklist Before You Pull a Seat Apart
No competitor page covering this repair mentions electrical safety, and on a modern vehicle that is where people get hurt or cause real damage.
- Disconnect the negative battery terminal and leave it disconnected for the full job. Do not reconnect it with the seat still apart.
- Wait at least 10 minutes after disconnecting before working near any seat wiring. The airbag capacitor holds a charge after the battery is off.
- Unplug the seat heater connector if your seat is heated, and the ventilation blower connector if it is cooled. Tag them with tape so you can identify them on reassembly.
- If the seat is powered, unplug the seat track motor harness and support the track so it cannot move while it is disconnected.
- If your seat has a side airbag, the seam of the seat back is not a seam you cut. Stop and get a shop with SRS training if the side bolster has to be opened.
- Support the seat and backrest on a stand before you lift it out of the vehicle. A seat with a powered backrest is heavy and awkward.
Tools and Materials You’ll Need
You do not need a shop for most of this. You do need the right pliers for one job in particular, because hog rings are the reason most attempts stall.
| Tool or material | What it is for |
|---|---|
| Hog ring pliers | Cutting and refastening the rings that hold the cover to the frame. Regular pliers will damage them. |
| Replacement hog rings | Buy a mixed assortment; originals break during removal more often than people expect. |
| Upholstery staple gun | Refastening the cover where staples were originally used. |
| Torx T25 and T30 | Seat track bolts and most seat-to-floor fasteners on modern vehicles. |
| Plastic wedge or trim tool | Lifting seat trim bezels without scratching them. |
| Needle-nose pliers and a body hammer | Re-seating stubborn spring clips and perimeter wire. |
| Spray contact cement | Bonding a replacement foam pad to the existing base. |
| High-density foam, 2.0 to 2.5 lb per cubic foot | Front seat replacement foam. Lower density is what collapses first. |
| Polyester batting | Wrapping foam so the cover glides instead of catching seams. |
| Corrugated cardboard | A barrier over the wire grid so it does not cut into foam. |
| Stainless steel cable ties | Tensioning springs and perimeter wire. Not plastic ties; they relax and stretch. |
How to Fix Sagging Car Seat Springs in 6 Steps
This is the full cycle: from a loose or broken spring to a finished, roadworthy seat. Allow a full weekend the first time and most of a day once you have done it.
Step 1: Remove the seat from the vehicle
With the battery disconnected, move the seat fully forward and up to expose the track bolts. Remove the Torx fasteners, lift the track off the runners, and take the whole seat out. Setting it on a stand keeps the backrest from swinging and lets you work from underneath.
Step 2: Strip the cover off the cushion
Peachparts describes the layout on an 83 Mercedes 380 SL: hog rings hold the cover to the frame along the back edge where the cushion meets the seat back, and you have to compress the seat to reach them. Flip the cushion face down on a padded surface and work from underneath.
Cut the hog rings in the middle with hog ring pliers rather than trying to untwist them. Twist and they snap. Set every ring aside in a bowl so you have replacements and so nothing ends up inside the foam.
Then pull out the staples holding the cover flaps and peel the cover off. Work slowly at the corners, where the vinyl or cloth is most likely to tear. If the foam is bonded with contact cement, expect to spend real time separating it rather than peeling it.
Step 3: Inspect the springs, wire, clips, and foam
Lift the foam off the base and photograph everything before you change anything. Note every broken spring, every clip that does not sit square on its wire, and any perimeter wire that has taken a permanent bow.
Now apply the tension test: press down firmly in several places. Where the base still pushes back, the suspension is fine. Where it goes hollow, that section has lost its load-carrying job.
Step 4: Tighten or replace the loose springs
There are three practical ways to restore tension, and the answer to how to tighten a loose spring is whichever one your clip style allows.
- Refasten the hog rings. Loosen the ring, pull the cover and cushion back down toward the frame, and re-close the ring with hog ring pliers. This is the least invasive method and often all that is needed when the springs themselves are still good.
- Close the loop around a shorter effective length. Unhook the ring from the perimeter wire, pass it through one link further along the spring, and re-close. Every link you add shortens the working length and raises the tension.
- Replace the spring. Match the wire diameter, coil count, and overall length as closely as you can. Unhook both ends, slide the new spring in, and close the clips with a body hammer so they seat fully.
For perimeter wire, do not try to stretch it back to its original shape cold. Cut out the stretched section and splice in a new length, or replace the whole run. A wire welded back together is a temporary repair at best.
On elastic tensioning, aussiefrogs recommends a couple of stainless cable ties to tighten the springs, and p15-d24 describes a quilted moving blanket laid over the springs, pulled tight, and stitched to the upper frame. Both are reversible and both beat welding.
Step 5: Lay a barrier and refasten the cushion
If a wire grid sits under the foam, cover it with corrugated cardboard first. Members on the GRM thread report that a foam pad laid straight onto a wire grid gets sliced by the grid, which recreates the sag within a year, and that laying cardboard on the grid fixed it for good.
Next, fit your replacement foam. Bendwood-style additions were described on benzworld as slipping a barrier between the seat springs and the cushion bottom, using a one-inch foam strip unhooked from the rear. That same idea works as a graft: lay a slab of 2.0 to 2.5 lb per cubic foot foam over the base, and bond it with spray contact cement if you want it to stay put.
Stretch the cover back over the cushion, pull the hog rings closed with hog ring pliers, and refasten the flap staples. The three ring styles you will meet are the double loop, the single loop, and the crimp; close each one the way it was closed originally rather than forcing one type into another’s hole size.
Step 6: Reinstall and test
Reconnect the track, seat heater, ventilation, and any backrest motor with the seat still on the bench if you can reach them. Once the seat is bolted down and the battery is reconnected, sit in it and check three things: the height matches the passenger side, the cushion pushes back instead of going hollow, and the seat does not rock.
3 Quick Fixes That Take Under 30 Minutes
These are the fixes the forums keep coming back to, and they are the right first move when the springs still feel firm. All three are reversible, which is exactly why owners trust them.
1. Graft a slab of foam under the existing cushion
Unhook the rear of the cushion, slide a slab of high-density foam underneath, and hook it back up. This is the fix the OP used on his Corolla, reporting it worked after the springs came back looking fine. Density matters more than thickness: 2.0 to 2.5 lb per cubic foot for a front seat, and cut the slab in two if it will not fold enough to slip in.
2. Lay a cardboard barrier over the wire grid
Pull the cushion up at the back, set a piece of corrugated cardboard over the grid, and hook the cushion back down. Five minutes of work, and it stops the grid from cutting into whatever foam you add later.
3. Tension the springs with stainless ties or elastic straps
For a marginal sag, stainless steel cable ties or a web of elastic straps over the springs can buy back an inch of height. Use stainless, not plastic, because plastic ties relax in heat. This buys time, not years.
How to Tighten a Sagging Leather Car Seat
Leather hides foam fatigue better than cloth but fails the same way. The leather itself is usually fine; the shape under it is not.
- Open the seam along the back edge and pull the cover up at the rear, as described in the Mercedes forum walkthrough.
- Slide a barrier or foam strip between the seat springs and the cushion bottom rather than pulling on the leather itself.
- If the leather has stretched and will not hold a crease, pull it taut as you close the seam and re-tighten the hog rings underneath.
- Condition the leather after the work is finished, because contact cement and steam will have left marks.
Avoid pulling the leather tight over unchanged foam. If the foam underneath has collapsed, tightening the cover only re-creates the dip a few weeks later, and you will have to open the same seam twice.
Repair or Replace: How to Decide
| Fix tier | Time | Tools | How long it lasts |
|---|---|---|---|
| Slab foam graft | Under 30 minutes | Knife, pliers | Usually years |
| Cardboard barrier over the grid | Under 10 minutes | Scissors | As long as the foam above it |
| Elastic or stainless tie tensioning | Under 30 minutes | Ties only | Months, sometimes longer |
| Re-close hog rings to restore tension | 2 to 3 hours with cover removal | Hog ring pliers, staple gun | As long as the springs |
| Replace springs or perimeter wire | Half a day | Full tool list | Years |
| Full cushion rebuild with new foam | A weekend | Full tool list plus foam and batting | Restores the seat to near-new height |
Two signals point toward replacement rather than repair. A cracked frame weld means the structure itself has failed, and a welder or a shop is the right call. So is a seat whose cushion and springs are both spent, because the labor to rebuild it approaches the cost of sourcing a better seat.
On donor seats, be realistic. GRM veterans point out that left and right cushions are almost always mirror images, so a driver-side cushion generally cannot be dropped into a passenger-side seat. Some owners convert a right-side cushion with aerosol contact cement and an electric carving knife, a technique borrowed from the seating industry, but it is fiddly work. The dealer answer is usually a matched seat from a donor vehicle.
Frequently Asked Questions
How do I fix a sagging car seat?
Diagnose first. If the cushion is soft with no rebound, graft foam beneath it. If the seat sits lower than the passenger side or creaks, re-close the hog rings to restore spring tension or replace the springs. If one side drops, suspect a cracked frame weld or broken spring clip.
How can I tighten a loose spring?
Unhook the hog ring from the perimeter wire, loop it through one additional spring link, and re-close it with hog ring pliers. Each added link shortens the working length of the spring and raises its tension. For perimeter wire, splice in a new length rather than trying to stretch it back.
Do I have to remove the whole seat cover to reach the springs?
Usually yes. Hog rings and staples hold the cover to the frame, typically along the back edge where the cushion meets the seat back, and you have to compress the seat to reach them. On some spring-only bases the cushion pad hooks on rather than glues down, which shortens the job considerably.
Can I slide foam under the cushion instead of stripping the seat?
That is the most common quick fix. Unhook the rear of the cushion, slide in a slab of high-density foam, and hook it back up. Use 2.0 to 2.5 lb per cubic foot foam for a front seat. Many owners report this holding for years.
How do I tighten saggy leather car seats?
Open the rear seam, place a foam barrier between the springs and the cushion bottom, pull the leather taut as you close the seam, and re-tighten the hog rings underneath. Condition the leather afterwards. If the foam underneath has collapsed, tightening the cover alone will not hold.
Is it okay for a car seat to wiggle?
Small movement under load is normal. Rocking with nobody in the seat, or a visible height difference between the driver and passenger seats, points to track hardware, a loose clip, or a cracked frame joint. Check the track bolts and the seat-to-floor fasteners before assuming the cushion is at fault.
Why does my new foam pad sag again after a year?
A foam pad laid directly on a wire grid gets cut by the grid, which recreates the dip. Lay corrugated cardboard over the grid before the foam. The same result comes from foam that is too soft, which is why 2.0 to 2.5 lb per cubic foot is the spec for a front seat.
Should I repair the seat or replace it?
Repair when the frame is sound and the failure is foam, hog rings, or a single spring. Replace or take it to a shop when a frame weld is cracked, when the foam and the suspension are both spent, or when the cushion is a mirror-image part that is hard to source for your side of the car.
Final Thoughts on Fixing Sagging Car Seat Springs
Most people who search how to fix sagging car seat springs have foam trouble, not spring trouble, and the passenger seat is the most useful diagnostic tool you own. Compare the two, decide which system has failed, and match the repair to that system.
Start with the slab foam graft if the springs still feel firm. Strip the cover and work the hog rings if they do not. And if the frame is cracked, stop and get a shop involved rather than welding it and hoping. Work through the diagnostic checklist first, and everything after that is straightforward.