
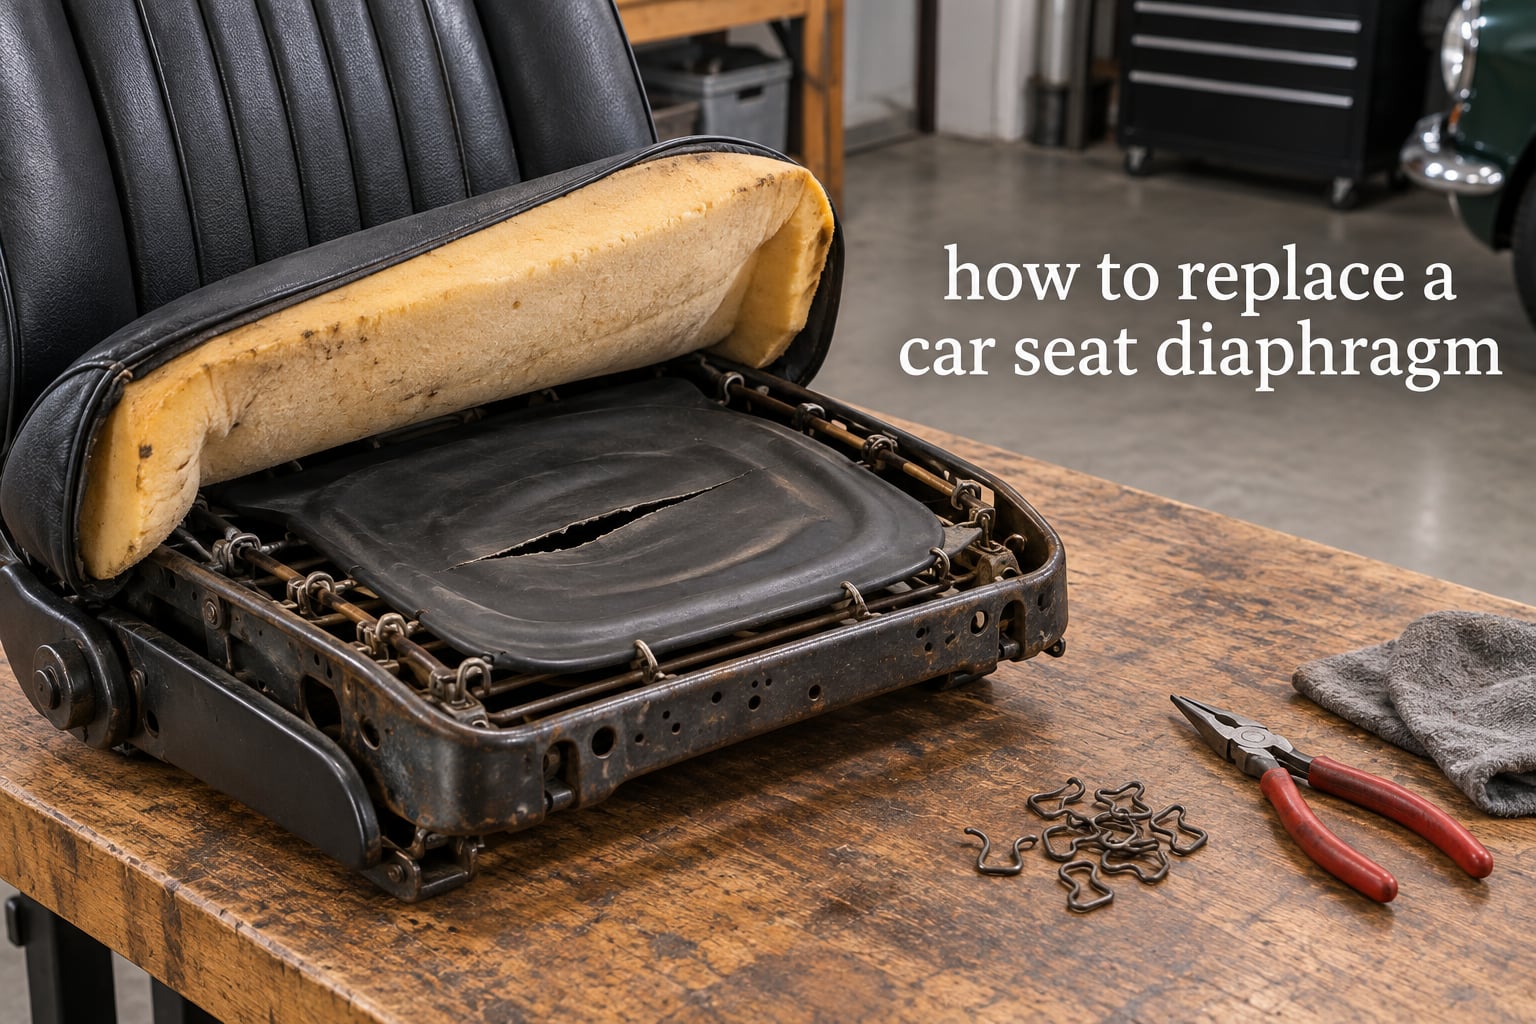
Most owners do not arrive at this job by choice. They arrive because the driver’s seat has gone soft at the front, the foam feels like it is sitting on nothing, and an hour on a long drive leaves them adjusting the wheel back up. Then they lift the seat base and find a rubber sheet that has either perished to a slack rag or split straight along the rear edge, and a bodge underneath holding the whole thing together. Learning how to replace a car seat diaphragm properly takes most people a weekend, and the awkward part is not the fitting at all, it is finding the right part and accepting that the foam underneath is probably finished too.
That is the honest version of this job. The membrane itself is a simple component: a shaped rubber sheet, tensioned across a seat frame and held on by a ring of clips. What makes it fiddly is that the shape is unique to your car, the clips go missing, and the last four of them are genuinely difficult to get on. Everything else is preparation and patience.
Before you commit a Saturday to this, spend fifteen minutes with the seat out of the car and the cover off. That assessment tells you which of three jobs you are actually doing, and two of the three are not the job most people expect.
Jump to the short version if you want the whole decision in a few bullets first.
Table of Contents
- Before you start: the short version
- What a car seat diaphragm is (and what it is not)
- How to tell it is the diaphragm and not the foam
- Repair or replace? the three-way call
- Tools and materials you need
- How to replace a car seat diaphragm, step by step
- Step 1: Mark the original clip positions
- Step 2: Release the seat cover and any trim tacks
- Step 3: Lift the foam squab clear
- Step 4: Count and remove the clips
- Step 5: Lift out the old diaphragm
- Step 6: Check the frame while it is bare
- Step 7: Refit the foam
- Step 8: Offer up the new membrane and start at the centre
- Step 9: Work outwards, stretching and pushing as you go
- Step 10: Refit the cover, tacks and hog rings, and reassemble
- Troubleshooting after fitting
- Fitting new foam at the same time
- The part that trips everyone up: fitting the last few clips
- Buying the clips, and why you need spares
- Choosing the right replacement diaphragm
- What to do when no correct replacement exists
- Why your car probably has a bodge under it
- Do it yourself or send it to a trimmer
- Frequently Asked Questions
- How can I repair a torn car seat?
- Can I repair a seat diaphragm or does it have to be replaced?
- Where do I buy a replacement seat diaphragm for my car?
- Can I use a seat diaphragm from a different car?
- What are seat diaphragm clips and how many do I need?
- How do I attach a new seat diaphragm to the seat frame?
- Why is my seat still sagging after fitting a new diaphragm?
- Do I need to replace the seat foam at the same time?
- What size is a car seat diaphragm?
- Conclusion
Before you start: the short version
- The diaphragm is the rubber membrane stretched across the seat frame underneath the foam squab. It carries the load and stops the foam collapsing into the frame.
- Most failed diaphragms perished long before you bought the car. A replacement is a shaped rubber sheet, not a generic sheet of rubber.
- Count your clips before you start. A Triumph 2500 uses twelve; equivalents for many British classics are sold under part number 612261 as a set of ten.
- Buy spares before you begin, not after. Clips routinely disappear when a diaphragm splits.
- Pull the foam at the same time if it crumbles in your hand. A new membrane over broken-down foam is a wasted part.
- Have a hairdryer to hand. Warm rubber stretches; cold rubber fights you for the final clips.
If those six points make sense, the rest of this guide just fills in the detail.
What a car seat diaphragm is (and what it is not)
A car seat diaphragm is the rubber or rubber-bound canvas membrane stretched taut across the seat frame beneath the foam squab. It carries the occupant’s weight and stops the foam collapsing into the frame. It is not a carburetor diaphragm, a clutch diaphragm spring, or a speaker or horn diaphragm, despite what most search results for the word suggest.
That collision matters. If you searched for this and landed on fuel or audio parts, you are not in the right place. This guide is about the rubber support membrane in the seat base, sometimes also called a seat rubber, a rubber base, or a seat swab on certain marques. The squab is the foam cushion above it, and the frame is the pressed-steel structure everything attaches to.
When the membrane is sound, the seat feels firm because the foam is being held in shape by something that does not compress. The moment that membrane perishes, the load transfers straight into the foam, the foam crushes, and the seat bottoms out. The foam then begins breaking down from underneath, which is why the two failures almost always arrive together.
It is also worth knowing why the shape is what it is. The membrane is not a flat sheet. It is pressed with raised contours and, on some cars, raised central lips that form the shape of the seat and give it its lateral support. That detail becomes very important when you are tempted by a cheaper part from another car, and we will come back to it.
How to tell it is the diaphragm and not the foam
These two faults produce almost identical symptoms from the driver’s seat, and they get confused constantly. Separating them takes five minutes and saves you fitting a brand-new membrane that achieves nothing.
Test one: lift the front edge of the squab and look underneath. If the foam is crumbling, powdering, or tearing into loose chunks, the foam has failed regardless of what the membrane looks like. A new diaphragm underneath loose foam still gives you a seat that bottoms out.
Test two: pull the membrane up and let it go. A sound membrane is taut across the frame and springs back to shape. A failed one is slack, floppy, or visibly split, most commonly along the rear edge where the load is heaviest.
Test three: check the seat suspension. On many cars the squab sits on rubber cones or helpers. When those have perished, the seat feels vague and bouncy no matter how good the membrane is. Squeeze one of the cones and compare. This is a common false culprit and a frequent reason a new diaphragm appears not to have fixed the problem.
Test four: look for a bodge. If you find cable ties, timber, books’ worth of filler or a foam offcut under there, the previous repair has almost certainly loaded the foam unevenly. Whatever the membrane does next, that filler has to come out.
If the membrane is slack or split, the diaphragm job is real. If the membrane is sound and the foam is gone, you need a foam job, not a membrane job. If both have failed, you are doing the combined job, which is the subject of its own section below.
Repair or replace? the three-way call
Small splits along the frame edge or at a clip point can be repaired by bonding a patch of new rubber across the tear from the underside, but a tear running the full length of an edge means support is effectively gone and the diaphragm must be replaced. There are three outcomes to a fifteen-minute assessment, and only two of them involve rubber.
Branch one: the tear is small and local
If the split is a finger-length, at a clip point or at a corner, and the rest of the membrane is still taut, a repair is reasonable. Clean the rubber around the tear, roughen the back, and bond a strip of new rubber across it from underneath, keeping the patch clear of the clip holes. Expect this to buy you years on a car that is not driven hard. Expect it not to restore a membrane that has lost its tension across the whole frame, because that is a different failure and no patch will fix it.
Branch two: the membrane is finished
A split along the entire rear edge, a membrane that hangs slack, or rubber that has gone hard and brittle with visible cracking all point the same way. Replace it. There is no threshold where a sufficiently large patch becomes equivalent to a new membrane, and continuing to repair a perished sheet is how people end up doing the job three times.
Branch three: no correct pattern exists
This is the branch that catches people out, and it is more common than the forums suggest. Plenty of cars have no reproduction diaphragm at all, particularly thinner later two-post seats. Suppliers frequently sell complete kits rather than individual seats, so you may not be able to buy one side at all. If you land in this branch, the two genuine routes are webbing or a foam solution, both covered in detail further down. The one thing not to do is buy an approximate part from a different car without checking the shape first.
Tools and materials you need
You do not need a workshop for this. The list is short and most of it you probably own already.
- Long-nose pliers – for removing and refitting the retaining clips, and the main tool of the job
- Torx, spline and/or flat drivers matching your seat frame fixings – these vary by car and by year
- A utility knife – for trimming hog rings and freeing perished rubber stuck to the frame
- Hog ring pliers, if your seat uses hog rings to hold the cover or the foam bolster
- A hairdryer or heat gun on a low setting – to soften the new rubber before the last clips
- Contact adhesive or rubber bonding cement – for patch repairs and for bonding new foam bolsters
- Shims, blocks or a spare pair of hands – somebody to hold the frame while you work
- A tape measure – for the frame dimensions you need when checking a cross-car part
- Replacement clips – a full set plus spares, ordered before you start
- A marker pen – to note the original clip positions before the old membrane comes off
Add a torch or head torch if you are working under a seat in a dim garage. That is most of the kit.
How to replace a car seat diaphragm, step by step
Remove the seat from the car and strip it back until you are working on a bare frame with the foam squab above it. The order below assumes that starting point.
Step 1: Mark the original clip positions
Before anything comes off, photograph the diaphragm in place and mark the position of every clip on the frame with a marker pen. Clip spacing is rarely even on a pattern-moulded membrane, and the reference saves you guessing once the new part is stretched.
Step 2: Release the seat cover and any trim tacks
Peel back the cover or the outer trim skin and pull the hog rings or trim tacks that hold it at the frame edge. Work slowly and keep the tacks, because some will be reusable and none of them are worth losing.
Step 3: Lift the foam squab clear
Slide the foam up and out of the frame. If it is bonded along the base panel or to bolsters, cut it free rather than tearing it, and take photographs of how it was assembled before you disturb it.
Step 4: Count and remove the clips
Work the clips off the frame holes with long-nose pliers. Count them as they come off, because a perished diaphragm frequently takes several with it, and because you need to know your total before you fit the new one. Put them in a jar so none go missing.
Step 5: Lift out the old diaphragm
Peel the membrane out of the frame. Take the opportunity to photograph the original from underneath before you bin it, because that photograph is your pattern reference when the replacement arrives and it does not match. It is also the single most useful image for anyone searching for a part for a car nobody makes one for.
Step 6: Check the frame while it is bare
This is the moment to look at the structure. Check the pan for rust or a crack, check the seat suspension cones or helpers while the load is off, and check the clip holes, which can be torn or elongated. Run a finger around every hole the membrane attached to. A new membrane will not fix a frame problem, and a perished membrane is often the least of what is wrong with the seat.
Step 7: Refit the foam
If you are doing the combined job, get the foam back in now, before the membrane goes on. Bond any new bolster sections to the base panel with contact adhesive, let it grab, and make sure the foam sits centrally so the membrane ends up tensioned evenly rather than pulling the squab to one side.
Step 8: Offer up the new membrane and start at the centre
Warm the rubber first if it is at all cool. Lay the new diaphragm over the frame dry, without forcing any clips, and locate the centre clip positions marked in step 1. Clip those two or three first. Starting in the middle is what keeps the membrane square; starting at one corner pulls everything across the frame out of true.
Step 9: Work outwards, stretching and pushing as you go
Move outward in pairs, one side then the other, so tension stays even. At every clip the rubber needs pulling laterally towards the frame edge and pushed inwards towards the foam at the same time. The last few clips are the hardest part of the entire job and the subject of the next section.
Step 10: Refit the cover, tacks and hog rings, and reassemble
Once the membrane is on and the foam is back, refit the cover in the same manner it came off, pull the tacks, re-tension the hog rings, and put the seat back in the car. Check the foam is not sitting proud of the frame lip and that the squab still latches down correctly.
Troubleshooting after fitting
The seat still sags with a brand-new membrane. Check three things in order. The foam base is almost always crumbling and no longer distributing load, which a new membrane cannot fix. Next, look at the membrane itself: if it is slack anywhere between the clips it is not doing its job, and it should be re-tensioned from the centre outwards. Finally, check the seat suspension cones, which give the seat its give and which perish independently of everything else.
The clips will not hold. Either the clip holes are enlarged or torn, in which case the holes need repairing before anything will grip, or the membrane is over-stretched and the clip is not seated fully on the frame edge. Work it on with long-nose pliers and check it is engaging the full thickness of the frame lip.
The seat still bottoms out but feels tight. The membrane is doing its job and the foam above it has collapsed in the middle. That is a foam replacement, not a membrane fault, and no amount of re-tensioning will change it.
Fitting new foam at the same time
Most of the jobs we see are the combined one, because the two components fail together. If the foam crumbles in your hand, throw it out, source a replacement or cut bolsters from a new block, and bond them to the base panel with contact adhesive. Owners working on later two-post Minis should know that correct-pattern foam is close to unobtainable, and that a foam offcut from an upholstery supplier stitched or bonded into shape is the accepted DIY route.
One owner on TheMiniForum re-covered a seat that had already given way before he bought the car, using foam from a local market upholstery stall with bolster sections glued down with contact adhesive, and reported it working well. It is not factory-standard, but it is a seat you can sit in, which is better than one with a bodge under it.
The part that trips everyone up: fitting the last few clips
Every owner reports the same thing. The first eight clips go on easily, and then the membrane fights back. Each clip you fit shortens the free length of rubber, so the rubber you have left to work with is tighter and less willing than it was five minutes earlier. Owners describe bruising their fingers. It is normal, and it is a technique problem rather than a parts problem.
- Warm the rubber. Run a hairdryer over the membrane, keeping the airflow moving, until the last section feels soft and pliable to the touch. Warm rubber stretches; cold rubber does not.
- Push inwards as well as outwards. The single most common mistake is pulling the clip outwards to reach it. The membrane also has to be pushed inwards, towards the centre of the seat and towards the foam, at the same time as it is stretched sideways.
- Use a second pair of hands. One person pulls the membrane taut, the other works the clip on with long-nose pliers. This is the difference between a ten-minute job and a forty-minute job.
- Fit from the centre outwards and alternate sides. Even tension keeps the squab square and stops the last corner being the point where everything concentrates.
- Expect the last two or three to need a rest between attempts. Put the pliers down, re-heat the rubber, and go again while someone holds the frame.
The aim is a membrane stretched taut across the frame with no slack between the clips. If you can press a finger into it and it moves, it needs re-tensioning. When it is right, the foam above sits on something firm, and the seat holds its shape under load instead of folding into the pan.
Buying the clips, and why you need spares
The clips, also called diaphragm hooks, are the spring steel hooks that grip the membrane to the frame holes. They are what holds the whole job together, and they are the most under-bought part of the operation. A Triumph 2500 uses twelve of them, and equivalents covering Triumph, MG, Morris, Mini, Land Rover, Jaguar and Ford are commonly listed under part number 612261 and sold as a set of ten.
Buy a full set plus spares before you start the job. When a membrane perishes to the point of splitting, the rubber often takes clips with it, and a car that has been bodged for a decade frequently has holes with nothing in them. The clips themselves are spring steel and they are the one item on this list you can comfortably use whatever the year of your car, provided the profile matches the frame edge.
If the frame holes are enlarged, a new clip will not save you. Repair the hole with a bonded patch of steel and a bar of suitable diameter before you fit anything, or the membrane will simply pull through again.
Choosing the right replacement diaphragm
There is no universal size, and cross-car substitutions are frequently approximate rather than correct. Measure the frame width at the widest point and the spacing between clip positions, and compare those against the original rather than trusting a nominal size on a listing. Where a part number exists for your car and year, buy by that number.
These are the references owners most often cite, gathered from the parts trade. Confirm the year range on the current listing before you commit, and check whether the part is sold singly, as a pair, or only as a complete kit.
| Vehicle or application | Part reference | Commonly cited suppliers |
|---|---|---|
| MG / MGB, 1963 to 1968 | Marked with the supplier reference on the listing | British Parts Northwest, Moss Motors, Rimmer Bros |
| MG / Triumph seats, mid 1965 to 1969 | Seat bottom diaphragm, mid 1965-69 | Moss Motors, Rimmer Bros |
| Jaguar E-Type, 3.8 litre seats | Seat diaphragm upgrade set | Moss Motors |
| Jaguar front seat base, rubber | BD48306 | Jagbits |
| Land Rover Discovery and Range Rover Classic, front seat, electric | Direct-fit OEM-style replacement | LR Direct |
| Mini front seat base, rubber | C705, also listed as HGD100150 by Minspares | Seven Mini Parts, South Lakes Minis |
| Triumph front seat | Marked with the supplier reference on the listing | Heritage Upholstery and Trim, Rimmer Bros |
| General British classics, clips only | 612261, sold as a set of ten | Welsh Enterprises, AH Spares, EnglishParts |
| Austin Healey seat base | Seat base diaphragm | AH Spares |
| Lotus / Elan and Plus 2 seats | Complete kit only from specialist suppliers | Sue Miller, Paul Matty, Sportscars |
Two practical warnings. First, some suppliers sell diaphragms as a pair or as a complete kit only, so a single-seat replacement may not be available at all, which is a genuine frustration worth checking before you commit to the job. Second, where a supplier has clearly labelled a part as an approximate fit rather than a correct pattern, believe them. Cross-car parts can be the right size and still the wrong shape.
What to do when no correct replacement exists
You will know you are in this situation if the forum consensus on your model is that fully correct diaphragms are not available, or if the only listings you can find are for a different car. It is more common on the thinner, later two-post seats than most owners expect. There are two honest routes, and one trap.
The trap: an approximately correct part from another car
A generic MGB or Triumph-style membrane is a common suggestion for a Lotus, and it is the right size. It is also functionally wrong on a car whose original diaphragm has raised central lips, because those lips are what shape the seat. An owner on LotusElan.net put it plainly: the alternative part is approximately the right size rather than a correct part, and the raised central lips that give the seat its shape are simply absent. A seat fitted with the wrong membrane will be serviceable and will still not hold its shape. Always lay the original and the candidate replacement side by side and compare the pressed contours before you commit.
Route one: convert to webbing
The documented DIY approach is plain webbing bought from a fabric supplier and made up into straps fixed to the frame. Owners have used this to restore support on cars with no available membrane. It works, it is fully reversible, and it will not match the original look. On some marques there is a rubber swab pattern available through the marque specialist that gives noticeably better support than webbing straps, so check for that before you commit to a conversion.
Route two: let dense foam do the diaphragm’s job
The other documented workaround replaces the membrane’s structural role with foam. One owner on LotusElan.net re-used the original foam, bonded a layer of dense foam underneath in the area that had broken up, cut that foam to provide the missing central lip, and stitched the centre of the seat to it. The seat then supports itself through the foam rather than through a rubber sheet. It is more work than a membrane swap and it produces a seat that is arguably better shaped than a generic membrane would have been.
Why your car probably has a bodge under it
Find a cable-tie net, a length of timber or a stack of books under the seat and you are looking at a fix that predates you. For many years there was no reproduction diaphragm available for these cars, and owners did what they could. A Triumph owner describes the historical picture plainly: until repro parts were produced, people kept their seats usable with books, timber or bricks, and it is those bodges that a lot of cars still carry today.
The cable-tie net is the one to watch. A previous owner on TheMiniForum had formed a net from very large cable ties under the foam, and it did give some support back. But the stiffness of the net meant the foam was being crushed between the occupant and the ties, particularly once the seat suspension cones needed replacing. The net does not fail loudly. It slowly destroys the foam above it, which is exactly the material you will need if you ever want to recover the original squab.
Take all of it out before you start, and photograph what you find. If the foam underneath is still intact once the bodge is gone, you may be in a luckier position than you expected.
Do it yourself or send it to a trimmer
This is a competent weekend job rather than a specialist one, provided you have somewhere to work and a second pair of hands. The mechanical work is straightforward, the tools are ordinary, and the difference between a good result and a poor one is tension rather than technique. The cost is a part, a weekend, and a certain amount of bruising on the last two clips.
Send it to a trimmer instead if any of these apply. The frame is rusty or the clip holes are torn, because that is structural repair rather than trim work. You have no way to support the foam while the membrane is stretched, which is a genuine constraint rather than a comfort preference. The cover material is fragile and will not survive being stretched back over a fresh membrane. Or the car is a concours candidate and you want the work recorded as done properly.
Worth knowing before you decide: repro diaphragms and new foam are the two significant costs in this job, and both are wasted if fitted badly. A trimmer charging for the fitting rather than the parts may be the cheaper route if the part itself is hard to source for your car.
Frequently Asked Questions
How can I repair a torn car seat?
Small splits at a clip point or along a corner can be repaired by bonding a patch of new rubber across the tear from underneath. A tear running the full length of the rear edge, or a membrane that has gone slack across the frame, means support is lost and the part must be replaced. A book, timber or cable-tie bodge buys time but crushes the foam above it.
Can I repair a seat diaphragm or does it have to be replaced?
It depends on where the damage is. A localised tear at a clip point or a corner is repairable with a bonded rubber patch, provided the rest of the membrane is still taut. A membrane split along a whole edge, or one that has lost tension across the frame, is not repairable, because the failure is structural rather than local.
Where do I buy a replacement seat diaphragm for my car?
Start with the marque specialist rather than a general marketplace, and search by part number where one exists for your year. Suppliers commonly referenced by owners include Moss Motors, Rimmer Bros, Heritage Upholstery and Trim, British Parts Northwest, Jagbits, Seven Mini Parts and LR Direct. Check first whether the part is sold singly, as a pair, or only as a complete kit.
Can I use a seat diaphragm from a different car?
Only with care, and not if your original has raised central lips that shape the seat. An MGB or Triumph-style membrane is approximately the right size for some cars but functionally wrong, because it lacks the contours that give the seat its shape. Always lay the original and the candidate replacement side by side and compare the pressed pattern before committing.
What are seat diaphragm clips and how many do I need?
The clips, or diaphragm hooks, are the spring steel hooks that grip the membrane to the holes in the seat frame. A Triumph 2500 uses twelve. Equivalents for many British classics are listed under part number 612261 and sold as a set of ten. Count yours before starting and buy spares, because clips routinely go missing when a membrane splits.
How do I attach a new seat diaphragm to the seat frame?
Warm the rubber, lay the membrane over the bare frame dry, and clip the centre positions first so it stays square. Then work outwards in pairs, alternating sides. At each clip the rubber must be pulled laterally towards the frame edge and pushed inwards towards the foam at the same time. The last two or three clips are the hardest and benefit from a second pair of hands.
Why is my seat still sagging after fitting a new diaphragm?
Check three things in order. The foam base is almost always crumbling and no longer distributing load, which a new membrane cannot fix. Next, check the membrane is genuinely taut with no slack between clips. Finally, check the seat suspension cones or helpers, which perish independently and give the seat its give. A tight membrane over collapsed foam will still bottom out.
Do I need to replace the seat foam at the same time?
Usually yes, because the two fail together and the foam is typically already crumbling where the membrane gave way. Replacing only the membrane over old foam produces a seat that still bottoms out and wastes the new part. If the foam is bonded in sections, cut new bolsters from a foam block and bond them to the base panel with contact adhesive.
What size is a car seat diaphragm?
There is no universal size, and cross-car parts are often approximate rather than correct. Measure the frame width at the widest point and the spacing between the clip positions, then compare those against the original membrane rather than trusting a nominal size on a listing. Where a part number exists for your car and year, buy by that number instead.
Conclusion
The decision rule is short enough to remember. If the membrane is taut and only the foam has gone, re-foam the seat. If the membrane is split along an edge or has gone slack across the frame, replace it, and treat the foam as part of the same job because it will have failed underneath. If no correct pattern exists for your car, take the original out, photograph it, and choose deliberately between a webbing conversion and letting dense foam take over the membrane’s structural role, rather than buying an approximate part and hoping.
Everything else on this page is detail on those three outcomes. Fit the clips from the centre outwards, keep the rubber warm, and get someone to hold the frame while you stretch the last two.