
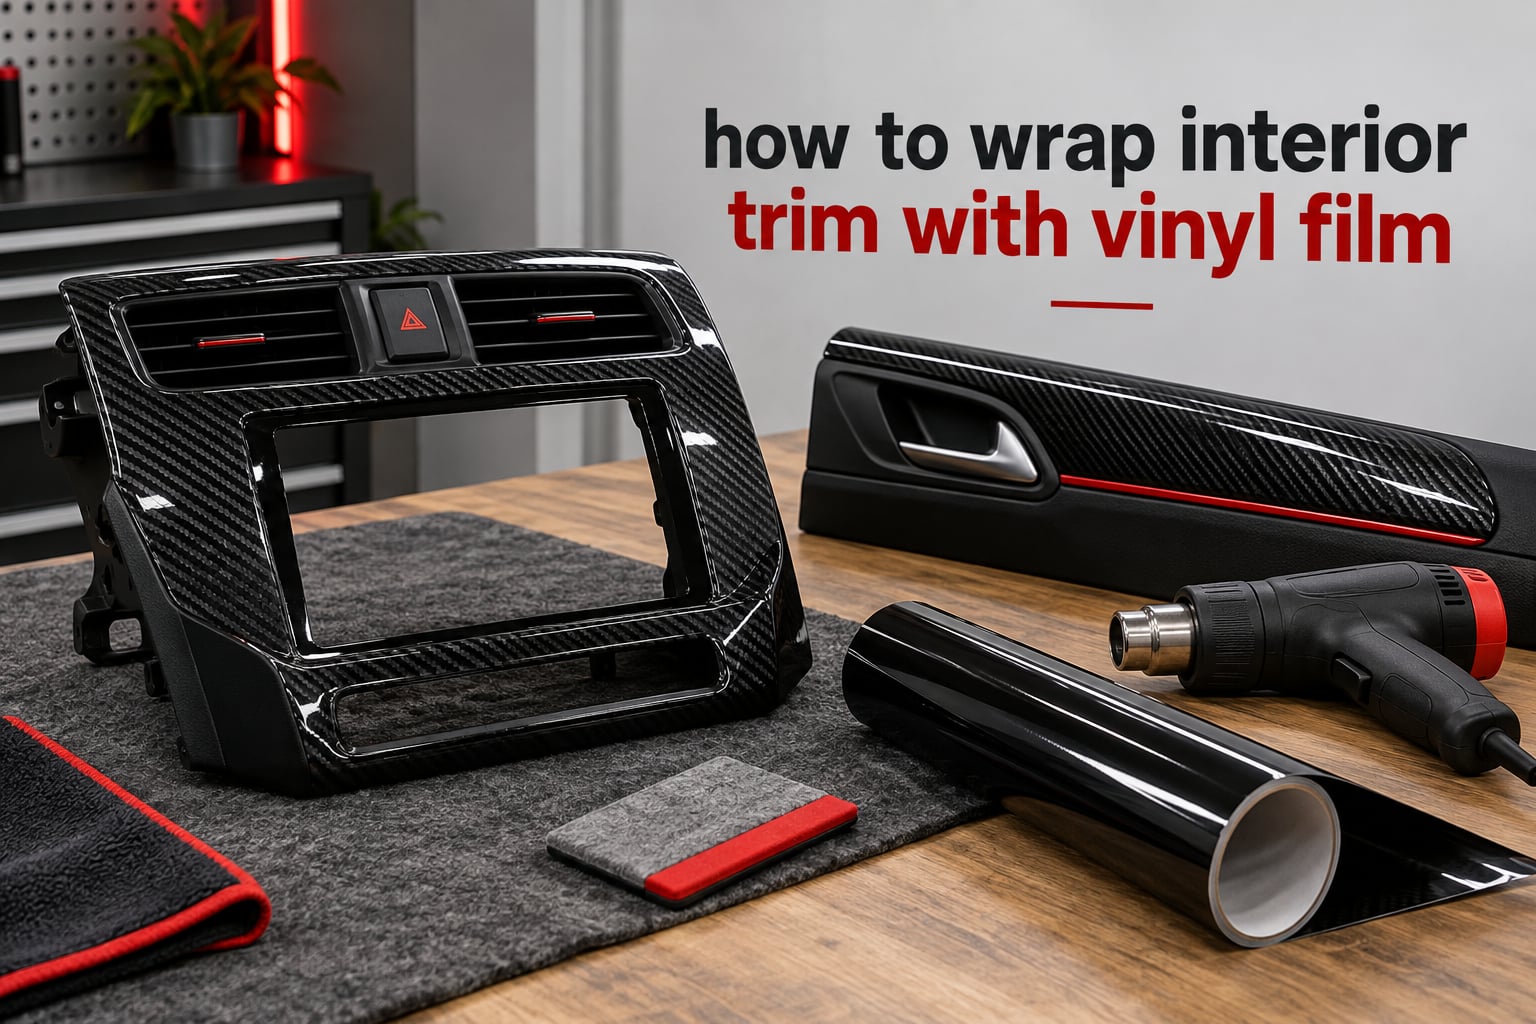
Yes, interior trim can be wrapped, and most plastic trim inside a car takes to cast automotive vinyl cleanly. The job is straightforward once the trim piece is off the car: clean the surface, lay the film down, heat it into the curves, push the air out with a squeegee, and trim the edge. What catches most beginners is not the vinyl. It is the disassembly, the cutouts around vents and switches, and the corner work on the reverse side.
We have wrapped door cards, dash bezels, centre console surrounds and A/C vent trim for years, and the technique barely changes from piece to piece. The materials are cheap. The mistakes are avoidable. Below is the full process as we work it, updated for 2026, including the steps that most video tutorials skip.
Table of Contents
- Can You Vinyl Wrap Interior Trim?
- Essential Tools and Materials
- Choosing the Right Film: Cast vs Calendared
- Choosing a Finish That Works in a Hot Cabin
- How to Wrap Interior Trim with Vinyl Film: Step by Step
- Step 1 – Remove the trim piece safely
- Step 2 – Degrease, wipe and let it dry
- Step 3 – Measure, cut and round off the film
- Step 4 – Set an anchor and lay the centre
- Step 5 – Heat and conform with light pressure
- Step 6 – Squeegee from the centre outward
- Step 7 – Cut vents, switches and knobs with relief notches
- Step 8 – Trim the edge and wrap the back side
- Step 9 – Post heat and let it cool
- Wrapping Trim Without Removing It
- Matching Interior Trim to Your Exterior Paint
- What Not to Wrap
- Common Mistakes and How to Fix Them
- Cost, Time and When to Hire a Shop
- Care and Cleaning After Install
- Frequently Asked Questions
- Can interior trim be wrapped?
- Can I vinyl wrap plastic trim?
- Does vinyl wrap stick to plastic trim?
- What is the best vinyl wrap for interior trim?
- What are the downsides of vinyl wrap?
- How to wrap dash panels?
- How to wrap a door panel in vinyl?
- Do you have to remove the trim to wrap it?
- How long does interior vinyl wrap last?
- Will vinyl wrap damage plastic trim underneath?
- Conclusion
Can You Vinyl Wrap Interior Trim?
Almost any interior trim piece can be wrapped, provided it is rigid, non-porous and free of soft-touch coatings. Door strips, armrests, dash bezels, instrument surrounds, centre console trim, speaker grilles, A/C vent surrounds and shifter surrounds are all fair game. The film also restores faded, scratched or sun-cracked plastic, which is the main reason people do it.
The main exception is soft-touch plastic, the rubberised or leather-grain coating found on many dashboards and armrests. A pressure-sensitive adhesive has almost nothing to grab onto there, so edges lift within weeks. Deep-embossed grain, piano black with heavy orange peel, and anything still attached to wiring or an airbag are the other problem zones.
Two honest calibration points before you start. A first-timer posting a Q7 interior wrap project on an AudiWorld forum thread described the install as not as hard as it looks and quite easy once you have the hang of it, and we broadly agree about the vinyl itself. But the same thread described the MMI centre console as the hardest part of the job by a wide margin, and that is accurate. The wrapping is not the difficult part. The removal is.
Essential Tools and Materials
This is the complete list. You can substitute equivalents, but do not skip the adhesion promoter, and do not use a sheet off a roll with an unbranded adhesive.
- Cast automotive vinyl film – 3M 2080 series, Avery Dennison SW900, Oracal or VViViD are the mainstream names. Budget 20-30 percent extra over the area you are covering so you have offcuts to practise on and to make mistakes in.
- Isopropyl alcohol, 70 percent or higher – for the final wipe-down. Not a household glass cleaner, which leaves a surfactant film that kills adhesion.
- Microfiber cloths – several clean ones. A dirty cloth recontaminates the surface you just cleaned.
- Degreaser or plastic-specific cleaner – for hand oils and dashboard dressing that has soaked into the grain.
- Heat gun – a variable-temperature gun with a narrow nozzle is the difference between a clean install and a scorched one. A hair dryer works in a pinch but runs too cool for tight curves.
- Felt-edge squeegee – the felt lip pushes air out of the micro air-release channels without scratching gloss finishes. A hard plastic shingle suits matte and textured films.
- Wrap knife with breakaway blades – plus a separate precision blade for cutouts. Retractable utility blades are dangerous at this scale.
- Plastic trim removal tools – a wedge set for releasing door cards and bezels without cracking them.
- Adhesion promoter (optional but recommended) – a 3M Primer 94-style product. Apply it on textured plastic, on tight curves, at deep edges and on the reverse-side wrap. It is the cheapest insurance in the whole job.
- Masking tape or magnets – to hold the film and mark your centreline before you commit.
- Knifeless tape – useful for getting started on tight-radius corners where the film keeps running away from you.
You do not need a plotter, a laser cutter or a dedicated wrap table. A clean bench and a cardboard cutting mat will do. The single most useful item on this list is the felt-edge squeegee, and it is the one beginners skip.
Choosing the Right Film: Cast vs Calendared
Cast film is the answer for interior trim, without exception. Cast vinyl is extruded rather than calendared, which gives it a thinner, softer, more conformable body that stretches around compound curvature without tearing. It carries a low initial tack pressure-sensitive adhesive, so you can position the film, reposition it, and decide you want it a few millimetres further over before you commit. Calendared film is stiffer, has a stronger early grab, shrinks noticeably when heated, and its edges lift in a hot cabin.
That shrinkage is the single most common reason first-time installers give up. A sheet of unbranded calendared film from a marketplace looks identical to 3M 2080 in the hand and behaves nothing like it on a dashboard.
- 3M 2080 series – the reference interior film. Very deep conformability, forgiving, holds shape well in heat. Wide colour range including genuine piano black and a good selection of 3D and 4D carbon weaves.
- Avery Dennison SW900 – comparable conformability, the go-to choice for textured and specialty finishes such as leather grain, croc and heavy-duty matte.
- Oracal – slightly firmer hand, excellent colour consistency, good value on solid colours and chrome-delete films.
- VViViD – strong on exotic finishes: colour-shifting, chromed, brushed aluminium, forged carbon.
- Paint protection film (PPF) – not for this. It is stiffer, thicker and more rigid than vinyl, and it exists to stop stone chips. A 3 mil PPF will not wrap a switchgear cutout cleanly.
Thickness matters less than people think. Almost all cast automotive film falls in the 3 to 4 mil range, and the difference between two branded 3 mil films matters far more than the difference between 3 mil and 4 mil. Adhesive chemistry, air-release channel quality and how well the film was manufactured are what decide whether your wrap is still flat in three years.
Choosing a Finish That Works in a Hot Cabin
Interior trim lives in the sunniest, hottest place your car ever is. A dashboard top can sit well above the ambient temperature outside on a still afternoon, and direct sun through the windscreen roughly doubles the heat load on the dash face. That heat does two things: it softens and shrinks cheap film, and it bakes any adhesive you would rather not have at full strength into the plastic beneath.
Finish choice is really a decision about glare and fingerprints, not just looks.
- Gloss – most reflective, shows dust and swirl marks instantly, and is the worst choice directly ahead of the windscreen. Excellent on door cards and lower console areas.
- Satin – the most forgiving of the conventional finishes. Hides fingerprints, diffuses cabin glare, and needs less correction to look right.
- Matte or ultra matte – the most modern look and very hard to scratch visibly, but it marks if you drag anything across it and it does not clean up as nicely. Matte holds up best in direct sun, where gloss can be distracting.
- Carbon fibre – the most requested interior finish by a distance. 2D is a flat printed weave, 3D is a lightly embossed one that catches light as the piece curves, 4D has a deeper embossed weave with a diagonal pattern. For a dash bezel, 3D or 4D looks markedly more convincing than 2D.
- Forged carbon – the marbled, non-directional pattern. It hides dirt and reads as a premium modern trim, and its random pattern does not demand perfect registration across adjacent pieces.
- Wood grain – the most difficult to do convincingly, and the most rewarding when it works. Buy the largest single sheet you can find so the grain runs continuously across a whole door card.
- Brushed aluminium and leather texture – both good at disguising an underlying surface defect, because the texture pulls the eye away from a crack or a scuff beneath.
One note on metallic and pearl flake. Flake reflects cabin light unevenly across compound curvature, so a metallic film on a three-dimensional bezel can look busier than the same film on a flat door strip. Solid colours and deep blacks photograph more consistently across a whole interior.
How to Wrap Interior Trim with Vinyl Film: Step by Step
Step 1 – Remove the trim piece safely
Almost every interior wrap requires the piece to come off the car. Door cards are the easy case: wedge a plastic trim tool into the seam at the corner furthest from the door handle, pull gently, get your fingers behind the edge, and pop the remainder out in a steady even pull rather than yanking one corner. Count your trim clips as you go, because a missing clip is a rattle you will be chasing later.
Centre stack and console trim is where most people stall. Expect to unplug a PRNDS indicator or gear selector, lift a shifter boot, disconnect the surrounding electronics, and remove a set of rear fasteners before the bezel will come free. Photograph every connector before you disconnect it, and note the orientation of each plug.
Safety first: never wrap over an airbag deployment seam. If a seam is visible, either side of it, the piece must not be covered. Never power the car with electronics disconnected, and disconnect the battery negative terminal before working around the steering wheel, the seat, or any SRS-marked trim. If you are not certain what a plug or a marked seam does, stop and find out before continuing.
One more thing to check before you pull anything: is the assembly welded together? A RamForum owner dealing with a plastic-welded radio surround chose to fully disassemble it, removing all rear screws, the vents and the surround itself, specifically so the film could wrap completely around the inside. He called it a bit of work but very low cost. Where an assembly is welded, the trim may not come off in one piece at all, and you need to know that before you start.
Step 2 – Degrease, wipe and let it dry
Take the piece to a bench. Degrease it with an automotive plastic cleaner, working into grain and any textured pockets, then wipe with isopropyl alcohol and a clean microfiber cloth. Let it dry fully. Adhesion promoters are moisture-sensitive and will not behave properly on a damp surface.
Do not wrap over a silicone or dressing residue. It looks invisible, feels smooth, and will cause the film edge to peel back within a month. If you are unsure, scrub harder and wipe again.
Textured and grained plastic needs one extra step. Spray adhesion promoter onto the surface, let it flash off, and wipe it with a clean cloth until it feels tacky. Piano black needs the opposite treatment: it is already perfectly smooth, so it needs nothing except a clean, oil-free surface. Treating piano black like textured plastic just adds a bond you do not need, and makes future removal harder.
Step 3 – Measure, cut and round off the film
Lay the film face down over the trim piece and press it into the contours with your palm. Push out every bubble so the film is moulded to the shape, then lift it and cut roughly 5-10 mm larger than the piece on every side. That extra is deliberate: it gives you material to grip, stretch and wrap around the reverse side.
Cut oversize, and you can always trim more away. Cut short and you cannot add material back. This is the same lesson the Q7 owner learned cutting his vinyl to trim size and then leaving extra length on each side for heat stretching and wrap-around.
Round every corner of your cut piece with gentle curved motions. Sharp film corners stress concentrations, and square corners on a curved trim piece are where tears start.
Mask the recess of any switch, knob or vent opening with tape before the film goes on. It keeps debris out and gives you a visual edge to cut against later.
Step 4 – Set an anchor and lay the centre
Remove the liner in a straight line, exposing only the centre of the piece. Tape that centre edge to the middle of the trim at one point, usually the centre of the widest flat area. This anchor point becomes your reference for everything that follows.
Peel back a little more liner on one side, lay the film down, and work in a shallow triangle toward the anchor. Then reposition the liner on the other side and mirror it. You are building an expanding V on both sides of the centre, which is how you keep a flat piece of film tracking onto a curved surface without trapping air behind it.
Do not stretch the film at this stage. Position it, check it, and only apply tension once the whole piece is down. Re-laying a film is cheap. Peeling stretched film back is not.
Step 5 – Heat and conform with light pressure
Set the heat gun to a moderate temperature and keep it moving. You are warming the film so it becomes workable, not cooking the plastic underneath. Work in short passes, roughly 15-20 cm at a time, and keep your other hand, palm or knuckles, on the surface behind the nozzle.
As the film softens, push it into the curve with palm pressure, not fingertips. Fingertips create the small stretched channels we call fingers, and they appear later as raised, discoloured lines running through the finish. If a finger does form, do not pull on it. Press the surrounding film down, re-heat the area, and work the finger out with light pressure while it is warm.
Post heat is a separate step and it is the one most often skipped. Wait until Step 9.
Step 6 – Squeegee from the centre outward
With the film warm and lying flat, use the felt-edge squeegee to push air out. Start at the anchor and work outward in overlapping strokes, always moving toward the edge and never back and forth across a section you have already cleared. Back-and-forth strokes drag adhesive into a zigzag pattern that stays visible in gloss finishes forever.
Air escapes through the micro air-release channels in the adhesive as you push. Squeegee firmly enough that you feel the film lock down, but not so hard that you stretch it. On textured films a hard plastic shingle gives a better result; on gloss, stay with the felt edge.
Step 7 – Cut vents, switches and knobs with relief notches
Every opening needs a cut, and the cut is where most damaged films come from. A traced curve that you cut in one continuous arc will wander, and a wandering cut on gloss carbon or piano black is immediately visible.
Use this method instead:
- Warm the film over the opening and press it down into the recess so it holds its shape without needing your hands.
- Mark the opening with a fine tip, or use the tape mask you applied earlier as a guide.
- Run the blade along the straight sections first, with the blade angled very slightly away from the edge so it cannot slice into the film you have already finished.
- On curves, make a series of small straight cuts or very shallow arcs, each with a breakaway blade snapped off. Do not attempt one long continuous slice around a radius.
- Trim the scrap away toward the end, so the film relaxes and the cut edge drops cleanly into the recess.
For a rectangular opening, cut the four straight sides first and then the corners. A small triangular notch of scrap at each corner, taken out last, is the cleanest way to get a square hole without overshooting. The same notch technique handles a switch that does not sit flush: cut a relaxed opening a few millimetres larger than the switch body so the switch moves freely and the film does not bridge into the gap.
If a knob or lever rotates and needs clearance, cut the opening generously and let the edge tuck underneath the bezel.
Step 8 – Trim the edge and wrap the back side
Now the detail that separates a wrap that lasts from one that peels off the dash in a year. Instead of cutting the film flush with the edge, leave a small margin, warm it, and roll it around onto the back of the piece with your thumb. That wrap-around is mechanical hold as well as adhesive hold, and it is the single most effective answer to lifted edges on hot interior trim.
Apply adhesion promoter to the reverse-side wrap before you commit it, and burnish it down firmly with a hard edge. Trim the excess so nothing protrudes past the moulding line, and check that no film is blocking a clip, a bolt hole or a mating surface. A RamForum owner wrapped the same way described cutting the trim short and tight at the edges so nothing fouled the plastic clips that snap back into the door. Miss that detail and the door will not close properly.
Where trim is welded or assembled, and you cannot wrap the back, at minimum take the film around a 90-degree edge and finish it underneath with a hard trim so there is no exposed cut edge sitting proud of the surface.
Step 9 – Post heat and let it cool
Set the heat gun to a higher setting than you used for application and make slow, even passes over the whole piece, from a distance, moving constantly. This final post heat softens the adhesive, releases the memory stress built into the film during forming, and lets the adhesive achieve full contact with the plastic.
Post heat is not optional. It is what reduces edge lifting for years rather than months. Then leave the piece somewhere warm and undisturbed for an hour or two before refitting it, and give it a full day before you drive hard.
Wrapping Trim Without Removing It
Some interior pieces genuinely cannot be removed: the upper dashboard skin, some A/C vent housings, headliner edges, and certain bezels that are bonded, clipped from behind, or part of a structural assembly. Wrapping in situ is possible on a flat dash top, and plenty of people do it, but the constraints are real.
You have less access, so anchor points and backing are restricted. You cannot wrap the back side, so you depend entirely on the adhesive and on the surface area available. Overlap seams on a compound curve will be visible. And any wrinkles you create are much harder to fix without being able to pull the piece off the car.
My rule: wrap in situ only on a flat or gently curved surface you can reach with both hands, and always use an adhesion promoter. For everything else, the trim comes off. It is an evening of disassembly saved you a visible seam and a lifted corner for two years.
Matching Interior Trim to Your Exterior Paint
This is the most asked and least answered question in the whole job. Can you get the interior vinyl to match a multi-stage pearl or metallic exterior paint? Sometimes, and usually not well enough to be worth it.
Why it fails: a vehicle paint code describes the paint under a clear coat under factory lighting. Interior trim is never lit that way. Your cabin has one light source from above, strong direct sun through glass, and no clear coat to deepen the colour. A blue pearl that looks electric outdoors reads flat and slightly purple in a cabin. A silver metallic that pops in daylight looks like plain grey plastic under an overhead dome light.
The community consensus, raised repeatedly on owner forums, is that a bright colour-matched interior reads cheap and dated. One RamForum user ordered a blue carbon fibre film, found it too bright, returned it, and switched to plain black. That reaction is the norm rather than the exception.
What works better:
- Matte or satin black, in flat, carbon or forged carbon – reads as a deliberate factory or aftermarket design choice, never as a failed colour match.
- Neutral dark grey or dark bronze – sits between the exterior and the cabin lighting without committing to either.
- Match to a design intent, not to the paint chip – a single gloss black door strip alongside a woodgrain armrest looks considered; four different black finishes across four pieces looks accidental.
If you still want a match, buy a sample first and hold it in the actual cabin, in daylight, at midday. Local wrap shops often have offcuts and are the best source of honest advice on what is achievable for a specific paint. But sample before you commit, not after.
What Not to Wrap
Some interior surfaces should be left alone, and knowing which ones is part of the technique.
- Airbag deployment seams – never cover, on any piece, for any finish. A seam is a designed structural break line and covering it can affect deployment.
- Soft-touch plastic and leather-grain coatings – a pressure-sensitive adhesive has almost nothing to bond to. Edges lift within weeks. Wrap the adjacent hard trim instead.
- Instrument cluster lenses, infotainment screens and head unit faces – heat, contrast and hard edges conspire to make every wrap look bad. Hard-plastic bezels are the right target.
- Wired, illuminated or SRS-marked components – the bezel is often fine, the electronics behind it are not your project.
- High-gloss piano black with heavy orange peel – the texture of the plastic prints straight through a gloss film and looks worse than the original. Matte or textured film is the better choice on that surface.
- Fabric, leather and foam – these need a different product entirely, not a change of technique.
Common Mistakes and How to Fix Them
Every failure mode below is normal. What matters is that the fix exists.
- Fingers – stretched air channels running through the finish. Cause: pulling the film with fingertips during application. Fix: press the surrounding film flat, re-heat gently, and work the channel out with palm pressure. Never pull on a finger to stretch it.
- Small bubbles – usually a small amount of trapped air rather than a defect in the film. Fix: wait for evening when the surface has cooled, warm the area lightly, then push the bubble toward a cutout or edge with a fingernail or a pick, and squeegee it out.
- Silvering or haze – a milky stress mark in gloss film. Cause: stretching the film during application. Fix: post heat the area and leave it to relax; it usually clears. Persistent cases cannot be recovered, so prevention is the answer.
- Lifted edges – the most common long-term complaint, and a cabin heat problem. Fix: pull the edge back, apply adhesion promoter to both surfaces, wrap further onto the back of the piece, and post heat. Matte film also outperforms gloss in high-temperature locations.
- Creases at 90-degree corners – cause: not enough material or not enough heat. Fix: give the corner more overlap before you start, and work the film around it in two or three small steps with heat between each.
- Film shrinking and lifting corners – cause: calendared or unbranded film. Fix: none that is permanent. Remove it while the adhesive is still fresh and start again with cast film.
- Torn cutout edges – cause: a single long slice around a radius, or a dull blade. Fix: snap to a fresh breakaway blade, cut straight sections first, and take curves in short segments.
- Trapped debris – dust and grit under the film. Fix: peel back a short length, lift the debris out, re-lay and squeegee. Prevention is a clean bench and a damp-wiped surface.
- Colour mismatch between adjacent pieces – cause: two different production batches. Fix: buy one sheet and cut every piece from it.
Cost, Time and When to Hire a Shop
Material cost is modest. A door card or a dash bezel needs somewhere around 0.15 to 0.3 of a metre of standard-width film for a single layer, and a full interior accent package across a dashboard, both door cards, console and vent surrounds typically needs a 15 to 20 cm by 5 m roll plus a couple of sheets. Add tools if you have none, and the total spend is a small fraction of the finished result.
Time is the real consideration. A flat trim strip such as a door trim insert takes 30 to 45 minutes start to finish once you are competent. A door card is one to two hours including removal and refit. A dash bezel or instrument surround is two to four. The centre stack, radio surround and anything with a welded multi-piece assembly can take a full day on a first attempt, most of it disassembly rather than vinyl.
Hire a shop when the piece contains an airbag seam you are not confident identifying, when the assembly is welded and would need destructive disassembly, when it sits behind a steering wheel or SRS component, or when you need a single-piece factory look across a large dash where your skill level is beginner. Ask for a written quote broken into labour and material, and ask to see a wrapped interior on the car in daylight, not in a workshop bay.
Care and Cleaning After Install
Give the wrap at least a week before cleaning it, so the adhesive reaches full bond. After that, care is straightforward and no more demanding than the original trim.
- Clean with a pH-neutral interior cleaner and a microfiber cloth. Avoid ammonia-based glass cleaners and household sprays.
- Wipe matte and textured finishes with light pressure only. They mark more easily than gloss.
- Keep the cabin cool before applying a dressing to a wrapped surface. Heat cycles make dressing and adhesive work against each other.
- For UV protection on a dash-top piece, use a matte-safe interior protectant and reapply every few months. Dash-top fade is mostly a heat and UV problem, and no film completely stops it.
- To remove a wrap later, warm the piece gently and peel slowly at a shallow angle. Never yank, and never pull it cold. The film peels off cleanly from plastic when it is warm and the adhesive is soft; a cold pull takes plastic with it.
Resale is one of the strongest arguments for wrapping rather than re-trimming. The film peels off, the original textured plastic is underneath, and the car goes to the next owner looking like a car that was never modified. That is not true of painting, and it is not true of upholstery.
Frequently Asked Questions
Can interior trim be wrapped?
Yes. Nearly every rigid plastic interior trim piece can be wrapped with cast automotive vinyl, including door strips, armrests, dash bezels, instrument surrounds, centre console trim, speaker grilles and A/C vent surrounds. The main exceptions are soft-touch plastic, fabric and leather surfaces, and anything that would cover an airbag deployment seam. Most pieces need to be removed from the car first, and the disassembly takes more time than the wrapping.
Can I vinyl wrap plastic trim?
Yes, and plastic is the ideal surface. Cast vinyl uses a pressure-sensitive adhesive with low initial tack that bonds well to clean, non-porous automotive plastic. The surfaces to be careful with are soft-touch or rubberised coatings, which have nothing for the adhesive to grab, and freshly dressed or silicone-treated plastic, which must be degreased and wiped with isopropyl alcohol before you begin.
Does vinyl wrap stick to plastic trim?
It does, provided the plastic is clean, dry and free of dressing residue. Wipe the piece with isopropyl alcohol after degreasing and let it dry fully. On textured or grained plastic, apply an adhesion promoter first and let it flash off. The adhesive achieves full bond within a few days, and a controlled post heat with a heat gun during installation locks the film into its final shape.
What is the best vinyl wrap for interior trim?
Cast automotive film is the right choice, and 3M 2080 series or Avery Dennison SW900 are the most widely used. Cast film is thinner, softer and more conformable than calendared film, with a low initial tack that lets you reposition it before committing. Avoid calendared film from unbranded sellers: it shrinks when heated and its edges lift in a hot cabin.
What are the downsides of vinyl wrap?
The main downsides are lifted edges over time, especially on the dashboard where cabin heat is highest, and the risk of fingers, creases and silvering in gloss finishes if the film is stretched during application. Cheap calendared film shrinks badly. A wrap also hides rather than repairs a badly cracked surface, and the seam lines across a compound curve are visible if the film is cut too small.
How to wrap dash panels?
Remove the bezel or trim strip if the design allows it, otherwise wrap the flat dash top in place. Degrease and wipe with isopropyl alcohol, apply adhesion promoter on textured plastic, then cut the film 5 to 10 mm oversize with rounded corners. Anchor the centre, lay the film out in both directions, heat lightly and squeegee from the centre outward. Cut vents and switch openings in short segments with relief notches, wrap the back side, and finish with a post heat.
How to wrap a door panel in vinyl?
Pop the door card off with a plastic trim tool, working from the corner furthest from the door handle, and count the trim clips as you go. Degrease the panel and wipe it with isopropyl alcohol. Cut the film oversize with rounded corners, anchor at the centre, apply with light heat and palm pressure, and squeegee outward with a felt-edge blade. Cut switch and handle openings with relief notches, wrap the excess around the back edge, and post heat before refitting.
Do you have to remove the trim to wrap it?
For nearly every interior piece, yes. Door cards, bezels, console trim and vent surrounds all come out, and removal is the part that takes the longest. In-situ wrapping works on a flat dash top or a bezel you cannot release, but you have less access, cannot wrap the back side for mechanical hold, and any seam on a compound curve stays visible.
How long does interior vinyl wrap last?
A well-installed cast film wrap on a door card or console trim typically lasts many years. Dashboard-top pieces wear faster because of sustained cabin heat and direct sun, and edges lift there first if the back side was not wrapped. A cheap calendared film can start lifting within months. Wrapping the back side of each piece and applying adhesion promoter at the edges are the two things that most extend service life.
Will vinyl wrap damage plastic trim underneath?
Not if it is removed correctly. Warm the piece gently and peel slowly at a shallow angle while the adhesive is soft. Pulling the film cold, or pulling it back against the grain, can take texture and even chunks of plastic with it. Over long periods a strong adhesive can leave a faint residue, which lifts with a plastic scraper and isopropyl alcohol once the film is off.
Conclusion
Learning how to wrap interior trim with vinyl film comes down to three things: buy cast film from a known brand, take the trim piece off the car, and give yourself room to work. Clean properly, cut oversize, anchor at the centre, heat gently, squeegee outward, cut your openings in short segments, and always wrap the back side.
Most of the horror stories you will read online are disassembly stories, not vinyl stories. Work through the removal carefully, keep every connector photographed, and the rest is technique you will have right on your second piece. Start on a flat door trim strip before you commit to the dash.