
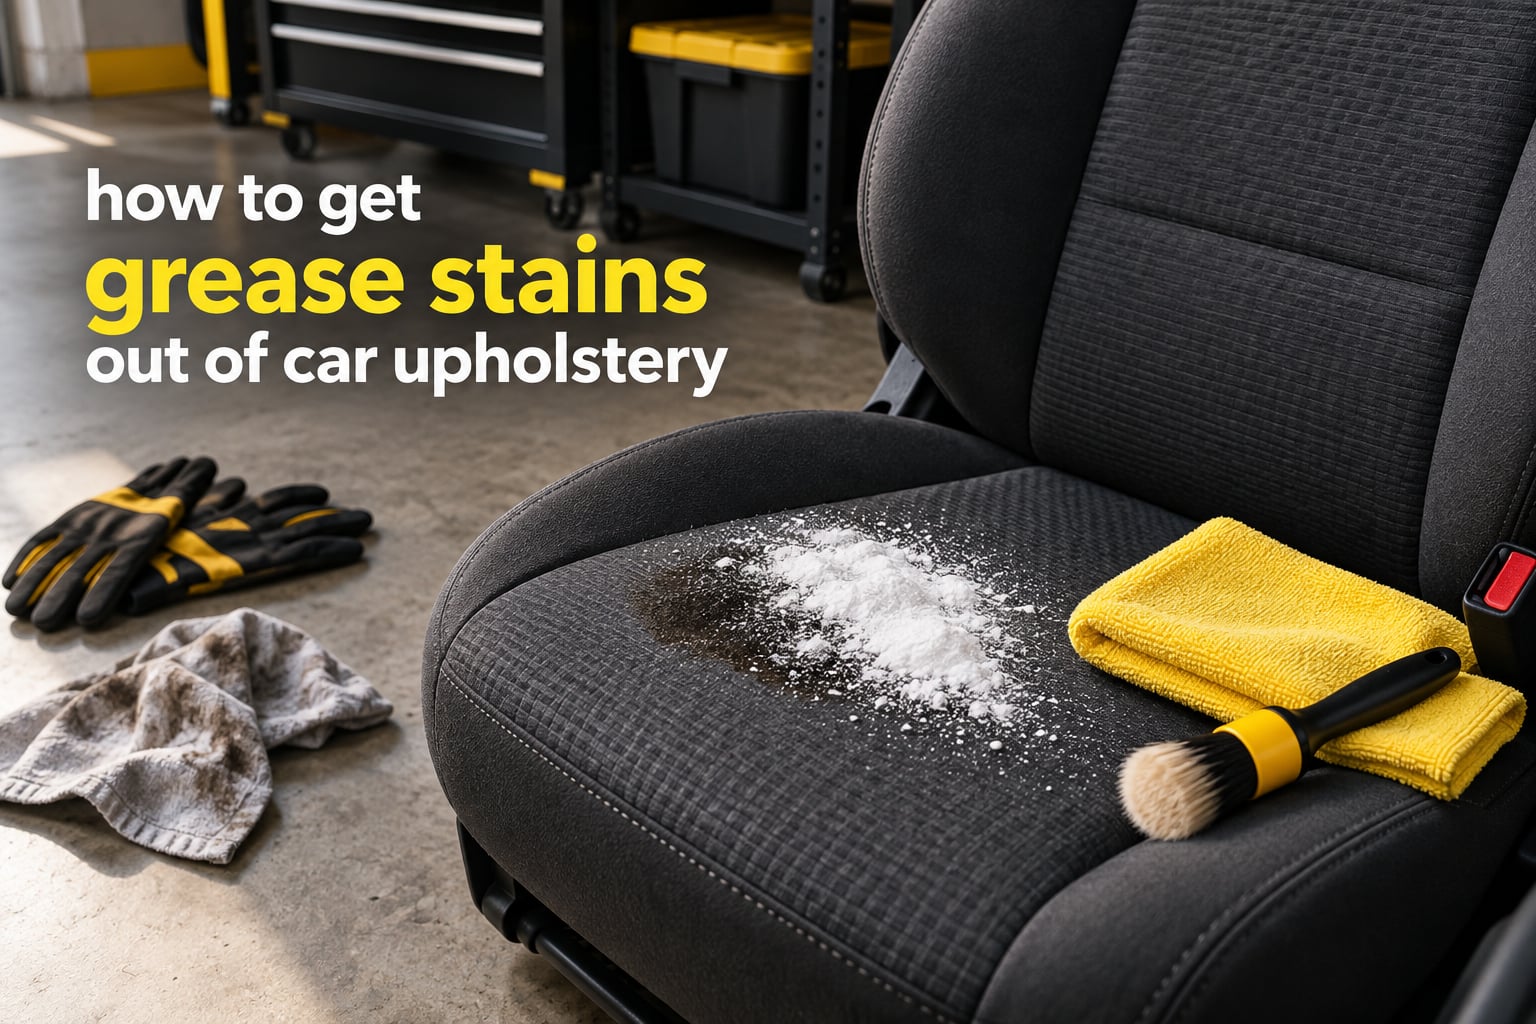
Grease bonds to fabric fibers instead of sitting on top of them, which is why it cannot be wiped or blotted away once it soaks in. To get grease stains out of car upholstery you have to lift it in three moves: absorb the loose oil with a powder, emulsify what is left with a degreaser, then pull the emulsified oil out of the fiber with a wet/dry vacuum or repeated blotting.
Short version: blot the fresh grease, absorb it with baking soda for 15 to 20 minutes, degrease with diluted dish soap or automotive interior cleaner, extract or blot out the residue, then let the area dry completely. Most grease stains come out of car seats with that sequence, even old ones, given enough dwell time and mechanical extraction.
Fresh grease and set-in grease need different amounts of patience. A grease mark from this morning lifts with powder and soap. A mark that has oxidized into the weave for months needs solvent, agitation, and a real extraction pass, and light beige or grey fabric shows every attempt you make at it. That is why the first thing to work out is what the stain is sitting on and how old it is.
Table of Contents
- Before You Start: What Material Is It On, and Is the Stain Fresh or Set?
- Tools and Supplies You Need
- How to Get Grease Stains Out of Car Upholstery: The Four-Step Method
- Material-Specific Instructions for Every Surface in the Car
- Removing Old, Set-In Grease Stains: The Escalation Ladder
- The Dawn and Baking Soda Method, Step by Step
- What Gets Grease Out of Fabric: Method Comparison
- What NOT to Use on Car Upholstery
- Removing Baking Soda Residue and Stopping the Stain From Coming Back
- When to Stop and Call a Professional Detailer
- Frequently Asked Questions
- Conclusion
Before You Start: What Material Is It On, and Is the Stain Fresh or Set?
Two questions decide the whole job, and both are worth answering before you open a bottle. Get them wrong and you can turn a grease mark into a bleach mark or a dried-out water ring.
What material is the stain on?
- Cloth or carpeted seats take the full powder, degreaser and extraction method.
- Leather needs a leather-safe cleaner and light dabbing. No powders, no soaking, no solvents.
- Vinyl or leatherette handles degreaser well but dyes can lift, so patch-test first.
- Headliner and roof fabric are the most fragile surface in the car. Spray, never scrub.
- Door pillar trim and hard plastic are not upholstery at all and need a completely different approach.
Is the stain fresh or set in?
Fresh grease sits on the surface, feels greasy to the touch, and lifts in one pass. Set-in grease has soaked into the fiber, often feels dry or slightly stiff, and has usually darkened where the oil oxidized.
Press a white paper towel firmly onto the mark. Grease transfers to the towel while it is still fresh, and a set-in mark leaves far less behind. If the towel comes away clean but the stain remains, you are looking at oxidized grease and should skip straight to the escalation section.
Time expectation: a fresh spot takes 20 minutes. A badly greased seat, the kind you get from working on a car in the driveway, runs one to three hours across both seats plus drying time. Plan for a full morning, not a five-minute wipe.
Tools and Supplies You Need
Most of this list is things you already own. Nothing here requires a specialty machine except the optional extractor at the end of the list.
- Plastic card or dull knife for lifting solid grease without pushing it into the weave
- White paper towels or plain white cotton cloths for blotting and for testing dye transfer
- Baking soda or cornstarch
- Dish soap, or an automotive interior cleaner, or an all-purpose cleaner (APC) diluted properly
- Soft detailing brush, a toothbrush for seams, and a stiff nylon brush for hard trim
- Microfiber cloths, three or more, kept for rinsing and extraction only
- Wet/dry shop vacuum or household carpet extractor (optional but recommended for set-in grease)
- Enclosed fan or open window for drying
Do not use WD-40 as a habit product. On cloth it genuinely lifts grease, and detailers on the Honda CR-Z forum and Mopar forums both describe it working, but it is an oil-based solvent that can yellow light fabric and it is the wrong tool on leather and vinyl.
How to Get Grease Stains Out of Car Upholstery: The Four-Step Method
This is the core sequence. It works on cloth seats, carpet, floor mats, and door panels, and it is the four-step list most search engines pull out as an answer, so it is worth following in order rather than jumping to step three.
Step 1: Blot and scrape off what you can
Press paper towels down firmly over the stain and lift straight up. Do not rub, because rubbing drives grease deeper into the fiber and spreads it past the seat seam. Lift any solid or cooled grease with a plastic card, working from the outside edge toward the center, and throw the towel away after each pass rather than reusing it.
Step 2: Absorb the oil with baking soda for 15 to 20 minutes
Sprinkle a thick layer of baking soda or cornstarch over the whole mark and leave it for 15 to 20 minutes. The powder pulls the loose oil out of the fabric by capillary action, which is why the dwell time is not optional. Vacuum or brush the powder off, check whether the towel test now picks up grease, and repeat the layer if it does.
Step 3: Degrease with dish soap or an automotive interior cleaner
Mix a couple of drops of dish soap into a cup of warm water, or dilute an interior cleaner according to its label, and apply it with a damp cloth rather than pouring it on. Work the solution into the fabric with a soft brush in short circles, staying inside the stain border, then let it sit 5 to 10 minutes so the surfactant can break the oil free. More people ruin car seats here by oversaturating than by any product choice, so keep the surface damp, not wet.
Step 4: Extract or blot out the residue, then dry fully
Pull the emulsified grease out with a wet/dry vacuum held just above the surface, not pressed down, or press clean white towels down hard and lift repeatedly until the towels come away clean. Rinse with a second cloth dampened with plain water to remove soap film, because leftover detergent is what causes re-staining and mildew. Air dry completely with the doors open or a fan running before anyone sits in the seat.
Material-Specific Instructions for Every Surface in the Car
The four steps above assume cloth. Here is how the same job changes on every other surface in a typical car interior, which is where most guides stop and readers get stuck.
Cloth seats and carpet
This is the full method, and it is the most forgiving surface you will work on. Run the whole four-step sequence, and on a set-in stain expect to repeat it two or three times. The single most endorsed pro technique in the Reddit detailing communities is spraying a properly diluted APC or interior cleaner, agitating with a brush, and wiping up with microfiber towels, so treat that as your step three on stubborn marks.
Leather seats
Grease on leather sits on the surface, so leather cleaner and a soft cloth handle it well. Dab, never scrub, because leather finishes scuff and scratch under friction. Skip baking soda entirely, since powder can lodge in the grain and dry out the hide, and keep solvents off leather unless the manufacturer says otherwise. A damp cloth with a pH-neutral leather cleaner, followed by a dry buff, is usually enough.
Vinyl and leatherette
Vinyl is more durable than leather and handles degreaser and a soft brush without complaint. The risk is dye bleed, so patch-test in a hidden seam with a white cloth first. Old grease on vinyl often needs a second pass after drying, because heat cycles in a parked car can re-wet the oil and make it look fresh again.
Headliner and roof fabric
Headliner fabric is the most fragile surface in the car and the most common source of nervous questions in detailing forums. Never brush it. Spray a diluted degreaser onto a cloth, dab from the center outward, and blot with a second clean cloth. If the whole headliner needs a deep clean, the wet the fabric down and dry it in under an hour approach works, but the risk of water staining is high enough that anything set-in belongs with a professional.
Door pillar trim and hard plastic
Hard interior trim takes a much more aggressive method than fabric. A stiff nylon brush with diluted APC scrubs grease off textured plastic and pillar covers, and a non-chlorine brake cleaner or electronic parts cleaner applied to a clean white cotton cloth and dabbed on slowly is the standard recommendation for black grease on light-colored trim. Work in small sections and wipe with a barely damp microfiber immediately afterward.
Floor mats and carpet
Grease on mats is the easiest job in the car, because you can take the mat out and work on it flat. Follow the four steps, then rinse the mat thoroughly with a hose and let it dry completely outside. Keeping mats out of the car while they dry prevents the trapped moisture that turns a grease stain into a mildew problem.
Removing Old, Set-In Grease Stains: The Escalation Ladder
Set-in grease has oxidized into the fiber, so a single degreasing pass will not move it. Work up the ladder one rung at a time and stop as soon as the stain goes. Rushing to a harsher product before the gentler rungs have had their full dwell time is the most common self-inflicted mistake, and it is why people end up with bleach marks on beige seats.
- Rung one: absorb and degrease. Baking soda for 20 minutes, then diluted dish soap and a soft brush. This handles anything less than roughly a week old.
- Rung two: dilute APC or interior cleaner. Dilute to the label ratio, agitate with a brush, dwell 10 minutes, then towel off. Popular with detailers for embedded grease.
- Rung three: the extract method. Saturate the area with dish soap solution, let it dwell 15 minutes, then wet-vacuum the seat three or four times. Reported as highly effective in detailing communities and reproducible at home with a household extractor, but the seat must dry completely afterward.
- Rung four: solvent for the last trace. Dab a non-chlorine brake cleaner or an electronics cleaner on a white cotton cloth and apply slowly, blotting immediately. WD-40 works on cloth, but use it sparingly and never near leather or vinyl.
- Rung five: hot water extraction or steam. A handheld steamer or a hot-water extraction pass is the last DIY attempt available. If the mark survives this, a detailer with a machine and a chemical inventory is the next step.
The Dawn and Baking Soda Method, Step by Step
Because this pairing comes up in almost every forum thread about grease in a car, here is the whole thing in one place with quantities. Dish soap works because it is a surfactant, meaning it surrounds the oil particles and suspends them in water so they can be lifted out. The baking soda does the absorbing beforehand so the soap is not fighting a full load of grease.
- Blot the grease with paper towels and lift any solid with a plastic card.
- Cover the stain with a thick layer of baking soda and leave it 15 to 20 minutes.
- Vacuum or brush the powder off the seat.
- Mix a couple of drops of dish soap with a cup of warm water, apply with a damp cloth, and work in with a soft brush.
- Dwell 5 to 10 minutes, then extract with a wet/dry vacuum or blot out with white towels until they come away clean.
- Rinse with a plain damp cloth, then air dry with the doors open.
Do not mix dish soap and vinegar in the same solution, and do not pour baking soda into vinegar on the seat. Acid neutralizes the soap, and you end up with salt and damp fabric instead of a clean one. Use them in separate steps, or not at all.
What Gets Grease Out of Fabric: Method Comparison
There are more DIY grease removers in circulation than any guide lists, and they are not interchangeable. This comparison covers the ones you will actually be choosing between, with dwell times and the surfaces each one is safe on.
- Baking soda. Absorbs loose oil by capillary action. Dwell 15 to 20 minutes. Safe on cloth, carpet and mats. Avoid on leather, vinyl and headliner.
- Cornstarch. Same absorbing action with finer particles. Dwell 15 to 20 minutes. Safe on cloth, carpet and mats. Avoid on leather and vinyl.
- Dish soap and warm water. Surfactant emulsifies the oil for extraction. Dwell 5 to 10 minutes. Safe on cloth, carpet and hard plastic. Avoid on leather and silk-blend headliner.
- Automotive interior cleaner. Degreaser designed for trim and fabric. Dwell 5 to 10 minutes. Safe on cloth, carpet and hard plastic. Avoid on leather without patch testing.
- All-purpose cleaner (APC). Strong alkaline degreaser that breaks embedded grease. Dwell 10 minutes. Safe on cloth, carpet and hard trim. Never use undiluted on light fabric or leather.
- WD-40. Oil-based solvent that loosens grease. Dwell 10 to 15 minutes. Safe on cloth and carpet, used sparingly. Avoid on leather, vinyl and light colors.
- Non-chlorine brake cleaner. Solvent degreaser, fast on black grease. Dwell under 2 minutes. Safe on cloth, carpet and hard plastic. Avoid on airbags, painted surfaces and leather.
- Enzyme cleaner. Breaks organic residue and is mild on grease. Dwell 15 minutes. Safe on cloth, carpet and mats. Avoid on hard plastic and leather.
- Steam cleaner. Heat loosens set grease from the fiber. Dwell under 5 minutes. Safe on cloth, carpet and hard trim. Avoid on headliner, leather and vinyl.
What NOT to Use on Car Upholstery
Every one of these causes more damage than grease stains do, and all of them show up in the complaints of people who came to forums after a bad attempt.
- Bleach and chlorine products. They attack dye and print a bleach mark that never comes out. Use a pH-neutral cleaner instead.
- Dryer sheets. They leave a waxy film that traps grease in the fabric and makes the seat worse after every wash.
- Undiluted APC on light fabric. Beige, grey and yellow seats go chalky and bleached. Always dilute to the label ratio and patch-test.
- WD-40 on leather or vinyl. It is an oil and it re-lubricates the surface, which makes the mark worse and can yellow the material.
- Nail polish remover on light fabric. The acetone attacks colorfastness and can pull dye out of the weave.
- Rubbing in circles. Not a product, but the single most common mistake people make. Rubbing spreads grease and damages fibers.
- Oversaturating the seat. Water that never gets extracted or dried leaves a water ring and, later, mildew and odor.
Removing Baking Soda Residue and Stopping the Stain From Coming Back
Residue is a real problem and it is the reason some people say the baking soda method made their seat look worse. The powder lifts the grease but the grease stays in the pad underneath, so re-wetting the seat brings the mark back as a dark ring.
- Vacuum the powder off thoroughly with the seat detached from the car if possible, or use a crevice tool in the seams.
- Follow the powder with the degreasing and extraction steps, since the powder pulls the oil up and into the pad.
- Blot the whole area with a white towel after extraction. If the towel picks up dark marks, extract again.
- Rinse the fabric with a cloth dampened with plain water, or a 1 part vinegar to 3 parts warm water mix on colorfast cloth only, to clear the last soap film.
- Dry completely. Open the doors, run a fan, and do not drive or sit in the seat until the fabric is fully dry to the touch.
Once the area is dry, apply a fabric protectant to the cleaned spot to give the fiber a barrier against the next spill. For prevention, put down a shop rag or a seat cover before doing engine work, and keep the garage rags in a bin rather than on the seat, because that habit is the leading cause of handprint grease in the cars people bring to detailers.
When to Stop and Call a Professional Detailer
DIY grease removal has a real ceiling. Stop and take it to a professional when the stain is set into a light-colored seat and you have already been through rungs one and two, when the mark covers more than a hand’s width across a seat, or when the fabric is headliner or roof lining.
A professional has a hot-water extractor and a solvent inventory that a weekend toolkit does not, and the cost is driven by the size of the area, how far into the seat the grease has traveled into the foam, and whether the headliner or carpet is involved. For a used car you are about to buy or sell, a professional interior detail is often the difference between a buyer walking away and not.
Frequently Asked Questions
Can grease stains be removed from car seats?
Yes, most grease stains come out of car seats if you act on them in the right order. Grease bonds to fabric fibers rather than sitting on the surface, so it cannot be wiped away. Blot first, absorb with baking soda for 15 to 20 minutes, degrease with diluted dish soap or automotive interior cleaner, then extract the residue with a wet/dry vacuum or white towels. Fresh grease usually needs one pass; set-in grease often needs two or three.
How can I remove old grease stains from my upholstery?
Old grease has oxidized into the fiber, so simple blotting does nothing. Work up an escalation ladder instead: first baking soda and dish soap, then a properly diluted all-purpose cleaner agitated with a soft brush, then the extract method where you saturate the area, dwell 15 minutes and wet-vacuum it three or four times. After that, dab a non-chlorine brake cleaner on a white cotton cloth for the last trace. Give each rung its full dwell time before moving up.
What gets car grease out of fabric?
Three things work together, and skipping any one of them leaves grease behind. An absorbent powder such as baking soda or cornstarch pulls the loose oil out for 15 to 20 minutes. A surfactant, which is what dish soap or an automotive interior cleaner is, emulsifies what remains. Then mechanical extraction with a wet/dry vacuum or repeated white-towel blotting pulls the emulsified oil out of the fiber. Products alone without extraction usually just move the grease around.
Is Dawn dish soap safe for car seats?
Diluted Dawn is safe on cloth seats and carpet, and it is one of the most effective grease removers available to a do-it-yourself owner. Use a couple of drops in a cup of warm water rather than straight from the bottle, and never on leather or vinyl. Patch-test any light beige or grey fabric first, keep the seat damp rather than soaked, and rinse with a plain damp cloth so no soap film is left to cause a water ring or mildew.
Can I mix Dawn and vinegar and baking soda together?
No. Vinegar is an acid and it neutralizes the surfactant action of dish soap, so mixing them defeats the purpose. Baking soda and vinegar in the same spot is worse: they react immediately and leave a salt and damp fabric instead of a clean one. If you want both, use them in separate steps, and use a plain warm water rinse to clear away residue rather than reaching for vinegar.
How do I remove baking soda residue from car seat?
Vacuum the powder off thoroughly, working the seams with a crevice tool, then follow it with the degreasing and extraction steps because the powder has drawn grease up into the seat pad. Blot the whole area with a white towel afterward; if the towel comes away dark, extract again. A final rinse with a cloth dampened with plain water clears the last soap film. Let the seat dry completely before driving so the mark does not return as a ring.
Is WD-40 safe on car seats?
On cloth it does lift grease, and detailers describe it working on embedded marks. The catch is that it is an oil-based solvent: it can yellow light-colored fabric, and it makes grease marks on leather and vinyl worse because it re-lubricates the surface. Keep it away from painted surfaces and airbags. If you use it, apply a small amount to a white cotton cloth, dab slowly rather than spraying, and blot it out immediately.
Conclusion
To get grease stains out of car upholstery, the order is everything: blot, absorb for 15 to 20 minutes, degrease, extract, and dry. That single sequence handles the majority of grease marks people deal with, from bacon grease on a cloth seat to mechanic handprints on a light grey one.
When the four steps are not enough, work up the escalation ladder one rung at a time instead of jumping to a harsher chemical. Set yourself a time budget of up to three hours for a badly affected seat, and if it still has not moved after the extractor pass, a professional detailer is the sensible next step. Updated for 2026, this guide covers cloth, leather, vinyl, headliner and hard trim so you can pick the right method before you open a single bottle.