
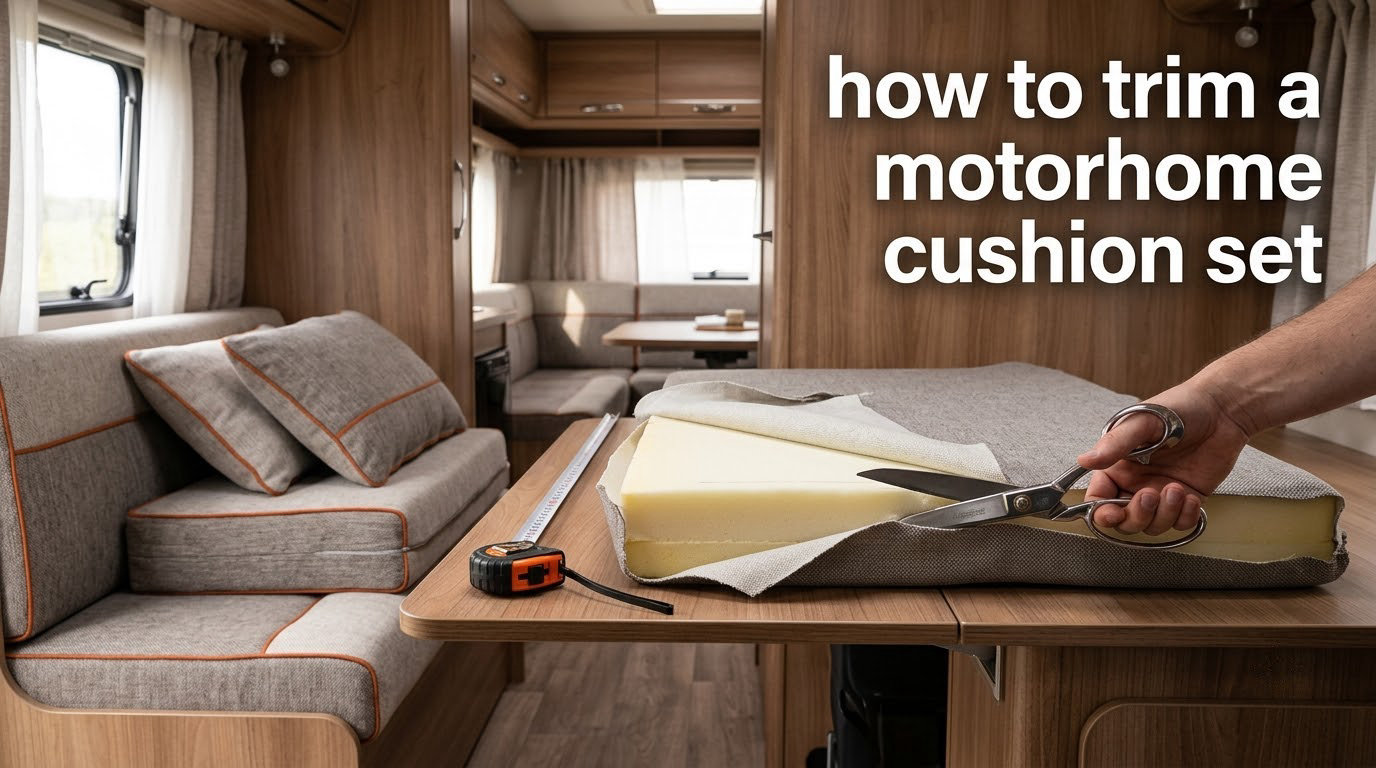
Finding out that a cushion set is slightly too big for the frame is one of the most common problems in a motorhome interior, and most owners assume the only fix is to order a whole new set. It is not. Learning how to trim a motorhome cushion set takes an afternoon, costs only the foam you remove, and lets you keep a cover you already like.
I have compared the standard replacement guidance with what trim-focused forums actually recommend, and the two rarely match. The order of operations is where most guides go wrong, so this one leads with that, then works through measuring, cutting, refitting and finishing.
Table of Contents
- What Trimming a Motorhome Cushion Set Actually Means
- Tools and Materials Checklist
- How to Trim a Motorhome Cushion Set: The 9-Step Process
- Step 1: Measure the frame opening, not the old cushion
- Step 2: Measure the cushion seam to seam
- Step 3: Add 0.5 inch to length and width, never to thickness
- Step 4: Mark the cut line on the foam
- Step 5: Cut the foam with a sharp blade and a straight edge
- Step 6: Test fit the foam dry before touching the cover
- Step 7: Re-cut the cover only if the shape changed
- Step 8: Refit the cover, working from the centre outward
- Step 9: Finish the edges and reassemble
- How to Measure Seam to Seam and Apply the 0.5 Inch Allowance
- Trimming Odd Shapes: U-Shaped, L-Shaped, Rounded and Trapezoid Cushions
- Cutting a Long Back-Bench Cushion Into Segments
- Trim the Foam First, the Cover Second
- Trimming Mistakes That Ruin the Fit
- Trim, Reupholster or Replace: Which One Do You Need?
- Finishing Touches: Fabric, Batting and Welt Cord
- Frequently Asked Questions
- How much should I trim off a foam cushion?
- Should I trim the foam or the cushion cover?
- Do you measure the cushion or the bench frame?
- Can I cut an RV cushion in half?
- What thickness foam should an RV cushion be?
- How do I get trimmed foam back into a tight cover?
- How do I cut fabric for a cushion cover?
- How much does it cost to reupholster camper cushions versus trimming?
- Conclusion
What Trimming a Motorhome Cushion Set Actually Means
Trimming a motorhome cushion set means cutting an existing or newly bought cushion down in length, width or thickness until it sits fully inside the frame opening. In practice it is needed when a set is a few inches too long for a back bench, when a single slab has to become two separate dinette pieces, or when a factory shape simply does not match a U-shaped or L-shaped booth.
Three different things can shrink: the foam, the cover, or the built-up assembly of board, batting and foam. A set is ready for a bench top when only the foam needs reducing. A set that has to change shape usually needs the cover re-cut as well, because the original cover was sewn to the original outline.
One thing trimming cannot fix is compression set. When foam has been sat on for a decade its cell structure has partly collapsed, and no amount of cutting brings it back. That is why a cover that felt snug on day one can end up loose and baggy after new foam goes in, exactly as owners on iRV2 describe when they report a bunk cushion cut incorrectly by a supplier.
Tools and Materials Checklist
You need fewer tools than most people expect, and most of them are already in a garage. The one item that matters most is a genuinely sharp blade, because a dull knife compresses and tears the cell structure instead of cutting it.
- A sharp foam cutter knife or long serrated utility knife with plenty of fresh blades
- A straight edge such as a yardstick, steel ruler or straight edge longer than the cut
- A measuring tape plus a rigid ruler for thickness readings
- Corrugated cardboard and a marker for making a template of odd shapes
- An upholstery staple gun and the correct staple gauge for the cover and board
- Pliers and a staple remover for taking the old cover off
- Polyester batting or dacron wrap for a softened edge
- Spray adhesive if you are gluing foam to an MDF base board
- Dry cleaning bags or a vacuum for getting foam back into a tight cover
- Upholstery scissors, a seam ripper and a needle or hidden zipper pull
Masking tape laid along the cut line before slicing makes a straight edge far easier to follow on foam. A chalk line works too, but the tape prevents your hand drifting into the blade line.
How to Trim a Motorhome Cushion Set: The 9-Step Process
The full sequence in short: measure the opening, measure the cushion seam to seam, add a 0.5 inch allowance to length and width, mark the trim line, cut the foam, test the fit dry, re-cut the cover only if the shape changed, refit from the centre outward, and finish the edges. Work through them in that order and the job takes about three hours for a full dinette set.
Step 1: Measure the frame opening, not the old cushion
Open the frame, pull the old cushion out, and measure the internal opening at its narrowest point. Take the measurement in two places per direction because frames are rarely square. Write down the smaller of each pair, since that is the number that governs the fit.
Step 2: Measure the cushion seam to seam
Lay the cushion flat on a hard floor and measure the finished seam-to-seam dimensions, not the outer edge of the fabric. A bulge of loose fabric makes a cushion look bigger than its stitched panel, and trimming to the visible edge leaves a slack bag that never fills the frame.
Step 3: Add 0.5 inch to length and width, never to thickness
Foam compresses by roughly half an inch across each dimension as it is pushed into a frame, so the cut panel should measure the opening plus 0.5 inch on every side. Do not add that allowance to thickness. Extra length and width make the cover pull tight, while extra thickness makes the zipper refuse to close.
Step 4: Mark the cut line on the foam
Mark all four sides with a marker and reinforce the line with masking tape. Photograph the marked foam before cutting so you have a reference if a cut goes wrong.
Step 5: Cut the foam with a sharp blade and a straight edge
Press the straight edge down firmly, score the line several times without cutting through, then complete the cut in one steady pass. Long continuous strokes tear less foam than short chopping motions. A slightly imperfect edge is fine because the cover hides it, which is the single most reassuring fact in this entire process.
Step 6: Test fit the foam dry before touching the cover
Drop the trimmed foam into the opening with no cover on. It should fill the space, sit roughly level with the frame edge and support weight without shifting. If it is loose, you can trim more later. If it will not go in, you have already made a one-way cut and cannot re-join foam.
Step 7: Re-cut the cover only if the shape changed
If you only reduced thickness, the existing cover goes straight back on. If the outline changed, remove the staples, open one seam, and re-cut the panel from a cardboard template of the new shape, leaving a 0.5 inch seam allowance on every side. Machine wash and shrink the fabric first so the finished cover does not shrink later.
Step 8: Refit the cover, working from the centre outward
Start one staple in the middle of each edge, then work outward in alternating pulls to keep tension even. Snug is enough. Over-tensioned fabric tears at the staple line the first time somebody sits down hard, and a centre-out pattern is what prevents the wrinkles owners complain about most.
Step 9: Finish the edges and reassemble
Wrap the cut edge in batting and add piping or welt cord where the original had it, then refit the board, trim caps and bench frame. Check the hidden zipper closes fully along its whole run before you call the job finished.
How to Measure Seam to Seam and Apply the 0.5 Inch Allowance
Seam-to-seam means the stitched panel size, measured across the flat face of the cushion between seams, not the bulge of loose fabric around it. Measure with the cushion fully compressed under your palm, because a fresh piece of foam measures thicker than the same foam after a year of use.
Thickness needs a rigid ruler on a hard floor. A flexible tape reads the plush surface and gives you a number several tenths too generous, which is why so many replacement sets arrive too soft and too tall at the same time.
| Cushion type | Target thickness | Notes |
|---|---|---|
| Dinette seat cushion | 3-4 inch | The normal working thickness for a booth seat |
| Seat back cushion | 3 inch | Thinner backs stop the sitter leaning too far back |
| Dinette that sleeps guests | 4-5 inch | Thicker panels close the gap when the table drops |
| Mattress replacement | 5-6 inch | Full bed comfort, no frame to hide the edge |
For a plain rectangular cushion, three numbers decide the job: finished length, finished width and finished thickness. Corner radius on a rounded dinette is a fourth, and the measurement is taken across the curve rather than chord to chord.
A high density polyurethane foam at 1.8 density with a 44ILD rating holds its shape longer than a soft foam of the same apparent firmness, and it is the standard choice for a seat that gets used daily. ILD describes how many pounds of force compresses the foam by one inch, so a higher number means a firmer sit.
Trimming Odd Shapes: U-Shaped, L-Shaped, Rounded and Trapezoid Cushions
For anything that is not a plain rectangle, the reliable method is a cardboard template rather than a tape measure. Trace the frame opening onto corrugated cardboard, cut it out, then check the template in the frame until it slides in with a light hand fit before you ever touch foam.
Rounded corners on a dinette commonly use a 4-6 inch radius. Cut the foam slightly inside the template curve so the finished edge falls under the piping, which hides the transition and stops the corner fraying outward with use.
A trapezoid or a wedge for a sloping bunk is the same idea with one extra rule. Mark the cut line across the foam at several points rather than one, because foam compresses unevenly along a long sloped edge and a single mark will leave you high on one end.
Spray adhesive keeps shaped foam from creeping back out of position while you staple the cover, and a thin layer is enough. Let it become tacky before you push the panels together, or the foam will slide out of alignment as you work.
Cutting a Long Back-Bench Cushion Into Segments
A long single back-bench cushion should be cut into two or three half-width or half-length segments rather than forced to sit as one slab. That is the consensus advice in the Escape Forum thread on back benches with U-shaped dinettes, and the practical reason is simple: separate segments stay in place, while one long cushion bows out in the middle and leaves gaps at both ends.
Measure the total run of the bench, subtract the frame uprights, and divide the usable length into equal parts. Mark each division with a straight edge across the full depth of the foam, and make sure the cut lands where the new seam will be covered by piping, because a raw cut edge on an exposed face will look unfinished forever.
Splitting a cushion also solves a conversion problem. A dinette that has to lay flat as a guest bed works far better from two or three separate pieces than from one long panel, since a single piece tends to rock and will not sit level once the table drops.
Long bench cushions are also the easiest job of the three. Every cut is a straight line, there are no compound curves to follow, and the same template covers the whole set.
Trim the Foam First, the Cover Second
Trim the foam first and leave the cover alone until the new shape is confirmed in place. Cutting the cover to fit a foam piece you have not yet test-fitted is the most common wasted afternoon in this whole job, because fabric does not go back.
Foam is forgiving and fabric is not. A cut that is a few millimetres ragged disappears under a cover, while a mis-cut cover panel has to be re-sewn from new cloth. Get the foam right, then make the cover match what you actually have.
The one exception is thickness. If you are reducing a set that is too tall, the cover will not go back on over the slimmer foam unless you cut an inch or two of height from the panel, so in that case remove the cover first, then cut the foam, then re-sew the shortened panel.
One more practical note from the Forest River Forums: putting the trimmed foam inside dry cleaning bags before feeding it into a tight cover reduces friction enough to make it go in. Rip the bag out afterwards by pulling it through a zipper opening or a staple gap.
Trimming Mistakes That Ruin the Fit
Over-cutting in a single pass is the most expensive error, because the material is gone and foam cannot be re-joined. Take off 0.5 inch, test fit, and repeat. Sagging after a trim is almost always one aggressive cut rather than three careful ones.
- Cutting the cover before the foam. Do the foam first in every case except a pure thickness reduction.
- Adding the 0.5 inch allowance to thickness. The zipper will not close and the cover will strain.
- Measuring the bulge instead of the seam. The finished cover ends up slack and baggy.
- Stapling from the outside in. Starting at a corner and pulling toward the centre creates the wrinkle fan that owners describe.
- Over-tensioning the fabric. Snug is the target. Fabric pulled too tight splits at the staple line under load.
- Leaving cut edges exposed. Batting and piping hide a raw edge and stop it fraying.
- Skipping a dry fit. Five minutes with bare foam in the frame prevents a repeat teardown with the cover on.
Two more that catch people out. Measuring a flexible tape for thickness gives a number that is too generous, and cutting a long back-bench cushion as one piece instead of segments is a design error that no amount of careful trimming will fix.
Trim, Reupholster or Replace: Which One Do You Need?
Choose the approach that matches the problem rather than the one that looks most thorough. A set that is only too big needs a trim. A set that is the right size but tired fabric needs reupholstering. A set with rotted board, perished foam and a failed zip usually needs replacing.
| Approach | Best for | Time | Skill level |
|---|---|---|---|
| Trim | Cushion too long, too wide or too tall; wrong shape for the frame | 2-4 hours | Confident with a knife and staple gun |
| Reupholster | Foam still sound, fabric faded, stained or torn | 1-2 days | Sewing machine helpful but not required for staple-on |
| Replace the set | Board rotted, foam brittle, zips failed throughout | Delivery time plus fitting | None beyond measuring |
Replacing is at least twice the work of a targeted trim, and it is the wrong call when the only fault is size. The Beckham Project rebuilt a pop-up camper dinette with cut MDF base boards and recovered the cushions in about two days, which is a reasonable benchmark for a full set of this size.
Do it yourself and the main cost is your time and the foam you buy. Out of your hands, a custom set adds labour on top of material, and the factory template may still be wrong, as iRV2 posters report when a supplied bunk cushion arrives cut out incorrectly and will not support a 200 lb adult.
Finishing Touches: Fabric, Batting and Welt Cord
Marine-grade vinyl and heavy canvas are the most practical covers for a motorhome interior because they handle sun, water and spills without a fabric protector. A synthetic microfibre blend works well if you prefer a softer feel, and pre-treating it guards against the stain and UV damage that makes upholstery look tired within a few seasons.
Wash the fabric before you cut it, on the cycle you would normally use, and dry it fully. Covers that were fitted first and washed later often come out of the machine slightly smaller, which is a disappointing way to lose a finished cushion.
Wrap every raw cut edge in batting before you staple, then add piping along the seam line where the original had it. Where the original had tufting, tufting is functional rather than decorative, because it holds the padding in place inside a thick cushion.
A machine washable cover with a hidden zipper is the easiest long-term option, since the foam stays out of the wash. Just check that it breathes, because a sealed cover over foam that never fully dries will encourage mould in a damp motorhome.
Frequently Asked Questions
How much should I trim off a foam cushion?
Measure the frame opening at its narrowest point, then cut the foam to that measurement plus 0.5 inch on every side. Never add the allowance to thickness, since that is what stops a zipper closing. Trim 0.5 inch at a time and test fit rather than cutting the full amount in one pass.
Should I trim the foam or the cushion cover?
Trim the foam first in almost every case. Foam is forgiving and a ragged cut is hidden by the cover, while fabric cannot be un-cut. The one exception is a pure thickness reduction, where you remove the cover first, cut the foam, then re-sew the shortened panel.
Do you measure the cushion or the bench frame?
Measure the frame opening first, since that is the space the finished set must occupy. Then measure the cushion seam to seam to find out how much needs removing. Measuring only the old cushion leaves you guessing at the clearance you actually need.
Can I cut an RV cushion in half?
Yes, and for a long back-bench cushion it is usually the right call. Divide the usable bench length into equal parts, cut straight across the full depth with a sharp blade and a straight edge, and position the new seam where piping will cover it. Separate segments stay in place where one long slab bows out.
What thickness foam should an RV cushion be?
Three to four inches for a dinette seat, three inches for a seat back, four to five inches when the dinette sleeps guests, and five to six inches for a mattress replacement. If you are reducing thickness to fit a frame, measure with a rigid ruler on a hard floor rather than a flexible tape.
How do I get trimmed foam back into a tight cover?
Put the foam inside dry cleaning bags before feeding it into the cover. The plastic reduces friction enough that it slides in, and you tear the bag out afterwards through the zipper opening or a staple gap. Compressing the foam with straps before insertion helps just as much.
How do I cut fabric for a cushion cover?
Make a cardboard template of the new shape, test it in the frame, then trace it onto fabric that you have already washed and dried. Leave a 0.5 inch seam allowance on every side and add extra if the fabric is loose weave. Cut the welt cord length before committing to the panel size.
How much does it cost to reupholster camper cushions versus trimming?
A trim costs only the tools you already own plus whatever foam you buy, and takes two to four hours per set. Reupholstering sound foam takes one to two days and needs new fabric. A full replacement set costs the most and is only justified when the board has rotted or the foam has turned brittle.
Conclusion
Trimming a motorhome cushion set comes down to three rules: measure the frame first, add 0.5 inch to length and width but never to thickness, and cut the foam before you touch the cover. Work in small passes with a dry fit between each one, and an oversized set becomes a set that fits.
For odd shapes, lay a cardboard template rather than chasing a tape measure. For a long back bench, cut it into segments instead of forcing one slab into the run. And if the foam has already compressed over the years, accept that the finished cover will sit slightly loose and plan for new foam rather than a trim.
Before you cut anything, write down the frame opening in two directions, find the smaller number, and add 0.5 inch. That single sheet of paper decides the whole job.