
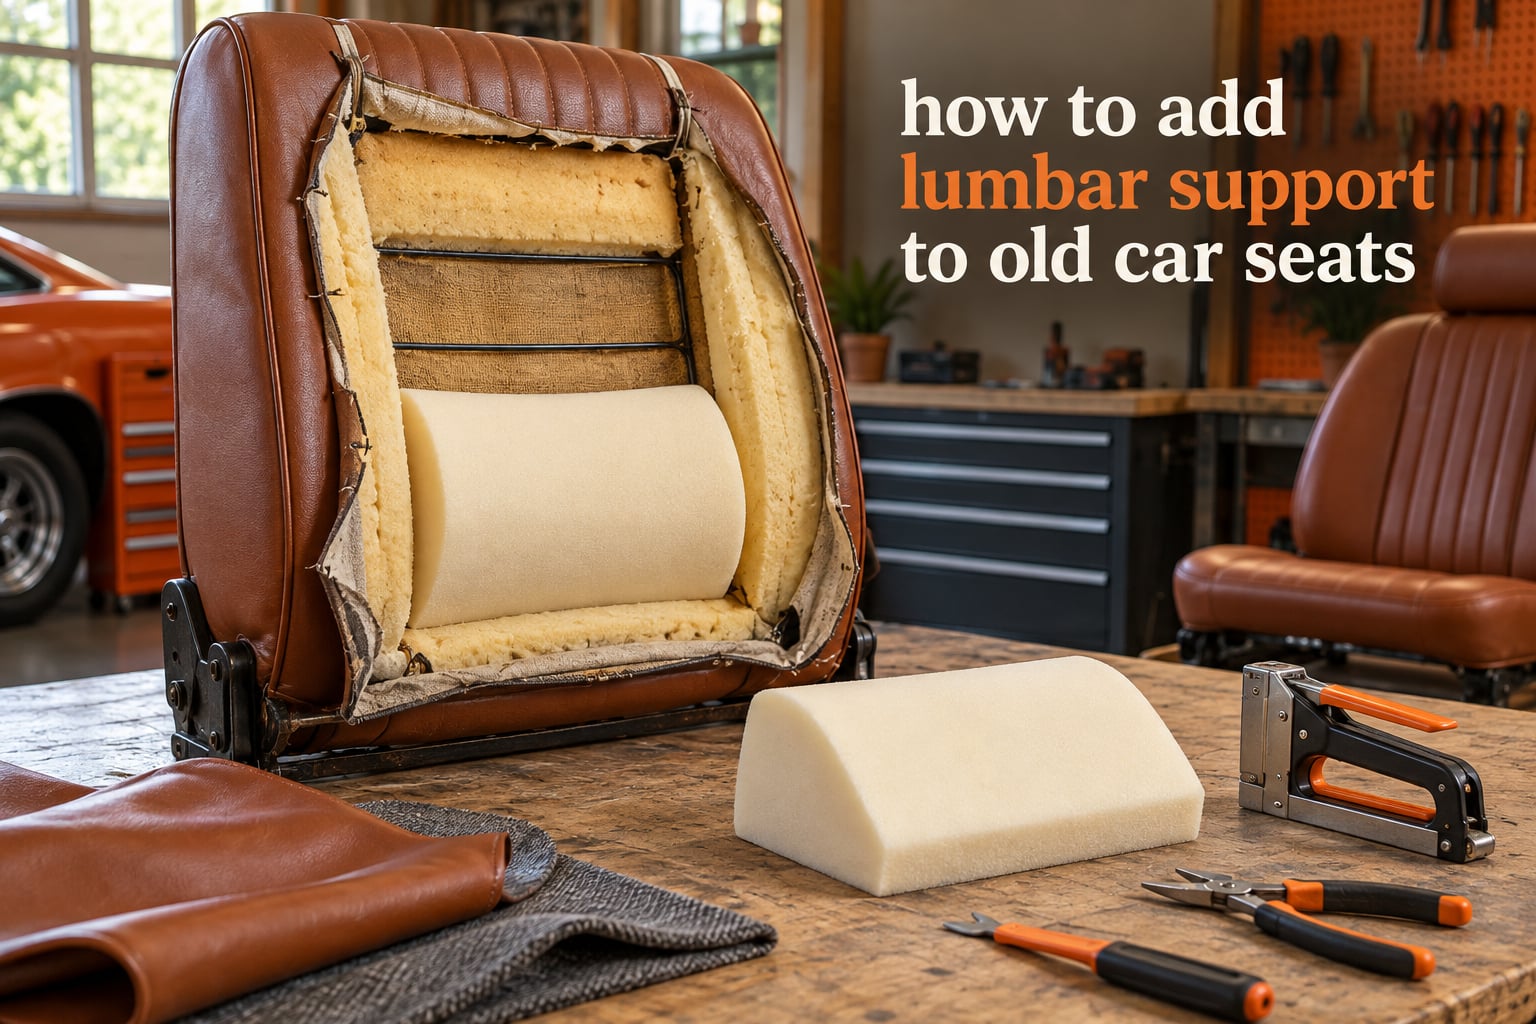
Yes, you can add lumbar support to an old car seat, and most worn seats need it badly. The five routes are a strap-on cushion or pillow, an integrated one-piece seat cushion with a built-in lumbar pad, a headrest-strap backrest, an internal foam or bladder insert fitted under the cover, and a full professional rebuild. Which one suits your seat depends on whether the foam has collapsed or was simply never shaped for lumbar support.
I have spent enough years in trim shops to know that the phrase “old car seat” covers two very different problems. One is a seat that once had a proper lumbar zone and has lost it, usually to 100k-plus miles of compressed foam. The other is a cheap seat that never had one and never will, no matter how you adjust the recline lever.
This guide covers both, and it starts with diagnosis rather than a shopping list. You should know what is wrong with the seat before you decide whether an external cushion will help at all.
What lumbar support actually is: lumbar support is the padding or structure that fills the gap between a flat seat back and the natural inward curve of your lower spine. Without it, your lower back flattens out within about half an hour of driving, and the muscles around your spine have to hold your torso up by working continuously.
Last updated October 2026.
Table of Contents
- How to Add Lumbar Support to an Old Car Seat
- Diagnose Why Your Old Car Seat Hurts
- DIY Lumbar Support Options From Fastest to Most Permanent
- Where the Lumbar Support Should Sit
- Adding an Internal Foam Lumbar Insert Step by Step
- Old and Classic Car Seats
- Choosing the Right Support Material
- Safety Before You Pull a Seat Out
- Troubleshooting After Installation
- When More Lumbar Support Is the Wrong Answer
- Frequently Asked Questions
- Can you add lumbar support to a car seat?
- How can I make a DIY lumbar support for my car?
- Where to put lumbar support on car seat?
- How can I make my car seat more comfortable with back pain?
- Should you use lumbar support in a car seat?
- How to make a homemade lumbar support?
- What is the best car seat support for lower back pain?
- How to add lumbar support to car seat?
- Conclusion
How to Add Lumbar Support to an Old Car Seat
There are five practical methods, and they differ far more in permanence and reversibility than in the comfort they deliver on the first day. The table below is the decision tool I use when someone walks into the shop. Read it before buying anything, because two of the five methods become far harder after the seat is re-covered.
| Method | What it is | Tools needed | Reversible | Skill | Best for |
|---|---|---|---|---|---|
| Strap cushion or pillow | A foam pad or inflatable bladder strapped onto the seat back | None | Fully | None | Trying support before committing to anything |
| Integrated one-piece cushion | A full seat-bottom pad with a raised lumbar section built in | None | Fully | None | Seats with firm foam and usable side bolsters |
| Headrest-strap backrest | A mesh or foam panel hung between the headrest posts | None | Fully | None | Seats with headrest posts and no collapsed foam |
| Internal foam insert | A shaped foam block fitted under the cover, inside the seat back | Torque tools, trim tools, staple gun, shears, adhesive | Not once re-covered | Advanced | Collapsed foam on a seat worth keeping |
| Professional rebuild | Shop-fitted bladder or reshaped foam, new cover if required | Shop equipment | Not reversible | Professional | Expensive covers, torn bolsters, SRS or heated seats |
Two things stand out. The first three methods take about ten minutes between them and none of them touch the seat structure. The last two are the only ones that actually rebuild a collapsed cushion, and both mean the cover comes off.
Diagnose Why Your Old Car Seat Hurts
Every guide I have read jumps straight to a product recommendation. That is backwards, because a lumbar pillow on a seat with a flattened bolster will make the pain worse. Run these five checks in order, about two minutes in total, before you spend anything.
1. The collapsed foam press test
Press your fist hard into the seat cushion in the middle, then in the lumbar zone at the lower back. If both areas feel equally hard and give back very little, the foam has compressed and lost its shape. This is the most common cause of discomfort in high-mileage seats, and no external cushion will correct it, because you would be propping up a flat surface rather than filling a gap.
2. The lumbar gap test
Sit back with your hands behind your lower back. If you can slide a flat hand between your spine and the seat back without effort, you have a lumbar zone that has lost its shape or was never built into the seat. This gap is exactly what a lumbar support is designed to fill, and it is good news: an external pad or an internal insert will work.
3. The bolster check
Bucket seats with pronounced side bolsters push inward at the hips and shoulders. Tall drivers often get pain between the shoulder blades from that pressure, not from the lower back, and a lumbar pillow does nothing for it. Worn bolsters are also usually hollow by the time the foam underneath is flat. Sit squarely in the seat and note where you feel pressure after twenty minutes.
4. The belt line and hip angle
Sit with your back flat and your knees roughly level with your hips. If your knees sit well above your hips, the seat cushion is too high or too thick and you are being pushed into a rearward posture that loads your lower back. No lumbar support fixes a seat that is pushing your pelvis forward. This is where a thinner cushion or a raising lever is the correct answer.
5. The recline and seat height check
Several owners in owner forums report that simply raising the seat cushion and tilting it back gave more relief than any lumbar product they tried. Most cars have a height lever or a pump handle, and many have a separate recline lever for the seat back. Try every combination of the two before you modify anything. It is the cheapest fix available and it is entirely reversible.
What the results tell you
A flat cushion plus a large lumbar gap means an internal insert or a professional rebuild. A large lumbar gap with a firm cushion means an external pad, an integrated cushion or a headrest backrest. Pressure at the shoulders and hips means bolsters, and the fix is a different seat or a rebuild. Knee-above-hip means cushion height, not lumbar support.
DIY Lumbar Support Options From Fastest to Most Permanent
These are ordered by effort. Work down the list only as far as the seat actually requires, because the fifth rung is a full re-cover and there is no going back from it.
1. A rolled towel or folded blanket
Roll a bath towel to roughly the diameter of your forearm, place it horizontally at the small of your back, and buckle up over it. Adjustable in the sense that you move it every time you get in, and completely free. A folded blanket behind the seat back works too, and on a seat with no headrest posts it is often the only option that fits.
2. A foam roll or buckwheat roll
A foam cylinder or a buckwheat hull roll about 20 to 25 cm wide and 8 to 10 cm in diameter gives a far more consistent shape than a towel. Buckwheat hulls are adjustable by hand, so you can thin or fatten the roll until it matches your lumbar curve. Owners on high-mileage forums report these holding their position much better than foam pellets loose in a pillow cover.
3. An inflatable lumbar bladder
An inflatable bladder with a hand pump stays a favourite cheap adjustable option on older cars, precisely because it needs no fixing and can be bled down a little each journey. Inflate it until your lower back makes light contact with the seat back, then stop. Over-inflating it produces a single concentrated pressure point, which is the sore-spot complaint that shows up again and again in owner reports.
4. A headrest-strap backrest
A mesh or contoured panel that hangs from the headrest posts fills the lumbar gap without pressing on the cover, and it moves with you when you slide forward. It is the most common answer on car owner forums for original cloth seats, and clip-on adjustable mechanisms of this type earn strong endorsement from owners for the same reason: nothing is drilled and nothing is cut.
The one complaint that comes up again is height. On a tall seat with long posts, a strap-mounted panel can end up well above the small of your back. Check the height on first use and either shorten the straps or use the threaded adjuster, or the support is just decoration.
5. A clip-on adjustable mechanism
If you want repeatable firmness rather than improvised foam, a clip-on lumbar support with an adjustment knob or strap is the upgrade. Owners adding these to original cloth seats without removing anything report that the anti-wiggle strap is what keeps them from creeping down. Fit the strap around the seat back frame or the seat base where it cannot slide, not around the cover alone.
Where the Lumbar Support Should Sit
The support belongs at the small of your back, filling the inward curve between your belt line and the top of the seat cushion. Concretely, that is about a hand’s width above the top edge of the seat base, level with the lower ribs when you are sitting properly. Sit down, mark the spot with your thumb, and set the support there rather than eyeballing it from outside the car.
Too high and it pushes your ribs forward and rounds your upper back. Too low and it fills the gap between the cushion and the seat back where it does nothing. The support should make contact across the width of your lower back, not press a single point into the centre of your spine, which is the usual reason a too-firm pad makes things worse.
Adding an Internal Foam Lumbar Insert Step by Step
This is the method that actually rebuilds a collapsed lumbar zone. It is also the one that can go wrong, so read the safety section below before you start, and only attempt it if the cover is in good condition and you are prepared to replace the original cover if it tears.
Tools and materials
- A cut-off wheel or ratchet with the correct size for the seat mounting bolts, plus a torque wrench so you can return them to specification
- Trim removal tools and a plastic panel fork for the release tabs and covers
- Staple gun, upholstery staples, and a pair of heavy shears or a foam cutter
- Contact adhesive or spray adhesive for bonding the insert
- A block of firm upholstery foam roughly 1 to 2 cm thick, plus a thinner soft layer to shape it
- Zip ties and anti-wiggle strapping to hold the insert while you work
- Masking tape to mark the cover’s original tension before you pull it back
Step 1: Remove the seat from the car
Unclip the seat harness or belt buckle connectors and label them before you touch anything. Move the seat fully forward, then take out the rear mounting bolts, lift the seat slightly to clear the rear hooks, and slide it out. Support the seat back as it comes free so the cable loom is not stretched.
Step 2: Release the seat back cover
On most seats the back cover releases at the bottom by pulling out the plastic push tabs or by unhooking the lower retainer, as owners on the priuschat and g8board threads describe. Peel the cover down from the top. Go slowly, and pull the material towards you rather than away from the foam, because the failure point is almost always the seam at the top corners.
Step 3: Mark the original cover tension
Before you release anything further, run strips of masking tape along the edges where the cover is stapled. This gives you a reference to stretch the cover back to the same tension when it goes home. A cover that is re-stapled at low tension develops ripples within a few months and is the most common reason a finished job looks amateur.
Step 4: Position the cushion
Lie the seat back cover down the bench in the orientation it came off. Place the foam block with its lower edge at the belt line and its upper edge about a hand’s width higher, spanning the width between the bolsters. This is the same placement rule described earlier, applied on the bench. Mark the outline before cutting.
Step 5: Cut and shape the foam
Cut on the marked line, then sand or shear a shallow curve across the face so the profile follows the lumbar curve rather than standing as a flat block. Round the corners generously. A square-edged insert that contacts your back over a small area creates pressure; a shaped one spreads the load across the whole lumbar region.
Step 6: Fit the insert behind the cover
Bond the insert to the existing foam with contact adhesive, keeping it inside the original seam line and well clear of the bolsters and any seat heater element. If your seat is heated, check the element route before positioning anything, and keep foam off it. Do not place the insert where a seat-mounted side airbag passes through the seat back.
Step 7: Re-cover, secure and refit
Pull the cover back over the seat back and re-stretch it to the masking tape reference before stapling. Trim the excess, refit the push tabs, then return the seat to the car. Refit the buckle connectors and the harness, then run the mounting bolts down to the manufacturer’s torque figure and give them a second pass after the seat has been loaded and used. Seat bolts that were torqued once and never retorqued are a genuine safety issue, not a formality.
Old and Classic Car Seats
Older seats change the method choice more than any other variable, and this is the part almost every online guide skips. A seat from the 1960s or 1970s often has no headrest posts at all, which removes the easiest option. On a bench seat there is no lateral support to work with, so a lumbar pad needs to be wider and flatter than a bucket-seat shape.
Pleated and button-tufted covers are the real challenge. They are held by buttons, springs or tacks rather than staples and elastic, so re-covering them is slow, and there is no cheap way to hide a new seam. If the cover is original, budget for a trim shop. The same applies to chrome tube frames, where a flat bar or custom bracket is the traditional solution and owners of original documented seats frequently build one themselves.
Owners of 1965 to 1967 Mustang seats, later Corvette sport seats and 1980s Lexus models on enthusiast forums consistently favour cutting to the original hardware because the fastener positions are documented. Where the hardware is undocumented and the cover is expensive, a shop-fitted bladder is the sensible route rather than a guess.
Choosing the Right Support Material
The material decides how the support behaves over an hour, not on the first minute. What follows is how each option performs in a car specifically, which is a different question from how it feels in a showroom.
- Memory foam moulds to your shape and quiet pressure, but it runs warm in a car with the sun on it and it will not hold a lifting position indefinitely. Good for a fixed internal insert, less good as a loose pad.
- Gel foam resists bottoming out and stays cooler over long drives, which makes it a sensible choice for heated seats and for summer journeys.
- Buckwheat hulls are hand-adjustable and refillable, so you can change the shape for different driving positions in the same week. They settle over time and need topping up.
- Inflatable bladders give the finest adjustment of all and leave no mark on the cover, which matters on an original seat you care about.
- Mechanical mechanisms with a knob or strap give repeatable firmness and stay put, because they mount to the frame rather than resting on the cover.
- Shop-installed bladders are the only option that supports an adjustable, near-factory result, and they are the only route that can cope with a seat that has lost its shape completely.
On firm versus soft, the rule is simple: aim for support that contacts your lower back with light pressure and distributes it across the width of the lumbar region. A pad you can feel digging into you is too firm or too narrow, regardless of the material.
Safety Before You Pull a Seat Out
This section is the reason we publish these guides. Removing a car seat is not just a matter of unbolting four corners, and the risks are not visible from the outside of the vehicle.
Buckle connectors. Seat belt buckles and any pretensioner wiring plug into a bracket on the seat base. Disconnect them with a plastic tool, never a screwdriver, and label each connector before you refit it. A buckle that is not fully latched will not stop the belt from paying out.
SRS side airbags. If the seat back has a side bolster seam, a side airbag, or a telltale warning lamp on the dash, treat the seat as airbag-equipped. Never cut the cover along an airbag seam, never use a staple that can pierce a harness, and never block a seat-mounted side airbag with a pad pressed into the side bolster.
Seat heaters. A heater element runs through the seat back and cushion under the cover. Foam placed over it can block the element, overheat it, or trap heat against your back. If you are modifying a heated seat, keep the insert clear of the element and test the heater on every setting once the seat is back in the car.
Bolts and retorque. Seat mounting bolts are structural. Tighten them to the manufacturer’s figure rather than by feel, and retorque them after a few hundred kilometres of use because the seat settles under load. If you cannot find the figure, ask a trim shop rather than guessing.
Troubleshooting After Installation
Almost every complaint we see after a first attempt falls into one of the five rows below, and all of them are fixable without starting again.
| Symptom | Likely cause | Fix |
|---|---|---|
| Support creeps down the seat back | Mounted to the cover only, so it slides with the occupant | Anchor the strap to the seat frame or the base, or add an anti-wiggle strap |
| Seat squeaks after the work | Bolts not torqued, or a clip or tab left out of position | Retorque the mounting bolts and check every retainer tab is seated |
| Cover will not zip back up | Foam is slightly too thick or the insert sits proud of the seam line | Trim the foam edge and re-seat the cover before forcing the zip |
| Foam does not stay put | Not bonded, or bonded to the wrong surface | Use contact adhesive and bond to the existing foam, not the cover |
| Seat now feels too high | Added thickness on the cushion rather than the back | Keep added material out of the seat base and use the height lever instead |
When More Lumbar Support Is the Wrong Answer
Adding support that you do not need can create a new problem. A pad that is too firm, too narrow or too high concentrates pressure into a small area, which over a long drive produces a sore spot that hurts more than the original stiffness did. If your discomfort sits between the shoulder blades rather than at the belt line, you have a bolster or recline problem, and more lumbar support will not touch it.
If the pain travels down a leg, comes with numbness or tingling, or is present when you are sitting at a desk, stop adjusting the car and see a clinician. Seat modification is a comfort measure, not a treatment for a spinal condition. The same applies if a support only helps for the first ten minutes and then gets worse.
Frequently Asked Questions
Can you add lumbar support to a car seat?
Yes, you can add lumbar support to almost any car seat, including old and original ones. The five routes are a strap-on cushion or pillow, a one-piece integrated seat cushion, a headrest-strap backrest, an internal foam or bladder insert fitted under the cover, and a full professional rebuild. Diagnosis comes first: a collapsed cushion needs an internal insert, while a firm cushion with a gap in the lumbar region is fixed by an external pad.
How can I make a DIY lumbar support for my car?
The fastest DIY lumbar support is a rolled bath towel or a foam cylinder about 20 to 25 cm wide and 8 to 10 cm in diameter, placed horizontally at the small of your back and adjusted each time you get in. For something firmer, an inflatable bladder with a hand pump lets you bleed the pressure down until it makes light contact. Both are fully reversible and take under ten minutes.
Where to put lumbar support on car seat?
Place it at the small of your back, filling the inward curve between your belt line and the top of the seat cushion. In practice that is about a hand’s width above the top edge of the seat base, level with your lower ribs when you are sitting properly. Sit down first and mark the position with your thumb, because a support set too high pushes your ribs forward and rounds your upper back.
How can I make my car seat more comfortable with back pain?
Start by testing the seat height and recline levers, since a cushion that sits too high pushes your pelvis forward and loads your lower back more than any lumbar pad can correct. After that, confirm the problem is lumbar by checking whether you can slide a flat hand behind your lower back. If you can, fill that gap. If your pain is between the shoulder blades, the cause is more likely the side bolsters.
Should you use lumbar support in a car seat?
Most drivers on long or high-mileage journeys benefit, because lumbar support transfers part of your upper body weight into the seat instead of your muscles. It is worth less than you expect if the cushion itself has collapsed, and it can make things worse if it is too firm, too narrow or set too high. If your pain runs down a leg or involves numbness, seek medical advice before modifying anything.
How to make a homemade lumbar support?
A rolled towel, a folded blanket behind the seat back, or a buckwheat hull roll are the three reliable homemade options. The buckwheat roll is the most useful of the three because you can thin or fatten it by hand to match your lumbar curve, and you can refill it when it settles. A folded blanket is the only option that fits a classic seat with no headrest posts.
What is the best car seat support for lower back pain?
For a seat with a firm cushion and an unfilled lumbar gap, a headrest-strap backrest or a clip-on adjustable mechanism is the best choice, because both mount to the frame and hold their height. For a seat with flattened foam, no external support will work properly and you need an internal foam insert or a shop-installed bladder. Inflatable bladders suit original seats you want to keep unmarked.
How to add lumbar support to car seat?
Use this order of escalation. First adjust the seat height and recline levers for free. Then add a strap-on cushion or a headrest-strap backrest for a fully reversible fix. If the lumbar zone has collapsed, remove the seat, release the back cover, cut a firm foam insert to the marked belt line position, bond it behind the cover, re-stretch the cover to its original tension and refit the seat, retorquing the bolts.
Conclusion
The method you pick depends almost entirely on what your diagnostic checks found. Firm cushion with a gap means a headrest-strap backrest or a clip-on mechanism, both fully reversible and both fitted in minutes. Flattened foam means an internal insert or a shop-fitted bladder, and there is no shortcut around taking the cover off. Classic seats with original pleated covers are the one case where a trim shop is the sensible call.
Before anything else, try the height and recline levers. Several owners on car forums found more relief there than in any lumbar product they fitted afterwards. Working through that escalation in order is the most reliable way to learn how to add lumbar support to an old car seat, because it matches the work to the actual fault in the seat rather than to a guess.