
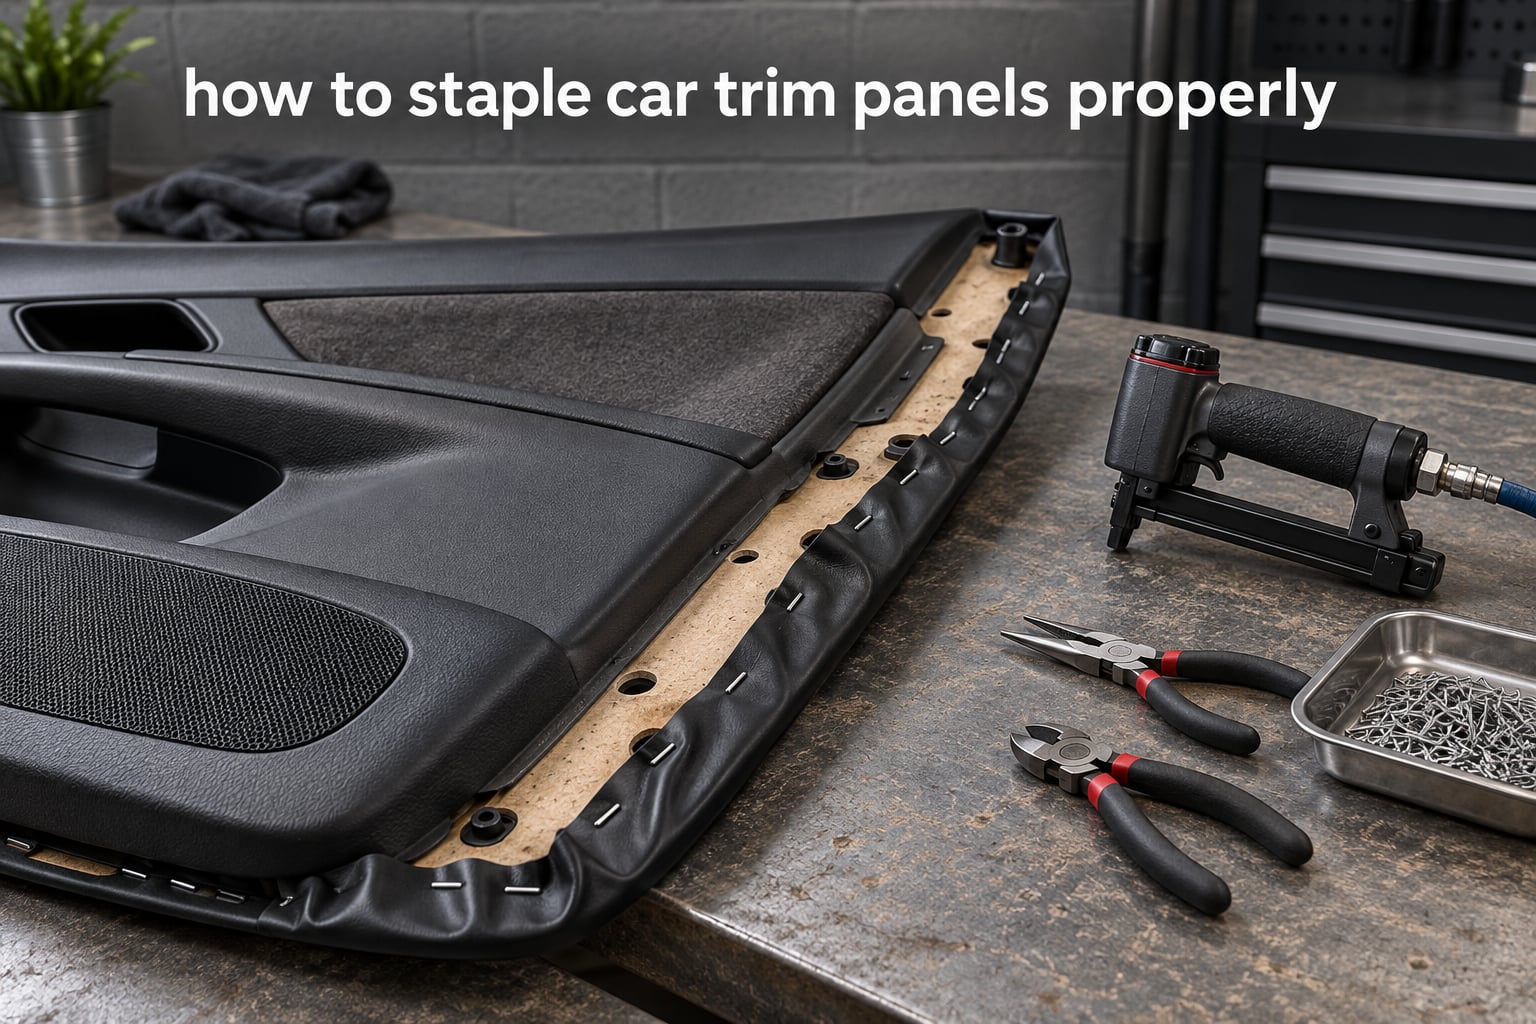
A properly stapled car trim panel is one where the material is held flat and even by flush stainless staples driven into the panel’s original factory holes, with every leg rolled closed tight on the back so nothing catches on a trim edge. The one non-negotiable rule is simple: the staple crown must sit flat against the material, and the legs must close. Everything else follows from that.
Getting this right is the difference between a door card that goes back on the car and sits flush, and one that rocks, puckers, and pushes trim out of alignment on the first drive. It is also the difference between a quick repair and a redo, because staples that drive straight through the back of a panel cannot be undone without opening it up.
Search results for this topic are mostly forum threads and video, which is exactly why a single written reference is useful. In our own shop work, the same handful of technical details decide whether the result looks factory-made or looks like a Saturday afternoon. We have pulled apart enough panels to know which details those are, and they are the ones we cover below.
What you will learn in this guide:
- The tool and staple specifications to have ready before you start
- A nine-step process you can repeat on any panel
- Staple orientation, spacing, and how to close legs properly
- Corner and curve technique that does not bunch the material
- What to do when your panel has no holes to staple into
- When staples are the wrong fastener, and what to use instead
Table of Contents
- What You’ll Need Before You Staple Anything
- How to Staple Car Trim Panels Properly, Step by Step
- Choosing the Right Staple for Car Trim
- Pneumatic vs Manual Stapler: Which One You Need
- Staple Orientation: Which Way Should the Crown Face?
- Stapling Corners and Curves Without Bunching
- Removing Old Staples and Reusing Factory Holes
- Panels With No Factory Staple Holes
- Door Cards vs Headliners vs Kick Panels: What Changes
- When Staples Are the Wrong Choice
- Common Mistakes and How to Fix Them
- Frequently Asked Questions
- Final Checklist Before You Reinstall the Panel
- Conclusion
What You’ll Need Before You Staple Anything
Most of the failures people report happen because a tool was missing, not because the technique was wrong. Set the tools out before the panel comes off the car, not after.
| Tool or material | Why you need it |
|---|---|
| Pneumatic upholstery stapler | Consistent drive depth and clean leg closure. The standard on door cards and headliners. |
| Handheld manual stapler | Fine for kick panels, small patches, and one-off trim pieces. Not for a full door card. |
| Needle nose pliers | Roll the staple legs down tight. Tapping them over with a hammer leaves them proud. |
| Side cutters or wire snips | Cut out old staples without tearing the surrounding material. |
| Nylon pry tool and trim tools | Lift retaining clips and panel edges without gouging the substrate. |
| Awl or small drill bit | Open up a torn pilot hole, or mark new hole positions on a panel that has none. |
| Utility knife and straightedge | Trim the material edge flush with the panel once stapling is done. |
| Marker or chalk | Mark the staple line before you start so spacing stays consistent. |
| Stainless steel staples | Resist corrosion inside a car where humidity and temperature swing constantly. |
| Work light and trim clip bag | Clip positions hide in shadow, and missing clips are the most common reassembly failure. |
Users on the AutoUpholstery forum repeatedly report that a handheld gun struggles to match the short staples used in factory panels. That matches our own experience, and it is the single biggest reason people end up with staples standing open instead of closed.
How to Staple Car Trim Panels Properly, Step by Step
This is the sequence we use on every panel that comes through the shop. Follow it in order and the tension stays even from the first staple to the last.
- Remove the panel without forcing it. Work a nylon pry tool around the perimeter, release every retaining clip, and disconnect any switches or wiring before the panel comes free.
- Strip the old material. Cut out existing staples with side cutters, peel away the old covering, and clean glue or padding residue off the substrate.
- Test for pilot holes. Most factory panels have a line of small holes around the flange. Check for them before deciding you need to drill.
- Mark your staple line. Use a marker and a straightedge so every staple lands in the same place. Even spacing is what keeps material flat.
- Set staple spacing. Work in roughly three-eighth inch to half inch increments along straight runs, and tighten that slightly through curves.
- Pre-tension before you staple. Pull the material taut and smooth from the centre outwards so it lies flat, then staple the centre first.
- Staple the centre out to the edges. Start at the middle of each straight run and alternate toward both ends, keeping the material flat under the crown.
- Close every leg with needle nose pliers. Roll each leg down tight against the back of the panel. No leg should stand up or point at you.
- Trim and reassemble. Cut the excess material flush with the panel edge, then refit the panel and confirm it sits flush before the clips go back on.
Two habits separate a clean staple line from a messy one. The first is centring out from the middle, which stops the material from shifting as you work. The second is closing every leg as you go, rather than at the end, because a leg that is still open will catch and drag the material out of position.
Choosing the Right Staple for Car Trim
Use stainless steel staples sized to the substrate, and reuse the factory holes wherever they still exist. Short-leg stainless staples on a thin panel, long-leg staples on a thick foam-backed insert.
| Leg length | Gauge | Typical use | Notes |
|---|---|---|---|
| 1/8 inch (3mm) | 20 gauge | Thin metal door cards, kick panels, original factory-style fixing | Matches most factory trim. Needs an air gun to close reliably. |
| 1/4 inch (6mm) | 18 gauge | Cardboard and fibreboard door cards, thick inserts | The most common choice for reupholstery work. |
| 5/16 inch (8mm) | 18 gauge | Foam-backed inserts, padded panels, thicker substrates | Check the back of the panel for hidden metal or wiring first. |
| 3/8 inch (10mm) | 16 gauge | Heavy panels, thick composite backing, heavy duty repair | Too long for most original panels. Will poke through thin backs. |
| 1/8 inch (3mm) | 22 gauge | Very thin vinyl on a thin panel where splitting is a risk | Lowest penetration. Often needs a manual gun. |
Three terms make the numbers easier to read. Crown is the flat span on top of the staple that presses against the material. Leg length is the penetration depth from crown to leg tip. Gauge is the wire thickness, and a lower gauge number means thicker wire and more holding power.
If you are unsure, take an old staple out of the panel to a hardware store and match it physically. Several people on the CorvetteForum threads describe exactly this step, and it settles the question faster than any chart. Our rule of thumb for a new replacement panel is 1/4 inch leg, 18 gauge, stainless, unless the panel tells us otherwise.
Pneumatic vs Manual Stapler: Which One You Need
Use a pneumatic stapler for full door cards, headliners, and dash panels. Use a manual gun for small trim pieces, patches, and tight-radius work. The reason is leg closure, not cost.
| Pneumatic stapler | Manual stapler | |
|---|---|---|
| Leg closure | Consistent, legs bend properly every time | Often leaves legs standing open or bent at an angle |
| Depth control | Adjustable air pressure, easy to dial in | Fixed by the tool, difficult to change |
| Control on curves | Superior, follow the line one staple at a time | Heavier, easier to overshoot a corner |
| Noise | Loud, needs hearing protection | Quiet |
| Portability | Needs a compressor or air tank | No power source |
| Best for | Door cards, headliners, dash panels, long runs | Kick panels, small repairs, filler pieces |
Air pressure is the adjustment most people miss. Too much pressure drives the staple through the back of the panel, which is the most common complaint we see on r/DIY, where users report over-penetration and staples that never bend down. Turning the regulator down one increment and testing on a scrap of the same material solves it more often than changing tools.
Staple Orientation: Which Way Should the Crown Face?
Crown down, on the face of the material you can see. The flat top of the staple presses the material into the panel, and the legs roll over on the back where nobody sees them.
Crown up leaves a raised ridge on the visible face, and on foam-backed vinyl or thick door panel inserts that ridge shows as a permanent line once the trim is back on. Crown down also spreads the holding force across the full width of the material, which is what stops puckering between staples.
To close the legs, grip each leg with needle nose pliers and roll it down tight against the panel. Do not tap them with a hammer and do not bend them outward. Rolling keeps the leg flat; striking leaves a proud crown that prevents the panel from sitting flush.
Stapling Corners and Curves Without Bunching
Bunching happens when you pull the material tight in two directions at once. Corners need a controlled sequence, not more tension. This is the technique that only exists on video today, written out step by step.
- Cut a relief notch. Make a small triangular cut in the material on the inside of the turn so excess material cannot gather.
- Pull the material into position first. Hold it with one hand and pre-tension it before the stapler goes anywhere near it.
- Place one staple at the corner. A single staple anchors the turn. This is the only staple in that area that should be driven straight.
- Fan the remainder. Work outwards from the anchor in both directions, with each staple angled slightly to follow the curve rather than fighting it.
- Trim the excess. Cut away any leftover material on the back side, out of sight, once the curve is held.
For internal ninety-degree corners, the anchor staple goes tight into the turn. For external corners, the relief notch is what prevents the material from splitting on the outside face. On a radius, increase staple density rather than pulling harder, because tension on a curve is what creates the puckering people fight with heat guns and steam.
Removing Old Staples and Reusing Factory Holes
Cutting old staples out and dropping new ones into the same holes is the most reliable repair path, because it preserves factory tension. Panels reuse cleanly when you follow this order.
- Snip each old staple in the middle with side cutters.
- Grip the cut end and straighten the leg so it releases from the material.
- Pull the remaining leg out along the same angle it went in.
- Clear the hole with an awl so a new staple slides in without fighting the material.
- Fill any torn hole with a thin dowel or a rolled piece of material before stapling into it.
Pulling staples straight out sideways is what rips the material. Cut them, straighten them, and withdraw them along their entry path. The old holes are your free guide for spacing, so use them as a template before drawing any new line.
Panels With No Factory Staple Holes
New aftermarket trim and many older cars arrive with no pilot holes at all. You have three options, in order of preference: drill pilot holes, fold tabs in plastic, or hand-bend wire staples.
- Drill pilot holes. Mark your staple line, then drill a small pilot hole for each position. A hole the same diameter as the staple leg gives the leg room to fold instead of splitting the substrate.
- Use an old staple as a template. If the car has any original staples left anywhere, take one to the hardware store to match gauge and leg length.
- Fold tabs in plastic panels. For wheel-arch liners and other moulded plastic, drill small slots and fold the material through, then flatten the tabs with a body hammer and dolly while the part is off the car.
- Hand-bend stainless wire. Cut short lengths of stainless wire, form a U, and drive the ends in with a small punch. It is slow, and it works.
Drilling is the cleanest answer, and it is what the original poster in the CorvetteForum thread ended up doing. The one caution is to check behind the panel for wiring, fuel lines, and window regulator cables before you drill. Marking from the front and probing from the back with a flashlight takes two minutes and prevents a very bad afternoon.
Door Cards vs Headliners vs Kick Panels: What Changes
The process is the same on every panel, but the staple size, the tension, and the hardware you must work around all change. Here is how the main panel types differ.
| Panel | Substrate | Typical staple | Watch for |
|---|---|---|---|
| Door card | Thin steel with fibreboard or foam insert | 1/4 inch, 18 gauge stainless | Window regulator, wiring loom, handle mechanism behind the panel |
| Headliner | Perforated fibreboard | 1/4 inch to 5/16 inch, 18 gauge | Dome light, hanger hooks, and seatbelts that pass through the board |
| Kick panel | Thin steel or plastic | 1/8 inch, 20 gauge | Thin substrate splits easily. Use less pressure and shorter staples. |
| Dash top | Foam-backed vinyl over a curved core | 1/4 inch, 18 gauge | Curved surface. Work in short sections and keep tension even. |
| Quarter trim | Steel or plastic | 1/4 inch, 18 gauge | Weather sealing along the flange must stay continuous |
| Fender well liner | Moulded plastic | Folded tabs or 1/8 inch, 22 gauge | Plastic splits. Drill pilot holes and fold instead of forcing. |
Headliners deserve their own note because so many questions on this topic are really headliner questions. The board is a woven structure that tears along the grain, so work in short sections and support the material underneath with a scrap of board while you staple. Never pull the material tight across a perforated board, since the perforations act like a hinge and will crease.
When Staples Are the Wrong Choice
Staples are a mechanical fixing, and some materials and positions do not accept a mechanical fixing. Use the table below to decide before you start.
| Situation | Use instead | Why |
|---|---|---|
| Chrome trim whiskers, narrow felt strips, new unrestored parts | Slow-hardening epoxy with clamps | Staples mar visible trim and show on the face |
| Full headliner replacement on a sealed board | Spray adhesive plus contact adhesive | Even coverage with no puncture points, and it is a reversible no-sew job |
| Lightweight felt on a flat panel that will be removed often | Contact cement or spray adhesive | Staples leave a permanent hole pattern in soft material |
| Panel where staples will not hold, or a repeated stress point | Short sheet metal screws with trim washers | Positive mechanical bite with a larger bearing surface |
| Moulded plastic liner with no back face | Folded tabs or plastic rivets | There is nothing behind the plastic for legs to bend against |
| Door card insert over a foam core | Staples, plus adhesive on the contact face | Staples give the edge tension, adhesive handles the broad surface |
The debate on the Trifive boards is worth reading in full, because both camps are partly right. Adhesive holds broad areas well and leaves no puncture marks, and it fails harder when it fails. Staples hold edges and tension superbly, and they stay reversible if you reuse the original holes. Many jobs in our shop use both, because they solve different problems.
Common Mistakes and How to Fix Them
Every complaint in the forums traces back to one of five causes. Find the symptom in the table, then work the cause rather than the symptom.
| Symptom | Cause | Fix |
|---|---|---|
| Staple legs go straight through the back of the panel | Over-penetration from too much air pressure or too long a staple | Drop the regulator pressure, step down to a shorter leg, test on a scrap offcut first |
| Staples stand up and never bend down | Manual gun, insufficient drive, or a hard substrate | Use an air gun, or close each leg by hand with needle nose pliers |
| Material bunches and puckers at corners | No relief cut and two-way tension | Cut a relief notch, anchor the corner with one staple, fan outwards from it |
| Backing tears behind each staple | Staples too long for foam-backed material, or driving through the foam layer | Use a shorter leg, support with a backing strip, and staple into the structural layer only |
| Panel will not sit flush on reassembly | Legs left proud, or material trimmed unevenly | Roll every leg down tight, then trim the material edge flush with the panel flange |
| Staples split a plastic panel | No pilot hole and too much pressure | Drill a pilot hole the same diameter as the staple leg, reduce pressure |
| Uneven tension along a straight run | Stapling in sequence instead of centring out | Remove and restaple from the centre outwards, alternating toward the ends |
One safety note that matters more than any other line in that table. An open staple leg pointed at the back of a door card will cut the leg or hand of whoever puts the trim back on, and a headliner staple pointing down is worse. Roll every leg. It takes a few seconds per staple and it removes the only genuinely dangerous failure mode in this job.
Frequently Asked Questions
Can you use a staple gun on plastic?
Yes, but only with a pilot hole and reduced pressure. Moulded plastic has no back face for the legs to bend against, so the legs drive straight through and the panel splits. Drill a hole the same diameter as the staple leg at every position, drop the air pressure on a pneumatic stapler, and use a short 1/8 inch leg. For wheel-arch liners and similar parts, drilling small slots and folding the material through with a body hammer and dolly works better than any staple.
Do staples face up or down?
Crown down, meaning the flat top of the staple presses against the material you can see. Crown up leaves a raised ridge across the visible face that shows as a permanent line once the trim is refitted, and it concentrates tension at the centre of the span instead of spreading it. Crown down also hides every leg on the back of the panel, which keeps the staple line flush and safe.
What type of staple is best for upholstery?
Stainless steel in the 18 gauge range, with a 1/4 inch (6mm) leg for door cards and headliners and a 1/8 inch (3mm) leg for thin metal panels and kick panels. Stainless resists the humidity and temperature swings inside a car that will corrode standard wire. Match the leg length to the substrate thickness rather than to the visible material, and if the panel has original staples, take one to the hardware store as a template.
Which corner should I staple first?
Anchor the corner with a single staple placed tight into the turn, then fan outwards from it in both directions. Before you staple, cut a small relief notch in the material on the inside of the corner so excess cannot gather, and pre-tension the material by hand. On an external corner the notch is what stops the visible face from splitting, so it matters more than most people expect.
How do I secure a headliner in a car?
Remove the edge trim, the dome light, any hanger hooks, and every seatbelt that passes through the headliner board. Fit the material to the board working in short sections from the front to the back, supporting the board underneath so the perforations do not crease. Secure it with a spray adhesive on the broad surface and staples around the perimeter, pulling only enough to remove sag rather than to make it drum tight.
What can I use instead of staples to hold a headliner up?
Spray adhesive is the standard alternative and works well on a broad, even surface. A contact cement gives stronger, faster initial bite but is harder to reposition once it grabs, so align before you spray. For a permanent fix, rivets or short sheet metal screws with trim washers hold where staples will not. Adhesive-only fixes are distrusted by enthusiasts, but on a headliner board that is sealed and flat, adhesive is genuinely the better tool.
Final Checklist Before You Reinstall the Panel
Run through this before the clips go back on. It takes a minute and it catches almost every problem while the panel is still on the bench.
- Every staple leg is rolled down tight, with nothing standing up on the back
- Staples sit flush, with no proud crowns keeping the panel off its flange
- Tension is even by hand, with no slack, no drum-tight areas, and no puckering
- Material is trimmed flush with the panel edge, with no loose tails behind the trim
- No staples are visible on the face of the panel
- All clips, wiring, and hardware are accounted for before reassembly
Fit the panel and press it at every edge before clicking anything into place. If any part of it rocks or needs forcing, the tension is not right yet, and it is far easier to fix now than with the trim back together.
Conclusion
Learning how to staple car trim panels properly comes down to three things: match the staple to the substrate, drive into the original factory holes with even spacing, and roll every leg closed tight so the panel sits flush. Get those right and the result is reversible, factory-looking, and holds tension for years. Skip the leg closure and you will be pulling the whole panel apart again.
Start on a panel that is already off the car, work from the centre outwards, and test your air pressure on an offcut before the first real staple goes in. As 2026 moves on, the same fundamentals keep working, because a door card does not change just because the model year does.