
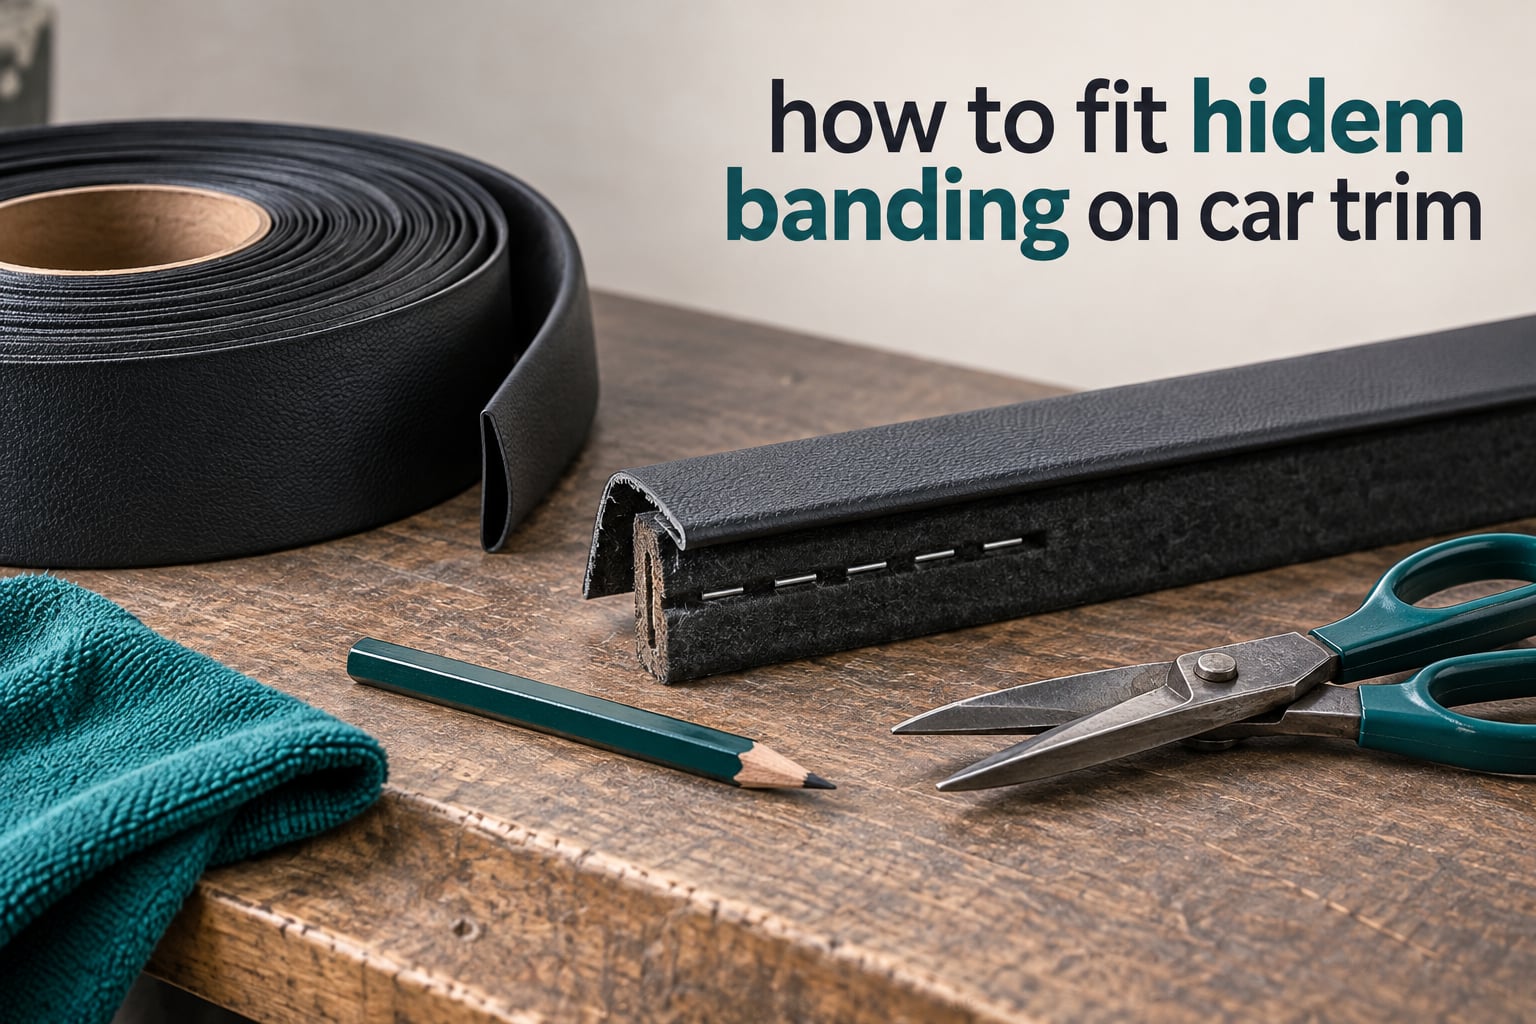
Learning how to fit hidem banding on car trim is the single finishing step that separates a home-fitted door card from a job that looks like it came out of a trim shop. Hidem banding is a folded strip of vinyl, leathercloth or mohair whose centre channel opens so you can staple through it, then closes again to bury every staple and tack head behind a clean, raised edge. Get it right and the staple line simply disappears. Get it wrong and you get ripples, gaps and visible metal. This guide walks through the whole method, from edge preparation to the final press, including the corners that most people find hardest.
We have pulled the practical detail out of restoration build logs and enthusiast threads, where this technique is discussed constantly but rarely written down as a proper method. The result is a sequence you can follow on your first attempt rather than a description of what the finished edge should look like. Whether you are trimming a headlining, a door card, a quarter panel or a seat base, the mechanics are the same.
Table of Contents
- What Hidem Banding Is (and What It Hides)
- Where Hidem Banding Is Used on a Car
- What You Need Before You Start
- How to Fit Hidem Banding on Car Trim: Step by Step
- Trimming Corners and Compound Curves
- Choosing the Right Banding Width and Material
- Matching Banding Colour to Your Trim
- How Much Hidem Banding Do I Need?
- Fitting Over a Staple Line vs. Sewn on Soft Tops
- Common Mistakes and How to Fix Them
- Repairing or Replacing Old Banding
- Frequently Asked Questions
- Should you glue or staple hidem banding?
- What width hidem banding should I use?
- How do you cut hidem banding neatly at a corner?
- Should you stretch the trim when fitting hidem banding?
- Can you reuse old hidem banding?
- Do you staple through both layers of the fold?
- Can hidem banding be painted?
- How long does fitted hidem banding last?
- Wrapping Up: A Clean Staple Line Every Time
What Hidem Banding Is (and What It Hides)
Hidem banding is a strip of automotive trim material folded down its centre with a channel between the two flanges. You open that fold, staple through the channel onto the raw edge of your trim, then press the fold back shut. The closed fold becomes a neat welt-like ridge that hides the staple or tack line completely.
That is the whole idea, and it is stated as plainly as anywhere in a 1952 Jowett Javelin build thread on the Retro Rides forum: the staple line gets covered with hidem banding, a strip that opens in the centre to allow it to be stapled on but then closes to hide the staple or tack.
So what exactly does it protect? Every hard trim panel is fixed to a board or a frame with staples or tacks, and a bare staple line looks unfinished. It also catches clothing, collects dirt, tears the covering material and lets moisture reach steel that will eventually rust. Banding hides the line, seals it, and gives the edge a factory-finished profile.
It is worth separating the terms, because customers search for all of them. A hidem strip, hidem welt, hidem gimp and hide edge are the same product sold under different names. Piping is a different item entirely: a rolled cord sewn into a seam, not a channel that staples to a raw edge. Hidem banding is the edge trim for a stapled line.
Where Hidem Banding Is Used on a Car
Anywhere a trim material is fixed to a rigid edge and that fixing needs concealing. The common jobs are:
- Headlining edges around the roof perimeter, sunroof surrounds and the lower screen rail
- Door cards, both the top rail and the lower kick panel edges
- Quarter trim and rear quarter panels on saloons and estates
- Seat bases, particularly around the front edge of a bench or split seat
- Bulkhead covers on open two-seaters
- Dashboard tops, a routine job on restored classics and especially on dashboards with curved ends
- Convertible rear quarters and soft-top edging
- Bonnet and boot linings where a flat panel meets a folded edge
The banded edge is always the edge the trim material turns under and staples onto, never the visible face. Getting that orientation right is what stops the banding appearing on the wrong side once the panel is back in the car.
What You Need Before You Start
Most of this is standard trim shop kit. The staple gun is the one tool that matters most, and the board stock is the one people forget until the trim is already on.
| Item | What it is for | Essential? |
|---|---|---|
| Trimming staple gun | Fixes the trim and the banding. Short, fine wire staples for light panels; heavier hog rings for thicker material | Essential |
| Trimming shears or knife | Cutting the banding square at mitres and trimming the ends | Essential |
| Trimming pencil or chalk | Marking the centre line and mitre points so the fold stays aligned | Essential |
| Millboard or trimboard | Stiff backing under the stapled edge so the banding has something firm to grip | Essential on most panels |
| Contact adhesive | Secures the closed fold on unglued banding, and tucks cut ends | Essential on unglued banding |
| Hardura | Firm, moisture-resistant edge backing that resists compression and gives a crisper edge | Optional, better edge |
| Skin wadding, dacron or foam | Soft build-up under the trim before the board, to restore the original crown | Optional, comfort and shape |
| Rubberised horsehair | Stable, grippy layer for bulkheads and covers laid over a curved frame | Optional, covers and bulkheads |
| Panel hammer and punch | Shaping trimboard and embossing detail where needed | Optional |
| Steamer or hot water and brush | Softening old covering material and relaxing tension in thick headlining | Optional, repairs |
On a bulkhead job, the layering is usually rubberised horsehair glued down first, then thin wadding over that, then the cover tacked on, as one Austin Seven restorer described it. That same order works on any cover that has to sit over a curve.
Safety first. The staple gun and the shears work in the same few centimetres, with your other hand holding the banding flat. Keep the gun’s nose away from the hand that is supporting the strip, brace the panel rather than your body, wear eye protection, and never staple towards yourself across your lap. A restorer on the Old Classic Car forum joked that the mark of a good trim job is no fingers stitched to the hidem banding, and that joke is a real warning.
How to Fit Hidem Banding on Car Trim: Step by Step
- Identify the edge you are banding. Confirm the line you are covering is the raw, stapled edge of the trim and not a visible face edge.
- Prepare the edge. The edge must be sound, firm and clean. Add millboard or trimboard where the panel flexes, and wadding or dacron where the original crown has gone.
- Measure and cut the banding. Cut it 10 to 15 per cent longer than the finished run, and add more for every mitred corner. Short runs are the single most common cause of a failed edge.
- Open the centre fold. Peel the two flanges apart along the length of the strip so the channel is fully exposed and the fold can sit flat against the edge.
- Start in the middle of the run. Align the raw bottom edge of the opened banding with the edge of the trim, and put in the first staple. Working from the centre is the sequence an MGAguru build diary describes, and it lets you set the position before either end can drag it out of line.
- Work outwards in both directions. Add staples every 25 to 30 mm, keeping even tension. Check constantly that the bottom edge is still square to the trim, not drifting.
- Stretch the trim slightly as you go. Take up the slack in the trim itself, not in the banding. A taut edge is flat; a slack edge is the thing that puckers later.
- Handle the corners as you reach them. Mitre or overlap-cut so the two runs meet cleanly, then staple through both layers at the corner and reinforce it with a second staple.
- Close the fold over the staple line. Press it down with your thumb along its length, then run a roller or the back of the shears over it to set a crisp edge. On unglued banding, run a thin bead of contact adhesive inside the fold first and let it tack up before closing.
- Trim the ends and inspect. Cut the ends square, tuck and secure any cut edge with adhesive, refit trim tabs and any capping trim, then run a thumbnail along the closed fold to find any staple head that has risen above the surface.
Work in one direction once you have started. Going back over finished sections to tighten them is how folds get crushed and how the closed flange creases.
Trimming Corners and Compound Curves
Restorers call this the fiddly bit, and it is where most jobs are judged. The rule is simple: never stretch banding round a corner. It does not have the give, so it either gaps or buckles.
- Lay the banding up to the corner and mark where the centre fold crosses it, using a trimming pencil or chalk.
- Make a mitre cut on that mark, cutting through the opened channel at roughly 45 degrees.
- Slide the two mitred ends together so they meet on the centre line of the corner and check the fold still lines up before stapling.
- Staple down both runs, adding an extra staple through both layers at the corner itself.
- Close the fold last, working the two mitred flanges into each other and pressing the corner flat with a roller.
For a compound curve, work in short sections rather than trying to bend one long length around the whole sweep. Open the fold a little wider than the flat run, staple more frequently than you think you need, and only close the fold once the section is fixed. Short staples at tight radii sit under the fold better than long ones because the crown of the staple stays low.
Choosing the Right Banding Width and Material
Width is not a preference. The closed fold has to cover your staple line completely with a little overlap, and if the edge is deeper than the fold, the staples show.
| Width | Coverage | Best used for | If you get it wrong |
|---|---|---|---|
| Half inch (13mm) | Narrow closed fold, roughly 6mm of visible welt | Thin edges: door card kick panels, flat board, simple headlining runs, screen rails | On a deep edge the fold cannot reach the staple line and heads remain visible |
| Five eighths inch (16mm) | Wider closed fold, roughly 8mm of visible welt | Deep or heavy edges: quarter trim, seat bases, thick board, convertible edging | On a thin edge the closed fold stands proud and looks bolted on |
As a rule, match the fold to the depth of the stapled edge, not to how the finished car originally looked. Over-width banding does not hide more staples, it just adds bulk. Under-width banding does not hide them at all.
| Material | Look and feel | Strength | Best for |
|---|---|---|---|
| Leathercloth covered | Woven cloth surface, matches period trim | Good, holds a crisp fold | Classic interiors, door cards, headlinings, period-correct work |
| Mohair | Fine pile, slightly hairy surface, premium appearance | Good | High-end and concours restorations, marque-specific colour matching |
| Marine vinyl | Vinyl surface, wipes clean, UV stable | Very good, weather resistant | Convertible tops, hoods, door cards in cars kept outside |
| Supreme or automotive-spec vinyl | Vinyl with a premium grain | Very good | Modern and modernised classics, sun-exposed panels |
| Pre-glued | Any of the above with a heat-activated or self-adhesive underside | Good if pressed properly | Curved sections and repairs where a staple line is awkward; saves time on the fold |
Sellers label good stock as automotive specification, meaning it is UV stable and suitable for road use rather than domestic furniture. For anything outdoors or under a car’s roof, that label is worth paying attention to.
Matching Banding Colour to Your Trim
Colour is the detail that gives a finished job away, because the banding sits against a large flat area of the same material. Buy against the trim itself rather than against a screen, and hold the strip next to the panel in the light the car will actually sit in. A taped-off sample strip left in the sun for a few days will tell you whether a batch fades differently from your covering material.
Suppliers publish colour charts, and on classic cars the palette is usually marque-specific: marques with formal interiors have their own named shades rather than a generic beige or grey. Where the original is gone, paint codes and supplier swatch grids are a reasonable starting point, but the physical sample is the only test that counts.
How Much Hidem Banding Do I Need?
Buy by the yard or the metre and add your 15 per cent allowance before you cut anything.
| Job | Typical run to band | Order with allowance |
|---|---|---|
| Door card | Top rail plus lower edge, around 2 to 2.5 m | 2.5 to 3 m |
| Headlining edge | Roof perimeter, roughly 3.5 to 4.5 m on a saloon | 4.5 to 5.5 m |
| Quarter trim panel | Perimeter of one panel, around 2 m | 2.5 m |
| Seat base front edge | One straight run, around 1.5 m | 2 m |
| Dashboard top | Curved front edge, around 1.5 to 2 m | 2 to 2.5 m |
| Bulkhead cover | Full width plus returns, around 2 m | 2.5 m |
Convertible top and hood work takes considerably more, because of the layered returns and the curve over the bow.
Fitting Over a Staple Line vs. Sewn on Soft Tops
Two methods exist, and mixing them up is how people end up with a top edge that looks wrong.
Stapled application is for hard trim and anything fixed to a board: door cards, headlinings, quarter panels, kick panels, dashboard tops. The channel opens, the staple goes through the channel into the edge, and the fold closes over it. This is the method set out in the steps above.
Sewn application is for soft-top and hood work, where the edging is bound on a sewing machine before the cover is fitted. On a 1930 Chrysler 66 Tourer restoration posted on the Antique Automobile Club of America forum, the hidem binding was made on the machine and only then fitted to the curtain compartment. Binding cut to shape and sewn around the returns stands up to being handled and flexing in a way that a stapled fold does not.
If the cover is already on the car and the edge is in tension, sewing a replacement binding on flat is usually faster than fighting a stapled fold into an awkward corner.
Common Mistakes and How to Fix Them
The run came out too short. Almost always the cause. There is no way to add length partway along, and pulling a short strip tight just puckers the trim. Lift the staples, cut a fresh length with 15 per cent extra, and start again.
The banding is pulling tight and wrinkling the trim. You are tensioning the banding instead of the trim. Ease the strip off, take the slack out of the covering material itself by stretching it as you re-fix, and only tension the banding enough to keep the bottom edge straight.
Staple heads are still visible. Three causes: the banding is too narrow for the depth of the edge, the staple crowns are sitting proud, or the fold was closed before the staples were fully seated. Use wider banding, drive every staple home with the gun’s second strike, and re-close the fold.
The corner gapped or the mitres did not meet. The cut was made without the fold opened, or the two ends were mitred against different reference lines. Open the fold fully, mark the centre line at the corner, cut once, and dry-fit both ends before stapling either.
The banding is peeling away at the closed fold. It was closed without adhesive, or the fold was pressed with grease on your fingers. Apply contact adhesive inside the fold, let it tack, then close and roll. Keep the glue off the visible face or you will have a permanent dark smear along the edge.
The finished edge looks fine but the line is not straight. You will need to lift it. A slight drift over a long run is far more visible than a slightly imperfect fold, so check the straightness with a straightedge before the final staples go in.
Repairing or Replacing Old Banding
Old banding usually fails at the staples, not at the fold, and the panel underneath is usually still fine.
- Remove retaining trim tabs and capping pieces first, so you can see the whole run.
- Open the fold along the length and lift the old strip off the edge, one staple at a time, cutting staples off rather than pulling them through the material.
- Keep the trim under tension as you work so the edge does not shrink or distort once it is released.
- Re-fix the trim itself if the old staple holes have torn, using a fresh line of staples and a little adhesive on the edge.
- Fit the new banding as in the step-by-step method above, working from the middle outwards.
Old vinyl is usually brittle and tears rather than peels. Work in short sections and do not try to save a strip that has already split, because the fold will never close evenly again.
Frequently Asked Questions
Should you glue or staple hidem banding?
Staple the opened channel to the trim edge, then use contact adhesive inside the fold before closing it. The staples give mechanical fixing and the adhesive holds the closed flange down. Pre-glued banding still benefits from a light bead of adhesive along the fold, particularly on compound curves.
What width hidem banding should I use?
Match the width to the depth of the stapled edge. Half inch (13mm) suits thin edges such as door card kick panels and flat board. Five eighths inch (16mm) suits deeper or heavier edges such as quarter trim, seat bases and convertible edging. Under-width banding cannot reach the staple line, so the heads stay visible.
How do you cut hidem banding neatly at a corner?
Open the centre fold, mark where it crosses the corner with a trimming pencil, and make a single 45 degree mitre through the opened channel. Slide the two mitred ends together, check the fold still aligns, then staple through both layers and close the fold last.
Should you stretch the trim when fitting hidem banding?
Stretch the trim, not the banding. Take the slack out of the covering material as you staple so the finished edge is taut, and only pull the banding hard enough to keep its bottom edge straight. Tensioning the banding itself puckers the trim underneath.
Can you reuse old hidem banding?
Only if it comes away intact. Old vinyl is usually brittle and splits at the fold, and a split strip will never close evenly. It is worth reusing the sound part of a failed run on a straight edge, but cut new banding for mitres and corners.
Do you staple through both layers of the fold?
No. Open the centre fold, staple through the channel onto the raw edge of the trim, then close the fold so the flange covers the staple heads. Stapling through both layers defeats the purpose and the heads will sit proud of the surface.
Can hidem banding be painted?
Rarely worth it. The fold is a closed edge and paint tends to bridge the seam and go shiny against the surrounding trim. If the colour is wrong, replace the strip rather than coating it, and match the replacement to a physical sample of the original material.
How long does fitted hidem banding last?
It lasts as long as the trim it is fixed to, provided the material is automotive specification and UV stable. Failure is nearly always mechanical: pulled staples from movement, a cracked fold from age, or adhesive letting go on a sun-exposed panel. Any of those can be repaired without replacing the trim.
Wrapping Up: A Clean Staple Line Every Time
Knowing how to fit hidem banding on car trim comes down to three habits: cut long, work from the middle outwards, and close the fold last. Back the edge with millboard, tension the trim rather than the strip, mitre corners without stretching them, and glue the fold shut. Follow those and the staple line disappears behind an edge that looks factory finished, whether you are trimming a headlining, a door card or a full interior.