
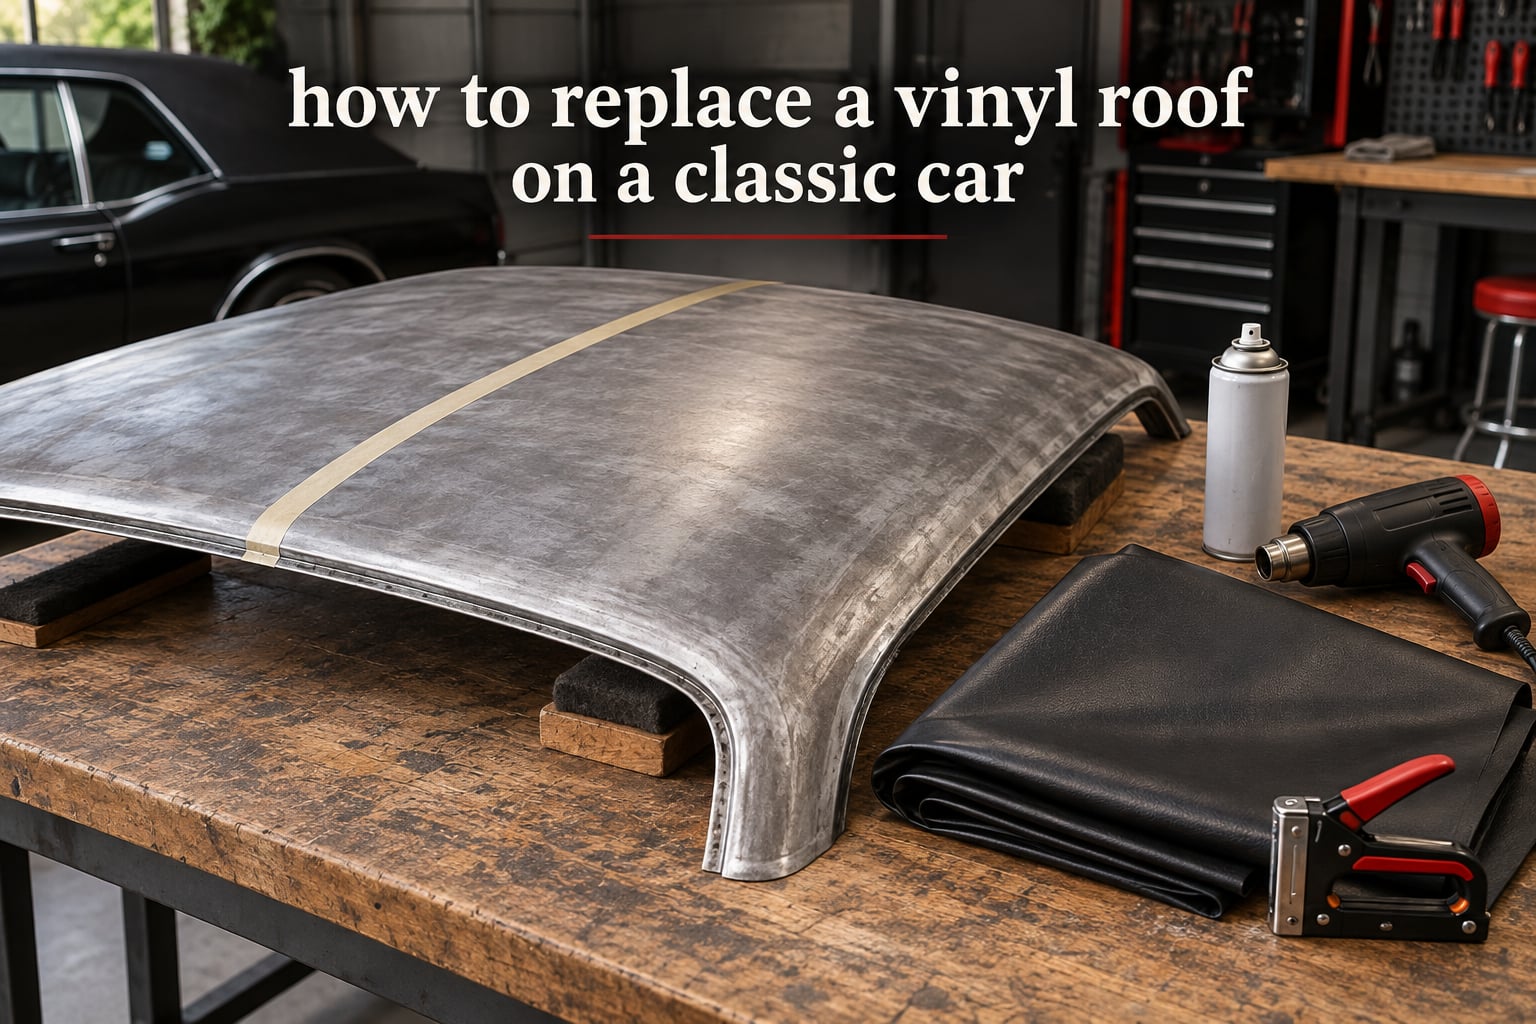
Replacing a vinyl roof on a classic car means stripping the old top and every trace of its adhesive, restoring the steel roof panel to bare sound metal, then bonding a new skin of automotive vinyl with spray contact cement. The vinyl is a non-structural covering held at the edges by removable window moldings and clips, and a closed-cell foam layer often sits between the vinyl and the metal. Most of the time in this job goes into preparation, not gluing.
That preparation step is the whole reason a top fails early. A vinyl roof traps moisture against the steel panel, and trapped moisture is the leading cause of rust-through on the cars that wore one from the factory. Once the vinyl is cracked, faded or torn, it also stops hiding anything: every dent, wave and misalignment in the bodywork telegraphs straight through it, because an original top has almost no padding behind it.
So replacing a vinyl top is a preservation decision before it is a cosmetic one. The car underneath has to be right, or the new top will sit on a buckled panel and telegraph every flaw you were hoping to cover. Our guide walks the whole job end to end, from identifying which top style you need through removal, adhesive stripping, panel repair, centering, gluing, trimming and finishing, plus what to do when the panel turns out to be worse than you expected.
Table of Contents
- What a Vinyl Roof on a Classic Car Actually Is
- Can You Replace a Vinyl Roof on a Classic Car Yourself?
- How Much Does a Vinyl Top Replacement Cost?
- Tools and Materials You Need
- How to Choose the Right Vinyl Top for Your Car
- How to Remove a Vinyl Car Roof
- How to Strip Old Adhesive and Prep the Roof Panel
- How to Dry-Fit and Center the New Vinyl Top
- How to Glue, Tension and Finish the Vinyl Top
- Vinyl Top Troubleshooting: Symptoms, Causes and Fixes
- Five Mistakes That Ruin a New Vinyl Top
- Key Takeaways
- Frequently Asked Questions
- How much does it cost to replace a vinyl top on a car?
- Can you replace a vinyl top on a car?
- How to remove a vinyl car roof?
- How to install a vinyl top on a car?
- Do I need to remove the windshield and rear glass to replace a vinyl top?
- How do I get old contact cement off a car roof?
- Why is my vinyl top lumpy after installation?
- How long does it take to replace a vinyl top?
- Should I repair a vinyl top or replace it?
- Conclusion
What a Vinyl Roof on a Classic Car Actually Is
A vinyl top is a decorative skin, not a structural roof. On a typical 1960s or 1970s American hardtop the layers stack from the sky down like this: the vinyl surface, a layer of stitching and backing, an Insolite closed-cell foam pad, the stamped steel roof panel, and finally the drip rail and rain channel that the window moldings clip into.
None of that except the steel panel carries any load. The foam exists to shape the crown of the roof and give the vinyl something to sit on, not to add structure. That closed-cell foam layer is the piece most guides skip, and it matters: foam that has absorbed moisture will print every water stain onto the back of the new vinyl, so replace it if it is spongy, stained or torn.
Three names get used interchangeably and cause most of the confusion at the parts counter. A hardtop is the body style with a fixed steel roof and no B-pillar or a removable one. A landau top is a vinyl treatment applied to part of that roof, often with styled seams and a padded landau section. A vinyl roof or carriage roof is the full coverage version that wraps from the windshield header to the rear deck.
Two more terms matter once you start working. The sail panel is the flat vertical area behind the door glass that the vinyl has to wrap and tension, and it is the hardest part of the job. The centerline is the imaginary line down the middle of the car that both seams must follow, marked on the roof with tape before fitting.
One myth to retire before you buy material: a vinyl top does not hide dents. Originals have minimal backing and no padding, so body defects that would disappear under a modern convertible top stand out in bold relief under vinyl. Straight metal first, vinyl second.
Can You Replace a Vinyl Roof on a Classic Car Yourself?
Yes, this is a realistic weekend project, but the honest version is that it is all-or-nothing. There is no way to test a top before you commit it, the adhesive grabs in seconds, and a mistake during the wrap usually means buying a second top. That is why even professional restoration shops routinely farm this job out to a dedicated upholstery shop.
The good news is where the difficulty sits. Owners who have done it consistently describe the installation itself as fairly easy, and the wrapping as the part that rewards patience. Nearly all of the difficulty lives in step two: getting the old adhesive off, finding the rust, and making the metal sound. Budget the majority of your time for preparation.
Before you start on a valued car, work through the whole procedure on a donor or befriend car if you can get one. It will teach you the feel of the vinyl, how much it stretches, and what dry-to-tack adhesive actually looks like. It is the cheapest insurance available.
How Much Does a Vinyl Top Replacement Cost?
Two things drive the cost of a vinyl top replacement, and only one of them is the material. The model-specific top is the larger line item by far, because it arrives pre-cut with the seams, sail panel openings and valance already shaped to your car. A generic roll of marine-grade vinyl costs far less per yard but hands you all the pattern-drafting work.
The second driver is what the panel underneath turns out to be. A roof with a surface rust patch and sound metal underneath is a preparation job. A roof that is rusted through at the drip rail, around the window openings or along the seam channels becomes a body and paint job, and that is where a modest-looking vinyl replacement turns into a serious restoration.
Time is the third number people forget. A professional crew quotes roughly four hours to install a top on an already-prepped panel, and closer to eight when removal and cleanup are included. A first-timer should assume the full day for removal and prep, and a second day for fitting and finishing. Add a full day more if the panel needs metal repair.
| Approach | Material | Time | Risk |
|---|---|---|---|
| Do it yourself | Top plus 3 to 4 cans of spray trim adhesive, razor blades, tucking tools, heat gun | Two full days for a first attempt, most of it prep | A misaligned or stretched top cannot be reused |
| Do it yourself on a donor car first | Same kit, plus a scrap top to ruin | One practice session, then the real job | Turns a coin-flip into a repeatable procedure |
| Automotive upholstery shop | Top plus professional consumables | About 4 hours installed, about 8 with removal | Lowest, and the shop absorbs the bad outcomes |
| Body shop with a paint correction first | Panel repair, primer, paint, then the top | Days to weeks depending on metal work | Necessary when the roof panel is rusted through |
Owners also ask whether to repair instead of replace. A small rip, a cracked seam or localized UV fading can be patched with a matching vinyl and a heat gun, and that is a legitimate option on a good top. Patch it when the foam underneath is sound and the surrounding vinyl has not gone brittle. Replace it when the whole surface has hardened and cracked, because a patch on brittle material fails right around the patch.
Tools and Materials You Need
The consumables list below follows what the major installation guides specify, and the adhesive quantity is the one people get wrong. Three to four cans of spray trim adhesive is a minimum for a full top, because you coat both the vinyl backing and the metal and you redo sections constantly. One can is never enough.
| Item | Quantity | Why you need it |
|---|---|---|
| Spray trim / contact adhesive | 3 to 4 cans minimum | Bonds the vinyl to the panel; applied to both surfaces |
| Razor blades | 1 pack, plus spares | Cutting the overhang and trimming to molding clips |
| Scissors | 1 pair | Trimming the top before it goes near adhesive |
| Flat-tip screwdriver | 1 or 2 | Prying molding clips without marking the glass |
| Phillips screwdriver | 1 | Interior trim and some clip styles |
| Tacking tool | 1 | Holding the top temporarily before adhesive sets |
| Tucking tool | 1 or 2 widths | Folding edges into the rain channel and under moldings |
| Heat gun | 1 | Activating the adhesive and stretching tight corners |
| Plastic sheeting or paper | Several large sheets | Protecting paint and glass, as forums recommend |
| Masking tape | 1 roll | Marking the centerline and the front and rear glass centers |
| Chalk or grease pencil | 1 | Marking clip positions and seam lines |
| Suction cups | 2 or 4 | Stretching and repositioning the top without puncturing it |
Add a plastic scraper for adhesive removal, nitrile gloves because the adhesive grabs skin, and a helper for the sail panels. Two people make the wrap realistic; one person makes it a fight. Keep a heat gun on hand but treat it as a tool rather than a cure-all, since too much heat thins and scorches the material.
How to Choose the Right Vinyl Top for Your Car
Ordering the wrong top is the most expensive mistake in this job, and it happens at the counter, not on the roof. Identify your configuration before you order anything, and match the seam style, pillar layout and grain to what came off the car.
| Top style | Coverage | Pillars | Notes |
|---|---|---|---|
| Full top | Windshield header to rear deck | B-pillar or pillarless | The most common vinyl roof treatment |
| Three-quarter top | Covers the sail panels and rear roof, leaves the front quarter panel body color | Varies by model | Popular on big-body coupes and formal rooflines |
| Half top | Front section of the roof only | Usually pillarless | Common on models with a formal rear section |
| Quarter top | Smallest covered section, typically a landau band across the front | Pillarless | Style detail more than weather protection |
Beyond coverage, four details decide whether a top looks factory-correct. Door count changes the cutting, because a four-door car has a B-pillar opening cut into the vinyl that a two-door does not. Seam style must match, either side-stitching running parallel to the drip rail or center-stitching dividing the roof down the middle. Valance presence depends on whether the original car had a padded rear section. And the grain pattern has to run in the same direction as the original, which is boar-type grain on most cars of the era.
Sourcing is simpler than it used to be. Model-specific tops are the default for cars from the mid-1960s through the early 1970s, and both Legendary Auto Interiors and TopsOnline carry them by year and model. For an obscure year or a car that was never offered with vinyl, you will be looking at a generic roll of vinyl of the correct thickness and grain.
When no model-specific top exists, you can draft your own pattern. Owners on the vintage Mustang and FirstGen M-Chrysler forums use a straightforward method: cover the car in sheeting, mark the center of the front glass, the center of the rear glass and the center of the roof with tape, drape the vinyl over the car, align the vinyl’s own center to that line, and tack it lightly before cutting. Allow extra material at every edge. A pattern cut with no margin has nowhere to hide a mistake.
Store an uninstalled top flat, not folded, and out of hot sunlight and heaters. The material is heat-sensitive and memory-creases will show up in the finished roof as wrinkles you cannot iron out.
How to Remove a Vinyl Car Roof
Removing a vinyl car roof is mostly disassembly, and the order matters more than the effort. Work from the inside out, save every clip, and do not cut anything you did not already expose.
- Protect the car. Lay plastic sheeting or paper over the body, glass and interior. Adhesive overspray and stray razor work find paint and upholstery otherwise.
- Trim the interior. Remove headliner, sun visors, the rear package tray trim and any interior molding that sits over the top of the glass. On a B-pillar car, note or photograph how the pillar trim goes back on.
- Mark and remove the moldings. Before pulling any window molding, run a grease pencil along its outer edge and mark the location of every clip. Mark each clip position as you go, not afterwards, because the clip spacing is not uniform and it is the only reference you will have when the new top is on.
- Pull the clips and take the moldings off. Work a flat screwdriver under the clip and lift gently. Keep every clip, every screw and every molding in a labelled bag, because replacements in original-style trim are hard to find and the originals fit exactly.
- Remove the glass only if the vinyl wraps it. On most cars the vinyl tucks under the molding rather than onto the glass, so the windshield and rear glass can stay in. You do need to pull glass when the vinyl runs across the opening, on some sail panel wraps, or when the rear glass is bonded to the top. This is the single most labor-intensive part of the job, so decide it deliberately.
- Peel the old top. Start at a corner and pull slowly with the grain rather than tearing upward. Heat with the gun in short passes to soften the adhesive, and keep a flat blade under the edge to stop the vinyl cutting into the panel as you go.
- Lift the foam and the drip rail seal if present. Note how the closed-cell foam was laid out before you remove it, because the new top needs the same flat, even bed.
Owners on the classic car forums describe this stage as the easy part, and it is. The part that follows decides whether the top you buy next survives.
How to Strip Old Adhesive and Prep the Roof Panel
Every trace of old contact cement has to come off. Leftover glue is the single most repeated complaint in owner forums, and the consequence is always the same: the new top bonds in patches, sits lumpy, and fails early. Work up this ladder in order and stop as soon as the panel is clean.
- Scrape. A plastic scraper and a razor blade at a shallow angle, pushing the blade away from your body.
- Solvent wipe. A dedicated plastic cleaner or the adhesive manufacturer’s recommended solvent, applied to a cloth rather than the panel. Test an area first.
- Second detail pass. A hard natural bristle brush and more solvent, worked into the graining and the seam channels where glue hides.
- Check with bare fingers. Run a finger across the metal. Any tackiness means it is not done. Bare, cool, slightly toothy metal is the target.
Now inspect the panel with a pick, not a glance. Rust concentrates in three places: along the drip rail, around the window openings, and in the seam channels where the old top trapped water. Tap the seam lines and the rail with a screwdriver and listen for dull metal. Any spot that is soft, blistered or perforated is a repair before it is anything else.
Cut the rust out back to solid metal, weld or patch in new steel, grind the repair flat, then prime and paint the panel. Painting the roof panel is worth doing even when there is no rust, because the top transmits color and a bare or mismatched panel shows through as a shadow. A uniform color underneath gives the finished top an even look.
Install the closed-cell foam last, only if the old one was compromised, and lay it flat with no gaps so the new top has an even bed. Skip it entirely if you are fitting a top that was made without a foam layer, because a top and a roof with mismatched build-up will not lie flat at the edges.
How to Dry-Fit and Center the New Vinyl Top
The dry fit decides whether the finished roof looks straight, and the centering method is the most-repeated piece of advice across the classic car forums. Mark the centerline before the top ever touches the panel.
- Mark the glass centers. Put a small tape tab on the exact horizontal center of the windshield and another on the rear glass.
- Mark the roof center. Measure between the two side window openings or between the drip rails at the header and the rear seam, find the midpoint, and run a tape line down the roof to join the two glass marks.
- Drape and align. Lay the top over the car, rotate it until its own center sits on the tape line, and tack it at the header with your tacking tool.
- Check the seams, not just the middle. Owners stress that the outer seams must be an equal distance from the roof edges on both sides. Centered but parallel-looking-wrong means it needs a small shift, and now is the only cheap time to shift it.
- Tack the front, then the rear, then the sail panels. Work in short sections with the tacking tool only. No adhesive yet. If the top cannot sit straight under tacks alone, the pattern or the panel is wrong and you find out for free.
Leave a consistent overhang of roughly two inches at the rear and side edges. That overhang is what you trim later, and it is what the molding and clips clamp over. Running short means there is nothing to tuck into the rain channel.
How to Glue, Tension and Finish the Vinyl Top
Installing a vinyl top comes down to four operations done in a fixed order: adhesive on both surfaces, a flash to a dry tack, positioning, then heat and tension while it bonds. Skipping the dry step is what ruins the alignment.
- Protect and clean again. Wipe the panel and the back of the vinyl with the same solvent used for prep. Dust and moisture are the enemies of a bond.
- Spray both surfaces. Coat the back of the top generously and the panel lightly, holding the can about 8 to 10 inches away and moving in one direction rather than spot-spraying. Overlap passes by about half the width.
- Flash it to a dry tack. Follow the can’s instructions for flash time. The surface must stop looking wet and go tacky without beading. This is not optional: a wet top grabs the instant it touches, and you lose the ability to center or slide it. If the can does not say how long to wait, work the bond in one small section at a time instead of spraying the whole roof.
- Lay it down and roll it. Start at the front header where your center mark is, lay the top onto the tack, and press it on with your palm or a roller from the center outward. Never scrub or drag a tacked surface, because dragging lifts the bond you just made.
- Work in sections with heat and tension. Keep the heat gun moving and keep light tension on the material. Heat activates the adhesive and lets the vinyl stretch rather than pucker. This is where the two-person sail panel wrap happens: one person heats the corner, the other pulls hard and steady, because the vinyl wants to pull back into a wrinkle and the only thing that beats it is tension held continuously. Professionals call it pulling like hell; just keep pulling until it lies flat.
- Trim to about two inches of overhang. Run a blade along the drip rail line, then relieve the lower sail panel at each molding clip hole so the clip can grab the edge. Cut relief notches rather than forcing vinyl into a clip.
- Tuck the edges. Use the tucking tool to fold the overhang into the rain channel all the way around, working in short pulls so the fold stays even.
- Reinstall the glass, moldings and trim. Refit the glass you removed, then clip the moldings back on using the clip marks you made at removal. A missing or misaligned clip shows as a lifted edge a few months later.
- Let it cure. Keep the car dry and out of direct sun if you can. Wrinkles that appear in the first days are normal as the material relaxes; they press out, but do not force them while the adhesive is still soft.
Safety note: Spray contact adhesive in a ventilated space away from sparks and flames, wear gloves, and follow the can’s stated flash time exactly. Adhesive overspray on paint and glass is permanent if you wait too long to wipe it, so keep a clean solvent cloth in your hand throughout.
Vinyl Top Troubleshooting: Symptoms, Causes and Fixes
None of the top-ranking pages for this query document what to do after a bad install, and it is the first thing owner forums ask. Use this table to diagnose what you are looking at before deciding whether the top is salvageable.
| Symptom | Likely cause | What to do |
|---|---|---|
| Lumpy or wavy surface | Old adhesive left on the panel, or a panel that is not flat | Strip the top again, clean the metal properly, and check the panel for a low spot |
| Seam off center or seams not parallel | Adhesive was still wet when the top was laid down | Peel back to the tacked line, clean both surfaces, and refit section by section |
| Bubbles or trapped air | Lay-down was too fast, or the vinyl was pulled taut before bonding | Slip a thin pick under the bubble and let air out, then roll the area from the center out |
| Wrinkles that appear days later | Over-stretching during the wrap, or the foam layer was not flat | Usually presses out on its own; reheat gently and roll only once the bond is fully cured |
| Adhesive bleeding through the vinyl | Too much adhesive, or a top too thin for the panel | Sand the area lightly and re-cover with a matching patch, or replace the top |
| Scorched or thinned vinyl | Heat gun held in one spot too long | Patch if the burn is small; replace the top if the grain is gone |
| Torn seam or ripped corner | Stretching cold vinyl instead of heating it first | Patch with matching vinyl from underneath, or replace the top |
| Edges lifting near the drip rail | Not enough material tucked into the rain channel, or a missing clip | Lift the edge, add adhesive, re-tuck and refit the clip |
Five Mistakes That Ruin a New Vinyl Top
- Leaving adhesive on the panel. The number one complaint in owner forums, and the number one reason a new top goes lumpy and fails in a season. Take an extra hour here.
- Bonding while the adhesive is wet. The top grabs before you can move it and your centerline marks become useless.
- Stretching cold material. Vinyl stretches under heat. Pulling it tight cold puts permanent stress into the panel and the seam.
- Holding the heat gun in one place. A few seconds of focused heat thins the vinyl and prints through as a shiny scar.
- Discarding the original moldings and clips. They are the only parts that fit exactly, and a missing clip leaves a lifted edge later.
Key Takeaways
- Preparation is the job. Removing all old adhesive and fixing the roof panel takes more time than the install and decides whether the top lasts.
- A vinyl top does not hide dents. Straight, sound metal has to come first.
- Mark a masking-tape centerline from the front glass center through the roof to the rear glass, and check seam distance from both edges rather than eyeballing the middle.
- Spray both surfaces, respect the flash time, and work in small sections if you are unsure of the timing.
- Save every clip and molding, and expect roughly four hours of install on a prepped panel or closer to eight with removal.
Frequently Asked Questions
How much does it cost to replace a vinyl top on a car?
Cost is driven by two things: the material and what the panel underneath needs. A model-specific top is the larger expense because it arrives pre-cut with factory seams, sail panel openings and valance, while a generic vinyl roll costs less per yard but adds all the pattern work. A roof with sound metal is a preparation job; a roof rusted through at the drip rail or window openings becomes a body and paint job before it is a vinyl job.
Can you replace a vinyl top on a car?
Yes. Most owners describe the install itself as fairly manageable, and the wrapping rewards patience rather than talent. The difficult part is preparation: stripping all old adhesive, finding rust and making the steel panel sound. The job is all-or-nothing, because a top that is stretched or misaligned cannot be reused, which is why so many shops hand it to a specialist.
How to remove a vinyl car roof?
Trim the interior and headliner first, then mark the position of every window molding clip with a grease pencil before pulling anything. Save the moldings, clips and screws in a bag. Peel the old vinyl slowly from a corner with the grain, using a flat blade under the edge and short passes of heat. Work up the side seam and rear last, and pull the glass only if the vinyl wraps the opening.
How to install a vinyl top on a car?
Clean the panel and the back of the new top, then spray contact adhesive on both surfaces. Flash the adhesive to a dry tack so it stops looking wet, lay the top down along your centerline starting at the header, and press it on from the center outward. Work in sections with a moving heat gun and steady tension, especially on the sail panels. Trim to about two inches of overhang, tuck the edges into the rain channel and refit the moldings.
Do I need to remove the windshield and rear glass to replace a vinyl top?
Usually not. On most cars the vinyl tucks under the window molding rather than onto the glass, so the windshield and rear glass can stay in place. Pull the glass when the vinyl runs across the opening, on certain sail panel wraps, or when the rear glass is bonded to the top. Since glass removal is the most labor-intensive part of the job, check your specific car before deciding.
How do I get old contact cement off a car roof?
Work up a ladder: scrape the bulk off with a plastic scraper and a razor blade held shallow, then wipe the panel with the adhesive manufacturer’s recommended solvent applied to a cloth, then detail the graining and seam channels with a hard brush and more solvent. Test a solvent on an area first. When a finger run across the metal feels cool and toothy with no tackiness, the panel is bare and ready.
Why is my vinyl top lumpy after installation?
Lumps almost always trace back to leftover old adhesive on the panel or to a roof panel that is not perfectly flat. Adhesive residue creates a thick patch so the vinyl bonds in some areas and floats in others. Peel the top back, strip the metal until it is bare and toothy, and check for a low spot in the steel before reinstalling.
How long does it take to replace a vinyl top?
A professional crew quotes roughly four hours to install a top on an already-prepped panel, and closer to eight when removal and cleanup are included. A first-timer should plan two full days, most of it spent stripping adhesive and inspecting for rust. Add a day if the roof panel needs metal repair and paint before the top goes on.
Should I repair a vinyl top or replace it?
A small rip, a cracked seam or local UV fading can be patched with matching vinyl and a heat gun, and that is a sensible option when the foam underneath is sound and the surrounding material has not gone brittle. Once the whole surface has hardened and cracked in a network of lines, a patch will only fail around its own edges, and replacement is the better call.
Conclusion
How to replace a vinyl roof on a classic car comes down to four phases done in order: strip the old top and every trace of adhesive, restore the steel panel to bare sound metal, dry-fit and center the new top against a tape centerline, then bond it with contact cement flashed to a dry tack and finish it with heat, tension and careful trimming. Every owner forum and shop technique we drew from points at the same thing: the install is the short part and the preparation decides whether the top lasts.
Before you start, cover the car, save every clip and molding, and inspect the drip rail and window openings for rust. If the metal is perforated, get the panel fixed and painted first, because a vinyl top will not hide what is underneath it. Then work through the procedure in order, and take your time on the prep.