
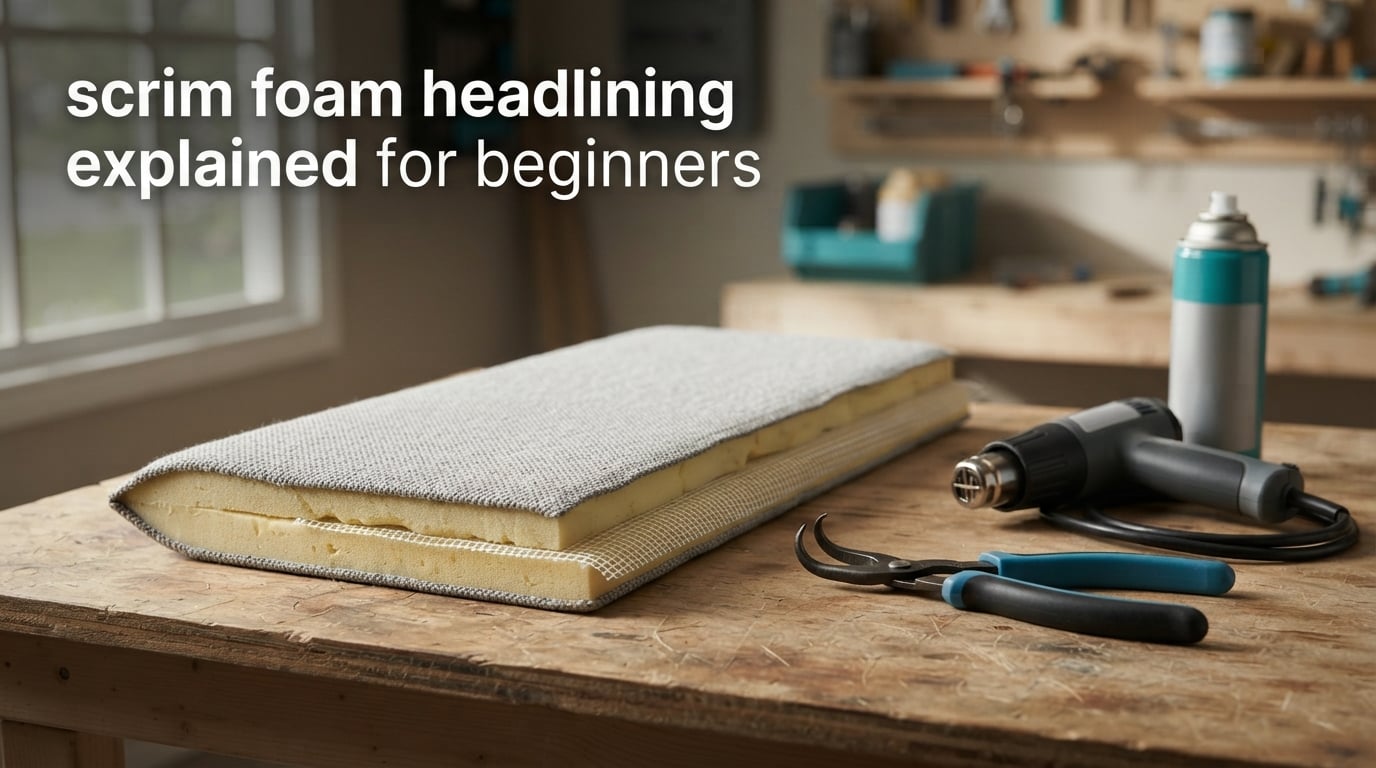
Scrim foam headlining is the layered material that forms the roof lining inside a car, and understanding it is the difference between a repair that looks factory-made and one that sags again within a year. If you are new to automotive trimming, the term gets thrown around a lot without much explanation, so this guide breaks down what the material is, how it is built, why it resists sagging, and how to fit it yourself. We have worked through the process on multiple restorations and pulled the details that beginners usually only learn the hard way.
By the end you will know which thickness to buy, which adhesive actually holds in a hot cabin, and which mistakes cause wrinkles and squeaks. Updated for 2026, this is written for first-timers rather than factory technicians.
Table of Contents
- What Is Scrim Foam Headlining?
- How Scrim Foam Headlining Is Made
- Key Properties: Stiffness, Sag Resistance and Thermal Stability
- Scrim Foam vs Non-Scrim Headliner Materials
- Thickness Guide: 1/4 Inch vs 3/8 Inch vs 1/2 Inch
- Tools and Materials You Need
- How to Install Scrim Foam Headlining: Step by Step
- Choosing the Right Adhesive for Scrim Foam Headlining
- Common Beginner Mistakes
- Repair or Replace: Fixing a Sagging Headliner
- Maintenance and Care Tips
- Frequently Asked Questions
- Conclusion
What Is Scrim Foam Headlining?
Scrim foam headlining is a fabric or vinyl cover bonded to a semi-rigid foam core that contains a thin reinforcement layer known as the scrim. That scrim is a coarse open weave, traditionally cotton cheesecloth and in modern builds a glass fiber mesh, and it sits either on the face of the foam or laminated inside it.
Think of the scrim as a skeleton. The foam gives the panel its thickness and soft touch, the scrim gives it stiffness, and the cover fabric is what you see and touch. Without the scrim, the foam behaves like a sponge blanket that drapes over the roof bows and pools in the corners.
Here is the quick definition to keep in mind: a semi-rigid foam core sandwiched around a woven scrim layer, laminated to a face fabric, forming a stiff but lightweight roof panel that holds its shape when the cabin gets hot.
The scrim is normally cheesecloth-backed on one side and plain on the other, and the most common automotive thickness is around 1/4 inch. Aesthetically it matters too, because a scrim-backed panel can be pulled taut between clips without every dent showing through, which is why restorers reach for it on classic cars where the factory roof is wide and flat.
Beyond the roof, the same material turns up in automotive interior trim work: parcel shelf padding, pillar trim, door panel lining, dash insulation, marine interiors, and commercial vehicle headliners. Every place that needs a thin, shaped, noise-damping panel uses the same construction.
How Scrim Foam Headlining Is Made
Understanding the manufacturing sequence explains why the finished panel behaves the way it does. A typical production run looks like this:
- The scrim and foam are combined, usually by adhesive film lamination or spray lamination, so the mesh is captured inside or on the face of the foam.
- The laminate is cut into a blank roughly the size of the roof panel.
- The blank is thermoformed, typically at 120-140 degrees C, so it curves to match the roof and headliner bow geometry.
- Openings for clips, wiring, and dome light components are cut.
- Attachment points are fitted, and the panel is trimmed to final outline.
You do not need any of that factory equipment for a DIY job. It is useful background because it explains the finished feel: the foam is not poured and trimmed, it is formed, and it holds a curve because the scrim resists bending beyond a limit.
One manufacturing detail surprises beginners. Because the scrim sits on one face, the panel has a built-in asymmetry. Heated by the sun, the two faces expand at different rates, and that mismatch can bend the panel. This is known as the bimetallic effect, and it is the single biggest reason an unbraced flat panel curls in a hot car.
Key Properties: Stiffness, Sag Resistance and Thermal Stability
Stiffness and rigidity. The scrim carries tension across the whole panel so the foam does not have to. That lets trimmers use a softer, lighter foam and still get a surface that resists puckering between attachment points.
Sag resistance. A cabin in summer sun can climb well past 80 degrees C, and an unstiffened foam backing droops. Sag resistant headlining holds its plane because the mesh keeps working while the foam softens slightly. This is the number one reason a sagging headliner stays sagging when you simply re-stretch the old cover: the problem is in the foam and the missing scrim, not the fabric.
Thermal stability. Quality headliner foam is specified for working temperatures up to around 90 degrees C. Lining up a car in summer with no shade will find that limit, and low-grade foam softens early, which shows up as permanent ripples.
Noise absorption. The foam core damps buzz, squeak and rattle, the BSR problems that plague a bare metal roof. Headliner engineers deal with the same issue from the factory side, placing foam and felt isolators at contact points such as door trim locators and instrument panel joints so metal-on-metal vibration never reaches the cabin.
Lightweight construction. Foam is light, so a full roof panel adds very little mass. Stiffness per gram is the whole engineering argument for the scrim.
Low fogging and colour fastness. Interior materials face strict limits on the VOC haze they emit, typically under 1 mg fogging, and colour fastness is graded on a scale where grade 4-5 is the target. Poor performers show a sticky film on the windows and a colour shift after a season.
UV and abrasion. Factory specifications call for hundreds of hours of xenon arc UV exposure and abrasion testing in the thousands of cycles, because the headliner is the surface most exposed to daylight through the glass.
Scrim Foam vs Non-Scrim Headliner Materials
This is the comparison most beginners never see written down, and it is usually the moment a project changes direction.
Scrim foam (semi-rigid, reinforced):
- Stiff, holds a curve, resists sag at high cabin temperatures.
- Tolerates tension between clips without the surface rippling.
- Heavier and more expensive than plain foam, and it can be harder to trim by hand.
- Best for roofs, parcel shelves, and any wide flat panel.
Non-scrim foam backed fabric:
- Lighter, cheaper, softer to handle and easy to fold around tight curves.
- Softer, warmer acoustic feel on smaller panels.
- Drifts and sags over time in a hot vehicle.
- Better suited to door cards, speaker boxes, parcel shelf kick panels, and small trim pieces.
Stretch cloth over foam:
- The softest option, easy to pull around compound curves.
- Wrinkles easily, stretches unevenly, and shows every dent in the board beneath.
- Poor choice for a large roof panel, fine for a kick panel or package tray.
The rule of thumb we use: if the panel is wider than roughly two feet, you want scrim. Below that, plain foam backed fabric is more forgiving and cheaper.
Thickness Guide: 1/4 Inch vs 3/8 Inch vs 1/2 Inch
Beginners ask how thick headliner fabric should be, and the honest answer is that the foam is usually not the layer you should be choosing freely. Match the original panel where you can.
1/4 inch (about 6 mm): The most common automotive thickness and the standard restoration choice. It fits most factory bow spacing, tucks into narrow roof rails, and weighs almost nothing. If a car came with a 1/4 inch panel, use 1/4 inch.
3/8 inch (about 9-10 mm): Useful when the original panel has been replaced with a thinner or damaged one and you need extra body to bridge gaps. It also works well as an added layer under a thin cover fabric to smooth out an uneven roof.
1/2 inch (about 12 mm): Thick and comfortable, used on parcel shelves, package trays, and classic interiors where extra padding is welcome. On a headliner it eats into headroom and rarely fits the factory roof rail, so measure before you commit.
5 mm (about 3/16 inch): Worth knowing about as an overlay. Trimmers report that adding a thin foam layer over a tired roof hides surface imperfections and gives a better substrate for the new cover, which is often a cheaper way to rescue a sound board than replacing it.
Density matters as much as thickness. Headliner foam is generally specified in the 25-35 kg/m3 range. Denser foam holds its shape better and resists the bimetallic curl, while softer foam is easier to conform but sags more readily.
Tools and Materials You Need
Gather everything before the car comes apart. Half a dismantled interior with no way to reattach anything is how weekend jobs become three-week jobs.
Materials:
- Scrim foam headlining material in the correct thickness and colour, cut slightly larger than the panel outline.
- Cover fabric or vinyl, bought about 10 percent larger than the finished panel all round.
- Contact or spray adhesive rated for automotive interior use.
- Cover clips, hog rings, or tacks in the original sizes.
- Polyester or cotton batting for the perimeter if the board needs evening out.
Tools:
- Curved hog ring pliers, which trimmers consistently prefer over straight pliers because the angle matches the roof curve.
- Staple gun, plus a small pry bar or clip removal tool for disassembly.
- Sharp shears or a trim knife for cutting the foam and cover.
- A heat gun or a way to warm the cover, since steam or a warm tumble dryer makes vinyl and cloth far more pliable.
- Utility blade, tape measure, and gloves.
A plastic bag is worth listing even though it is not a tool. Wrapping the board in plastic or applying a silicone spray lets the cover slide instead of catching, a trick that has rescued more stretched headliners than any adhesive choice.
How to Install Scrim Foam Headlining: Step by Step
Work slowly and in daylight if possible. Follow these steps in order.
Step 1: Photograph everything before disassembly. Take wide shots of the roof area, then close-ups of every clip position and each wire routing. When you are holding a bare roof in the dark, those photographs are the only map you have.
Step 2: Remove the old headliner carefully. Release the perimeter trim, then the clips and hog rings. If the panel is stuck down with old adhesive, slide a thin plastic card under the edge to cut the bond rather than tearing the board.
Step 3: Scrape the board back to sound material. Old adhesive residue is the single most common source of complaints, and it is genuinely hard to remove. Take it down to bare board or to a clean, sound layer before anything new goes down. Glue applied over residue is glue applied to a loose surface.
Step 4: Check the board for damage. Look for rust, delamination, and areas where the previous panel had sunk. Repair or fill these before the cover goes on, because every defect shows through the finished surface.
Step 5: Cut the new scrim foam to size. Cut the panel about 1 inch larger than the finished outline on every side. Sharp shears cut the foam cleanly; a dull blade crushes the scrim and leaves a ragged edge.
Step 6: Test fit the foam dry. Sit it on the board, line up the centre, and check the fit at the doors before you spray anything. Trim once and you avoid trimming twice.
Step 7: Warm the cover material. For vinyl, a heat gun on low, or steam, or a few minutes in a warm tumble dryer makes the material stretch instead of tearing. Cotton and foam-backed cloth benefit from the same treatment, more gently.
Step 8: Apply adhesive in thin, even passes. Coat the foam or the board, not both, unless the adhesive instructions say otherwise. Work in a ventilated space, away from flames, and let the adhesive reach the tacky stage the label describes before you commit.
Step 9: Slide the cover on through the door opening. Start with the cover inside the cabin, attach the centre clips first, then work outward toward both edges. Wrapping the board in plastic or using a light silicone spray lets the material glide rather than grab.
Step 10: Stretch evenly and reattach the perimeter. Pull alternating sides so tension stays balanced. Work the tacks or hog rings in gradually, checking for a diagonal wrinkle at each step. A wrinkle pulled tight at the front is a wrinkle you will chase for an hour.
Step 11: Fit the trim back over the edges. Refit the perimeter trim, the pillar covers, and the dome light surround. Leave the vehicle in the sun for a day or two and re-check any spot that looks slightly loose, as the material relaxes under its own tension.
Choosing the Right Adhesive for Scrim Foam Headlining
Adhesive choice decides how long the job lasts. The requirements are specific: strong enough to hold under a hot roof, flexible enough not to crack, and thin enough not to bleed through the cover fabric.
3M Super 77. It is a general-purpose spray adhesive and trimmers use it for lighter work, but it is not the default choice for a full headliner. It grabs quickly, which is helpful for test fitting and awkward shapes, and it can become brittle with age and heat. For a car that sits in summer sun, a higher-specification automotive adhesive is the safer bet.
3M Hi-Strength 90. This is a common recommendation among professional headliner shops for a reason. It has more body and heat tolerance than a light spray, which matters on a panel as large as a roof.
Dedicated headliner adhesive. Purpose-made automotive headliner adhesive is formulated for exactly this job and is the first choice when the manual specifies it. Follow the coverage rate on the can, not the slogan.
Contact cement and self-adhesive film. Contact cement gives an immediate grab and needs careful alignment, because once it touches you cannot slide the piece. Adhesive film lamination is the factory method and gives the most consistent bond, but it needs a roller and a controlled surface.
Hot melt and glue sticks. Handy for holding layers together during fitting, but they soften in a hot car. Never use them as the only bond on a roof panel.
Whatever you choose, apply thin coats. Heavy coats are what cause adhesive to push through seams and leave a stiff, unsightly edge, and they also make future repairs harder when the cover has to come off.
Common Beginner Mistakes
Most beginner mistakes are variations on the same three problems: tension, adhesive, and preparation.
- Stretching the cover unevenly. Attach the centre first and work outward, alternating sides. Pulling one edge tight before the other creates diagonal wrinkles that no amount of heat will fully remove.
- Skipping the board preparation. Old adhesive residue is difficult to remove and is the main cause of new covers peeling back down within months.
- Too much adhesive. Excess adhesive bleeds through seams, creates stiff patches and traps moisture against the foam.
- Too little adhesive, or drying coats too long. If the product instructions give a tack window, respect it. Going past it gives a dry bond that fails in summer heat.
- Wrong clip spacing. Clips set too far apart let the panel belly out between them and concentrate all the load on a few points.
- Mismatched thickness front to rear. If the original had different panel thicknesses, matching them keeps the trim lines and gaps consistent.
- Ignoring heat. A panel that looks fine in shade can curl on a hot day if the foam is soft. This is the bimetallic effect, and stiffening or bracing is the fix.
- Cutting corners on hog rings. Cheap straight pliers slip off the ring and leave a mark. Curved pliers make the job faster and cleaner.
Repair or Replace: Fixing a Sagging Headliner
Not every sagging roof needs new material, and deciding early saves a lot of work. Look at the foam, not the cover, because the cover is often perfectly good.
Signs the cover can stay: the foam has held its shape, only the cover has loosened from the clips or the board, and there is no hardening or crumbling in the foam. Re-stretching the existing cover and refitting the trim fixes this in an afternoon.
Signs you need new material: the foam has gone soft and the panel now bellies between the bows, the foam is crumbling or powdering, there is a water stain or a musty smell, or adhesive has failed along whole sections. Wrinkles that return within a day of tightening are a sign the scrim is gone.
The middle option. If the board is solid and only the foam is tired, cut away the old foam and glue a fresh scrim foam layer to the board, then stretch the original cover over it. Several trimmers do exactly this, and it saves both the cover and the money.
Maintenance and Care Tips
A well-fitted scrim foam headliner can last for decades. A few habits keep it that way.
- Keep interior cleaners off the cover fabric unless they are labelled for automotive upholstery, and test any product on a hidden area first.
- Do not use very hot water or steam to clean, because the heat can relax the adhesive and let the cover creep at the edges.
- Vacuum gently with a brush attachment, working from the centre out, rather than pushing a hard nozzle into the bows.
- Park in shade when you can. Persistent heat is the main driver of foam softening and panel curl.
- Fix small tears and loose edges early with a dab of the same adhesive you used originally, while the surface is clean.
Frequently Asked Questions
What are common headliner mistakes?
The most common mistakes are stretching the cover unevenly instead of working from the centre clips outward, applying adhesive over old residue left on the board, using too much adhesive, and letting adhesive dry past its tack window. Using the wrong clip spacing and cutting corners on cheap hog ring pliers also cause visible failures.
What is the best glue to use for a foam-backed headliner?
A dedicated automotive headliner adhesive is the safest choice, with 3M Hi-Strength 90 a common recommendation among professional trimmers because it holds better under sustained heat than a light spray. Contact cement works but demands careful alignment. Always apply thin coats and follow the tack window on the can.
How thick should headliner fabric be?
Most automotive scrim foam headlining is around 1/4 inch, and matching the original panel thickness is the best rule. 3/8 inch is useful for rebuilding a tired roof or adding a smoothing layer, while 1/2 inch suits parcel shelves and package trays rather than a headliner, where it eats headroom and rarely fits the roof rail.
Is 3M Super 77 good for headliners?
It is a useful general-purpose spray for test fitting and lighter trim work, but it is not the usual first choice for a full headliner. It grabs quickly and can become brittle with age and heat, so a higher-specification automotive adhesive is safer on a car that sits in summer sun.
Conclusion
Scrim foam headlining is simply a foam core stiffened by a woven layer, and that one idea explains almost everything about how it behaves. The scrim holds tension, keeps the panel flat in a hot cabin, damps buzz and squeak, and lets a lighter foam do work that would otherwise need a much heavier board.
For a first attempt, match the original thickness at around 1/4 inch, scrape the board back to clean material, work from the centre clips outward, and choose an adhesive built for heat. Those four decisions solve most of the problems beginners run into. Take your time with preparation, because that stage is where the repair either succeeds or fails.