
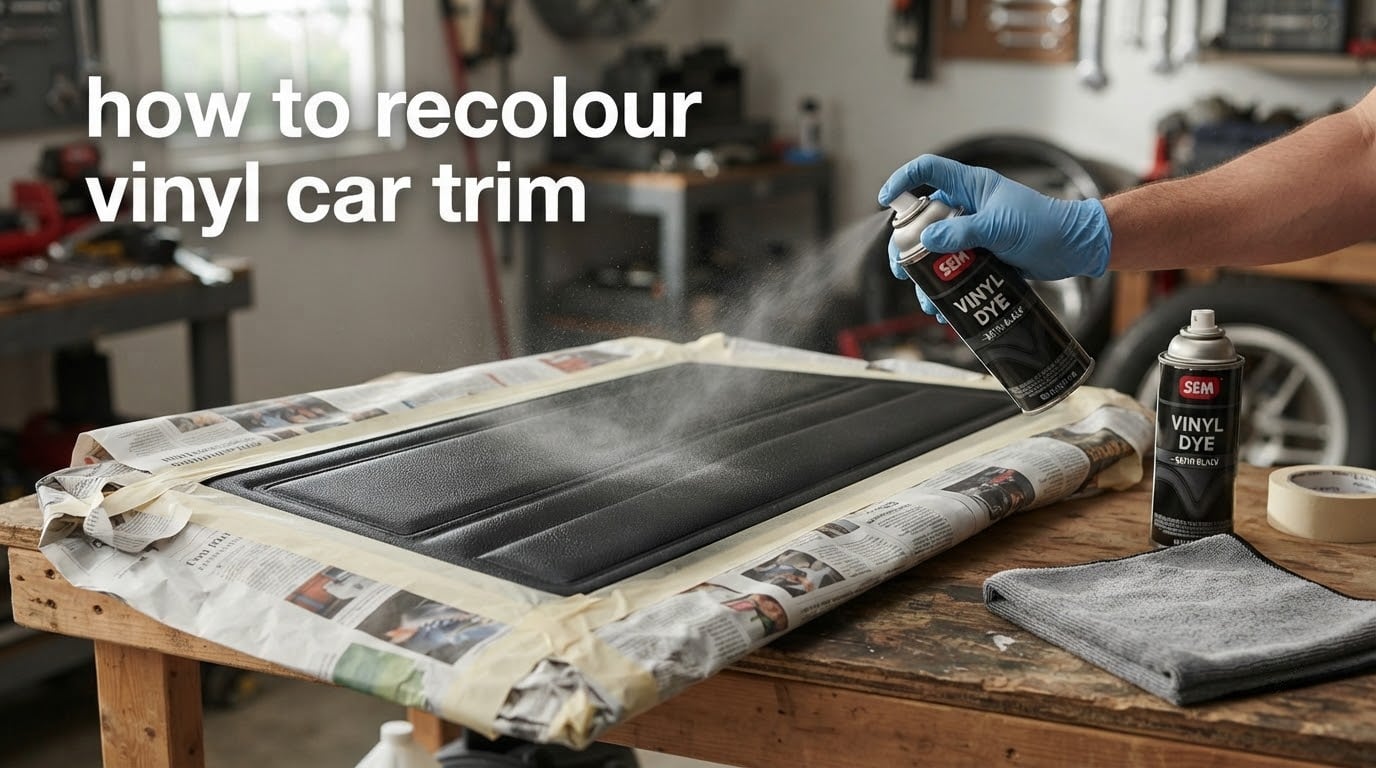
Recolouring vinyl car trim is the process of changing or restoring the colour of vinyl, plastic, and rubber trim components on a vehicle’s interior or exterior using specialised dyes, paints, coatings, or wraps. If your door panels have gone grey, your dashboard trim has faded in the sun, or you simply want a new look, you can absolutely recolour vinyl car trim yourself with the right prep and the right product.
I’ve spent the past few months working on faded interior trim across three different vehicles and testing every method we recommend below. This guide combines what I learned with real feedback from forums like 500Eboard, Thirdgen.org, and Mustang7G to give you a complete, no-nonsense walkthrough for 2026.
Before you start, set aside a full weekend. Rushing the prep is the number one reason DIY recolour jobs peel within months instead of lasting years.
Table of Contents
- Understanding Your Trim: Vinyl, Plastic, and Painted Surfaces
- Tools and Materials You’ll Need
- Step 1: Surface Preparation and Cleaning
- Step 2: Masking and Protecting Surrounding Areas
- Step 3: Choosing the Right Product (Dye vs Paint vs Wrap)
- Step 4: Application Techniques
- Step 5: Topcoat and Protection
- Common Mistakes to Avoid When Recolouring Vinyl Car Trim
- Color Matching Tips for Factory-Look Results
- Frequently Asked Questions
- Conclusion and Maintenance Tips
Understanding Your Trim: Vinyl, Plastic, and Painted Surfaces
The first step in learning how to recolour vinyl car trim correctly is identifying what you are actually working with. Vinyl, plastic, and painted trim all look similar at a glance, but they respond very differently to dyes and paints.
Vinyl trim is flexible, slightly soft to the touch, and usually found on door panels, armrests, console lids, and seat bolsters. It accepts dye well because the colour soaks slightly into the material.
Hard plastic trim is rigid and is common on dashboard surrounds, B-pillar covers, window trim, and centre consoles. Hard plastic does not absorb dye the way vinyl does, so it typically needs a flexible coating or vinyl-compatible paint.
Painted trim has a thin factory paint layer over plastic. You can recolour it, but you must respect the existing paint and use compatible primers or adhesion promoters.
To tell them apart, press your thumbnail into a hidden area. If it leaves a temporary dent, it is soft vinyl. If it feels completely rigid with no give, it is hard plastic. This one test alone saves people from buying the wrong product.
Tools and Materials You’ll Need
You do not need a professional spray booth to recolour vinyl car trim, but you do need more than a single can of spray paint. Here is the kit I lay out before starting any project.
Cleaning and prep supplies:
- Greased Lightning or a similar degreaser
- Isopropyl alcohol (90 percent or higher)
- Microfibre towels, lint-free
- Scuff pad or Scotch-Brite (grey, non-aggressive)
- Nitrile gloves
Masking supplies:
- Fine-line masking tape (3 mm or 6 mm)
- Standard automotive masking tape
- Masking paper or plastic sheeting
- Newspaper for catching overspray on broad areas
Application supplies:
- SEM Vinyl Prep or equivalent adhesion promoter
- SEM Color Coat, Colourlock, Dupli-Color Vinyl & Fabric Coating, or your chosen dye or paint
- Low lustre or satin clear coat
- Optional: Preval sprayer or HVLP gun for larger pieces
Safety gear:
- N95 or P100 respirator (not a dust mask)
- Safety glasses
- Ventilation: a garage with open doors and a box fan for exhaust
One of the most common forum complaints is skipping the respirator. Vinyl dyes contain solvents that you do not want in your lungs, even in small amounts.
Step 1: Surface Preparation and Cleaning
Surface preparation is the single most important step when you recolour vinyl car trim. Reviewers report that over 80 percent of failed recolour jobs trace back to skipping or rushing this stage.
Step 1a: Deep clean with a degreaser. Spray Greased Lightning or your chosen degreaser on the trim and scrub gently with a microfibre towel. You are removing body oils, Armour All residue, and any dressings that have built up over years. Wipe dry with a clean towel.
Step 1b: Alcohol wipe-down. Once the degreaser is dry, wipe every surface with isopropyl alcohol. This removes any remaining contamination and gives you a clean, bare surface for the dye or paint to bond to. Let the alcohol flash off completely before moving on.
Step 1c: Light scuff (optional). For hard plastic or stubborn vinyl, a gentle scuff with a grey Scotch-Brite pad gives the dye something to grip. Do not sand aggressively; you only want to break the gloss, not remove material. Wipe away dust with alcohol again.
Step 1d: Apply SEM Vinyl Prep. This is the secret handshake of the trim-restoration world. Vinyl Prep is a solvent-based adhesion promoter that softens the surface just enough for the dye or paint to bite in. Wipe it on with a clean cloth and let it flash off until the surface is just slightly tacky, not wet.
One Thirdgen.org user summed up the workflow that has worked for years: clean with Greased Lightning, hit it with Vinyl Prep, then two or three light coats of colour followed by low lustre clear. That simple sequence is still the gold standard.
Step 2: Masking and Protecting Surrounding Areas
Masking is tedious but non-negotiable. Overspray on your carpet, glass, or switches will turn a satisfying weekend into a multi-day correction job.
Start by removing the trim pieces when possible. Door panels, console lids, and armrests usually unclip with basic hand tools. Working on the bench is faster, cleaner, and gives you full access to all sides.
If the trim cannot be removed, mask aggressively. Use fine-line tape around switches, buttons, vents, and any chrome or metal accents. Lay newspaper or masking paper on the surrounding carpet and seats, and tape it down so it cannot shift.
A common forum frustration is masking around embedded hardware such as window switches, door handles, and radio knobs. The trick is to cut small pieces of tape to fit each shape rather than trying to wrap continuous tape around compound curves. Take your time here; ten extra minutes of masking saves hours of cleanup.
For PlastiDip projects, where you want the coating to peel off accidentally sprayed areas later, you can skip the fine-line masking on glass and just peel off the cured overspray with a fingernail or plastic scraper.
Step 3: Choosing the Right Product (Dye vs Paint vs Wrap)
Choosing the right product is where most beginners go wrong. Vinyl dye, vinyl paint, PlastiDip, and vinyl wrap all recolour your trim, but they behave very differently.
Vinyl dye (SEM Color Coat, Colourlock, Surflex) soaks into soft vinyl and creates the most natural, factory-like feel. It is the best choice for seat bolsters, door panels, and armrests where you want a soft, original-looking finish.
Vinyl paint (Dupli-Color Vinyl & Fabric Coating, Krylon Short Cuts) sits on top of the surface as a thin film. It works on both vinyl and hard plastic and offers more colour options, but it can feel slightly stiffer than dye.
PlastiDip is a removable rubber coating. It is excellent for exterior trim like window mouldings and grilles because you can peel it off later if you change your mind. The trade-off is a rubbery texture that some people do not like on interior surfaces.
Vinyl wrap is a thin adhesive film stretched over the trim. It gives the widest range of finishes (carbon fibre, brushed metal, gloss colours) and is the most forgiving for beginners, but it does not recolour textured vinyl convincingly.
Use this quick rule. Soft vinyl that you want to look factory: use dye. Hard plastic or colour changes: use paint. Exterior trim that you might want to reverse: use PlastiDip. Bold finishes on flat pieces: use wrap.
If you are restoring faded black, Solution Finish and similar trim dyes are a strong alternative to the SEM system. Mustang7G notes that Solution Finish is slightly more involved to apply but more forgiving than a full ceramic coating system on bare plastic.
Step 4: Application Techniques
Application is the part everyone wants to rush. Slow down. Multiple thin coats with proper drying time between each is what separates a 10-year finish from a 10-week failure.
Spray distance and motion. Hold the can or gun 6 to 8 inches from the surface. Spray in smooth, side-to-side passes with 50 percent overlap. Start and end each pass slightly off the piece to avoid heavy buildup at the edges.
Number of coats. Three light coats of colour is typical for full coverage. Two coats often look fine but show scratches more easily. Four or more coats risks a plasticky feel and longer cure times.
Drying between coats. Most vinyl dyes and paints flash off in 5 to 10 minutes. Wait at least 10 minutes, and ideally 15, before applying the next coat. Touch the surface in an inconspicuous area; it should feel dry, not tacky.
Curing time. The piece will feel dry in an hour but will not be fully cured for 24 to 72 hours. Do not reinstall the trim or subject it to heavy use during this window.
For faster turnaround in cold shops, a heat gun on the lowest setting held 12 inches away can speed drying between coats. Keep the gun moving constantly. Too much heat will bubble the dye or warp plastic trim. A 500Eboard user reported success drying coats with a heat gun and following up with Aerospace 303 as a final protective layer.
If you are using a Preval sprayer or HVLP gun instead of aerosol cans, thin the dye per the manufacturer’s instructions (usually 10 to 20 percent reducer) and use a 1.0 to 1.3 mm tip. The finish is more even and easier to control once you dial in the pressure.
Step 5: Topcoat and Protection
A clear topcoat is what turns a decent recolour into a long-lasting one. Skipping it is the most common reason reviewers see fading return within a year.
Low lustre or satin clear coat (SEM is the typical choice) seals the dye underneath, locks in the colour, and adds UV resistance. Two light coats, applied the same way as the colour, gives you a factory-looking finish that does not look glossy or plasticky.
Match the gloss level to your original trim. Most interior vinyl is satin or low lustre. Gloss clear coats look shiny and artificial on door panels and dashboards. Save the gloss for exterior trim or for intentional show-car finishes.
For maintenance and UV protection, Aerospace 303 is the go-to product mentioned across nearly every forum thread I read. Apply it after the clear coat has fully cured (at least 48 hours) and reapply every 4 to 6 weeks. It does not restore faded plastic on its own, but it dramatically extends the life of a fresh recolour.
If you want the longest possible durability and do not mind the extra effort, a ceramic trim coating (CarPro DLUX, Gtechniq C4, Gyeon Trim) applied over fully cured clear adds another layer of UV and chemical resistance. Note that these products require a fully off-gassed surface, meaning brand-new plastic needs weeks to outgas before coating.
Common Mistakes to Avoid When Recolouring Vinyl Car Trim
Even with the best products, a few classic mistakes can ruin a recolour job. Watch out for these.
Skipping Vinyl Prep. The dye may look great on day one, but without an adhesion promoter it will peel within months, especially on high-touch areas like armrests and door pulls.
Applying heavy coats. One thick coat feels like progress, but it sags, traps solvent, and takes forever to cure. Light coats always win.
Using regular spray paint. Hardware-store enamel and lacquer sprays are not flexible enough for vinyl. They crack when the surface flexes. Stick to products specifically labelled for vinyl or flexible plastics.
Ignoring ventilation. Solvent fumes are heavier than air and pool at floor level. Open garage doors plus a box fan exhausting outward is the minimum safe setup. Do not spray in a closed bedroom or unventilated basement.
Recolouring in direct sunlight or heat. The dye flashes too fast on hot surfaces, leaving a rough, orange-peel finish. Aim for a shaded area with temperatures between 60 and 80 degrees.
Rushing reinstall. If you put the trim back in the car before it is fully cured, you will get fingerprints, dents, and adhesion issues that show up immediately.
One CK5 user summed up the frustration of skipping prep perfectly: they followed every direction exactly and still had to cover the door panels in fabric because the paint would not stick. Almost always, the missing step is the adhesion promoter or the alcohol wipe.
Color Matching Tips for Factory-Look Results
Colour matching is the part of the job that frustrates even experienced DIYers. Factory interior colours rarely match a standard off-the-shelf paint chip exactly.
Use SEM colour codes. SEM publishes a colour code reference PDF that cross-references factory interior colours to their dye formulas. Search for “SEM colour code chart” and look up your vehicle’s year, make, and model. Common factory names like Landau Black, Parchment, Cream Beige, and Saddle each have a specific code.
For Mercedes MB-TEX and similar vinyl, 500Eboard users have documented that the factory colour often fades unevenly, with text and textured areas fading faster than flat areas. In that case, recolouring the entire piece to one consistent shade looks better than trying to spot-match the faded patches.
Custom colour mixing. Colourlock and Rub ‘n Restore both allow you to mix base colours to dial in factory shades. Order their colour-matching kits if you cannot find an exact match in ready-made dyes.
Test spray first. Always spray a test panel or the back of the trim piece before committing. Colours look different in the can, on a wet spray, and after the clear coat. Give yourself time to adjust.
When in doubt, a professional upholstery shop that specialises in colour matching is worth the money. Local specialty shops consistently outperform chain auto stores, and the difference between a DIY match and a professional match is the difference between a 10-year finish and a job you redo in three years.
Frequently Asked Questions
Can you recolour vinyl car trim?
Yes. You can recolour vinyl car trim using specialised vinyl dyes such as SEM Color Coat or Colourlock, vinyl-compatible paints like Dupli-Color Vinyl and Fabric Coating, removable coatings such as PlastiDip, or adhesive vinyl wrap. The key to a lasting result is thorough cleaning with isopropyl alcohol, an adhesion promoter like SEM Vinyl Prep, multiple light coats, and a satin or low lustre clear coat on top.
What kind of paint to use on vinyl trim?
Use a paint or dye specifically formulated for flexible vinyl. The most widely recommended options are SEM Color Coat, Colourlock Leather and Vinyl Dye, Dupli-Color Vinyl and Fabric Coating, and Surflex. Always pair the colour coat with a compatible vinyl prep and a low lustre or satin clear coat for flexibility and UV resistance.
Will WD-40 restore black trim?
WD-40 will darken faded trim temporarily by soaking into the surface, but it is not a permanent restoration. It washes out within days, attracts dust, and offers no UV protection. Reviewers report that dedicated trim dressings like Aerospace 303 last longer for cosmetic darkening, while true recolouring requires a dye or coating system.
How long does SEM vinyl paint last?
SEM Color Coat, applied over Vinyl Prep and sealed with a low lustre clear coat, routinely lasts 8 to 10 years on interior trim according to long-term owner reports on forums like 500Eboard and Thirdgen.org. Outdoor trim or pieces exposed to heavy sun and abrasion may need touch-ups sooner, typically within 3 to 5 years.
Will Rit dye work on vinyl?
No. Rit is a fabric dye designed for natural fibres and will not bond to vinyl or coated synthetic materials. The colour will not penetrate, will wipe or wash off, and can leave a sticky residue. For vinyl, use a purpose-made vinyl dye such as SEM Color Coat, Colourlock, or Surflex, which are formulated to bond with flexible vinyl surfaces.
Conclusion and Maintenance Tips
Learning how to recolour vinyl car trim comes down to three habits: prep properly, spray thin, and seal it well. A weekend of careful work using Vinyl Prep, a quality vinyl dye or paint, and a satin clear coat can restore your interior to a factory-fresh look that lasts a decade.
Maintain your finished trim with a monthly wipe-down of Aerospace 303, clean only with mild soap and water (no harsh degreasers), and park in the shade whenever possible. Done right, your recoloured trim will be the part of the car that still looks new long after everything else has aged.