
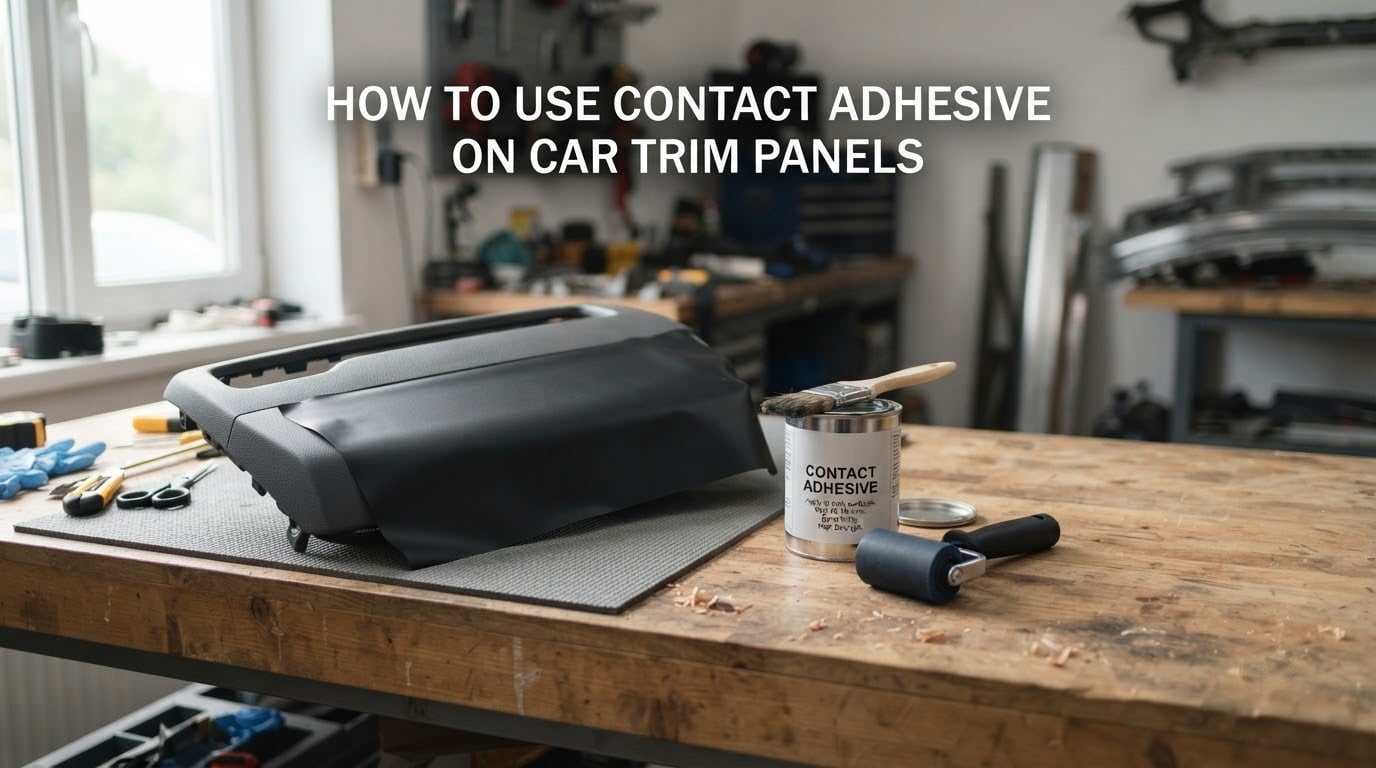
Contact adhesive is the single most reliable glue for bonding automotive trim, vinyl, and headliner fabric because it grabs instantly on contact and resists the heat and vibration inside a car. The short version: clean both surfaces, scuff them lightly, apply two thin coats of contact cement to each part, wait until the adhesive turns tacky (about 5 to 15 minutes depending on temperature and humidity), then press the trim panel in place with firm, even pressure. Done right, the bond survives summer dashboards at 150 degrees F, winter cold snaps, and daily door slams for years.
I have rebuilt dozens of dashboards, door panels, and headliners using contact adhesive, and the same handful of mistakes causes almost every failure I see: rushed prep, skipping the second coat, joining the parts while the glue is still wet, or bonding in a cold garage. This guide walks you through the entire workflow that our team uses at the shop, plus the troubleshooting steps that turn a peeling panel into a permanent fix. Updated for 2026, everything below reflects what is actually working on real cars this year.
Table of Contents
- What Is Contact Adhesive and Why Use It on Car Trim Panels
- Tools, Materials, and Safety Gear Checklist
- How to Prep Trim Panels and Mounting Surfaces
- Choosing the Right Contact Adhesive for Trim Panels
- Temperature, Humidity, and Ventilation Requirements
- Step-by-Step: Applying Contact Adhesive to Car Trim Panels
- Flash-Off, Tack Time, and Bonding Window Explained
- Pressure, Roller Technique, and Trimming After Bonding
- Troubleshooting Common Contact Adhesive Failures
- Repairing a Failed Bond Without Removing the Trim
- Low-VOC and Sustainable Adhesive Options
- Frequently Asked Questions
- What is the best adhesive for attaching car trim?
- What is the best way to apply contact adhesive?
- How long does it take for contact adhesive to dry completely?
- How do you fix trim that is falling off a car?
- Can you use contact adhesive on plastic car trim?
- What temperature can you apply contact adhesive?
- Final Verdict
What Is Contact Adhesive and Why Use It on Car Trim Panels
Contact adhesive (often called contact cement) is a fast-tack glue that bonds two surfaces the moment they touch, without needing clamps, heat, or long cure times. It is sold as a solvent-based liquid, a water-based emulsion, a spray aerosol, or a pressure-sensitive film, and it is the industry standard for attaching vinyl, leather, foam-backed fabric, and carpet to dashboards, door panels, consoles, and headliners.
The chemistry is straightforward. The adhesive is loaded with either solvent or water that keeps it liquid in the can. Once you spread it on a surface, those carriers evaporate (this is called flash-off), leaving behind a layer of rubbery glue that feels dry to a fingertip but is still aggressively tacky. When you press two flashed-off, tacky surfaces together, the two glue films grab each other instantly and create an immediate mechanical bond. Full strength usually develops over 24 to 72 hours, but the green strength is strong enough to hold trim in place the moment you release pressure.
Why use it on car trim panels instead of regular glue or epoxy? Three reasons matter for auto interiors:
- It grabs instantly, so a curved vinyl piece does not slide off a vertical dash while you hunt for clamps.
- It stays flexible, so it survives the constant flex and heat cycles inside a parked car.
- It bonds dissimilar materials (vinyl to plastic, foam to metal, fabric to ABS) without brittle failures.
Epoxy and hot-melt glue are popular on forums, but they are poor choices here. Epoxy cures too rigid and cracks when the dash flexes in the sun. Hot-melt softens again on hot summer days and lets the panel peel. Contact adhesive is built for this exact use case.
Tools, Materials, and Safety Gear Checklist
Before you open the can, lay out everything you need on a clean bench. The list below is what our team pulls for every trim job, large or small.
- Contact adhesive (brush-on, spray, or pre-taped system appropriate for your substrate)
- Stiff natural-bristle brush (for brush-on contact cement) or a low-pressure spray gun with a 1.8 to 2.5 mm tip
- J-roller or hard rubber laminating roller (a 3 inch wide roller handles most curves)
- Pre-buffing pads or 320 to 400 grit scuff pads for plastic, 80 to 120 grit for metal
- Isopropyl alcohol (90% or higher) and lint-free microfiber towels
- Grease and wax remover, plus a plastic-safe cleaner for the substrate
- Masking tape, painter’s tape, and a few sheets of kraft paper or wax paper for test tacks
- Sharp trimming knife with fresh hook blades and a steel ruler
- Seam roller or edge tool for finishing
- Adhesive promoter (3M 94 or equivalent) for hard plastics and painted metal
Safety gear matters even more than the tools. Contact adhesive solvents are aggressive, so use:
- A NIOSH-approved organic vapor respirator (not a dust mask)
- Safety glasses and nitrile gloves
- A spray booth, garage with the door open, or an outdoor work area with cross-ventilation
- A spark-free workspace; many solvent adhesives are flammable until cured
If you only buy one extra item, buy the respirator. Solvent contact cement will give you a headache in minutes and long-term exposure is not something you want to test.
How to Prep Trim Panels and Mounting Surfaces
Surface preparation is where most trim jobs succeed or fail. A clean, slightly rough surface gives the contact cement something to grab; a slick, oily, or dusty surface guarantees a peel within weeks.
Step 1: Remove the trim panel from the car whenever you can. Working in your hands is faster than fighting gravity on a dash, and you can lay everything flat for even coats.
Step 2: Degrease both the trim and the mounting surface with a plastic-safe cleaner or isopropyl alcohol. Wipe in one direction with a clean microfiber towel. Repeat until the towel comes away clean. Skip this step and the adhesive bonds to the wax or oil film instead of the plastic underneath.
Step 3: Scuff the bonding face lightly. Use a 320 to 400 grit scuff pad on plastic and ABS, or 80 to 120 grit on bare metal. The goal is a uniform matte finish, not deep scratches. Scuffing multiplies the surface area and creates a mechanical tooth for the contact cement.
Step 4: Wipe again with alcohol to remove scuff dust. Dust left behind acts like ball bearings under the glue.
Step 5: Mask off any area you do not want adhesive on. Painter’s tape along edges saves cleanup time later, especially on visible trim.
Step 6: For hard-to-bond plastics (polypropylene, polyethylene, TPO) and any powder-coated or painted metal, wipe on a thin coat of adhesive promoter and let it dry fully before you open the contact cement. The promoter acts as a chemical bridge between the slick substrate and the rubber-based adhesive.
Two-person prep is faster on big pieces like full dashboards. One person scuffs and cleans while the other lays out tape and tools. If you are working solo, a rolling workbench or yoga mat on the bench keeps parts from sliding.
Choosing the Right Contact Adhesive for Trim Panels
Not all contact adhesives behave the same way. Pick the wrong chemistry and you will be re-doing the job by next summer.
For vinyl-wrapped dash pads, door panels, and consoles, a high-temperature brush-on contact cement is the safest pick. Look for labels that say “high heat,” “automotive grade,” or “headliner safe.” Solvent-based formulas (neoprene or nitrile rubber based) handle dash temperatures best, but they smell strong and require real ventilation.
For headliner fabric and foam-backed material, choose a spray contact adhesive designed for porous substrates. Spray cans like 3M 08090 or 3M High Strength 90 give a wider, thinner coat than a brush, which is what you want to avoid stiffening the foam.
For carpet and floor mats, a thick, gap-filling brush-on cement works best because carpet backing is rough and uneven.
For weatherstrip and thin rubber seals, a fast-tack contact adhesive or even a high-quality pre-taped system from brands like All-Fit Automotive is faster than brushing and gives a cleaner edge.
Here is a quick brand reference our shop uses:
- DAP Weldwood Landau Top and Trim: a thick neoprene brush-on cement that has been the upholstery shop standard for decades. Strong smell, very strong bond.
- 3M Headliner and Fabric Adhesive: a spray that lays down a uniform mist without stiffening foam. Our pick for headliners.
- 3M High Strength 90: a versatile spray contact adhesive for trim, foam, and lightweight panels.
- Evo-Stik Impact Adhesive: a UK favorite for smooth vinyl on dashboards and consoles.
- Loctite Brush-On Contact Adhesive: a lower-odor option for small interior repairs.
Whenever you can, test the adhesive on a scrap piece of the same substrate before committing to the real panel. A 15-minute test can save a 4-hour rework.
Temperature, Humidity, and Ventilation Requirements
Contact adhesive is a chemistry experiment that runs on shop conditions. Get the temperature or humidity wrong and the bond never reaches full strength.
The sweet spot is 65 to 80 degrees F with relative humidity below 60%. Most product data sheets call out 65 F as the minimum; below that, the solvent flashes off too slowly and the glue can stay wet past its open time. Above 90 F, the solvent flashes off so fast the surface skins over while the layer underneath is still wet, which leads to tiger stripes and weak bonds.
If you are working in a cold garage (under 60 F), bring the parts into a heated room for at least a few hours before you start. Warming the cans themselves in a water bath (sealed bag, never on a heater) makes the adhesive flow easier and speeds the first coat.
Humidity above 70% slows water-based contact adhesives badly. Solvent formulas handle humid garages much better, which is one reason shops in the South often reach for solvent-based products.
Ventilation is non-negotiable with solvent adhesives. Open the garage door, set up a box fan pulling air out of the workspace, and wear your organic vapor respirator. Water-based adhesives are far more forgiving on the ventilation side and are a sensible pick for a home garage without airflow.
Step-by-Step: Applying Contact Adhesive to Car Trim Panels
This is the core workflow. Follow it in order and you will end up with a bond that outlasts the trim itself.
Step 1: Stir the adhesive gently with a flat stick. Do not shake; shaking introduces bubbles that pop on the surface and leave craters.
Step 2: Apply the first coat to both the trim panel back and the mounting surface (or the substrate if you are wrapping vinyl to plastic). Use long, smooth strokes with a brush, holding it at about 45 degrees so the glue lays down rather than smears. On porous foam-backed vinyl, brush the adhesive into the foam rather than over it.
Step 3: Let the first coat flash off completely. It should feel dry but tacky to a clean knuckle, not wet or stringy. Times vary from 5 minutes in a warm, dry shop to 20 minutes in a cool, damp garage. Do not rush this.
Step 4: Apply the second coat at a 90 degree angle to the first (perpendicular strokes). The two-coat crosshatch evens out thickness and seals any pinholes from the first pass. This is the “double-pass technique” that professional upholsterers swear by, and it is the single biggest difference between a lasting bond and a peeling one.
Step 5: Flash off the second coat the same way. You should now have two surfaces that feel dry to the touch but grab aggressively when you touch a corner of them together.
Step 6: Run a tack test before bonding. Press a small piece of masking tape onto the glued surface and pull it off. The tape should lift cleanly with no glue transfer, and the surface should feel like the back of a postage stamp. If glue strings onto the tape, wait longer.
Step 7: Align the trim panel carefully. Once the two glue films touch, they bond instantly and you cannot reposition. Use masking tape hinges, alignment marks with a fine Sharpie, or a two-person dry fit before the second coat so you know exactly how the panel will land.
Step 8: Press the panel in place starting from one edge or the center and working outward. Push out any trapped air with your hand or a J-roller as you go. Bonding from the center out prevents bubbles; bonding from one end lets you chase wrinkles.
Step 9: Roll the entire panel with firm, even pressure using the J-roller. Hit every square inch, especially the edges where peel failures start. A good rule: 30 pounds of pressure across the full panel, twice in perpendicular directions.
Step 10: Let the bonded assembly cure for at least 24 hours before stressing it. Light handling is fine after 30 minutes, but do not slam a door or sit on the seat until the next day.
Flash-Off, Tack Time, and Bonding Window Explained
These three terms confuse a lot of first-time users, and misunderstanding them is the most common cause of trim failures.
Flash-off is the period when the solvent (or water) is evaporating out of the wet glue. It starts the moment you brush the adhesive on and ends when the surface is dry to the touch but still chemically active.
Tack time (also called open time) is the window when the flashed-off glue is ready to bond. Most contact adhesives stay in this state for 15 to 60 minutes depending on temperature, humidity, and film thickness. Bond during this window.
Bonding window closes when the adhesive has dried too long and lost its grab. If you miss it, you have to scuff the surface and apply a fresh coat. Contact cement does not reactivate with heat or solvent the way some wood glues do.
The masking tape tack test is your best friend. Press a strip of tape onto the flashed surface, peel it off, and look at the result. If the tape comes away clean and the glue feels tacky, you are inside the bonding window. If glue strings onto the tape, keep waiting. If the surface feels dry and powdery, you have passed it and need a fresh coat.
Pressure, Roller Technique, and Trimming After Bonding
Pressure is what actually fuses the two glue films together. Without firm, even pressure, even a perfectly prepped and timed bond will be weaker than it should be.
Use a hard rubber J-roller, not a soft paint roller. The hard rubber transfers your hand pressure into the bond instead of absorbing it. Roll twice across the panel: once in the original direction, then again at 90 degrees. Hit edges and seams with a smaller seam roller for concentrated pressure.
If you do not have a J-roller, press a clean piece of 3/4 inch plywood over the panel and lean into it with your body weight. The wood spreads the load evenly and gives you more pressure than your hands alone.
Trimming comes after the bond. Use a fresh hook blade in a sharp knife and a steel ruler for straight edges; freehand cuts with a dull blade cause ragged vinyl that lifts at the edges. Cut from the face side down into a piece of cardboard so the blade does not dig into the bench below.
Roll the cut edges one last time with the seam roller to push the glue into the substrate corner. Edge sealing with a thin bead of contact adhesive on a toothpick stops the first signs of peel-back.
Troubleshooting Common Contact Adhesive Failures
Even experienced techs run into problems. Here is a field guide to what went wrong and how to fix it.
Bubbling under the vinyl: almost always trapped air or solvent. Re-open the panel, lift the bubbled area, and roll outward with the J-roller. If the glue has already skinned over, prick the bubble with a pin, inject a drop of fresh contact cement with a syringe, and roll flat under weight for 24 hours.
Peeling edges after a few weeks: usually poor edge pressure or a missed second coat on the edges. Lift the loose edge, scuff the back of the vinyl and the substrate, brush a fresh coat of contact cement onto both, flash off, and re-bond under clamp pressure.
Tiger stripes or telegraphing across the surface: the second coat was applied over a first coat that had not fully flashed off. The wet glue trapped under the dry skin caused uneven cure. The fix is full removal and a fresh start with proper flash-off times.
Cobwebbing when spraying: the adhesive is too cold or you are too far from the surface. Warm the can in a water bath and shorten the spray distance to 8 to 12 inches. A 1.8 to 2.5 mm fluid tip at 30 to 40 psi lays down a wet, even mist without atomizing the glue into strings.
Bond feels weak even after 24 hours: usually bonding during the bonding window failure: either too wet or too dry. Re-do the joint with a fresh coat on both surfaces.
Glue left a haze on visible vinyl: you got adhesive on the face of the trim. Wipe immediately with the adhesive maker’s own cleaner, or a tiny amount of mineral spirits on a lint-free cloth. Test on a hidden area first; many vinyls blush or dull with the wrong solvent.
Repairing a Failed Bond Without Removing the Trim
Sometimes the trim is fine and you just need to re-secure a lifting section. Full removal is overkill, and it risks damaging stitched edges or clips.
Method 1: Syringe injection. Lift the loose edge just enough to expose the gap. Use a needle-tip syringe to inject a small amount of contact cement into the void. Press the edge down, roll it with a seam roller, and clamp it under wax paper and a flat board for 24 hours.
Method 2: Iron-on reactivator. Some solvent-based contact cements can be softened with a clothes iron set to medium, with a press cloth between the iron and the vinyl. Heat re-liquifies the top layer of glue, allowing a re-bond under pressure. Test first; too much heat damages vinyl.
Method 3: Patch with double-sided trim tape. For weatherstrip and small trim edges, 3M VHB or similar double-sided automotive tape is a faster, cleaner fix than fresh contact cement. Clean both surfaces with alcohol, apply the tape, peel the liner, and press.
If the trim has fully released and the old glue is crumbly, scrape off the residue with a plastic scraper, wipe with alcohol, and treat it as a fresh bond. Trying to glue new contact cement over old, dead adhesive is a guaranteed failure.
Low-VOC and Sustainable Adhesive Options
If you are sensitive to solvents or work in a shared garage, water-based contact adhesives have come a long way. Brands like 3M Fastbond and many eco-labeled formulas now offer green strength close to traditional solvent cements, with almost no odor.
The trade-offs are real. Water-based adhesives need longer flash-off times (often 20 to 40 minutes per coat), are fussier in cold or humid shops, and do not handle high heat as well as solvent formulas. They are an excellent pick for door panels, headliners, and consoles, and a less reliable pick for dashboards that see direct summer sun.
For shop owners trying to reduce VOC output, a hybrid workflow works well: keep a small can of high-heat solvent contact cement for dashboards, and use water-based formulas everywhere else.
Frequently Asked Questions
What is the best adhesive for attaching car trim?
A high-temperature, automotive-grade contact adhesive is the best all-around choice for car trim. Solvent-based neoprene formulas like DAP Weldwood Landau Top and Trim or 3M Headliner and Fabric Adhesive give the strongest, most heat-resistant bond for dashboards, door panels, and consoles. For porous headliner fabric, a spray contact adhesive such as 3M High Strength 90 lays down a thinner coat that does not stiffen the foam.
What is the best way to apply contact adhesive?
Apply two thin, even coats to both surfaces with the second coat at a 90 degree angle to the first. Let each coat flash off until dry to the touch but still tacky (5 to 20 minutes depending on shop conditions), align the parts carefully because the bond is instant, then press them together with firm, even pressure using a hard rubber J-roller. Bonding inside the open time window under real pressure is what separates a lasting trim bond from a peeling one.
How long does it take for contact adhesive to dry completely?
Contact adhesive flashes off in 5 to 20 minutes per coat under normal shop conditions, and reaches handling strength within 30 minutes. Full cure takes 24 to 72 hours depending on temperature, humidity, and film thickness, so avoid stressing the bonded panel for at least 24 hours after installation. Higher temperatures and lower humidity speed flash-off; cold or damp shops slow it down significantly.
How do you fix trim that is falling off a car?
Lift the loose edge, scrape off any crumbly old adhesive with a plastic scraper, wipe both surfaces with isopropyl alcohol, and let them dry. Apply two fresh coats of contact adhesive to each side, flash off between coats, then press the trim back in place and clamp under flat weight for 24 hours. For very small lifts, inject fresh adhesive with a needle-tip syringe and clamp with wax paper and a board instead of removing the trim.
Can you use contact adhesive on plastic car trim?
Yes, contact adhesive works on most automotive plastics including ABS, PVC, and polycarbonate. For hard-to-bond plastics such as polypropylene, polyethylene, and TPO, scuff the surface with a 320 grit pad and wipe on an adhesive promoter like 3M 94 before applying the contact cement. Without the promoter, slick plastics can peel within weeks even when the application technique is correct.
What temperature can you apply contact adhesive?
Most contact adhesives work best between 65 and 80 degrees F with humidity below 60 percent. Below 60 F the solvent flashes off too slowly and the glue can stay wet past its bonding window, while above 90 F the surface skins over before the layer underneath cures, leading to tiger stripes and weak bonds. Warm cold parts and adhesive cans in a heated room before starting, and avoid working in direct summer sun on a hot day.
Final Verdict
The shortest path to a long-lasting contact adhesive bond on car trim panels is the boring one: clean both surfaces, scuff them, apply two thin coats with a crosshatch pattern, wait for full flash-off, align carefully, and roll with real pressure. Every shortcut you take (one coat, joining while wet, skipping the promoter on hard plastic) shows up as a peeling edge within a season.
Follow the workflow in this guide and your dashboards, door panels, and headliners will sit tight through summer heat and winter cold for years. If you remember nothing else, remember the crosshatch double coat and the J-roller; those two habits fix 90 percent of trim failures before they start.