
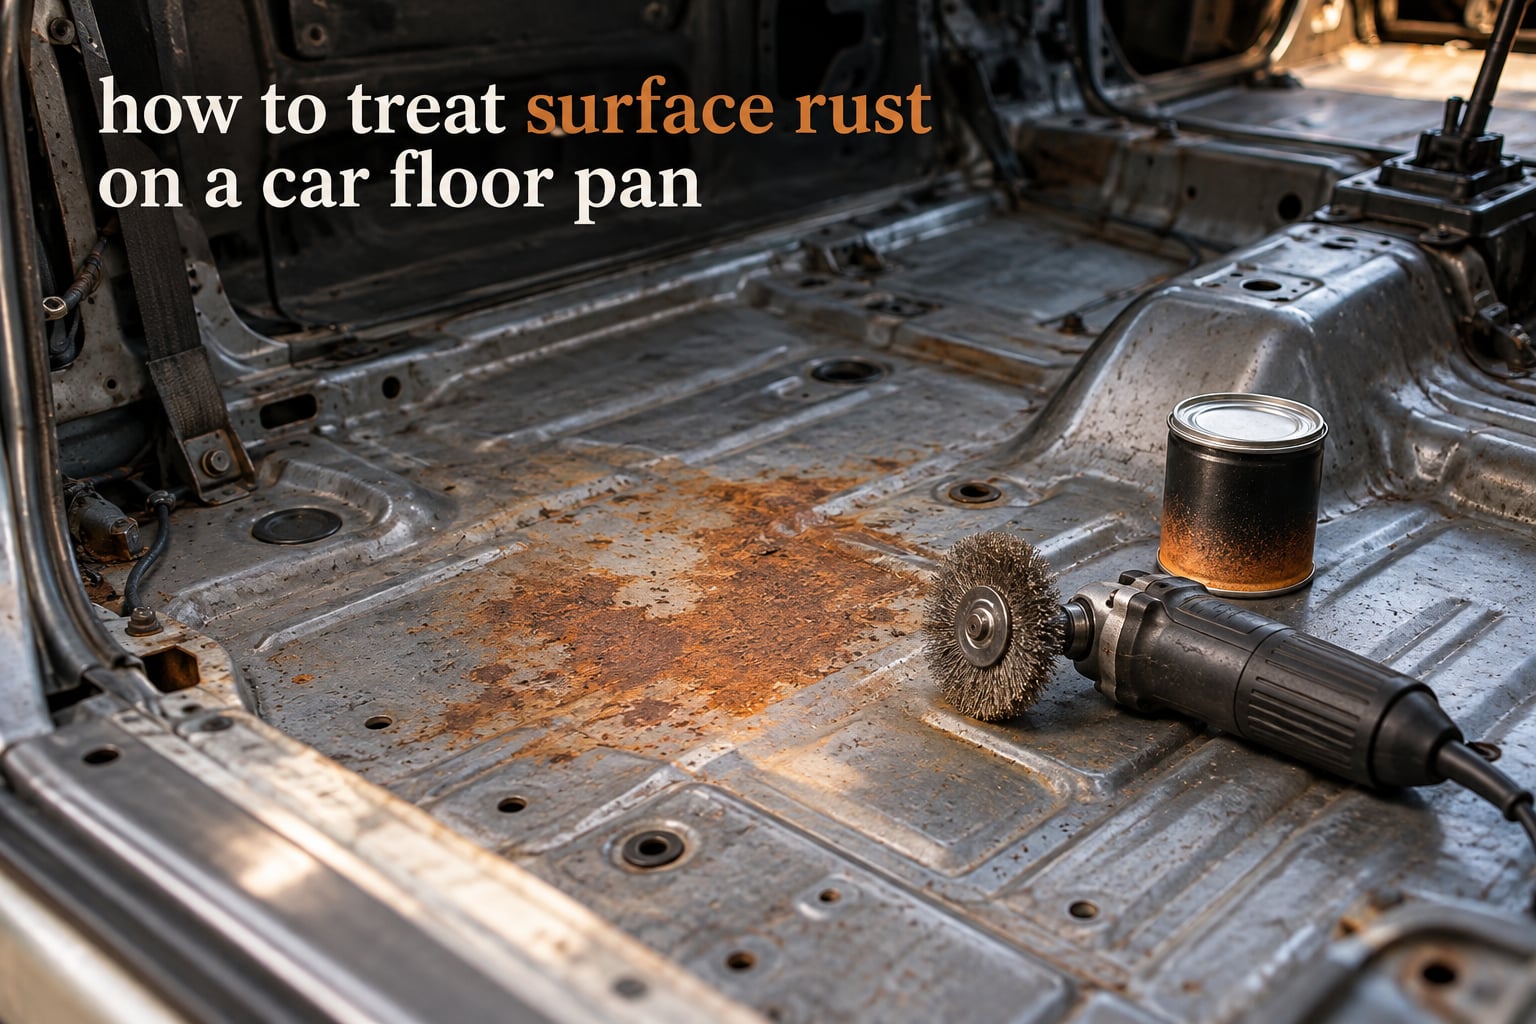
To treat surface rust on a car floor pan, sand the loose scale off with a wire wheel and 80-grit paper, feather to 180-grit, neutralize what sanding cannot reach with a rust converter, then seal the bare metal with a self-etching or epoxy primer, colour coats and clear coat. It is a weekend job, and no welding is needed as long as the metal is still solid.
That is the short version. The longer version is that a floor pan is a structural part of the car, and the difference between a Saturday afternoon and a body shop bill is decided entirely in the first hour, by figuring out whether the metal is still there.
Surface rust on a floor pan is early-stage corrosion where the metal has oxidized under a chip, a seam, or a worn factory coating but has not been eaten through. It stains orange or brown, it flakes, and it can be treated without welding. Left alone it moves to scale rust, then to rot-through, and the repair stops being a coating job.
Below is the full process, including the part almost every guide skips: how to actually reach the pan through the carpet, seats and sound deadening mats. We have compared the process notes used by restorers across several forums and worked through the failure modes they keep hitting. Last updated for 2026.
Table of Contents
- How to Treat Surface Rust on a Car Floor Pan: The Eight-Step Sequence
- Tools, Time and Difficulty for the Whole Job
- Step 1: Diagnose What You Actually Have Before You Touch It
- Step 2: Get to the Floor Pan by Removing the Carpet, Seats and Sound Deadening
- Step 3: Clean and Degrease the Metal and Mask Everything Around It
- Step 4: Remove Loose Rust Mechanically Without Thinning the Pan
- Step 5: Neutralize What Sanding Cannot Reach with a Rust Converter or Neutralizer
- Step 6: Prime the Bare Metal With Self-Etching or Epoxy Rust-Inhibiting Primer
- Step 7: Paint and Clear Coat the Repair
- Step 8: Coat the Underside, Seams and Hem Flanges Too
- When to Stop and Weld Instead of Repairing
- Sanding, Blasting or Dry Ice: Which Removal Method Suits a Floor Pan
- Find the Moisture Source Before You Reinstall the Carpet
- Common Mistakes That Make Floor Pan Rust Come Back
- Long-Term Protection and a Maintenance Schedule
- Frequently Asked Questions
- Do I need to remove the carpet to fix surface rust in a floor pan?
- Can I just sand surface rust and paint over it?
- Is a rust converter or rust reformer needed for surface rust?
- How long does it take to treat surface rust on a car floor pan?
- What is the best product for sealing a treated floor pan?
- Will surface rust on a floor pan come back after painting?
- Can you bondo over a floor pan rust spot?
- How do I tell if floor pan rust is surface rust or rot-through?
- Conclusion
How to Treat Surface Rust on a Car Floor Pan: The Eight-Step Sequence
- Diagnose first. Press a thumb into the spot and probe it with a pick. Solid metal answers both. Soft, flaky metal or a hole means you have a bigger job than a coating.
- Get to the pan. Pull the carpet, remove the seat and any spot well or riser covering it, and take off the sound deadening mat. You cannot treat what you cannot reach.
- Clean and degrease. Wash off wax, road salt and carpet adhesive with a dedicated cleaner, then mask the surrounding interior completely.
- Remove loose rust mechanically. Wire wheel first, then 80-grit, then 180-grit, then 220-grit to feather the edge. Stop at solid metal, not at shiny bare steel.
- Neutralize what sanding leaves behind. Apply a phosphoric rust neutralizer or converter, respect the dwell time, rinse per the label, and dry fully.
- Prime. Two to three thin coats of self-etching or epoxy rust-inhibiting primer, flashing between coats and watching for flash rust.
- Paint and clear. Three to four thin colour coats with a flash between each, then a clear coat that cures for a day or two before anything touches it.
- Coat the underside and seams. Cavity wax in the closed sections, seam sealer on the factory folds, and an underside coat. A top-only repair comes back.
That is the whole method in eight lines. The rest of this guide explains each step, including the grit numbers, the dwell times, and the point where you should stop and hand the job to a welder.
Tools, Time and Difficulty for the Whole Job
A spot the size of a dinner plate takes a weekend. The same spot, with the interior in pieces, takes longer than people expect.
The honest answer to how long floor pan rust treatment takes is that the coating work is the easy half. Disassembly and cleaning are the slow half, and on a car with seat-mounted carpet and glued insulation, the interior work is often longer than the repair.
| Stage | Realistic time | Difficulty |
|---|---|---|
| Diagnosis and access | 2 to 3 hours including disassembly | Easy, mostly connectors and trim clips |
| Degrease and mask | 1 hour | Easy, mostly patience |
| Mechanical rust removal | 1 to 2 hours for a dinner-plate spot | Moderate, requires control near spot welds |
| Neutralize and dry | 1 hour plus full drying time | Easy |
| Prime, paint, clear | 3 to 4 hours across two or three sessions | Moderate, dominated by flash and cure times |
| Underside, seams, reassembly | 2 to 3 hours | Easy to moderate |
Budget two full days for a clean job with drying in between. If you have a lift and the car is already stripped, the repair itself is an afternoon.
Step 1: Diagnose What You Actually Have Before You Touch It
There are three levels of corrosion on a floor pan, and only the first one is a weekend job.
Run the thumb-press test and the pick test before you buy anything. Press a thumb firmly into the spot: solid metal pushes back. Then drag a straight pick or a screwdriver tip across it. On sound metal the tip skips along. On scale or rot-through metal it bites in and leaves a trench.
| Level | What it looks like | What the probe tells you | Treatment | DIY |
|---|---|---|---|---|
| Surface rust | Orange or brown staining, dry and powdery, no flaking scale | Thumb presses firm, pick does not bite | Sand, neutralize, prime, paint | Yes |
| Scale rust | Thick, dark, flaky scale with pitting and blisters | Thumb leaves a dent, pick bites in | Grind to sound metal, treat pitting, prime with epoxy | Often, with limits |
| Rot-through | Holes, ragged edges, crumbled hem flanges | Probe passes straight through | Weld a patch or replace the panel | No, unless you weld |
Blistered paint is a warning sign. A bubble means rust is growing under the coating, and the visible extent is always smaller than the real extent, so mark the edge of the blister with a pencil before you grind.
Check the underside before you commit to anything. Owners on r/projectcar repeatedly ask whether a pan that looks bad on top is also bad underneath, and the community answer is consistent: you cannot judge the underside until it is cleaned, so jack it up, wire brush a section, and look.
Also probe the places that hide more rust than they show: the seat riser and spot well flange, the seat bolt holes, the door sill pinch weld, the drain holes, and the pan-to-rocker or pan-to-tunnel seam. The worst corrosion on most cars is at a hole, because that is where the water gets in.
Tip: before you start, take photos of every connector and bracket you remove. Reassembly goes twice as fast when you are matching photos to parts instead of guessing.
Warning: if the pan is already holed near a seat mount or a structural rail, stop reading about coatings. See the section on welding below.
Step 2: Get to the Floor Pan by Removing the Carpet, Seats and Sound Deadening
Yes, you have to pull the carpet. Every guide on this topic starts at the point where the metal is already exposed, and that is precisely where most weekend jobs stall.
Carpet, seat risers, spot wells and trim all sit directly on top of the pan. There is no way to sand and coat a floor pan in place without taking the interior apart.
- Move the seats out. Unbolt the seat rails, unplug any occupant or belt sensors, and lift the seats out of the car entirely. Set them on a tarp, not on bare concrete.
- Take the sill and kick panel trim off. These usually come away on plastic clips. Keep every clip in a magnetic tray.
- Pull the carpet. Start at a front corner and work rearward. Carpet with a rubber backing usually peels up; glued carpet needs a plastic trim tool and patience to avoid tearing the insulation pad underneath.
- Remove any spot well or seat riser panel. This is the part owners skip and later regret. Experienced builders on r/classicmustangs treat drilling out the seat riser spot wells, removing the panel, cleaning it, painting it and welding it back as the only way to do the job properly.
- Peel the sound deadening mat. This has to come off. Forum consensus is unanimous: the mat hides the rust, traps the moisture that caused it, and prevents the coating from ever reaching the metal.
- Check for factory seam sealer. Note which folds are sealed before you disturb them, because you will need to reseal those seams later.
What you do with the sound deadening afterwards is a real decision, not a formality. Reuse it if it peels up in one piece and is dry and flexible. Replace it if it is brittle, crumbling, or stiff with moisture, and use a mat designed for the location rather than a generic sheet. Delete it if the vehicle is kept outside year round, since a mat that holds water is a liability rather than a comfort feature.
Set the trim and carpet aside in a dry, ventilated space. If you strip the car in damp weather, the bare pan will flash rust overnight.
Step 3: Clean and Degrease the Metal and Mask Everything Around It
Dirt, wax and road salt will kill adhesion faster than any rust left on the surface.
Start with a vacuum so you are not grinding old carpet fibres into the pan. Then clean the metal with a dedicated automotive cleaner or a wax and grease remover, working it in with a stiff nylon brush and letting it dwell. Road salt is sticky, invisible when the panel is wet, and it will sit right under your primer and blister it months later.
Mask with far more care than you think you need to. Paper and tape on the seat brackets, wiring, drains and any surface you do not intend to paint. Mistake overspray on a seat bracket is a much longer afternoon than masking properly.
Take the temperature seriously. Metal that is cold and damp will hold moisture you cannot see. Bring the pan to room temperature before you apply anything chemical, and work in a ventilated space with a respirator if the product label calls for one.
Step 4: Remove Loose Rust Mechanically Without Thinning the Pan
Strip the loose scale mechanically first, because no chemical reaches under a thick flake and no primer bonds to it.
Work in this order:
- Wire wheel on a hand drill to knock off thick scale and blister edges. Keep the wheel flat against the pan and moving, and lift it every few seconds.
- 80-grit to take the remaining rust and old coating down to sound metal.
- 180-grit to remove the scratch pattern from the 80-grit.
- 220-grit to feather the edge of the repair into the surrounding coating.
Stop at solid metal, not at bright silver bare steel. Grinding all the way to bright shiny metal on a floor pan is unnecessary and it thins the panel. On r/Wrangler the top consensus answer is straightforward: pull the carpet, grind down to bare metal, and repaint with a rust-inhibiting coating. “Bare metal” there means bare of rust, not polished.
Grinding discipline is the difference between a repair that lasts and a new hole in the car. Keep the wheel off the pinch welds and hem flanges, which are already the thinnest metal on the pan. Work from the centre of the rust patch outward. Check your progress with a coarse rag: if the rag comes away clean and the metal feels solid under the pick, you are done.
Pitting is normal at this stage and is not a reason to keep grinding. Shallow pits get filled by the converter and primer. Deep pits that hold water and still feel soft after neutralization are scale rust, and they need attention in Step 5.
Warning: a dual-action sander is fast and effective, but it will thin a floor pan without you noticing. On a hand panel, the slower wire wheel plus paper method is the safer choice.
Step 5: Neutralize What Sanding Cannot Reach with a Rust Converter or Neutralizer
Sanding cannot reach rust inside pinholes and at the base of pits, and that residual rust is what punctures the repair later.
This is where most guides go quiet, so here is the chemistry in plain terms:
| Product | What it actually is | What it does | Weak point |
|---|---|---|---|
| Phosphoric rust neutralizer | Dilute phosphoric acid | Reacts with iron oxide and converts it to a stable phosphate layer, then rinses off | Needs a full rinse and a full dry; it is not a coating |
| Rust converter | Tannic or acid-based treatment, usually a two-part epoxy-style product | Converts remaining oxide into a stable dark layer and adds a sealing film | Will not penetrate deep; a shortcut on its own and it traps the appearance, not the problem |
| Rust reformer | A light-bodied converter sold for touch-up work | Neutralizes light surface oxidation and leaves a thin protective film | Not strong enough for pitted or thick scale; not a topcoat |
| Epoxy primer | Two-part primer with a resin hardener | Forms a hard, chemical-resistant barrier that bonds to steel and seals against further oxidation | Must go on clean bare metal, not over a dirty or flaky surface |
The single most repeated technical correction across the forum threads came from r/AutoPaint, and it is worth quoting in spirit: you can use a rust converter, but you are going to want to clean it down first, because the converter will not really penetrate that far. That is why grinding comes before chemistry in this sequence, and why a converter alone is a false confidence.
Application is simple. Brush or roll the neutralizer onto the sanded area, work it into the pits, and respect the dwell time printed on the can rather than guessing. Rinse exactly as directed, then let the panel dry completely. A hair dryer on low or a heat gun held at a distance will speed this along on a confined floor pan.
When the converter has done its job, sound metal turns dark grey, black or deep brown rather than orange. That colour change is your indicator, and it is the point at which you move on to primer.
For pitted scale rust, an epoxy primer is the better primary barrier than a converter alone, because the resin bridges micro-porosity. Many restorers combine them: neutralize first, epoxy primer over the top.
Step 6: Prime the Bare Metal With Self-Etching or Epoxy Rust-Inhibiting Primer
Primer is what actually stops the corrosion, and the coating system is doing more work here than the rust remover ever did.
Self-etching primer contains an acid that bites into clean steel and bonds chemically. It is the right choice for thin, straightforward surface rust. Epoxy primer is a two-part system that forms a much harder, more impermeable barrier and is the better choice once you have pitting, scale rust, or a repair you want to last through several winters.
Apply two to three thin coats. Thick coats trap solvent and dry soft in the middle, which is worse than a single thin coat. Flash for 5 to 10 minutes between coats, or per the can. Do not rush the cure: most of these primers want an hour before colour goes on, and epoxy wants longer in cool or damp conditions.
Watch for flash rust during this stage. It appears as a fine orange bloom on the primed surface, usually within an hour, when a coating goes on over damp or chemically active metal. If you see it, do not paint over it. Strip the affected area back, neutralize again, and redo the coat.
Keep the temperature above roughly 10 degrees and the air reasonably dry while you work. Below that, adhesion drops sharply and you will see the failure later as blistering rather than now.
Step 7: Paint and Clear Coat the Repair
Once the primer has cured, the repair is a standard refinishing job.
Find your paint code on the door jamb sticker, in the glovebox, or on the fuel filler door frame, and match it before you start. A floor pan repair is nearly always visible through a trunk or rear window opening, and a colour mismatch in a spot you had to pull the interior apart to reach is an expensive disappointment.
Lay down three to four thin colour coats, flashing 5 to 10 minutes between each, and use the manufacturer panel blend rather than masking off a hard line if the repair sits next to a visible wall. If the repair is out of sight, a hard mask line is fine.
Two thin coats beat one thick one every time. A heavy coat sags, orange-peels, and holds solvent under the surface.
Clear coat goes on last, and it needs a real cure. Give it 24 to 48 hours before anything touches the pan, and longer before the car goes outside in rain. If the finish looks chalky or hazy after a week, that is usually uncured single-stage paint that needs a wet sand at 2000 grit and a polish, not a failed repair.
Step 8: Coat the Underside, Seams and Hem Flanges Too
Sealing only the visible top side guarantees a repeat within a season, and owners on the forums warn about this constantly.
The underside of a floor pan collects road salt, water off the road, and mud that never dries. A repair that is beautiful on top and bare on the bottom will fail from below, and you will see it as a blister appearing through the topcoat a year later.
Three products do three different jobs, and they are not interchangeable:
- Cavity wax stays soft and creeps, so it reaches inside closed sections and body cavities where a paint spray cannot go. It is for the inside of the pan, the seat riser cavity, and the closed hem flanges.
- Seam sealer is a flexible elastomeric seal for factory folds, pinch welds and the pan-to-rocker joint. Apply it where the original sealer was disturbed, not over bare metal.
- Undercoating is a tough external coating for the underside and wheel arch area. It is a barrier, but it is not a cavity wax and it will not get into a seam.
Apply cavity wax after the paint has cured, inject it into the drain and access holes, and work it along the underside. Reseal the factory folds with seam sealer, following the original bead pattern. Then coat the underside with undercoating.
When you reinstall the carpet, keep the drain holes clear. A plug of sound deadening or carpet over a drain hole is a small mistake that reproduces the exact condition you just repaired.
When to Stop and Weld Instead of Repairing
Some floor pan damage is beyond a coating job, and knowing where that line sits saves you from grinding a hole bigger than the one you started with.
Use these thresholds:
- Pinhole to about 1/8 inch: epoxy-coated body filler or a metal patch over properly primed bare metal works well. Never filler over active rust.
- 1/8 inch to about 1/2 inch: cut clean to sound metal, coat both faces, and fit a sheet metal patch or reinforced filler.
- 1/2 inch to 3 inches, or any hole in a structural area: this is a welded patch. Seat mounts, rails and the pan edges are structural and are not a filler job.
- 3 inches or larger, or widespread rot: panel replacement. The pan is a structural part and this is where a body shop earns its fee.
If the hem flanges or pinch welds are crumbling, the panel is past the point where a coating system can help, because there is no sound flange left to bond to.
Even experienced builders treat panel removal as the honest route for structural areas. On r/classicmustangs the endorsed method is to drill out the seat riser spot wells, remove the panel, clean it, paint it, and weld it back in.
Sanding, Blasting or Dry Ice: Which Removal Method Suits a Floor Pan
Removal method is a tradeoff between speed, control, and what happens to the factory coatings on the pan.
| Method | Speed | Control | Seam sealer and coating risk | Best use |
|---|---|---|---|---|
| Hand wire wheel and paper | Slow | Excellent | Low, you control every pass | Most floor pan spot repairs |
| Dual-action sander | Fast | Good, but thins panel easily | Medium | Larger flat areas on sound, thick panels |
| Soda blasting | Fast | Medium | High, it strips factory coatings and sealer | Bare metal on a fully stripped pan |
| Sandblasting | Fastest | Poor on a pan in a car | Very high, warps thin sheet and destroys sealer | Pan removed from the car, professional work |
| Dry ice blasting | Medium | Very good | Low, leaves most coatings intact | Cleaning a pan in place without touching factory coating |
For a pan still in the car, the hand wire wheel plus 80-grit is the reliable default. Blasting in place is a poor trade because it takes the factory coating, the seam sealer, and often the pinch weld dimension with it, and you have just created a much bigger resealing job.
Dry ice blasting is the option worth considering when you want the rust gone without stripping the surrounding coating, and videos of pan restoration using this method circulate for exactly this query.
Find the Moisture Source Before You Reinstall the Carpet
Repairing the rust without finding why it appeared is how the same spot fails again a year later.
Work through these in order before the carpet goes back in:
- Blocked drain holes. The small weep holes in the pan and sill exist to let water out. Sound deadening and carpet seal them shut. Clear every one you find with a drift and a piece of wire.
- Windshield and rear glass seals. A leaking seal wets the cowl and tracks water along the tunnel edge to the pan. Check for a damp carpet edge rather than a wet floor, because the water often travels before it shows.
- Wet carpet padding. If the foam under the carpet is damp or smells musty, it has been holding moisture against bare metal. Let it dry fully or replace it.
- Body drains in the doors and quarters. A clogged door drain puts water directly on the sill and the pan edge.
- Road salt history. If the car lives in a salt belt, the salt is often still inside the cavities, dissolving slowly. Cavity wax after the repair is not optional there.
Run the car with the heater on high for 20 minutes after reassembly and check under the mats. If the carpet is damp, the source is not fixed.
Common Mistakes That Make Floor Pan Rust Come Back
Most repeat failures trace back to one of a handful of shortcuts, and each one is easy to avoid.
Painting over loose rust. This is the big one. Rust under a coating keeps growing, and the paint blisters rather than protecting. Grind to sound metal first, every time.
Skipping the neutralizer. Sanding leaves oxide in pinholes that you cannot see. The neutralizer is what converts that last bit. Skipping it because the surface looks clean is the most common reason a repair fails at eighteen months.
Using a converter as the whole treatment. A converter is a step, not a system. It does not replace mechanical removal, and it does not replace primer.
Filling over active rust. No, you cannot bondo over floor pan rust. Body filler is a fairing compound, not a corrosion treatment, and it has no ability to stop an electrochemical process. Any filler that goes on must sit on metal that has been cleaned, neutralized and primed.
Repairing only the top. The underside, the hem flanges and the seams are where the water and salt go. Seal the top only and you will see the blister from the inside out next spring.
Reinstalling carpet over the wet spots. Trapping damp insulation against a fresh coating recreates the conditions you just repaired.
Grinding until the metal shines. Bright polished metal on a thin pan means the pan is thinner than it was. Sound metal, not shiny metal, is the target.
Painting in the cold or the damp. Coatings applied below roughly 10 degrees, or onto a cold panel carrying condensation, will lose adhesion. The failure shows up later, not immediately.
Long-Term Protection and a Maintenance Schedule
A treated floor pan lasts when the barrier is continuous and you keep the moisture out.
Immediately after the repair and before reassembly:
- Cavity wax inside the pan, the seat riser cavity and the closed hem flanges.
- Seam sealer on every factory fold and pinch weld you disturbed.
- Undercoating on the underside and the sill area.
- Clear drain holes, and a check that the sound deadening or carpet does not sit over them.
Then put it on a schedule rather than reacting to the next blister:
- Every spring: wash the underside with a plain water rinse, more thoroughly in a salt belt. Road salt that stays on the pan all winter is a slow coating failure.
- Every year: check the sill, the seat riser and the pan-to-tunnel seam for new bubbling or flaking, especially after heavy road salt.
- Every few years: inspect the interior under the carpet rather than only the underside. A spot that has been quietly growing under sound deadening is still a surface rust problem if you catch it early.
- Annually: touch up any coating damage on the underside before corrosion starts rather than after.
Carnauba wax or a ceramic sealant on an exterior painted surface is a nice extra, but it does nothing for the underside. Corrosion protection on a floor pan comes from cavity wax, sealer and undercoat, and from keeping water out of the car.
Frequently Asked Questions
Do I need to remove the carpet to fix surface rust in a floor pan?
Yes. The carpet, seat brackets, spot wells and sound deadening mats all sit directly on top of the pan, so there is no way to reach the metal to sand and coat it without pulling the interior apart. Work from the seats out, then the sill trim, then the carpet, then the deadening mat, and expect the disassembly to take as long as the repair itself.
Can I just sand surface rust and paint over it?
Not reliably. Sanding removes the loose scale but leaves iron oxide trapped in pinholes, and painting over that lets the corrosion continue under a coating that will eventually blister. Sand to sound metal, neutralize the remainder with a phosphoric neutralizer or converter, rinse, dry, and only then prime. Skipping the neutralizer is the most common reason a repair fails within a year or two.
Is a rust converter or rust reformer needed for surface rust?
A neutralizer or converter is needed, but only after mechanical removal. A converter converts remaining oxide into a stable layer and adds a light film; it is not a coating and it does not penetrate deeply into thick scale. On the forum advice that comes up most often, you clean it down first because the converter will not reach far. Follow it with a self-etching or epoxy primer, which is what actually forms the barrier.
How long does it take to treat surface rust on a car floor pan?
Budget two full days for a clean job on a spot the size of a dinner plate, including drying and flash times. The coating work itself is an afternoon, but disassembly, cleaning, and reassembly add two to three hours on each side of the job. If the car is already stripped and you have a lift, the repair can be done in a single day.
What is the best product for sealing a treated floor pan?
It depends on the surface. Primer and paint seal the visible pan. Cavity wax is the right choice inside closed sections and hem flanges, because it stays flexible and creeps into places a spray cannot reach. Seam sealer goes back on factory folds and pinch welds. Undercoating protects the exterior underside. These are different jobs and none of them substitutes for another.
Will surface rust on a floor pan come back after painting?
It can, and the cause is usually a repeat of the original problem. Paint stops corrosion by keeping water and salt off the metal, so if the moisture source is still there the repair fails. Check for blocked drain holes sealed by carpet or deadening, leaking windshield or rear glass seals, a clogged door drain, and a damp carpet pad. Also coat the underside, seams and cavities, because a top-only repair usually fails within a season.
Can you bondo over a floor pan rust spot?
Not over active rust. Body filler is a fairing compound, so it can cover a hole only after the metal has been cleaned, neutralized and primed, and it cannot stop an electrochemical process on its own. Over untreated rust, the filler absorbs moisture, the corrosion continues, and the repair pops out from underneath within months.
How do I tell if floor pan rust is surface rust or rot-through?
Press a thumb firmly into the spot, then drag a straight pick or screwdriver tip across it. Solid metal pushes back and the tip skips along. Scale rust dents under pressure and lets the pick bite in, leaving a trench. Rot-through lets the probe pass straight through. Sound, powdery orange staining with a firm feel underneath is surface rust, and that is the only level you can reliably fix with a coating system.
Conclusion
To treat surface rust on a car floor pan, the sequence is simple and the order matters: diagnose, strip the interior, degrease, grind, neutralize, prime, paint, and seal the underside.
Grind to sound metal rather than bright steel. Follow the mechanical work with a phosphoric neutralizer, because sanding cannot reach the oxide in the pinholes. Prime with self-etching or epoxy primer, lay colour coats thin, and let the clear coat cure before anything touches it.
Then do the two jobs most people skip: coat the underside, seams and cavities, and find the water that got in there. A floor pan repair is not finished when the topcoat looks good, it is finished when the drain holes are clear, the carpet is dry, and the metal is sealed on every side.
If the metal is soft, crumbling or already holed near a seat mount or a structural rail, stop there. Cut it out and weld a patch, or take it to a shop. Guessing at that stage is what turns a weekend into a body bill.