
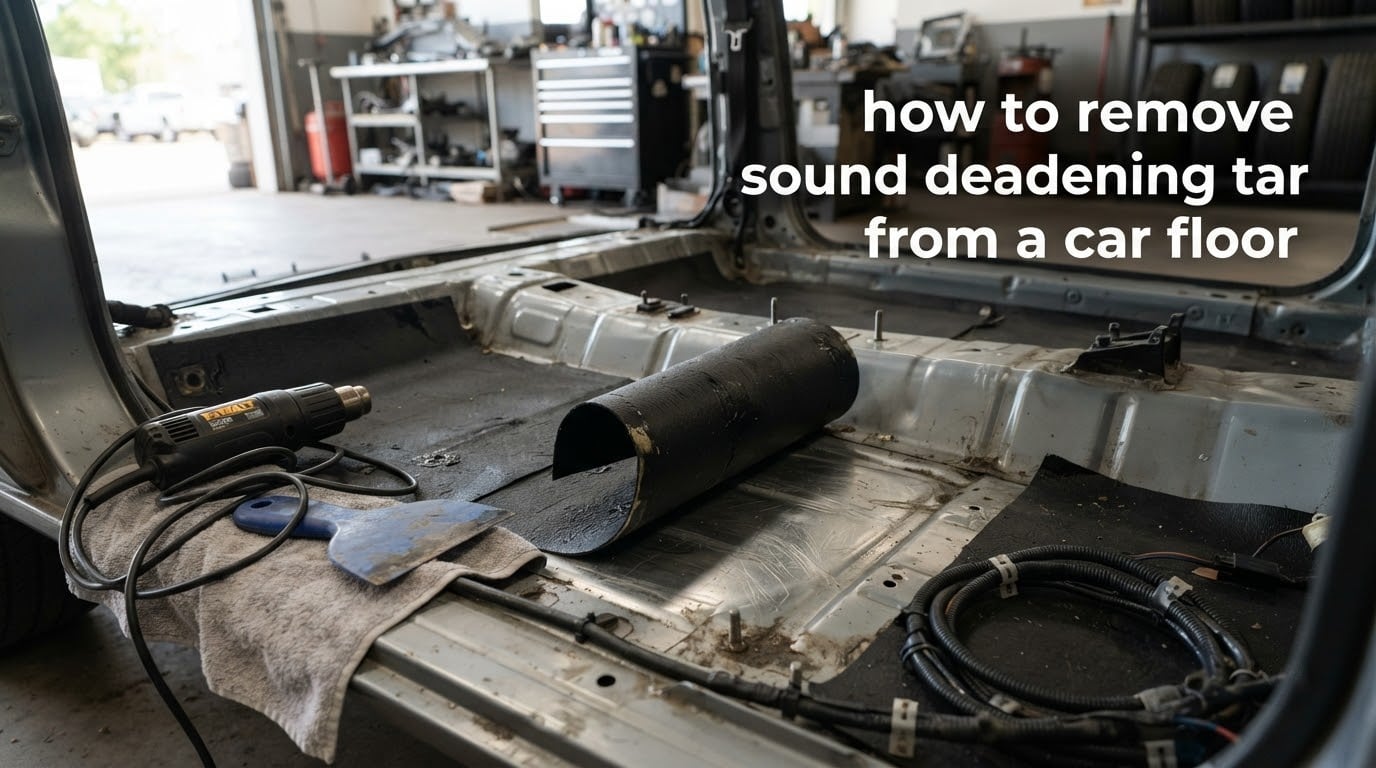
The fastest way to remove sound deadening tar from a car floor is a heat gun on low, held 4 to 6 inches from the mat, with a wide plastic scraper lifting the softened material in sheets. It is the most reliable method on almost every material type, it leaves the least residue, and it works in sections small enough to control. If the deadening is non-fibrous butyl and you already have a chunk of dry ice, the shatter method is faster per square foot. If it is fibrous, dry ice will not touch it.
Over the years our workshop has watched this job go every possible way, and the pattern is consistent: the material type decides the method, the working temperature decides how long it takes, and people who skip the preparation step are the ones who end up with tar in their trim clips and a melted harness in their hands. This guide walks through the whole process the way we do it, including the parts most write-ups leave out: what sits directly under the mat, what to do when the heat gun makes a mess instead of releasing the sheet, and how to dispose of the waste.
We have also pulled the scattered numbers from enthusiast builds into one place, because a 10-minute job and an all-day job are both real and the difference comes down to three variables you can control. If you just want the answer, jump to the step list. If you want to avoid a ruined floor pan, read the safety section first.
Table of Contents
- What Sound Deadening Tar Is (and Why Factories Put It There)
- Why You Might Remove Sound Deadening (and Why You Might Not)
- Fibrous vs Non-Fibrous Butyl: Why Material Type Decides Your Method
- Tools and Supplies You Will Need
- Preparation: Strip the Interior, Vacuum, Protect Harnesses
- How to Remove Sound Deadening Tar from a Car Floor: Heat Gun and Plastic Scraper
- Method 2: Dry Ice Shatter Technique (and When It Fails)
- Method 3: Mechanical Removal with Chisel, Hammer, and Air Chisel
- Removing Tar from Curved Areas and Wheel Wells
- Dealing with Leftover Tar Residue and Adhesive Film
- Cleaning the Floor Pan Afterwards and Checking for Rust
- Time and Weight Reality Check
- Disposing of Tar and Chemical Waste Safely
- Replacing the Deadening You Removed
- Common Mistakes and Safety Warnings
- Frequently Asked Questions
- How do I remove sound deadening from a car?
- How can I remove sound deadening without using dry ice?
- Can dry ice be used to remove sound deadening?
- Why does dry ice not work on my sound deadening?
- What is the best sound deadening material for car floors?
- How much sound deadening should a car have, and is it necessary?
- Will my car be louder after I remove the sound deadening?
- How long does it take to remove sound deadening from a car?
- Can dry ice be used to remove car undercoating?
- Conclusion
What Sound Deadening Tar Is (and Why Factories Put It There)
Sound deadening, sound dampening, and sound deadener are the same material under three names. It is a viscoelastic layer bonded to sheet metal to absorb road noise, kill vibration, and slow heat transfer into the cabin. On most cars it sits on the floor pan, the transmission tunnel, the wheel arches, the firewall, the trunk floor, and sometimes the quarter panels and rear seat pan.
Modern factory deadening is built around butyl rubber, a polymer that flows slightly under load and absorbs vibration instead of bouncing it back into the cabin. When that butyl layer is bonded to a stiff outer layer, the combination is called constrained layer damping, and it is the reason the material is so effective. Older and vintage cars more often carry bituminous tar paper, an asphalt-based mat that is heavier, smellier, and harder to work with.
There are two other names worth knowing because they are not the same material. Sound deadener refers to the vibration damping layer. A sound dampener or insulation mat usually refers to the thicker, less dense closed cell foam that sits above it. Several rivals are partly responsible for the confusion, which is why shops insist on a clear test piece before quoting work.
Factory coverage is heavy. Builders stripping complete cars report pulling 20 to 40 pounds out of a small car, with one long-running restoration thread logging 30 to 40 pounds from a single vehicle and another owner filling two large supermarket bags. That weight comes out of every corner of the shell, which is part of why racers remove all of it.
Age changes the material more than most people expect. Fresh butyl is rubbery and lifts cleanly. Ten-year-old butyl turns gummy and smears. Thirty-year-old butyl goes hard and brittle, then cracks and delaminates, at which point it stops damping entirely. Very old tar paper sticks to the primer like glue and often has to be fought off in pieces.
Why You Might Remove Sound Deadening (and Why You Might Not)
The honest answer is that most cars should keep their deadening, and a good share of the tar you see online is being removed by people who are annoyed rather than informed. Sound deadening only works while it is bonded to metal, so the moment it cracks or lets go, it is just a heavy sheet sitting in the way. That is the clearest reason to pull it.
Beyond that, four situations genuinely justify a full strip:
- Rust repair. The mat traps moisture against the floor pan, and the corrosion underneath is invisible until the mat comes up. This is the single most common surprise people find mid-job.
- Weight reduction. Twenty to forty pounds comes off a small car, more from a truck or SUV.
- Full restoration. A body-off or bare-metal restoration needs a clean surface for seam sealer, epoxy primer, and new material to bond to.
- Interior or carpet refit. Carpet that has been wet, mildewed, or cut up is far easier to install over bare metal.
The noise question deserves a straight answer. Removing deadening makes a car louder, but not always unacceptably so. One owner in a long-running restoration thread kept the carpet and removed the mat and found the car was not intolerably loud, while another filled the same floor with new butyl instead of stripping it. Coverage matters more than people expect, and the difference between 20 to 30 percent coverage and 90 percent coverage is audible at highway speed.
Our rule of thumb: leave sound deadening in place if it is still bonded, still flexible, and your floor is sound. Strip it if it is cracked, sliding around, soaked, or sitting on top of corrosion. Stripping working material to chase a quieter car is work you do twice, because you will be putting new material down immediately.
Fibrous vs Non-Fibrous Butyl: Why Material Type Decides Your Method
This is the single most decision-relevant fact in the whole job, and almost nothing written about this topic explains it. Factory deadening comes in two structurally different forms, and they behave nothing alike under cold or heat. A car that strips in twenty minutes with dry ice and a car that ignores it completely usually have the same material in the same year, built to two different specs.
| Feature | Fibrous butyl | Non-fibrous butyl |
|---|---|---|
| Structure | Butyl with embedded fibers or textile matting | Solid viscoelastic butyl sheet |
| How it looks when lifted | Stringy, fibrous core, tears into strands | Uniform rubbery sheet, holds together |
| Dry ice response | Does not shatter; absorbs the cold | Brittles and chips cleanly |
| Heat gun response | Softens, releases with patience | Softens fast, peels in wide sheets |
| Typical origin | Common on European cars and some state-side builds | Common on North American sedans and trucks |
| Best method | Heat gun and scraper, or a mechanical chisel | Heat gun, dry ice, or air chisel |
An expert post on a Honda Civic forum laid this out clearly: fibrous butyl will not come off with dry ice, while non-fibrous stick-on pad type responds well to both cold and heat. A separate long-running thread on a rotary-engined sports car has users reporting the same split, with the dry ice advocates and dry ice critics in the same conversation describing opposite results on cars built in the same era.
Before you commit to a method, lift one corner with a putty knife and look at the cut edge. Solid and rubbery means non-fibrous and dry ice is on the table. Stringy and matte means fibrous and skip the dry ice, or you will burn an afternoon and a bag of ice for nothing.
Tools and Supplies You Will Need
Most of this list is hardware store stock or things already in a garage. The two items worth buying specifically for the job are a heat gun with adjustable heat and a genuinely flexible plastic scraper. Thin metal putty knives chip, bend, and leave rust streaks, and a rigid plastic body scraper gouges the primer.
| Item | Purpose |
|---|---|
| Heat gun with adjustable output | Softens the adhesive so the mat peels in sheets |
| Wide flexible plastic scraper | Lifts softened deadening without touching bare steel |
| Utility knife | Scores the mat into manageable squares before heating |
| Putty knife | Lifts corners, tests material type, pries seam sealer |
| Air chisel with a flat blade, or hammer and cold chisel | Mechanical removal for fibrous material and stubborn seams |
| Dead blow hammer | Shatters frozen brittle material without a rebound blow |
| Shop vac | Captures chips that would otherwise land in the seat rails |
| Adhesive remover such as Goof Off Pro Strength | Dissolves the black residue left by heat |
| Brake cleaner, acetone, or mineral spirits | Alternative residue solvents, used sparingly and ventilated |
| Denatured alcohol and clean shop towels | Final wipe and surface check |
| Nitrile gloves, safety goggles, N95 or better mask | Bare minimum protection for heat, shards, and solvent fumes |
| Heavy duty trash liner or contractor bags | Contain gummy tar that will not go in a bin loose |
Add a roll of aluminum foil or heavy tape and a bundle of cable ties to your kit for harness protection, and a fire extinguisher within reach whenever a heat gun is running in a car. Dry ice handling needs insulated gloves that reach the wrist.
Preparation: Strip the Interior, Vacuum, Protect Harnesses
The tar is always directly on top of things that matter. Wiring harnesses, brake lines, fuel lines, and the parking brake cable run across the floor pan under the carpet, and the deadening is bonded to the metal over or beside them. Rushing this step is how people melt a harness they will not see until the car is back together.
- Take the seats, carpet, kick panels, sill trim, spare tire well, and center console out.
- Photograph the factory harness routing before you touch anything. You will not remember it later.
- Pull every harness, line, and cable that crosses the work area up and over, then secure it with cable ties to structure above the floor, never to the mat.
- Wrap anything that must stay in place in aluminum foil. Do not rely on the mat as insulation.
- Vacuum the exposed floor thoroughly so grit does not drag across the primer with the scraper.
- Check the weather. Sixty to seventy degrees is the ideal working range reported by restorers.
On a hot day the tar turns sticky and smears instead of releasing, and your scraper will just spread it around. On a cold morning you will get more brittle, chip-prone material. Overcast days in the sixties are the best version of this job.
One more thing to do now, before anything is stripped: get a socket wrench and check the seat belt anchor bolts. Torque specs matter on those fasteners and the torque wrench is a lot cheaper than a seat belt.
How to Remove Sound Deadening Tar from a Car Floor: Heat Gun and Plastic Scraper
This is the primary method and the one we reach for first. On a small sedan with sound, still-adhered non-fibrous material, it takes roughly two to three hours end to end. On a truck with fibrous material in a cold garage, budget a full weekend.
Here is the whole procedure in the order we do it:
- Score the mat into 6 by 6 inch squares with a utility knife.
- Work on a 60 to 70 degree day when the tar is firm.
- Set the heat gun to low and hold it 4 to 6 inches back.
- Sweep the heat until the mat softens and the edges curl.
- Slide the plastic scraper under the softened edge.
- Peel back in sheets and fold waste into a trash liner.
- Work section by section, never heat the whole floor at once.
- Repeat until the floor reads as bare metal, not shiny tar.
- Scrub residue, then wipe the pan with denatured alcohol.
- Inspect for rust before you cover the floor again.
Keep the gun moving. The single most common failure in this method is parking the nozzle on one spot long enough to discolor the primer, or worse, soften the paint on a car that has been repainted. A slow sweep at low heat is the whole technique. The material tells you when it is ready: the edge of the square will curl and lift slightly on its own, and the adhesive will look wet and glassy under the surface.
Angle matters. Hold the scraper at about 45 degrees to the floor rather than flat, and let the heat do the separating rather than the edge of the blade. If you find yourself levering, the material is not warm enough. Reheat and come back in twenty seconds rather than forcing it.
Pull the sheet back slowly and fold it over itself as it comes away. A long strip lifts in one motion; a short one tears and leaves more residue. When a sheet starts to break, stop, reheat that area, and pick the seam up from a corner instead of pulling across it.
Work from the flat center of the pan outward. The wheel arches and tunnel corners hold the most heat and the most stubborn material, so save them for when your hands are warmed up and your technique is settled.
One thing that trips people up: if the heat gun seems to make a worse mess instead of a clean release, the material is probably fibrous, or the panel underneath is holding more heat than you think. Drop to the lowest setting, shorten your passes, and increase distance. Go slower and let the adhesive soften rather than the tar itself. Melted tar is a problem; softened adhesive is not.
Method 2: Dry Ice Shatter Technique (and When It Fails)
Dry ice works by freezing butyl rubber until it becomes brittle enough to chip and shatter instead of stretch. On the right material it is genuinely fast, and enthusiasts report stripping a section in a couple of minutes once the process is running. The technique:
- Wear insulated gloves to the wrist. This is not optional.
- Break the dry ice into pieces roughly the size of your fist.
- Lay pieces on top of the mat and pack them along the section.
- Wait roughly 20 to 30 minutes, topping up as the ice sublimates.
- Hit the frozen material with a dead blow hammer or hammer and chisel.
- Vacuum or bag the chips before they scatter into the seat rails.
- Repeat section by section until only patches remain.
- Finish the patches with a heat gun and scraper.
Now the honest part. In a well-known test on a Volkswagen Cabriolet, dry ice left on for 30 minutes did essentially nothing, a chisel did nothing, and the heat gun finished the job in about ten minutes plus cleanup. The conclusion was blunt: dry ice was a waste of time once the travel and waiting were counted. That is the single most useful dry ice data point on this topic, and it comes from a real head-to-head comparison rather than a forum guess.
Why it fails, three reasons:
- Fibrous material. The fibers carry the cold away and the mat just flexes. This is the most common cause and it is not fixable with more ice.
- Not enough dwell time. Thirty minutes is not magic. Thicker pads need longer, and adding more ice on top does not make the heat leave faster.
- Thin or already cracked material. Cracked butyl has delaminated from the metal, so shattering it achieves nothing except scattering fragments that no longer need to come off.
Safety with dry ice is straightforward. Ventilate, because it releases carbon dioxide gas and a closed garage can make you genuinely lightheaded. Wear gloves. Never put dry ice in a sealed container, and never leave it in a hot car. If you have no insulated gloves, skip this method; the material is not worth a cold burn.
A cheap alternative to buying dry ice by the bag is a carbon dioxide fire extinguisher. One owner in a hybrid vehicle forum reported freezing the material with one and finding the brittle chips came up far more easily than with any other cold method.
Method 3: Mechanical Removal with Chisel, Hammer, and Air Chisel
Mechanical removal is the oldest technique and still the best one for fibrous material, for tar paper on a vintage car, and for anyone who does not want heat anywhere near a fuel line. The principle is simple: get the material brittle with cold, then lift it at the correct angle so it breaks into large pieces rather than dust.
Use a wide flat blade screwdriver or a cold chisel with a dead blow hammer. Set the tool at about a 45 degree angle to the floor and work in along the factory seams first, where the mat was already cut and the bond is weakest. Keep the lifting angle under about 20 degrees. Under that angle the material releases in big pieces; over it, it shatters into chips you will be vacuuming for an hour.
Control the pieces, not just the effort. Large plates and 4 by 6 inch chunks come free if you work along the seam line, and that is what a good removal looks like. A restoration thread on a second-generation rotary car documents exactly this: hammering at 45 degrees and lifting shallow lifted entire panels.
The air chisel is the speed option. One builder finished an entire car in about 30 minutes with an air chisel after spending four hours with a hammer and chisel, and it comes up repeatedly in enthusiast threads as the step that changes the size of the job. A flat blade and a cheap compressor beat a sore wrist every time. If you will not buy one, renting a few hours beats buying a multi-tool you will use once.
Whatever you use, wear eye protection. Chipped butyl and tar paper fly, and the shards are sharp enough to embed in skin.
Removing Tar from Curved Areas and Wheel Wells
Flat floor pan is the easy half of the job. The wheel arches, transmission tunnel, firewall, trunk floor, and quarter panels are where most of the weight hides, and they are where flat blades stop working.
On a curved surface, work in short overlapping strips rather than squares. Follow the contour with the plastic scraper held tangentially, and keep the blade in contact with the metal so the tar peels away from the curve instead of lifting off it in a sheet. On the wheel arches, many builders go around the arch with heat and then finish the tight radius with a heat gun alone, holding the mat against the metal while it softens and pulling it away by hand.
The tunnel is the slowest area because it is a deep channel with a lip on each side. Take the mat off the flat top first, then work down each side. Do not try to preserve material in the channel unless you already know you are putting it straight back, because you will end up tearing it in the middle.
Dealing with Leftover Tar Residue and Adhesive Film
Heat removal leaves a thin black film even on a clean job, and fibrous material leaves a stubborn version of it that never fully lifts. This is normal, and it is a chemical problem rather than a mechanical one at that point.
Goof Off Pro Strength is the most commonly recommended adhesive remover across enthusiast threads, and it works on butyl residue and the adhesive film underneath. A detailed post on a Honda Civic forum describes the technique that works: work in 6 by 6 inch sections, apply the remover generously, and agitate it with an old toothbrush so it gets into the texture of the residue rather than sitting on top of it.
Test first. That same post reports Goof Off removing residue but being capable of stripping paint if left too long, while leaving factory primer alone. The primer is sacrificial by design; paint on a restored car is not. Always do a small test patch in a hidden corner and leave it for the full dwell time you intend to use elsewhere.
Brake cleaner is the common alternative and it shows up in a lot of builds for residue cleanup, with the standard warning that it will attack plastic and rubber trim, so keep it off the interior plastics. Acetone and mineral spirits work but strip faster and need more ventilation. Never use paint thinner or lacquer thinner to soften the mat itself, because the result is a gooey black smear that is harder to remove than the original problem.
Thin coats, short dwell, stiff brush, and a shop towel to lift the loosened film. Work while the residue is still soft. Once it dries, you are back to scraping.
Cleaning the Floor Pan Afterwards and Checking for Rust
Once the metal is bare, wipe the whole pan with denatured alcohol and clean shop towels. It cuts through the last of the oily film, evaporates without residue, and leaves the surface in a state where epoxy primer and new butyl will actually bond.
This is the moment to look for corrosion, because you have never had a better view of the floor pan in your life. Pay attention to the front footwell corners, the seat mounts, the drain channels along the rocker, and any spot weld that was ever repaired. Run a magnet over the pan to find thin spots, and pick at any suspicious area with a pick tool. On cars with wet carpet history, assume there is something under the rear seat area.
Check the factory seam sealer while you are in there. If the deadening came off as part of removing the seam sealer, plan on re-running every seam you disturbed with body sealer before primer goes down.
Inspect the primer itself. Where the scraper was aggressive, you may find bare steel or a dragged-through primer edge. Bare steel spots should get converted to bare metal, primed, and sealed, not painted over with a surface coat and hoped for.
Time and Weight Reality Check
Here are the numbers enthusiasts report, consolidated so you can plan a weekend properly. These are the figures from build threads, not laboratory conditions, and your results will vary with material condition and weather.
| Vehicle and approach | Reported time | Reported weight removed |
|---|---|---|
| Small car, heat gun, sound material | About 10 minutes of active work per section | 20 to 40 pounds for a full strip |
| Full car, air chisel | About 30 minutes | Not separately reported |
| Full car, hammer and chisel by hand | About 4 hours for the same job | Not separately reported |
| Dry ice test on a VW Cabriolet | 30 minutes, no useful result | None removed by cold |
| Partial strip, Toyota 4Runner | Single evening | About 10 pounds for part of one car |
| Two-generation sports car full strip | Multiple evenings | 30 to 40 pounds |
The pattern across all of them is that preparation and cleanup take as long as the removal itself. Budget equal time for vacuuming, residue work, and the final wipe, or you will be doing this job in three separate weekends.
Disposing of Tar and Chemical Waste Safely
Almost nothing written about this topic covers what happens to the waste, and it matters more than people expect. Butyl rubber is not a hazardous waste in the way solvents are, but the solvent-soaked towels and the tar paper with its bituminous backing do not belong in a general recycling bin, and many local waste services will not take solvent-contaminated material.
Work in a ventilated space with a fan if you are indoors. A garage door open on its own is often not enough ventilation when you are using remover across an entire floor. Wear a mask rated for organic vapors rather than a dust mask, and change gloves between the removal stage and the chemical stage.
Contain everything. Line a bucket with a heavy duty trash liner, drop the sheets in as you peel them, and tie it off before the sheets stick to the sides. A contractor bag works well for chips and small fragments. Bag the solvent wipes separately from the solid tar, and check your local household hazardous waste rules for the soaked towels before they go anywhere near a bin.
Replacing the Deadening You Removed
If you removed the material because it was working and you want the noise back, plan the replacement before you start. Nothing is more frustrating than a bare, primered floor with a pile of new butyl in the trunk and no idea how far to cover it.
Modern butyl mat in a 3 to 4 mm thickness is the most direct replacement and bonds to clean, primed metal. Closed cell foam adds thermal insulation rather than vibration damping, so it works best layered over butyl rather than as a substitute. Foil faced barrier mat is useful for heat and is not a replacement for damping on its own.
Coverage is the open question, and honest enthusiasts disagree. One owner in a 4Runner thread argued that 20 to 30 percent coverage captures most of the benefit, while another found measurable gains all the way to 90 percent. At minimum, cover the front footwell floors, the transmission tunnel, and the rear seat pan, which is where road noise enters. If you want a defensible number, the two large flat floor sections first, then the tunnel, then the wheel arches.
Never reapply loose factory material. Once it has cracked and delaminated, it is no longer damping anything, and a builder who did put factory material back over fresh butyl after other chassis work is the exception that proves the rule. Use new material on clean, prepared metal.
Common Mistakes and Safety Warnings
Parking the heat gun in one spot. This is how you discolor primer and how you start a fire in a car full of upholstery. Keep the nozzle moving, use the lowest effective setting, and hold a working distance of 4 to 6 inches.
Heating over wiring, fuel lines, and brake lines. Pull and secure them out of the work area first. Where that is not possible, wrap them in aluminum foil and keep the gun moving. Heat plus a plastic sheath plus an oily surface is a bad combination, and the people who discover this usually find out by smell.
Using thin metal tools. Flat putty knives and screwdrivers chip the primer, tear through it, and leave bare steel that rusts from the inside out. A wide flexible plastic scraper costs very little and does not touch bare steel at all.
Using thinners or lacquer thinner to soften the mat. Every thread that tried it reported the same result, a big gooey black mess that is worse than the original problem. Solvents belong on the final residue, not on the mat itself.
Skipping the solvent test patch. Adhesive remover that works in one minute on factory primer can lift paint if left longer. Test a hidden 6 by 6 inch section and wait the full dwell time.
Handling dry ice barehanded or in a sealed container. Wear gloves to the wrist, ventilate the space, and never seal it. Dry ice in a closed car is a genuine asphyxiation risk, not a joke.
Torquing seat belt bolts with an impact driver. Seat belt fasteners are torque-to-yield. Use a torque wrench and look up the spec for your car before the seats go back in.
Forgetting the safety glass around you. Goggles, gloves, and a dust mask are cheap. Chipped butyl and tar paper are sharp, hot tar burns, and solvent fumes are exactly the kind of thing you notice after the fact instead of before.
One more that is not a safety issue but saves the most time: do not skip the preparation. The difference between a two-hour job and a two-day job on the same car with the same material is almost always whether the interior was stripped and the harness was moved first.
Frequently Asked Questions
How do I remove sound deadening from a car?
Score the mat into 6 by 6 inch squares, warm each square with a heat gun on low held 4 to 6 inches away, then slide a wide plastic scraper under the softened edge and peel it back in sheets. Vacuum as you go and finish the black residue with an adhesive remover. Pull wiring and brake lines out of the area before you start.
How can I remove sound deadening without using dry ice?
Use heat. A heat gun on low plus a wide plastic scraper is the most reliable non-freezing method and it works on fibrous and non-fibrous material alike. Hold the gun 4 to 6 inches from the mat, keep it moving, and let the adhesive soften before you lever. If heat is not an option, a cold chisel and dead blow hammer works on brittle material.
Can dry ice be used to remove sound deadening?
Yes, but only on non-fibrous butyl. Lay pieces on the mat, wait 20 to 30 minutes, then chip it with a dead blow hammer. Fibrous material absorbs the cold and will not shatter, and one documented test on a VW Cabriolet found 30 minutes of dry ice did nothing at all. Wear insulated gloves and never store dry ice in a sealed container.
Why does dry ice not work on my sound deadening?
Almost always because the material is fibrous. Fibrous butyl has embedded fibers that carry the cold away, so the mat flexes instead of becoming brittle and it will not shatter. Some non-fibrous material also fails when it is already cracked and delaminated, because it no longer needs to come off. Lift a corner with a putty knife and look at the cut edge before you buy ice.
What is the best sound deadening material for car floors?
Butyl rubber mat in the 3 to 4 mm range is the most direct replacement for factory deadening, because it is the same viscoelastic material that damps vibration. Layer closed cell foam over butyl for added heat insulation, since foam alone is not a vibration damper. Apply it to clean, degreased, primed metal for the best bond.
How much sound deadening should a car have, and is it necessary?
Most cars should keep what they came with. Sound deadening only works while it is bonded to metal, so leave it if it is still flexible and stuck down. Coverage matters more than most owners expect, and the difference between 20 to 30 percent coverage and 90 percent coverage is audible at highway speed. Strip it only if it is cracked, soaked, or sitting on corrosion.
Will my car be louder after I remove the sound deadening?
Yes, somewhat. One owner who stripped the mat and kept the carpet reported the car was not intolerably loud, while others found a clear increase in road noise through the transmission tunnel and rear footwells. If noise is the main worry, plan to put new butyl down before the carpet goes back in rather than leaving the floor bare.
How long does it take to remove sound deadening from a car?
About two to three hours for a small car with sound, still-adhered non-fibrous material using a heat gun. Fibrous material, tar paper, and cold weather push that to a full day or a weekend. One builder finished an entire car in about 30 minutes with an air chisel after spending four hours with a hammer and chisel, so your tooling matters as much as your technique.
Can dry ice be used to remove car undercoating?
Only the factory floor deadening is worth attacking this way. Undercoating sprayed on the underside of a car is a different material, and a lot of it is deliberately designed to resist removal, so it is better removed with a scraper and panel off. Dry ice and cold chisels are for butyl mat and tar paper on the interior floor pan, firewall, and trunk.
Conclusion
To remove sound deadening tar from a car floor, identify the material first, strip and protect the interior second, and only then pick a tool. A heat gun on low with a wide plastic scraper is the default answer and the one that works on almost everything. Dry ice earns its place on non-fibrous butyl in a cold garage. An air chisel earns its place when you have a whole car and a sore back coming.
Take your time with the parts nobody photographs. Pull the harness out of the way, keep the gun moving, test every solvent on a hidden square, and look hard at the metal when it is bare. That last step is the one that turns this from a weekend chore into the moment you find the rust before it becomes a floor pan replacement.
Last updated October 2026. If you are mid-project and want a second opinion on a stubborn corner, send a photo of the cut edge of the material and we can tell you which method to switch to.