
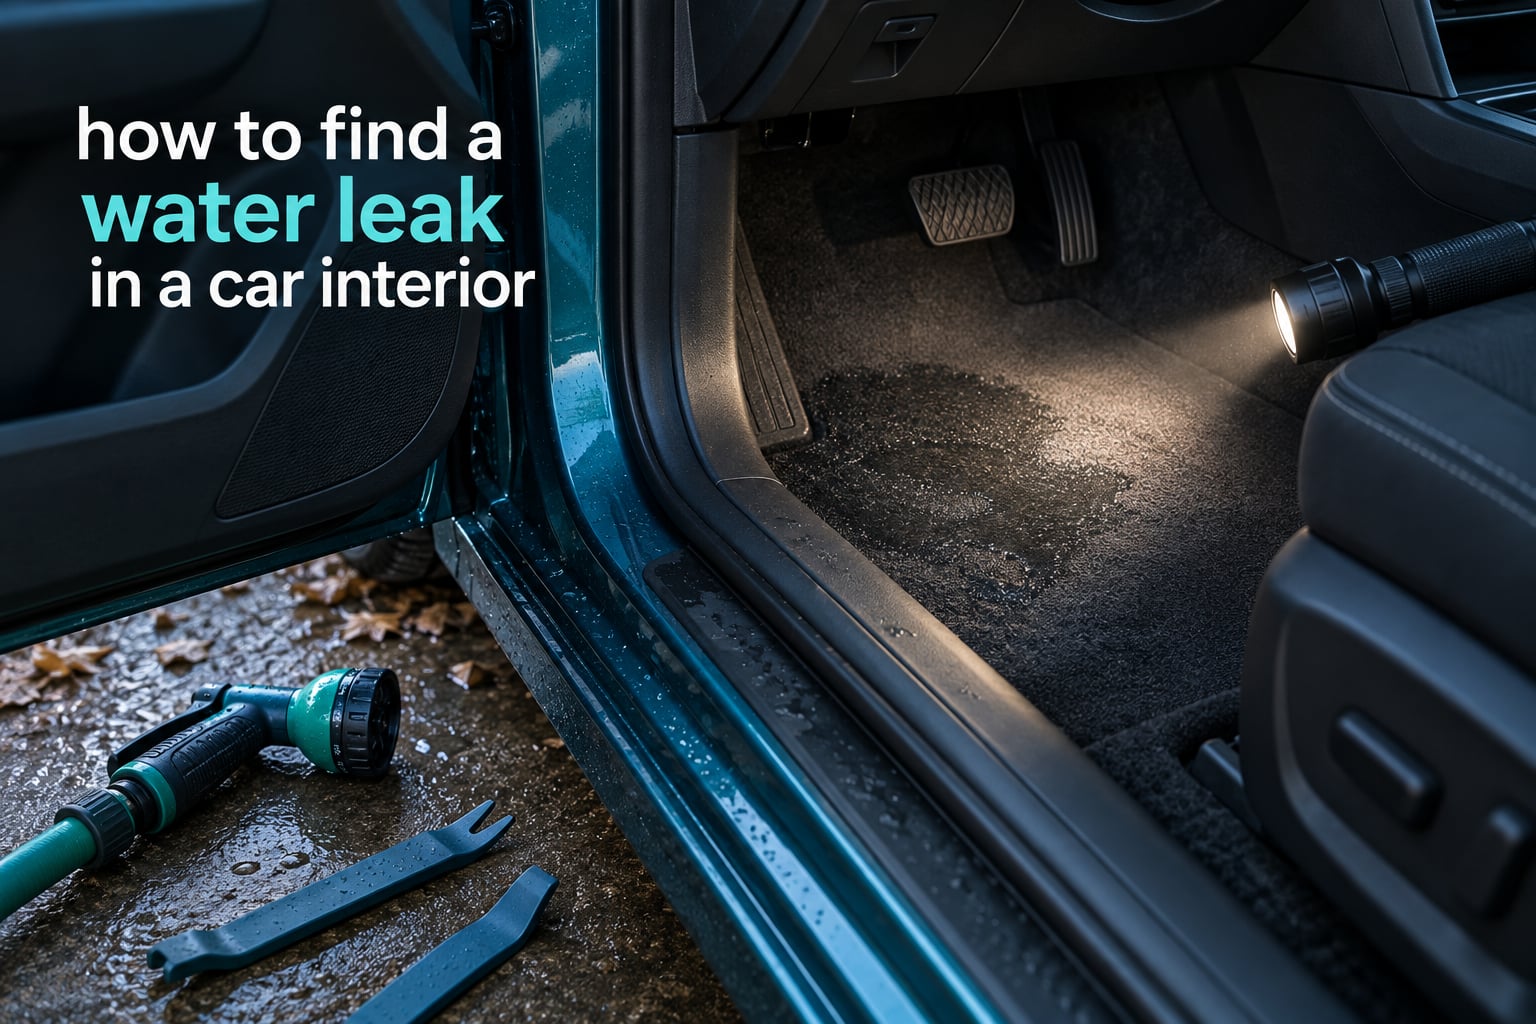
Finding the source of a wet patch inside a car takes patience more than talent, because water rarely lands where it enters. It runs along wiring looms, down pillar cavities, and under carpet padding before it finally shows up in a footwell or on a seat frame. That is why a wet spot on the floor is a starting clue, not an answer.
This guide walks through how to find a water leak in a car interior using the same order of operations a trim technician would use: read the timing pattern, confirm the liquid, then isolate the source with a controlled test before you start pulling trim apart. Updated for 2026, it covers the five leak sources behind the large majority of interior water intrusion, plus the drying protocol that keeps a single leak from turning into a mold problem.
We have run through the diagnostic sequence below on cars ranging from early sedans with sealed cabin air systems to newer crossovers with sunroofs, panoramic glass, and electronics mounted under the front seats. The techniques do not depend on a specific make, and none of them require a lift.
Table of Contents
- How to Find a Water Leak in a Car Interior: The 6-Step Method
- When the Leak Happens Tells You Where It Started
- Common Signs of an Interior Water Leak
- Tools and Materials for Leak Diagnosis
- How to Run a Controlled Water Test
- Leak Clues by Interior Location
- Top 5 Leak Sources and How to Fix Them
- Tracing the Water Path Back to Its Source
- Why Some Leaks Only Appear on a Slope
- DIY Repair or Call a Professional
- How to Dry Out a Wet Car Interior and Stop Mold
- Mistakes to Avoid While Diagnosing a Water Leak
- Post-Repair Verification Checklist
- Seasonal Checklist to Prevent the Next Leak
- Frequently Asked Questions
- What could be causing water leakage inside my car?
- Why is water leaking inside my car when it rains?
- How do I find where moisture is getting in my car?
- How to get water out of a car interior?
- How to identify liquid leaking from a car?
- How much does it cost to repair a water leak in a car?
- What to do if my car is leaking water inside?
- Can a clogged sunroof drain cause water in my car?
- Conclusion
How to Find a Water Leak in a Car Interior: The 6-Step Method
Here is the condensed version before the detail. Work through these in order and stop as soon as you find a wet source you can account for.
- Read the timing. Note whether water appears only after rain, only with the air conditioning running, only after a car wash, or only when parked on a slope.
- Confirm the liquid. Smell it, touch it, and check for oil film, sweetness, or a musty carpet dampness that identifies condensation.
- Map every wet area. Walk the interior, check the headliner and pillar pockets, and record all damp zones rather than just the wettest one.
- Check the easy drains first. Sunroof drain tubes, cowl drains, the cabin air filter housing drain, and the A/C evaporator drain account for most reports.
- Run a controlled water test. Apply a gentle hose stream to one zone at a time while watching the interior for movement.
- Verify before you repair. After the fix, run the same test again plus a full hose rinse to confirm the leak is genuinely gone.
Two rules make the rest of this process work. First, never work on a lone dry car with no water source and no way to see inside while water is applied. Second, keep the interior dry and monitored from the moment you find the source, because mold begins growing well inside a day.
When the Leak Happens Tells You Where It Started
The single most useful diagnostic signal is not where the water is, it is when the water is. Timing narrows the candidate list faster than any other test.
Only after rain, heavy wash, or snowmelt
That pattern points to an external entry point: a sunroof seal or drain, door or hatch weatherstripping, a windshield or rear glass seal, a body seam, or a cowl area problem. Mud on the sills or a wet door card confirms water came in from outside.
Only with the air conditioning on
This is condensation, not a body leak. A clogged evaporator drain tube, an iced-over evaporator case, a failed heater core bypass valve, or a dirty cabin air filter housing will all drip onto the passenger floor. The water is cold, clear, and has a faint musty smell, and it appears in a predictable line from the HVAC case.
Only after a car wash or automatic wash cycle
High-pressure washers find gaps a garden hose never will. Pay attention to whether water appears minutes later or only after a drive, because saturating an absorbent surface often takes time to travel out to the cabin.
Only when parked on a slope or nose-down
Water already inside the body can be held by a seal or a plug that drains correctly when level. Tilting the vehicle lets trapped water migrate inward, so the wet spot tells you about gravity, not necessarily the entry point.
Delayed, weeks after the weather changed
Leaks that appear long after the cause usually mean gradual saturation. A slowly rusting floor pan seam, a separated body drain plug, or a cowl drain that clogs every autumn and slowly overflows all fit this profile. Forum owners report this pattern repeatedly, and it is why a leak that only shows up in spring often points back at a debris-filled drain.
Always, in any weather
Constant dampness with no weather trigger is more likely a coolant or refrigerant-adjacent leak, a leaking heater core, or a failing window regulator drain. It can also be an evaporative emission leak dripping onto the carpet, which smells sharply of fuel.
Common Signs of an Interior Water Leak
Water announces itself before it is visible. These are the signs worth acting on immediately.
- Damp carpet padding that feels spongy underfoot, especially in the passenger footwell
- A musty or sour odor that strengthens after the car sits closed for a day
- Water stains or a discolored ring on the headliner, sun visor, or pillar trim
- Fogged or permanently hazy windows, or a rear defroster that stays cloudy
- Drips landing on a seat or center console when the car is parked overnight
- A musty smell from the HVAC even when the system is off, caused by a soaked cabin air filter
- Rust-colored or greenish residue around interior electrical connectors
- Dampness in the trunk, under a cargo liner, or in a hatch or liftgate weatherstrip
- Paint or seam sealer that feels soft, blistered, or peeled near the base of a pillar
How to identify the liquid
Before you start taking things apart, put a finger in the wet area and look at it. Clear water with a musty or earthy smell is rain or condensation. Coolant is sweet-smelling, slimy, and often leaves a colored residue. Engine oil is dark and film-forming. Fuel or evaporative vapors smell sharp and chemical.
Test with a paper towel. A greasy ring that does not soak through points to an oil or coolant film rather than plain water, and that changes the whole diagnosis. If you suspect coolant, never run the engine with the interior exposed to it, and treat the source as urgent.
Tools and Materials for Leak Diagnosis
You can start with very little, and add tools as the diagnosis demands. Group them by job.
Finding and reading the leak
- A bright inspection light or LED headlamp, since water hides in dark cavities
- Low-pressure spray nozzle or garden hose with a controllable trigger
- Absorbent cloths, paper towels, and a wet/dry shop vacuum
- Low-tack painter’s tape for labelling and isolating test zones
- Talcum powder or cornstarch for tracing water movement
- Detection mirror and a small pick for checking behind trim
Removing interior trim
- Trim removal tools or plastic pry tools to avoid breaking clips
- Phillips and Torx drivers in the sizes your car uses
- Clip assortment, because trim clips are one-use items that snap easily
- Work light on a stand, so both hands stay free
Clearing drains and sealing
- Soft drain clearing wire or flexible plastic tube for narrow drain tubes
- Compressed air used conservatively, well under 30 PSI, with a regulator
- Butyl mastic tape and automotive-grade seam sealer for seam repairs
- Neutral-cure silicone or a purpose-made weatherstrip adhesive for door seals
- Vacuum and a small bottle of water for verifying drains flow to the exit
A cheap fog or smoke machine is the most underrated item on this list. Owners on enthusiast forums use one to make leaks and open drain paths visible, and it works on sealed cabins far better than most people expect.
How to Run a Controlled Water Test
The controlled test isolates one area at a time. Applying water to the whole roof and then looking inside teaches you almost nothing, because five things could be leaking at once.
Prepare the vehicle first. Empty the interior and remove the floor mats. Set up a wet/dry vacuum in the passenger footwell to catch drips before they soak in, and keep a light in the footwell pointing upward so you can see the floor pan.
Work through the following steps.
- Start at the top. Apply a gentle stream along each roof seam, the sunroof perimeter, and the drip rails in turn.
- Move down one zone at a time. Test the windshield header, then each door opening, then the hatch or liftgate, then the rear glass.
- Watch the interior continuously. Keep your eyes on the headliner seams, pillar pockets, and seat frames while the water runs.
- Isolate with tape. If a general test is too broad, use painter’s tape to partition the roof or opening into a small number of sections and retest each one.
- Use controlled pressure. Stay in the range of ordinary rain pressure. A pressure washer can force water past a sound seal and give you a false result.
- Let it run long enough to travel. Water through a blocked vapor barrier may not show inside for several minutes, so give each zone a few minutes before you move on.
- Log the result. Write down which zone produced water and where it appeared. A short written record beats relying on memory after twenty tests.
Use talcum powder to reveal the path
Sprinkle a thin, even layer of talcum powder or cornstarch across the carpet and along the door sills before you test. When water runs, the dry powder turns into a visible dark channel that shows you the direction of travel and the entry point. Tap the powder off and reapply a fresh layer before each new test, otherwise you will trace your own previous path.
Use a fog machine to see sealed leaks
Close the doors and windows, run the heater on high to draw air through the cabin, and push smoke or fog into the cabin from a gap in the door frame or an open window. Where smoke escapes, the leak is. The same principle works in reverse: seal the cabin and pressurize it slightly, then look for where the pressure drops. Many trim specialists rely on this method, and a single run can rule out four suspects in a couple of minutes.
Test on a slope
If the leak only shows up when the car sits nose-down, park it on a driveway with a meaningful grade or lower one side with ramps, then wait. Anything already inside the body will migrate toward the low corner. This is a good way to find leaks sitting inside a sealed cavity, since a park with the nose down moves water out of the cowl and away from the firewall.
Leak Clues by Interior Location
Water pools at the lowest point it can reach, so the wet area tells you where the path ended. Use this map as a starting point, not a conclusion.
Front passenger footwell only
Likely sources: cabin air filter housing drain, evaporator drain tube, cowl drain overflow, or an HVAC case seal. Confirming clue: water appears only with the A/C or heat on, with a damp cabin filter or a soaked case base.
Driver side footwell
Likely sources: cowl drain, firewall grommet, door vapor barrier, or an A-pillar seam. Confirming clue: water spreads across the whole floor mat area from one side.
Both front footwells
Likely sources: firewall grommets, the cowl area, the HVAC case, or the evaporator drain. Confirming clue: symmetrical wetting, often with a musty HVAC smell.
Under a front seat
Likely sources: floor pan seam rust, a body drain plug, or the seat rail seam. Confirming clue: standing water under the rail and rust bleed on the pan surface.
Along a door sill or rocker
Likely sources: door weatherstripping, a torn vapor barrier, or a body seam. Confirming clue: a wet sill channel and water on the top of the door card.
Rear seat area and parcel shelf
Likely sources: rear glass seal, C-pillar seam, roof seam, or headliner drop. Confirming clue: a damp rear footwell with dry front footwells after rain.
Trunk or cargo area
Likely sources: hatch or liftgate seal, trunk floor seam, spare tire well drain, or a tailgate wiring pass-through. Confirming clue: wetness concentrated at the back and around the spare well.
Headliner and pillar trim
Likely sources: roof seam, sunroof drain, drip rail blockage, or a disconnected sunroof drain tube. Confirming clue: staining around a pillar pocket and a damp roof lining above it.
Under the dash near the blower housing
Likely sources: cowl drain overflow entering the HVAC intake, or a cabin filter housing leak. Confirming clue: water dripping from the blower area on the passenger side.
Top 5 Leak Sources and How to Fix Them
Ranked by how often they show up in real diagnostic work, these five account for the large majority of interior water intrusion.
1. Sunroof Drains
A sunroof collects rainwater in a channel around the glass perimeter, then runs it through small drain tubes at the corners down the A-pillar, B-pillar, or C-pillar into the body. Leaves, dirt, and garage grit clog those tubes, and the channel overflows inside the headliner.
Inspection: Open the sunroof fully and look along the channel for debris. Check the headliner around the opening for brown water staining or a soft, spongy edge. Look down each pillar for a damp trail, a disconnected tube, or water staining on the trim.
Clearing the drains:
- Open the sunroof and locate the drain exits at the corners of the channel.
- Feed a soft flexible wire or a narrow plastic tube into each tube and work it down the full length.
- If the tube is compressed or disconnected, reseat it and secure it with a plastic tie to prevent future slippage.
- Pour a small amount of water into the channel and confirm it exits at the bottom of the pillar or outside the body, not into the cabin.
- Add a rubber drain plug or a screen as a guard if the vehicle design allows it.
Test with a fog machine: The drain tube is the best place to start smoke testing, since it is a long open path. Smoke emerging inside the headliner confirms a clog or disconnection immediately.
2. Door Weatherstrips and Vapor Barriers
Modern doors carry a molded plastic vapor barrier membrane behind the door card. It is the layer that stops road spray from wetting the carpet edge. When it tears, water wicks up the door card and migrates into the cabin, which is why the wet spot often appears well away from the door.
Inspection: Run your fingers along the door perimeter rubber, looking for hardening, flattening, gaps, or a broken section. Then remove the door card or at least the lower kick panel and examine the membrane for tears, especially around speaker cutouts and harness pass-throughs. Forum owners report that a speaker installation is a frequent point of failure, since drilling and re-seating often puncture the barrier.
Repair:
- Replace the perimeter weatherstripping with the correct profile; buy by part number, not by appearance.
- Patch a small tear in the vapor barrier with the correct butyl-based repair tape, pressed firmly and kept clear of direct heat.
- Re-seat a loose door card so the membrane edges are captured and the lower edge seals against the sill channel.
- Check the sill channel for a drain hole, and clear it if it is packed with grit.
Warning: Do not use household silicone to fix a door weatherstrip. It is not UV-stable, it can hold water against the paint, and it makes the next replacement far harder.
3. Cowl Drains, the Cabin Filter Drain, and the A/C Evaporator Drain
Three separate drain systems sit in the same general area, and confusing them is the most common misdiagnosis. Know the difference before you start.
Cowl drains. The plenum area below the windshield traps water that runs off the glass. Its drain holes and the wiper trough channel water into the body. Leaves mat down here every autumn, and owners report leaks that appear only once seasonal rains begin. Clear the trough and holes by hand and pour water in to confirm it exits at the body drain holes outside the vehicle.
Cabin air filter housing drain. Many people never know this hole exists. The housing that holds the cabin air filter has a small drain at its base so the moisture that collects from the evaporator box can escape. When it blocks, water backs up and soaks the filter and the box, producing a soaked filter, a soaked floor mat, and a strong musty smell with the fan off. A blackened or wet-looking filter is your confirmation, and a filter that is wet while the A/C is not running points to a roof or cowl leak instead.
A/C evaporator drain tube. The evaporator produces condensation, and that water runs out of the case through a small tube. A common failure mode: the drain exits above the evaporator, the case ices over, and the meltwater runs out of the case floor once it thaws. A foul smell and a puddle in the footwell on hot days are the classic signs. Clear the tube gently with a soft wire and low-pressure air, and confirm you did not damage the tube, since a loose evaporator drain is a known cause of water intrusion on some models.
Firewall grommets. Every bundle of wiring, hose, or cable that passes through the firewall should be sealed with a grommet. A missing or displaced grommet is an open highway straight into the cabin. Inspect the full harness route through the footwell.
4. Windshield, Glass Seals, and Body Seams
Windshield seal failures are often missed because the water does not appear at the glass. It enters under the cowl, runs down the A-pillar cavity, and only surfaces at the base of the pillar or in the door card weeks later. A telltale sign is rust on the inside of the windshield trim clips or a stained pillar.
Inspection: Examine the windshield perimeter, the side windows, and the rear glass for wetness, gaps, or sealant that has pulled away. Peel back a corner of the windshield trim to look at the seam underneath. Check roof seams and drip rails for separation, and look for any seam sealer that has cracked, blistered, or been painted over.
Minor fender damage can also expose a windshield seal that was never touched. Forum readers describe a small bumper scuff that misaligned the fender and let water reach a seal, with the leak appearing months later. If your car has had body work, inspect the adjacent seals first.
Repair: A proper windshield reseal or replacement is a body shop job with a cure time, and doing it yourself usually voids the urethane bond. Smaller points, such as a separated roof seam or a cracked pinch weld area, can often be handled with butyl mastic tape and seam sealer, cleaned and dried first.
5. Floor Pan Rust and Body Drain Plugs
The floor pan is a double-layer steel structure, and the space between the layers traps water. If the plug at the bottom rusts out, water stays in the pan and seeps up through the seams. Nobody notices until the carpet is soaked, and by then the rust has often spread along the seam.
Inspection: Pull back the carpet edge and look for a repair panel, seam sealer that has been cut or coated, and rust-colored streaks running downhill. Feel for a hard spot in the carpet padding, which is a rust-through area or a pinch weld. Check under the car for water running out from under the vehicle after a heavy rain.
Repair: A missing or rotted drain plug is a small job: clean the hole, fit the correct plug, and seal it. Rust-through needs more: cut out the corroded metal, cut a patch from matching steel, weld or bond it in, coat it properly, and restore the seam sealer. A coating on rust that has already perforated the metal will not hold.
Trunk leaks follow the same logic. Check the hatch or liftgate seal, the trunk floor seam, the spare tire well, and any drain holes under the cargo liner. Lift the liner and look for water staining rather than assuming the liner is clean.
Tracing the Water Path Back to Its Source
Two tools turn guesswork into a process, and neither needs a full teardown.
Powder tracing. Lay a light coating of talcum powder or cornstarch over the floor, sills, and under the seats before each test. Dry powder turning dark shows the exact path the water took, which often leads you straight to the offending pillar, seam, or body panel. Reapply fresh powder between tests, or you will follow the ghost of the last test.
Smoke and fog. Run the heater on high to circulate air, close the doors, and feed fog into a gap in the door frame or an open window. Escaping smoke pinpoints the leak. The technique also works on drains and body cavities, which makes it the fastest way to check a sunroof channel, a cowl drain, or a firewall grommet you cannot see properly.
Check for electrical corrosion while you are in there
Water and wiring do not mix, and the damage is slow and often misdiagnosed. When moisture reaches a connector, the copper reacts and turns the plug green or chalky white. Forum mechanics call this green death corrosion, and the symptoms are electrical, not visual: intermittent sensors, warning lights, a blower that works on one speed, windows that drop a few inches and stop, or lighting that behaves oddly in wet weather.
Disconnect the battery before handling anything, do not pry a connector open while it is energized, and inspect every connector in the wet area: seat harnesses, the under-dash junction blocks, the HVAC blower plug, and any connector sitting under the carpet. A connector that is already green will not recover on its own. Clean it with contact cleaner, address the water source first, and treat any corroded terminal or heat-damaged connector as a replacement, not a cleaning job.
Timers, wiring, and body seals can also be checked with the smoke test, which catches leaks that do not yet reach the carpet but are already wetting a connector.
Why Some Leaks Only Appear on a Slope
Plenty of leaks depend on the parking angle, and that gives you a diagnostic trick for free. Water held inside a body cavity, a cowl channel, or a double-layer floor pan will run toward the low side. A seal or drain that sits higher than the pocket it drains will leak when the car is tilted and stay dry when the car is level.
To test this, park the vehicle with a clear nose-down grade and leave it for a few hours. Then repeat with the vehicle sitting the opposite way. If the wet area moves to the low side, you are dealing with a containment problem rather than a straight-down intrusion, and you should look at internal drains and body cavity plugs before exterior seals.
For the same reason, a car that is parked nose-up on a driveway can look dry for weeks and still hold a hidden reservoir of water. A gentle hose test with the car on a grade moves water out of cavities and into view far more often than a level test does.
DIY Repair or Call a Professional
Some repairs are a weekend job, and some are not. The honest line sits at the point where the fix requires opening the body or pulling the dashboard.
Worth doing yourself:
- Clearing a clogged sunroof, cowl, cabin filter housing, or A/C drain tube
- Replacing door weatherstripping and reseating or patching a vapor barrier
- Replacing a body drain plug and re-sealing the hole
- Clearing cowl troughs and wiper channel debris
- Cleaning and resealing a connector in the footwell, after disconnecting the battery
Take it to a professional when:
- The windshield or rear glass has to be resealed or replaced, because the urethane needs proper surface prep and cure time
- The floor pan is perforated and needs welding or a properly formed patch
- The water is going through a body seam or structural panel joint
- The leak runs into the dashboard, where the HVAC case, wiring, and airbag components live
- You suspect coolant rather than rain or condensation
- The car has been in collision repair, and you cannot tell what was undone
Explain the test you already ran when you hand the car over. Tell the shop which zone produced water, when it happens, and what the liquid smells like, and ask them to reproduce it before they start. A shop that can duplicate your test in five minutes will not replace parts on a guess.
How to Dry Out a Wet Car Interior and Stop Mold
Stop the water first. Everything below assumes the source is fixed, because drying an active leak just wets the carpet twice.
Environment protection guidance points to a short window: mold can begin growing on wet materials within 24 to 48 hours. That is why speed matters more than equipment.
- Remove the source of water. Fix the leak, then confirm it with a test before you start drying.
- Pull the carpet and padding if soaked. Water in the padding will not dry on its own and will keep feeding mold underneath. Carpets dry far faster laid out flat on a driveway.
- Vacuum out standing water. A wet/dry shop vacuum removes soaked padding water that a towel cannot reach.
- Move the air. Open the doors and windows if the weather is dry, and run the HVAC fan on high without the A/C, which pulls air through the cabin and the case vents.
- Add mechanical drying. A desiccant dehumidifier and a fan work together to actually pull moisture from the air, and a rechargeable or replaceable desiccant absorber packet works well for smaller damp areas and closed cars.
Compare the drying methods
Wet/dry shop vacuum. Best for standing water and soaked padding. Watch out for the fact that it removes the water but not the moisture bound inside the fiber.
HVAC fan on high with windows open. Best for free air movement in mild, dry weather. Watch out for humid conditions, where it adds moisture instead of removing it.
Desiccant dehumidifier. Best for a closed car, a humid climate, or larger damp areas. Watch out for the fact that it needs power and time, and works best with a fan moving air.
Rechargeable desiccant absorbers. Best for small damp zones, storage, and overnight pull-down. Watch out for their limited capacity, which means they need frequent reheating or replacing.
Dealing with odor
A musty smell that survives drying is almost always mold in the carpet padding or under the trim. A diluted vinegar solution applied to the affected area kills surface spores after the carpet is fully dry, and baking soda left overnight absorbs residual moisture and odor. If the smell returns when the carpet gets damp, the padding is contaminated and the only real fix is removal and replacement of the affected section.
Mistakes to Avoid While Diagnosing a Water Leak
- Using a pressure washer. Force can push water past a sound seal and produce a false result, so start with a gentle hose stream.
- Flooding the whole roof at once. If water appears, you still do not know which zone did it. Test one zone at a time.
- Trusting the wet spot. The puddle location is where the water stopped, not where it entered. Always trace the path back.
- Assuming it is condensation. A wet passenger floor on a hot day is often a clogged cabin filter housing drain or an evaporator drain failure, not normal condensation.
- Using household silicone on weatherstripping. It is not UV-stable and traps water against the paint.
- Painting over a rust spot. A coating on a perforated floor pan will not stop the leak; the metal has to be replaced.
- Using compressed air at high pressure inside a drain tube. Keep it well under 30 PSI and regulated, or you can rupture a tube or a case and create a new leak.
- Drying with heat alone. Heat alone drives moisture into the padding and the closed cabin. Combine it with airflow and dehumidification.
- Forgetting the battery. Disconnect the negative terminal before working near interior wiring, and never probe a live connector.
- Assuming the fix worked after one dry day. Confirm it with a full test, which is the subject of the next section.
Post-Repair Verification Checklist
This is the step most people skip, and it is how a fixed car ends up back in the shop. Run the whole sequence after the repair.
- Repeat the original test. Run the same controlled water test that located the leak, on the same zones, with the same timing.
- Run a full rinse test. Give the vehicle a complete slow rinse over the roof, glass, doors, and hatch. This catches adjacent seals the focused test missed.
- Do a soak test. Park the car overnight or through a rain shower, then check every footwell, the trunk, the headliner edges, and the pillar pockets in the morning.
- Verify the drains. Pour a measured amount of water into the sunroof channel, the cowl trough, and the A/C case and confirm each one exits outside the cabin.
- Inspect after a drive. Take a twenty-minute drive, then check the carpet edges, seat rails, and door cards. Many slow leaks only move once the body warms and flexes.
- Check the electronics. With the battery reconnected, confirm there are no warning lights and that the blower, windows, and lights all behave normally.
- Recheck after a month. Sealed leaks that have been repaired can reopen as the sealant cures or the body flexes in cold weather. A single follow-up check prevents a repeat teardown.
Seasonal Checklist to Prevent the Next Leak
Most interior leaks come from small maintenance items that are easy to skip. A short routine covers nearly all of them.
- Spring: Clean the cowl trough and wiper channel before leaf season, and confirm both cowl drains flow. Check the sunroof channel while you are there.
- After heavy rain: Check the cabin air filter for dampness and the musty smell, and glance at the parking spot for a wet mark under the car.
- Before summer: Run the A/C on cold and confirm the drain tube flows and the footwell stays dry on a hot day.
- Autumn: Clear sunroof drain channels and the A-pillar drain exits before the leaves and pine needles go down.
- Year-round: Keep the door seals wiped and conditioned, and keep body drain plugs in place so the floor pan cannot hold water.
Frequently Asked Questions
What could be causing water leakage inside my car?
Five sources cause most interior water intrusion: clogged sunroof drain tubes, failed door weatherstripping or a torn vapor barrier membrane, blocked cowl drains, the cabin air filter housing drain, or the A/C evaporator drain, plus windshield and body seam failures and floor pan rust in older vehicles. The timing of the leak narrows the list fastest, because a rain-only leak points outside while an A/C-only leak points at the evaporator case.
Why is water leaking inside my car when it rains?
Rainwater is getting past an exterior seal or a drain. The usual culprits are a clogged sunroof drain channel, hard or torn door weatherstripping, a split vapor barrier, a separated windshield or rear glass seal, an open roof seam, or a cowl drain blocked with leaves. Water then travels inside a cavity before it appears, so the wet area is often a long way from the entry point.
How do I find where moisture is getting in my car?
Start with timing, then confirm the liquid, map every damp area, check the easy drains, run a controlled hose test one zone at a time, and verify before you repair. Sprinkle talcum powder on the carpet so the water path becomes visible, and use a fog machine or smoke machine to pinpoint leaks in sealed areas and drain tubes.
How to get water out of a car interior?
Fix the leak first, then pull out soaked carpet and padding, vacuum out standing water with a wet/dry shop vacuum, run the HVAC fan on high with the windows open, and add a desiccant dehumidifier. Mold can begin growing on wet materials within 24 to 48 hours, according to EPA guidance, so start the same day. A musty smell that returns when the carpet gets damp means the padding is contaminated and needs replacing.
How to identify liquid leaking from a car?
Touch the liquid and check a paper towel for a ring. Clear water with a musty or earthy smell is rain or condensation, sweet-smelling slimy fluid is coolant, a dark film is oil, and a sharp chemical smell points to an evaporative emissions leak. Any oily film means you should stop the diagnostic and trace that source instead, because engine oil and coolant on carpet needs a different repair entirely.
How much does it cost to repair a water leak in a car?
Cost depends entirely on the source. Clearing a clogged sunroof, cowl, cabin filter housing, or A/C drain, replacing door weatherstripping, and fitting a new drain plug are straightforward DIY jobs that mainly cost your time and parts. Windshield resealing, floor pan rust repair, and leaks routed through the dashboard need a body shop, an upholsterer, or a dealer glass specialist, and the labor far outweighs the parts. The practical advice is to spend an afternoon on diagnosis first, because a misidentified leak can mean paying for the wrong repair twice.
What to do if my car is leaking water inside?
Move the vehicle out of the rain, dry what you can with towels, and check whether the fluid smells sweet or smells like oil, since that changes the urgency. Avoid driving if coolant or oil is involved, and disconnect the battery before touching interior wiring. If there is green corrosion on any connector, stop and address the water first, because that corrosion is a symptom of the leak rather than a separate fault.
Can a clogged sunroof drain cause water in my car?
Yes, and it is one of the most common interior leak sources. The channel around the sunroof glass collects rainwater and sends it through small drain tubes down the pillars. When leaves and grit block the tubes, the channel overflows into the headliner and water runs down inside the trim. Clear the channel and the tubes, then pour water in to confirm it exits at the bottom of the pillar rather than into the cabin.
Conclusion
To find a water leak in a car interior, treat timing as the first clue and the wet spot as the last. Read whether the water follows rain, air conditioning, a wash, or a parking angle, confirm what the liquid actually is, and then test one zone at a time with a controlled hose so you know exactly which area is responsible.
Check the drains before anything else, because clogged sunroof tubes, cowl drains, the cabin air filter housing drain, and the evaporator drain account for a large share of cases. Use powder and smoke to trace the path when the wet area does not line up with any obvious seal, and inspect the wiring in the area for green corrosion while the trim is apart.
Once it is fixed, dry the interior the same day and confirm the repair with a repeat test rather than a dry day. A leak that is genuinely gone stays gone in heavy rain, on a slope, and on a long drive.