
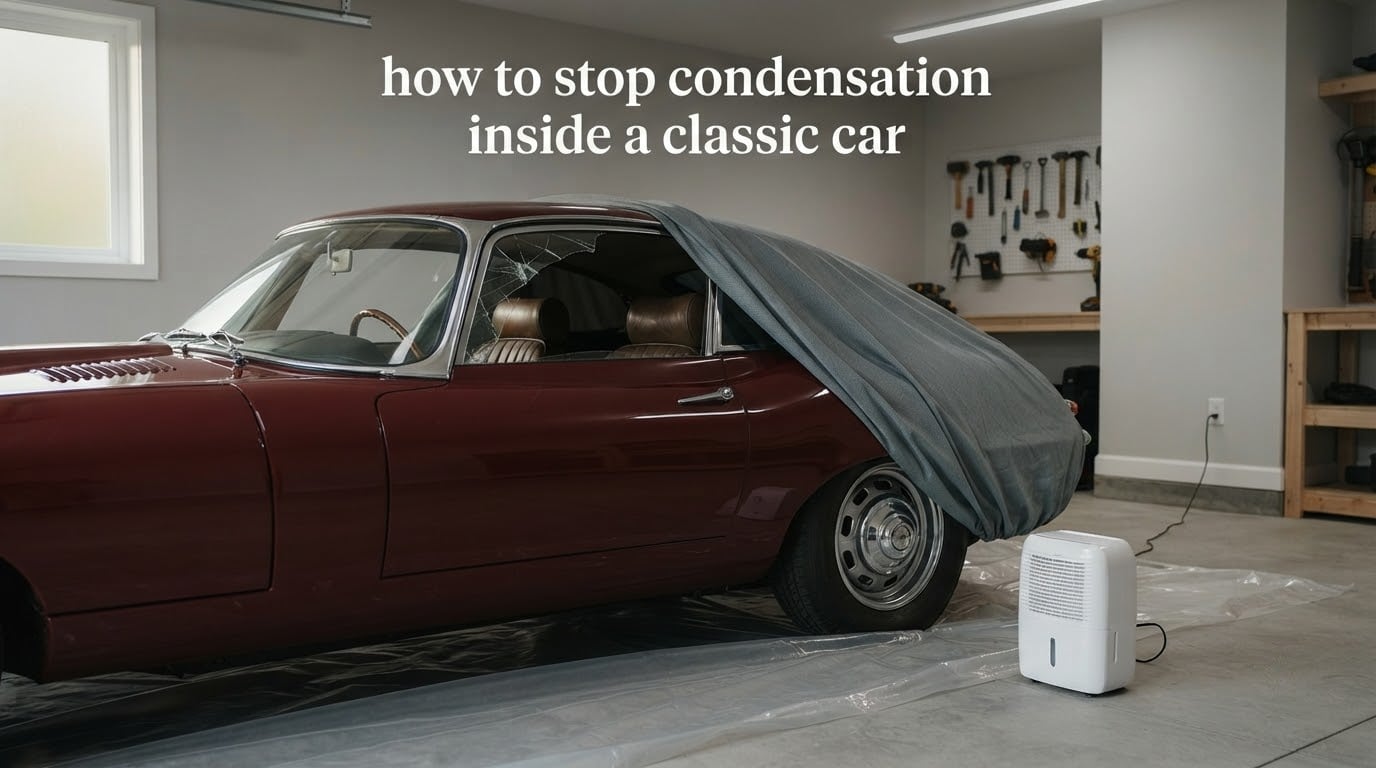
If you are wondering how to stop condensation inside a classic car, you are dealing with one of the most common and most misunderstood problems in the hobby. Moisture does not creep in through a hole. It arrives as water vapour already in the air of your garage, and it turns back into water the moment that air touches a surface colder than itself. A thin steel roof panel, a single-glazed window and an uninsulated floor do that cooling almost every night of the year.
The reason this matters more for a classic car than for a modern one comes down to the fact that a fifty-year-old body shell has no vapour barrier, almost no insulation and seals made of rubber that hardened decades ago. Add a carpet and seat foam designed to absorb water, and you have a wet incubator sitting in an unheated garage.
What follows is the plan we use ourselves, built around what owners actually repeat on the classic car forums and on marque-specific boards: ventilate the cabin, control the humidity of the space rather than the car, use a breathable cover rather than a tarp, and break the path water takes upward through the floor. It also covers the two things almost every other guide skips, which are how to dry out a car that is already soaked, and how to tell condensation apart from a genuine leak.
Table of Contents
- Why Condensation Builds Up Inside a Classic Car
- The Six Moves That Do Most of the Work
- How to Stop Condensation Inside a Classic Car: 7 Steps
- Getting Rid of Condensation Fast
- Already Got a Damp Car? How to Dry It Out
- Is It Condensation or a Leak? How to Tell the Difference
- Choosing a Fix: Cost, Effort and Effectiveness
- How Long You Are Storing the Car Changes the Job
- Driving a Humid Day Without Fogged Windows
- Fixing a Retro-Fitted or RHD A/C That Soaks the Carpet
- Mould: What to Do Once It Has Already Grown
- Garage Setup: Fix the Room Before You Fix the Car
- Frequently Asked Questions
- How to quickly get rid of condensation inside a car?
- What can I put in my car to absorb moisture?
- Why is there so much condensation inside my car?
- How long does condensation last in a car?
- My car has really bad condensation. What can I do to fix it?
- Why is there so much condensation on my car in the morning?
- How to get moisture out of the inside of a car?
- How to prevent condensation in a vehicle?
- Does shaving foam stop car windows steaming up?
- In Summary: Keep the Moisture Moving
Why Condensation Builds Up Inside a Classic Car
Condensation forms because warm air holds water vapour, and that air turns back into water when it touches a surface colder than its dew point. A classic car stored in a garage produces a great deal of it, because thin single-layer steel, thin glass and almost no insulation chill to the dew point overnight, while the surrounding air stays warm and damp. The water then collects on glass, runs down door cards and pools in the carpet and seat foam, where it breeds mould and eventually rots the headliner and floor pans.
None of that is a fault in the car. It is physics working on a body shell that was never designed to be sealed against vapour.
Dew point and relative humidity, in plain terms
The dew point is the temperature at which the air becomes saturated and water starts forming on surfaces. What owners care about is relative humidity, and the number to aim for in a storage space is below 50 to 60 percent. Above roughly 70 percent you are asking for mould, above 85 percent you will find standing water in the sills and door bottoms.
Most garages in the UK and northern Europe sit between 60 and 80 percent through a wet winter. That is the whole problem in one number.
Why a classic car is worse than a modern one
Modern cars are built as condensation machines that can cope with condensation. They have double glazing, sealed cabins with cabin air filters that trap humidity, drained evaporators and factory vapour barriers. A classic car has none of that. Its window seals perished, its headliner is original foam, its floor is bare steel with a thin carpet over it, and the cabin breathes freely to the outside.
Owners on the classic car forums say the same thing repeatedly: a car can come out of a wet winter with a musty smell that returns every spring no matter what was done beforehand. That smell is mould established in foam, and it is a signal you have a moisture problem rather than a cleaning problem.
Why condensation is worst in the morning
Overhead, a garage roof can sit six to eight degrees warmer than the air near the floor overnight. At dawn that heat has gone, the roof skin and the inside of the windscreen have chilled to the dew point, and the air that was holding moisture all night is suddenly against a cold surface. The result is a fogged screen and a headliner that feels wet to the touch.
If condensation is heaviest on the inside of the roof panel and along the top of the windscreen, think temperature. If it is heaviest in one corner, think a leak.
The Six Moves That Do Most of the Work
- Open both side windows a finger-width, or one window plus a quarter-boot lid.
- Run a dehumidifier in the storage space, not a heater.
- Use a breathable indoor cover, never a waterproof tarp over a damp car.
- Lay heavy-gauge polythene sheeting over the floor beneath the car.
- Store with a full fuel tank and stabiliser, and never start the engine cold.
- Keep nothing organic, damp or spilt inside the cabin before it goes away.
Do those six and most cars stay dry. Everything after this point is detail on how to do each one properly, what to do when the car is already wet, and how to work out whether the water you have found is condensation or something much more expensive.
How to Stop Condensation Inside a Classic Car: 7 Steps
These are the seven actions that actually stop condensation, in the order that gives the best result for the least effort. Ventilate the cabin, control the humidity of the room, cover the car correctly, break the path water takes up through the floor, deal with the fuel tank and engine bay, keep the drains and trim clear, and check the condition of the car at least monthly.
- Crack the windows a finger-width for the whole storage period.
- Run a dehumidifier in the garage with a continuous drain hose.
- Fit a breathable indoor cover, and never seal plastic over damp paint.
- Sheeting over the floor stops moisture wicking up through the pan.
- Store full of fuel with stabiliser added, and never start it cold.
- Keep the A/C drains, door drains and sills completely clear of debris.
- Check humidity, the floor and the roof lining every month you are away.
Step 1 in detail: ventilate the cabin
Open both side windows about 20 to 30 mm, or one side window plus the quarter-boot lid, and leave them there. This is the single most repeated tip on every classic car forum, and it works because moving air prevents the stagnant layer of saturated air that forms against glass and steel in a sealed cabin.
Security is the only real objection. If the car is on a drive in a high-theft area, use a cabin vent that keeps the boot shut, or fit a locked cover that achieves the same air path. What you should not do is seal every aperture and hope the car is all right, because the result is a sealed greenhouse sitting under a mild dew point cycle.
Step 2 in detail: dehumidifier sizing and placement
Size on the volume of the space, not on the size of the car. A typical single or double garage of about 30 cubic metres is comfortably handled by a small compressor dehumidifier rated at roughly 10 to 20 litres a day. Coastal air, a concrete floor and a large unheated space push that requirement up.
Two placement details matter more than the model. Put the unit in the corner of the room furthest from the door, because that is the last air to turn over, and set it to drain continuously into a floor drain or a bucket rather than relying on a tank that fills overnight. Run it on a hygrometer and set the cut-out point at 55 to 60 percent.
Owners frequently ask what this costs to run. A small compressor unit in an unheated garage typically draws in the low hundreds of watts, which is the reason many of them simply leave it running all winter rather than cycling it. A Studebaker owner put the point better than any guide could: when you are garaging a classic, heating or cooling the space is not the issue, moisture is.
Step 3 in detail: breathable cover versus tarp
This is the mistake that makes things dramatically worse. A waterproof tarp over a car that is already damp seals the moisture in against warm daytime air, and the vapour that would have escaped condenses instead on every panel and window. You end up with more mould than you started with.
A breathable cover works the other way round. It has a membrane that lets vapour pass outward while stopping liquid water getting in, so the car dries instead of stewing. For a car kept indoors, a fitted soft indoor cover is the right answer. For a car kept outdoors, use a breathable multi-layer outdoor cover and keep it a finger-width away from the bodywork on every side so air can circulate.
Step 4 in detail: sheeting under the car
Water wicks up through concrete and straight through a thin floor pan. Owners dealing with damp carpet and stained floors lay heavy-gauge polythene sheeting over the garage floor before the car goes in, sealed at the edges. This breaks the capillary path and costs very little.
One more layer of protection goes on the body itself. Cavity wax or an equivalent corrosion inhibitor sprayed into the sills, arches and door bottoms after washing and before covering keeps trapped moisture off the steel. It is a different problem from cabin condensation, but it is the same moisture, and it is the one that ends an expensive restoration.
Step 5 in detail: fuel tank and engine bay
Store with a full tank of fuel and a stabiliser in it. An empty tank has a large volume of air above the fuel, and that air carries moisture directly onto the tank steel. Owners on r/classiccars and on the AACA boards converge on the same advice for exactly that reason.
The same logic applies to the engine. Add a stabiliser, coat the plugs and cylinder bores, and never start a stored engine cold. On retrieval, run it for 20 to 30 minutes at full operating temperature so the crankcase condensation that forms during storage has a chance to evaporate rather than being churned into the oil.
Step 6 and 7: drains, seals and the monthly check
Water gets into a cabin through drains as much as through seals. Clear the A/C condensate drains, the windscreen washer overflow, the door drain holes at the bottom of each door card and the scuttle. A blocked A/C drain is a well known cause of heavy interior condensation on cars of any age, and on a retro-fitted classic it can soak the carpet in a single wet weekend.
Check the perished items while the car is parked. Look at the rubber around the door tops, the tailgate or boot seal, and the window channels. Feel the headliner and the underside of the roof panel. Put a hygrometer in the cabin and read it monthly. A garage is a slow problem, and ten minutes a month is what keeps it a slow problem.
Getting Rid of Condensation Fast
To clear condensation quickly inside any car, open the doors and windows wide and leave them open as long as the outside air is drier than the air inside. The trick owners use is the opposite of a heater: if the cabin is damp and the outside air is cool and relatively dry, ventilation alone clears it in minutes.
- Open everything and stand the fan in the cabin on full blast.
- Heat the cabin gently and then vent it once the glass clears.
- Set the air conditioning to cold on high with the recirculation off.
- Wipe the glass dry, then run a dehumidifier or a fan to finish it.
Heating alone does not fix condensation, it just creates more water vapour. Heating and then venting works because the final vent carries the moisture out. On a classic with demisting air, the same principle applies: heater on, then open the windows a crack once the screen is clear.
Already Got a Damp Car? How to Dry It Out
Drying a soaked interior is a different job from preventing one, and it is the single biggest question in the forums that no general article answers. If your car already has wet carpet, foam that feels heavy, a musty smell or a headliner that has gone spongy, work through these in order rather than reaching for a smell spray.
- Open every aperture and move air across the interior for a full day.
- Run a dehumidifier in the same room, with a fan aimed into the cabin.
- Pull the carpets and boot-lining out, stand them on edge outside and dry them.
- Remove seats if the foam is heavy, and dry them separately and slowly.
- Run a dehumidifier in the closed car for several days after reassembly.
- Treat remaining foam and trim with an anti-mould upholstery product.
The step owners skip is the fourth one. Seat foam and carpet underlay hold an astonishing amount of water, far more than anyone expects, and owners who have weighed their own car mats are astonished by the figure. Foam squeezed and dried fast in a warm room will shrink. Dry it slowly, in moving air, out of direct heat, and replace anything that has already gone soft and crumbly rather than trying to rescue it.
When the car is reassembled and still not fully dry, close it up with a dehumidifier running inside or a heavy bag of a passive absorber in the cabin, and recheck every few days. Do not put a cover on a car that is still damp for the same reason you should not put a tarp on it.
Is It Condensation or a Leak? How to Tell the Difference
Clear water with no smell, no colour and no oily film is almost always condensation. Colour is the fastest way to narrow it down, and one editorial fuel-industry checklist does this better than anything else on the topic.
- Clear and odourless – condensation. Normal, and more of it on a classic than a modern car.
- Clear, in a defined puddle under one corner – a seal, drain or windscreen leak worth finding.
- Green, pink or blue – coolant, and the car should not be moved until it is found.
- Dark brown and oily – oil, so check the sump and the oil seals.
- Dripping from the tailpipe shortly after a warm drive – exhaust condensate, which is entirely normal.
- A wet patch in the cabin, near the A/C unit – the evaporator condensate line, not a body leak.
For a repeatable test, park on level clean ground, run the engine to full operating temperature, then idle until water appears. If the puddle forms and then stops once the engine is switched off, and it is clear, you are looking at exhaust condensate. One Benzworld post recommends exactly this check, and owners who run it stop panicking about leaks they never had.
Two related questions are worth answering directly. Water dripping from a passenger-side exhaust tip after warming up on a big-block V8 is water in the exhaust, not a head gasket. And a puddle that appears on the passenger side of a car stored indoors, away from any weather, is a cabin recirculation or drain issue, not condensation from the weather.
Choosing a Fix: Cost, Effort and Effectiveness
Owners rarely struggle to find tips for this problem. They struggle to decide which tips are worth the money and the effort for their own garage. The table below ranks every method by the four things that actually matter, so you can pick the two or three that suit your situation rather than attempting all of them.
| Method | Cost | Effort | Best For | Effectiveness |
|---|---|---|---|---|
| Cracked windows or open boot lid | None | Minutes, once | Every car, every garage | High for the cabin, zero for the space |
| Compressor dehumidifier with continuous drain | Moderate, plus a small running cost | An afternoon to place and plumb | Unheated or coastal garages | Very high – controls the whole space |
| Passive desiccant packs or absorber boxes | Low, recurring | Minimal, but needs checking | Small spaces, dehumidifier-free setups | Low to moderate, short duration |
| Breathable indoor cover | Low to moderate | Minimal | Cars kept under cover indoors | High, provided the car is dry first |
| Waterproof tarp | Low | Minimal | Nothing – avoid entirely | Negative on a damp car |
| Polythene sheeting under the car | Very low | An hour | Concrete floors, water wicking up | High for the floor pan |
| Full fuel tank with stabiliser | Low, plus fuel | Minimal | Any storage period | High for the tank, zero for the cabin |
| Garage vapour barrier and roof repair | Highest | Weekend plus materials | Leaking roof, ground-level damp | Very high, permanent |
| Cavity wax and rust-proofing | Low to moderate | Half a day | Any stored car near salt air | High for corrosion, not for mould |
The honest summary is that a dehumidifier plus cracked windows plus a breathable cover solves the cabin problem for nearly everyone. Everything else is either situational or protecting a different part of the car from the same damp air.
How Long You Are Storing the Car Changes the Job
A car stored for a fortnight does not need the same treatment as one laid up for six months, and giving both identical advice is a common and sometimes counterproductive error. Longer storage means a bigger reservoir of moisture, more temperature cycles and a higher chance of a seal failing while you are not looking.
| Storage duration | Heated or dry garage | Unheated garage | Outdoors under a cover |
|---|---|---|---|
| Up to 2 weeks | Crack the windows, a fabric cover, spot-check before and after | Crack the windows, silica gel packs in the cabin | Breathable cover, crack windows only if secure |
| Around 3 months | Crack the windows, breathable cover, desiccant, monthly humidity check | Add a dehumidifier on a hygrometer, full fuel tank and stabiliser | Add a passive absorber inside, expect damp on retrieval |
| 6 months and beyond | Dehumidifier running, sheeting under the car, cavity wax, monthly check | All of the above, plus a full garage moisture audit | Sheeting under the car, weekly absorber changes, plan a full interior dry-out on return |
A 20 to 30 minute first drive at full operating temperature on retrieval is not optional. It clears crankcase condensation and it is also your first diagnostic: if the car runs evenly and the water under it is clear, you are dealing with condensation and not with a leak.
Driving a Humid Day Without Fogged Windows
For clearing condensation quickly while driving, put the air conditioning on cold with the fan on high and recirculation switched off. Recirculation is the mistake here, because it re-blows the damp cabin air at itself. With recirc off, the system pulls in outside air, and the evaporator condenses the moisture out of it.
On a classic with a demister, the sequence that works best is heater or air conditioning on first, then once the glass is clear, drop the side windows a crack to vent what has just been drawn out of the cabin. Expect the same owner-reported complaints as any retro-fitted system: a cold line behind the unit that sweats heavily, and a blocked evaporator drain. A Skoda Octavia owner traced heavy interior condensation to a pollen filter due for replacement and a drain that was blocked, which applies just as well to a classic with a modern air conditioning unit.
Fixing a Retro-Fitted or RHD A/C That Soaks the Carpet
This is one of the most common complaints on classic car build threads and it deserves its own answer. When an air conditioning unit is retro-fitted, the evaporator sits somewhere it was never designed to sit, and the cold refrigerant line running to it drops well below the dew point of the cabin air. It condenses heavily, sometimes heavily enough to soak a carpet panel.
There are three things to check and fix, in order. First, the evaporator drain: the tube that carries condensate out of the housing is frequently omitted, crushed during installation, or connected but blocked. Route it down and out of the car, not into the footwell, and check that it discharges outside the cabin rather than under the car where the water can wick back up through the floor. Second, insulate the cold line with foam sleeving and tape every joint, so the cold surface area is as small as possible. Third, keep the cabin filtered.
On a right-hand-drive conversion the same three points apply, and owners on right-hand-drive build threads add a fourth: check the door seal gaps on the offside doors, which on a converted car are often the original seals for a different door and never compress properly.
Mould: What to Do Once It Has Already Grown
Mould that has established in seat foam or carpet underlay is why owners get the same musty smell back every spring. Deodorising sprays cover the smell for a day and change nothing. A short, hard campaign does.
- Dry the area completely first, because mould does not survive dryness.
- Remove loose mould and dry material from foam, seams and underlay.
- Wash what can be washed, then dry it again in moving air.
- Apply an anti-mould upholstery treatment to dry foam and carpet.
- Replace seat foam and carpet underlay that is soft, crumbly or permanently stained.
- Fix the source of the moisture, or it will all return next spring.
Step six is the one that matters most. No amount of upholstery treatment survives a car that is still sitting wet in an unheated garage. If the headliner, boot-lining or door cards feel damp to the touch, those panels are a seal problem and need attention before anything else on this list.
Garage Setup: Fix the Room Before You Fix the Car
You can only manage a car as well as the space around it. A leaking roof, a bare concrete floor and a damp wall will defeat any car-level fix, so it is worth an afternoon of assessment before you buy a single dehumidifier.
- Fix a leaking roof first. An extractor fan moves air but does not remove water coming in.
- Lay polythene sheeting over the floor and seal the edges with tape or a foam gun.
- Line the walls with a vapour barrier on the side facing the outside earth.
- Insulate the ceiling if there is a room above, as this cuts the overnight dew point cycle.
- Move the car off cold concrete on timber blocks if the floor is unavoidably cold.
Safety first. Never run an engine or a petrol-fuelled heater in a closed garage, and never leave a trickle charger connected to a car in a sealed space overnight with any petrol-fuelled heater running nearby. Carbon monoxide has no smell and no warning. If you want the car kept on a trickle charger, use a dehumidifier, not a heater, as the answer to a damp garage.
One more practical point. A dehumidifier and a closed-up classic car both sit in a space a rodent can reach, and owners on the marque forums repeatedly report nest damage to wiring after storage. A humane trap in the corner of the garage costs almost nothing and prevents a far larger bill.
Frequently Asked Questions
How to quickly get rid of condensation inside a car?
Open the doors and windows fully and let moving air cross the cabin for at least an hour, ideally with a fan on full blast. If the outside air is drier than the air inside, ventilation alone clears fogged glass quickly. Set the air conditioning to cold on high with recirculation off, since the evaporator pulls the moisture out of the incoming air. Wipe the glass dry afterwards and run a dehumidifier to finish the job.
What can I put in my car to absorb moisture?
Silica gel packs, rechargeable passive absorbers and moisture-absorbing cabinet boxes all work, and the passive type is the practical choice for a small enclosed cabin. Place two or three on the floor under the seats, where cold air pools, and one near the rear parcel shelf. Replace or regenerate them on the schedule the packaging states, because once the crystals are saturated they do nothing at all.
Why is there so much condensation inside my car?
Condensation forms because warm air holds water vapour and turns back into water when it touches a surface colder than its dew point. A classic car condenses far more than a modern one because the body is single-layer steel, the glass is thin, there is almost no insulation, the window seals have perished and the cabin has no filtered ventilation to trap humidity.
How long does condensation last in a car?
A light overnight layer clears on its own within a few hours of the cabin warming up. A soaked interior with wet seat foam and carpet can take days to dry, and if you close the car up again while it is still damp the moisture simply returns. Persistent condensation in the same spot after a warm day usually means a leak or a blocked drain rather than humidity.
My car has really bad condensation. What can I do to fix it?
Stop treating it as a cleaning job and start treating it as a drying job. Open every aperture and move air across the interior, run a dehumidifier in the room, pull the carpets and boot-lining out and dry them on edge, and remove the seats if the foam feels heavy. Then treat the dry foam and carpet with an anti-mould upholstery product and fix whatever allowed the moisture in.
Why is there so much condensation on my car in the morning?
Overnight the garage roof skin and the inside of the windscreen lose their stored heat and fall to the dew point, while the air around them stays warm and holds moisture. By dawn that warm damp air is touching a cold surface and turning to water. This is why condensation concentrates on the inside of the windscreen and the underside of the roof panel rather than spreading evenly.
How to get moisture out of the inside of a car?
Ventilate the cabin with a fan, then run a dehumidifier in the same space. Remove the carpets, boot-lining and any seat with waterlogged foam and dry them separately, slowly and out of direct heat, since foam dried too fast shrinks and crumbles. Reassemble only when everything is dry, then run a dehumidifier inside the closed car for a few days to catch the last of it.
How to prevent condensation in a vehicle?
Crack the side windows or the boot lid a finger-width for the whole storage period, run a dehumidifier in the storage space with the cut-out set at 55 to 60 percent relative humidity, and fit a breathable cover rather than a waterproof tarp. Lay polythene sheeting over the floor beneath the car, store with a full fuel tank and stabiliser, keep the A/C and door drains clear, and check the humidity and the floor monthly.
Does shaving foam stop car windows steaming up?
No, not in any way that matters. Shaving foam can mask light fog briefly because of the surfactant in it, but it does nothing to the humidity in the cabin, it leaves a residue on the glass and trim, and it has no effect on the real cause, which is damp air meeting a cold surface. Ventilation and dehumidification are what actually clear condensation.
In Summary: Keep the Moisture Moving
To stop condensation inside a classic car, you do not need to stop the air, you need to stop the air going cold against damp surfaces. Crack the windows, control the humidity of the garage with a dehumidifier set below 60 percent, use a breathable cover, and lay sheeting over the floor so nothing wicks up through the pan.
If the car is already damp, treat it as a drying job rather than a cleaning one, and give the carpets and seat foam the time they need. If you are not sure whether the water you have found is condensation or a leak, use the colour key: clear is condensation, coloured is something you need to look at.
And if you only do one thing, do the one every forum owner repeats first. A finger-width of open window does more for a stored classic car than any product ever will.