
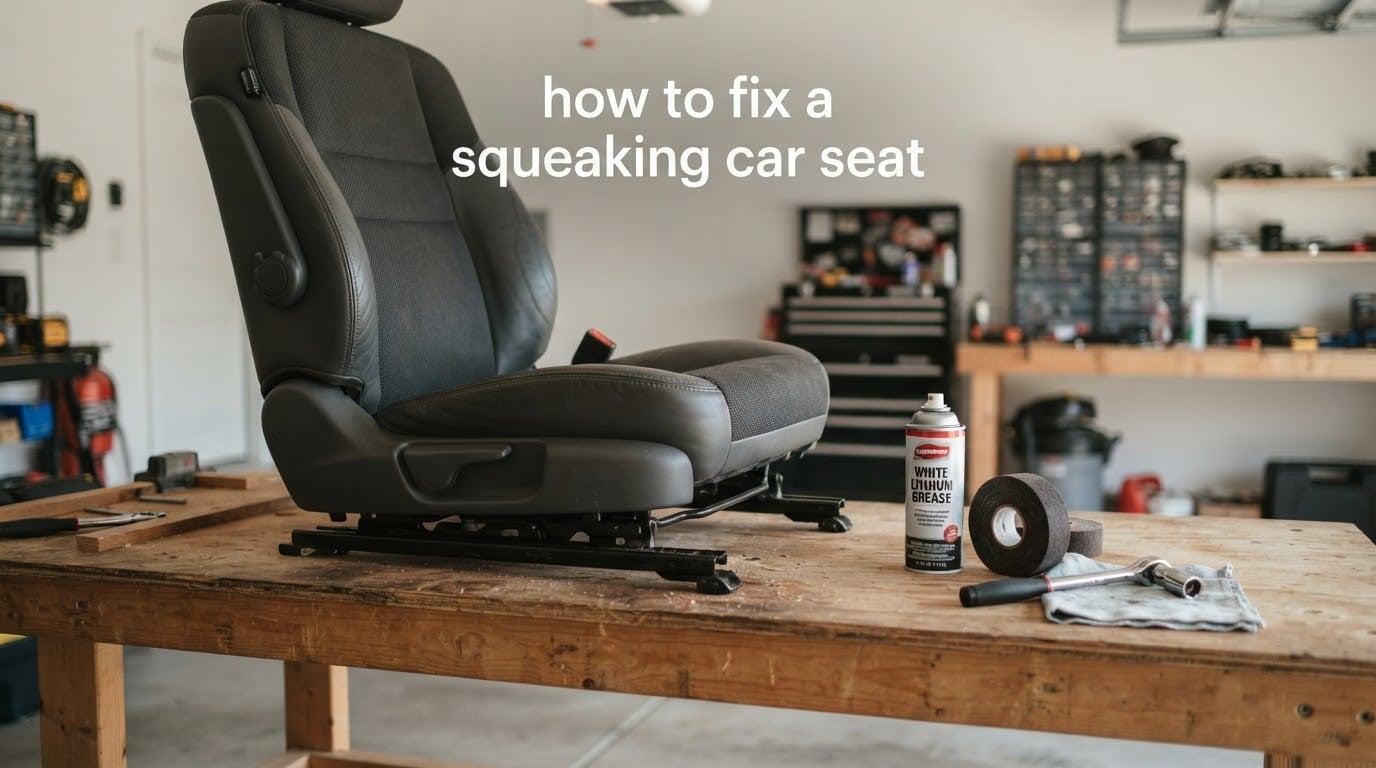
A squeaking car seat is almost always friction between two parts that should never touch: metal sliding on metal in the rails, foam pressing against a bare seat frame, a leather bolster rubbing the plastic console, or a dry seat belt buckle pivot. Weight and vibration make those surfaces slide against each other in a stuttering stick-slip motion, and that motion is the sound you hear.
That matters because the noise is fixable. Once you find the contact point, the repair is usually a shot of white lithium grease, a strip of felt tape, or a bolt tightened by a quarter turn. This guide walks through how to fix a squeaking car seat, starting with a four-step process and then breaking the problem down by noise type, seat material and seat type so you can stop hunting blindly.
Table of Contents
- Why your car seat squeaks (and what the noise actually is)
- How to fix a squeaking car seat: the four-step process
- Diagnose the squeak first: symptom to source
- Lubricating the seat rails and tracks
- Tightening loose seat bolts without stripping them
- Foam, frame and upholstery squeaks: felt tape, moleskin and conditioner
- Seat belt buckle, retractor and rear bench squeaks
- Power seat noise and how to remove the seat safely
- When to stop and pay a shop, and the free TSB route
- Tools and materials checklist
- Preventing the squeak from coming back
- Frequently Asked Questions
- What can I do to fix a squeaky driver’s seat?
- How do I get my car seat to stop squeaking?
- What is the best lubricant for car seat tracks?
- Does WD-40 remove squeaking noise?
- How to fix a squeaky chair without WD-40?
- Can you use WD-40 on squeaky car windows?
- Why is my car squeaking when I sit in it?
- How to grease seat rails?
- Why is my back seat squeaking?
- How can I fix a rattling passenger seat in my car?
- Conclusion
Why your car seat squeaks (and what the noise actually is)
Seats are built from a metal frame, a foam cushion, an upholstery cover and, on most vehicles, a set of rails bolted to the floor. Every one of those parts moves a little differently as you shift your weight, and over time the small clearances designed to stop metal-on-metal contact change shape. Foam compresses and dries out. Bolsters lose their tension. Rails collect grit and surface rust. Springs take a set.
Any of those changes turns a formerly quiet joint into a rubbing joint. The four most common root causes, in the order we usually find them:
- Dry or corroded rails. The grease factory-applied to seat tracks wears off, and the bare steel then slides on bare steel under load.
- Loose seat bolts. A quarter-inch of movement at a mounting bolt lets the whole frame rock, and rocking joints are loud joints.
- Foam against metal frame. The cushion’s foam block rubs the plastic or steel side frame every time you move, and a squashed bolster rubbing a trim panel does the same thing.
- Dry leather or fabric. Leather that has lost its oils squeaks against itself and against plastic, and cloth covers squeak when the foam underneath has hardened.
There is a fifth category that owners forget: the noise is not always in the seat. Seat belt buckles, retractors, the recline lever and the seat-to-console gap are all common sources, and we cover those separately below.
How to fix a squeaking car seat: the four-step process
Run these four steps in order. Most squeaks disappear at step three, and the whole process takes under fifteen minutes with a flashlight and a can of grease.
Step 1: Find the source of the squeak
- Park on level ground, engine off.
- Have a helper sit and shift weight slowly.
- Move the seat fore and a little rearward.
- Grab and shake each rail end.
- Press the side bolsters by hand.
- Load the seat belt and wiggle the buckle.
Mark the spot with tape as soon as you hear it. The noise is easier to find with a helper than alone, because you can stand still while the seat is being flexed.
Step 2: Clean the area
- Vacuum both rails fully fore to rear.
- Wipe rails and pivots with a degreaser rag.
- Brush grit out of the bolt pockets.
- Dry the surfaces before adding anything.
Do not skip this. Grease sprayed over road grit grinds that grit into the rail, and you will be back at step one within weeks.
Step 3: Lubricate the parts
- Use white lithium grease on rails.
- Use silicone spray on plastic pivots.
- Use felt tape on rubbing trim points.
- Wipe off every bit of excess.
Grease transfers readily to clothing and to the seat bolster, and overspray on leather or cloth leaves a permanent slick stain. Work in a ventilated space and wipe the joint down before you sit.
Step 4: Test the seat
- Sit normally and shift weight side to side.
- Have the helper repeat the movement.
- Drive over a speed bump and listen again.
- Recheck after one week of normal use.
If the sound persists at the same location, you have located a joint rather than the frame itself. That is normal, and the next section tells you which one.
Diagnose the squeak first: symptom to source
Almost nobody locates these noises on the first attempt because the sound travels. The table below maps what you hear to where to look first, based on the symptoms owners describe across owner forums.
| What you hear | Where to listen | Likely cause | Fix | Difficulty |
|---|---|---|---|---|
| High-pitched squeak when you slide into the seat | Both floor rails, full length | Dry or corroded rail steel | Degrease, then white lithium grease | Easy |
| Low creak when you lean sideways | Side bolsters, plastic side trim | Bolster rubbing console or trim panel | Felt tape or anti-friction tape at the contact line | Easy |
| Rattle over bumps only | Seat mounting bolts | Loose frame or bolt movement | Tighten bolts snug plus a quarter turn | Easy |
| Creak with every weight shift, stationary | Under the cushion, frame sides | Foam rubbing bare frame or springs | Cloth or foam strip between foam and frame | Moderate |
| Creak on a pass, in cold or dry weather | Seat cover, seat back pockets | Dry leather or stiffened foam | Leather conditioner, or loosen tensioned panels | Easy |
| Squeak only when the seat moves forward and back | Rail stops, seat lifter link | Grease-starved pivot or a cable against the frame | Lubricate the pivot, or check cable slack | Moderate |
| Squeak when you buckle the belt | Buckle pivot and webbing | Dry or corroded buckle tongue | Light lubricant on the pivot, felt at the tongue | Easy |
| Buzz or grind while the seat is driving | Seat motor and cable under the seat | Power seat motor or stretched cable | Check cable slack and rail alignment | Moderate |
| Squeak that started after a wash or a wet week | Inside the cover, between panels | Damp fabric panels pressing together | Let dry fully, then treat the contact point | Easy |
| Clunk rather than squeak, during heavy braking | Belt mount and frame mounting points | Structural looseness | Stop and get a shop to inspect it | Get a shop |
Two questions narrow this down further. If the noise is only in the rails, it changes when the seat slides and is fixed with grease. If the noise is inside the backrest, it stays with you as you lean and is fixed with tape or strips rather than grease.
Manual and power seats also behave differently. A power seat adds a motor, a drive cable and a set of limit switches, and each of those can make a noise a manual seat cannot. If your car has a power seat and the sound is a buzz or a whir rather than a squeak, go to the power seat section first.
Lubricating the seat rails and tracks
Greasing the rails is the single most-cited fix in owner threads on corvetteforum.com, ferrarichat.com and a long list of model-specific boards, and it works because the rails are the most heavily loaded sliding joint in the car. Your body weight, the car weight and every road impact all act through four small contact patches.
How to grease seat rails
- Slide the seat fully forward, then fully rearward.
- Vacuum each rail channel end to end.
- Wipe both rails with a degreaser-soaked rag.
- Look for surface rust and sand it lightly.
- Apply white lithium grease along the channel.
- Work the seat back and forth five times.
- Apply grease to the seat stop bumpers.
- Slide the seat again to spread the grease.
- Wipe every exposed surface clean.
Work the seat through its full travel twice so the grease reaches the front and rear stops, which take more load than the middle of the rail. On power seats, leave the motor disconnected or the ignition off so you can move the seat by hand.
Which lubricant to use
| Product | Best use | Avoid on |
|---|---|---|
| White lithium grease | Seat rails, bolts, metal pivots, springs | Bare leather and cloth, where it transfers and stains |
| Silicone spray | Plastic pivots, recline mechanism, seat lifter link | Spraying a full seat, which oversprays upholstery |
| Silicone protectant | Dust suppression on rails after lubrication | Rubber and leather surfaces, which it slicks over time |
| Felt tape or moleskin | Bolster-to-console and belt-to-trim contact points | Nothing, provided the surface is clean and dry first |
| Leather conditioner | Dry leather covers and bolsters | Cloth and vinyl, which it will not absorb into |
| WD-40 | Cleaning rust off a rail before greasing | Use as a lubricant. It is a cleaner and penetrant, not a lasting grease |
Why WD-40 is the wrong answer for most squeaks. WD-40 is a solvent-based cleaner and penetrant. It loosens rust, displaces moisture and works as a light temporary lubricant, but it evaporates and leaves an oily film that attracts road grit. A rail greased with WD-40 sounds better for a few weeks and then sounds worse than before, because the grit it pulled in is now abrading the rail under load. It is a reasonable rust remover for step two. It is not a fix for step three. The same reasoning applies to car window channels, where a long-lasting silicone or PTFE lubricant is the correct product for a similar sliding joint.
If you have no grease on hand, a silicone spray is a better stand-in than WD-40. It lasts longer, it stays cleaner and it is safe on plastic, though you still need to wipe the overspray off upholstery before you sit down.
Tightening loose seat bolts without stripping them
Seats are usually held by four bolts, two at the front of the rails and two at the rear, sometimes with a fifth nut on an adjuster bracket. A loose bolt is the most common cause of a rattle over bumps, and the cheapest fix available.
How to tighten seat bolts
- Move the seat fully forward.
- Access the rear bolts through the rail channel.
- Use a socket or box spanner of the correct size.
- Tighten until the washer seats flat.
- Add no more than a quarter turn beyond snug.
- Move the seat rearward and repeat.
- Check the adjuster nut if the seat slides on its own.
Do not over-tighten. Seat bolts thread into aluminium or cast floor brackets, and a ratchet will strip them long before it strips a steel bolt. Snug plus a quarter turn is enough; if the washer is fully compressed and the bolt still turns, stop and replace the bracket rather than forcing it. There is also a torque specification published for most vehicles if you want to be precise, but the snug-plus-quarter-turn rule is safe and works everywhere.
Check for rust around the mounting holes as you go. A brown ring around a bolt means water has been sitting there, and a clean, lightly coated hole is what keeps a tight bolt tight.
Foam, frame and upholstery squeaks: felt tape, moleskin and conditioner
If greasing the rails did nothing, the noise is almost certainly a contact point rather than a sliding joint. These are the fixes that reach it.
Reaching the foam and springs
Most seat covers unzip or unhook at the rear seam, which lets you peel the cover back and reach the foam block, the springs and the plastic side frame without unbolting the seat. Lift the cushion edge, slide a strip of cloth or a thin foam strip between the foam and the frame where you can see the rubbing mark, and pull the cover back down.
Where springs attach to the frame, wrap the metal at the contact point with vinyl tape or cloth so the spring no longer meets raw steel. An rx8club.com owner resolved a spring-and-frame squeak exactly this way, and the same write-up notes that a dealer’s silencer material repair often leaves exposed metal areas still free to creak.
If the cover is not removable, the other entry point is from the top. Reach under the cushion edge with a long flat strip of hook-and-loop or felt and push it into the gap between the foam and the plastic side trim. Pull the strip back and forth to work it in as far as it will go.
Felt tape and moleskin at rubbing points
Where two finished surfaces touch, lubrication is the wrong answer and padding is the right one. Felt tape, moleskin or anti-friction tape separates the surfaces permanently. Clean both surfaces first, then apply the tape to the softer, less visible of the two.
Typical locations include the inner bolster against the centre console, the seat back against the rear trim panel, the outer bolster against the door card, and the seat belt tongue where it strikes the buckle housing. A driveaccord.net thread settled on a strip of sticky-back hook-and-loop on the armrest contact point, and an mbworld.org thread reached for moleskin where the seat or seat belt met the console. Both fixes are permanent and both take under two minutes.
Leather, cloth and vinyl: different products
| Surface | What stops the squeak | Warning |
|---|---|---|
| Leather | A pH-balanced leather conditioner worked into the surface, then buffed | Silicone overspray leaves a permanent slippery film on leather and cannot be fully removed |
| Cloth | Anti-friction tape or a cloth strip at the rubbing line | Do not overspray fabric; silicone overspray darkens cloth and transfers onto clothing |
| Vinyl | Silicone spray applied to a cloth, not to the seat, then wiped | Direct spray causes a tacky surface that attracts dust |
Dry leather is the most misunderstood case, and a thread on reddit.com/r/civic states the point plainly: leather gets squeaky when it is dry. Conditioning restores the oils that let the hide flex without grabbing, and it addresses the squeak directly rather than masking it. Expect to recondition every few months in a dry climate, and again after a wash if you use a solvent-based car shampoo on the interior.
Warning on overspray. Both grease and silicone transfer to fabric and to the tops of your trousers. Always apply to a rag and wipe the joint, and never spray a seat with the trim still fitted.
Seat belt buckle, retractor and rear bench squeaks
The buckle and retractor are the most under-served squeak in the car, and they are asked about constantly on owner forums. They are also the easiest to fix.
For a squeaky buckle tongue, apply a light film of lubricant to the pivot pin where the tongue hinges in the housing, then work the tongue in and out a few times. A thin strip of felt under the tongue stops the metallic tap entirely if the sound is a click rather than a squeak.
For a squeaky retractor, pull the belt all the way out and check the webbing for kinks, twists or flat spots. A twisted belt rubs inside the retractor spool and sounds exactly like a creaking seat. Straighten the webbing by pulling it hard while the retractor is extended, and lubricate the retractor’s internal frame lightly.
For a buckle that squeaks against the console, the answer is padding. Wrap a strip of felt or moleskin around the stalk of the buckle housing where it meets the console, exactly as owners describe on mbworld.org.
On a rear bench, start at the outer edges. Bench seats flex across their whole width, so the ends lift when a passenger gets in and drop when they shift, and the noise usually comes from the plastic trim cover at the side bolsters or from the seat back hinge. Lift the bench and check the hinge pivot points, and apply the same grease or felt treatment.
Power seat noise and how to remove the seat safely
Power seats add moving parts, and their noises are often misdiagnosed as frame creaks. A rub that changes with the seat position is usually a cable or a harness, not a rail. A reddit.com/r/TeslaModel3 owner traced a power seat squeak to a cable under the seat and fixed it with slack adjustment and no parts at all. A ferrarichat.com thread cured a recurring power seat squeak by sliding the seat forward slightly and then back, which re-seated the cable and the stop bumper.
That said, if the noise follows the motor while the seat is driving, or if the seat does not stop cleanly at either end of travel, the motor or its limit switch is the suspect rather than the frame.
Removing the seat
- Switch off the ignition and remove the key.
- Disconnect the battery negative terminal first.
- Unclip the seat side trim and the plastic covers.
- Unplug any seat sensor or occupant detection wiring.
- Remove the four mounting bolts, two per rail.
- Lift the seat out with two people.
Battery first, always. Power seats carry a seat belt buckle connector, and on many vehicles a seat-mounted connector feeds the occupant classification sensors for the airbag. Disconnecting the battery before touching the connectors removes the risk of deploying the restraint and of setting an airbag warning light. Treat every yellow or orange connector under the seat as a live restraint circuit, and leave it alone if the vehicle is damaged in a way that could have affected the belts.
Once the seat is out, put it on a workbench and flex it by hand. Every contact point that makes noise is now visible, which is why removing the seat resolves noises that resisted every in-car fix. Use the seat as a guide for where the repair material goes, then reinstall it and tighten the bolts snug plus a quarter turn.
When to stop and pay a shop, and the free TSB route
Some squeaks are free to fix under a manufacturer campaign. Before you buy any parts, look up your vehicle’s model and year in the manufacturer’s service bulletin database using your VIN, and search for open campaigns covering seat creak, seat noise or seat silencer. An rx8club.com write-up names three specific Mazda bulletins for spring-and-frame contact, frame-and-seat-foam contact, and a squeak from under the driver seat lifter link, any of which would be covered at no charge. A Jeep rear seat bulletin covering the same complaint has circulated on owner boards too.
A campaign applies when the noise is a factory design fault, which is exactly what an open bulletin means. Check this before you spend an evening on a fix you would have received free.
Stop and take it to a shop when any of these apply:
- The noise is a clunk during heavy braking rather than a squeak.
- You can see rust perforating the seat bracket or floor mount.
- A seat belt mount, buckle stalk or pretensioner looks worn or was previously repaired.
- SRS or occupant detection wiring is damaged or has a warning light on the dash.
- The seat was in a collision, even lightly.
- The bolt threads strip instead of tightening.
A cosmetic squeak and a structural one can sound identical in the cabin. What separates them is movement: a joint that shifts under load is a joint that needs a shop, not a can of grease.
Tools and materials checklist
You need very little, and most of it is available from any auto supply shop. The whole job is a weekend-garage task rather than a workshop one.
- White lithium grease. Applied to rails, bolts, springs and metal pivots. The single most useful item on the list.
- Silicone spray. Applied to plastic pivots, the recline mechanism and the seat lifter link.
- Degreaser or brake cleaner. Used to clean rails and pivots before lubrication. Never spray it onto an airbag connector.
- Felt tape, moleskin or anti-friction tape. Applied between rubbing trim surfaces, belt buckles and the console.
- Cloth or thin foam strips. Applied between the seat foam block, the springs and the frame.
- Hook-and-loop tape. Applied at armrest and bolster contact points where a permanent pad is wanted.
- Vinyl tape. Wrapped around seat springs at the point where they meet the frame.
- Leather conditioner. Applied to dry leather covers and bolsters only.
- Socket set and ratchet. For the four mounting bolts. Bring the size your vehicle specifies.
- Flashlight and a vacuum. Non-negotiable for locating and cleaning the rails.
- Fine wire brush or 180 grit paper. For light surface rust on rails before greasing.
- Rust converter. Only for older vehicles with pitted rails, applied after brushing and before greasing.
- Painter’s tape. For marking the source of a noise while diagnosing it.
The cost difference between doing this yourself and paying a shop is the difference between a tube of grease and an hour of diagnostic labour, which is why almost every owner forum thread on this topic ends with the advice to just try the grease first.
Preventing the squeak from coming back
A squeak that is fixed with grease usually returns when the grease wears off or when a wash pushes water into the joint. Three habits keep it quiet for years.
- Lubricate the rails every six months, or twice a year before winter.
- Keep the rails vacuumed so grit never sits in the channel.
- Recondition leather every few months in dry or heated air.
Cold-weather squeaks are the most frustrating to fix, because they appear in dry air, disappear in the rain, and come back after every car wash. Dry air shrinks leather and stiffens foam, and both then press harder against whatever they touch. That cycle is why owners report the same squeak returning a few months after a successful fix, and why a surface protectant on the rails plus leather conditioner on the covers handles it better than grease alone.
Also check the seat bolts once a year. They loosen slowly with use, and tightening them takes two minutes.
Frequently Asked Questions
What can I do to fix a squeaky driver’s seat?
Work through four steps: find the contact point with a helper moving the seat, vacuum and degrease the area, apply white lithium grease to rails or felt tape to rubbing trim, then test by sitting and sliding the seat. Wipe off excess grease so it does not transfer to clothing.
How do I get my car seat to stop squeaking?
Stop the sliding. If the noise follows the seat rails, degrease and apply white lithium grease. If it comes from a bolster rubbing the console, apply felt tape or anti-friction tape between the surfaces. If it is inside the backrest, slip a cloth strip between the foam and the frame.
What is the best lubricant for car seat tracks?
White lithium grease is the best choice for seat rails because it stays in place under load and resists grit. Silicone spray works well on plastic pivots and the recline mechanism. Apply sparingly and wipe the surface clean before sitting down.
Does WD-40 remove squeaking noise?
Only temporarily. WD-40 is a solvent-based cleaner and penetrant, not a lasting lubricant. It loosens rust, which makes it useful for cleaning a corroded rail, but it evaporates and leaves an oily film that attracts road grit. Use it to clean, then use white lithium grease to lubricate.
How to fix a squeaky chair without WD-40?
Degrease the joint, then apply white lithium grease on metal or silicone spray on plastic. Where two finished surfaces rub each other, use felt tape or moleskin instead of any lubricant, since padding separates the surfaces permanently.
Can you use WD-40 on squeaky car windows?
It is not the best choice there either. A long-lasting silicone or PTFE channel lubricant is designed to stay in place, while WD-40 leaves a film that collects dirt in the window channel and can make the noise worse.
Why is my car squeaking when I sit in it?
Because two parts are rubbing under load. The usual sources are dry or corroded seat rails, loose mounting bolts, seat foam pressing against the frame, a bolster rubbing the console, or a dry leather cover. Find the location first, because grease and felt fix very different problems.
How to grease seat rails?
Slide the seat forward, vacuum both channels, wipe them with degreaser, treat light surface rust, apply white lithium grease along the full channel and to the end stops, then work the seat through its travel twice and wipe off the excess before sitting down.
Why is my back seat squeaking?
Bench seats flex across their whole width, so the noise usually comes from the plastic side trim covers or the seat back hinge. Lift the bench, grease the hinge pivots, and apply felt tape where the trim or cover rubs against the frame.
How can I fix a rattling passenger seat in my car?
A rattle that appears only over bumps is almost always a loose seat bolt. Move the seat fully forward and rearward, tighten the four mounting bolts until the washer seats flat, add no more than a quarter turn, then check the adjuster nut if the seat slides on its own.
Conclusion
To fix a squeaking car seat, find the contact point before you buy anything. The noise is almost always a sliding joint, a rubbing joint or a loose bolt, and each one has its own short fix: white lithium grease for rails, felt tape for bolsters and buckles, a cloth strip for foam against frame, and a quarter turn for the four mounting bolts.
Check your VIN for an open manufacturer campaign before you spend the afternoon, because a factory design fault is repaired at no charge. And leave WD-40 in the cupboard where it belongs, cleaning grease, not lubricating it. With the right material on the right joint, the squeak is usually gone within fifteen minutes.