
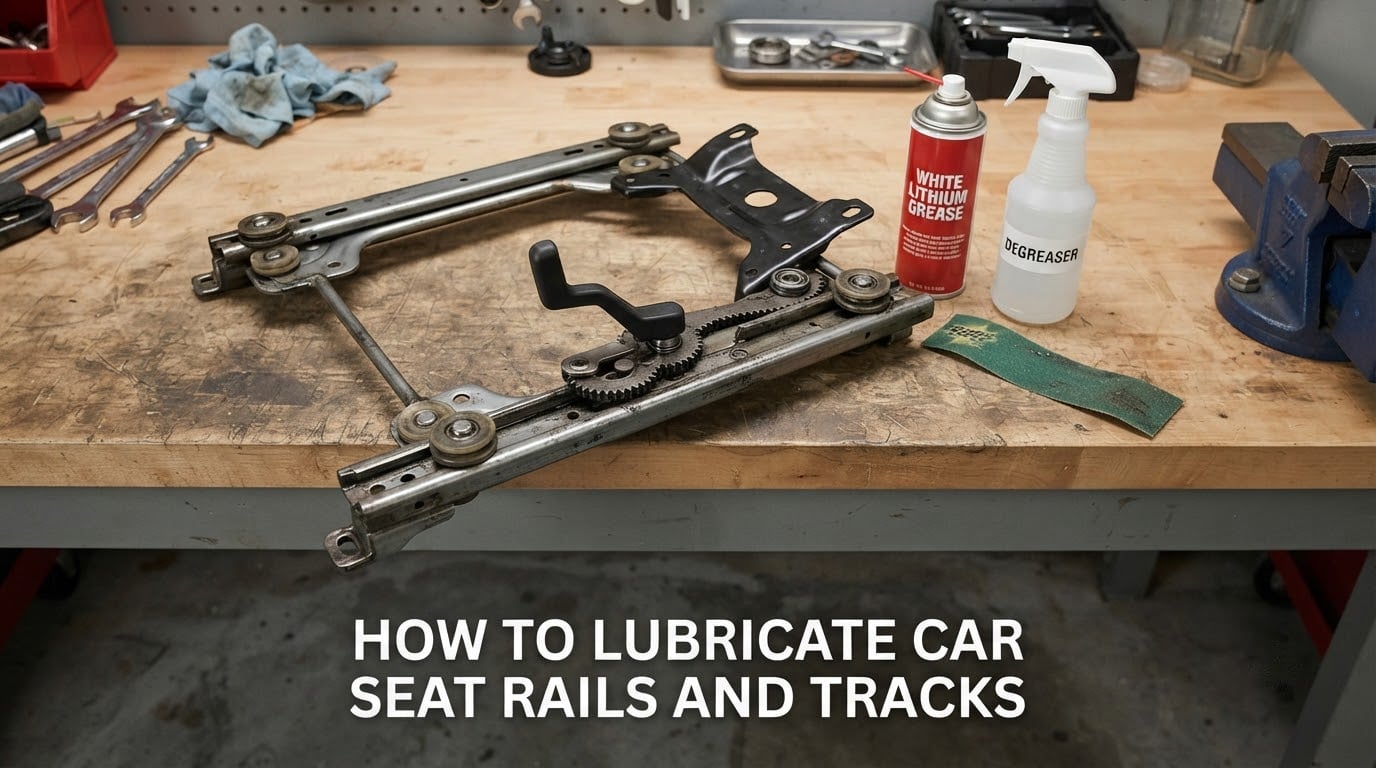
A dry car seat track squeaks over bumps, binds when you try to slide it, and quietly wears out the adjuster gears underneath. The fix is a thin film of white lithium grease or silicone spray on the rails, rollers and pivot points, and the whole job takes about 30 minutes with basic hand tools.
Our trim shop sees the same three complaints walk through the door every week: a seat that grinds going forward, a manual adjuster that will not catch, and a power motor that hums and stops. All three start the same way. This guide covers how to lubricate car seat rails and tracks properly, which lubricant to pick, how often to reapply, and the jobs that lubrication cannot fix.
Written by the Segal Motor Trimmings team and last reviewed in 2026.
Table of Contents
- How to Lubricate Car Seat Rails and Tracks (Step-by-Step)
- Which Lubricant to Use (and What to Avoid)
- Why Seat Tracks Squeak, Bind and Jam
- Cleaning the Track Before You Lubricate
- Power Seat vs Manual Seat: Important Differences
- How Often Should You Lubricate Seat Rails?
- When Lubrication Is NOT the Fix
- Lubricating Bench Seats and Removed Tracks
- Frequently Asked Questions
- Conclusion
How to Lubricate Car Seat Rails and Tracks (Step-by-Step)
Work on a level surface in a shaded area where you can see into the track channel. The rails sit low under the seat, so a flashlight and a pair of trim tools make the difference between a clean job and a smeared one.
Tools and supplies
- White lithium grease in a spray can or a small tube, or silicone spray lube as an alternative
- Parts degreaser or brake cleaner for breaking down old hardened grease
- Scotch-Brite pad strips and a small pick or awl for packed-in gunk
- Clean lint-free rags plus mineral spirits or a mild dish soap and water mix
- Basic socket set and trim removal tools for moving the seat or lifting the rail cover
- Wire brush for rust scuffing on a track you plan to coat or paint
- Disposable nitrile gloves and a paper towel or cardboard to catch drips
Safety first: disconnect the battery before you work under the seat. Modern seats carry seat belt buckle pretensioners, occupant sensing mats and side airbag wiring. A 10mm wrench on the negative terminal, a folded towel over the cable end, and a 5 minute wait for the capacitors to drain keeps the airbag light off. If your seat has a memory function, plan on resetting it before you drive away.
Once the battery is disconnected, follow these ten steps in order. Cleaning comes before lubricating, and skipping that order is the single most common reason a seat track still binds after a grease job.
- Park on level ground, engage the parking brake, and disconnect the negative battery terminal.
- Slide the seat fully forward to expose the rear of both rails and the full length of the channel.
- Move the adjuster through its full range two or three times to reveal which points stick, squeak or catch, and note the tightest spot before you start.
- Remove the seat bolt covers and lift the plastic trim shrouds off the rails so the channel is open; on many vehicles the rails are only accessible once the seat is moved or removed entirely.
- Degrease the channels. Spray parts cleaner or brake cleaner into the rail, let it soak for a few minutes, and wipe it out with a rag.
- Scrub the hardened residue. Work a Scotch-Brite strip along the channel walls and around each roller and pivot, and use a pick to lift gunk out of the corners.
- Wipe everything clean and let it dry fully. Any solvent or moisture left in the channel will dilute the grease and turn it into paste.
- Apply a thin coat of white lithium grease or silicone lube along the inside walls of both rails, directly onto every roller, ball bearing and pivot point. Move the seat back and forth with the power switch or by hand so the lube works into the contact surfaces.
- Run the seat through its full range several times and wipe off the small amount of grease that pushes out of the channel. That squeeze-out is what keeps grit out of the track later.
- Reconnect the battery, cycle the seat through fore-aft, recline and height, then set the memory positions again if the car has them.
That is the whole routine maintenance job. The two rails, the adjuster gear housing and the seat cushion pivot bolts all benefit from the same ten minutes of attention.
Which Lubricant to Use (and What to Avoid)
For most cars, white lithium grease is the right answer because it stays put under load and resists water. Silicone spray leaves a thinner, cleaner film that will not collect grit, which makes it the better choice in a dusty truck or a convertible. Use the table below to match the product to the situation.
| Lubricant | Best for | Avoid when |
|---|---|---|
| White lithium grease | General use on rails, rollers and pivots; heavy load, older vehicles, maximum staying power | The track collects road grit, or a new painted or coated rail has not fully cured |
| Silicone spray lube | Dusty conditions, convertible cabins, seats with plastic bushings you do not want coated in sticky grease | A heavily loaded track that needs a thick, long-lasting film |
| Dry PTFE film lube | Fine dust, sand, mud and winter road salt that would gouge or wash out a wet grease | A cold, seized track that needs penetrating oil first |
| Chain and wire rope lube | Tracks that stay exposed to water, slush or splash, and for bench seats with exposed cables | Upholstery and carpet directly below the rail, because it sling and overspray |
| Graphite lubricant | Sliding metal tracks on vintage and bench seat builds, especially after a rebuild | Modern sealed roller assemblies, where graphite pastes into the bearing and can score the race |
Owners on the Vintage Mustang forum and Tacoma World forums overwhelmingly reach for white lithium grease and describe it as a solid general choice that is compatible with whatever original grease remains after cleaning. That is the safe default for most drivers.
Silicone spray and chain lube get recommended for a specific reason. The propellant evaporates and leaves a thin clear film in the groove, and any excess wipes off with a solvent rag instead of migrating into your carpet. That property is why so many people prefer it on a daily-driven track where over-greasing is a bigger annoyance than a slightly shorter service life.
When not to use white lithium grease
Skip it in three situations. Do not use it on a freshly sandblasted and painted rail until the coating has cured, because grease applied to soft paint gums up immediately and the parts that came apart cleanly will jam shut. Do not use it on a track that is permanently exposed to grit and sand, where a dry PTFE film or silicone spray will not hold dirt the same way a thick lithium film does. And do not use a heavy bead on rails positioned directly above carpet or fabric, because the excess transfers to the trim and is difficult to remove.
One more limitation is worth knowing. Lithium grease is a soap thickener, and owners restoring older cars report that it can gel and harden over time, which is exactly how a neglected track ends up with a hard ring of gunk around each roller. If your track has been unlubricated for years, plan on a full clean before the fresh coat goes on.
What never goes on a seat track
WD-40 is a solvent and a water displacer, not a lubricant. Owners on the Corvette Forum and For B Bodies Only describe using it usefully as a rinse after scrubbing, because it flushes residue out of the grooves, but it leaves behind a thin film that is not designed to carry load. The consensus is clear: use WD-40 to clean, then use real grease or a dry film lube to lubricate.
Also keep cooking oil, motor oil penetrating spray, silicone sealant and spray paint off the channel. They attract dirt, they soften plastics, and none of them will still be there a year from now when the seat starts binding again.
Above all, keep grease off the seat belt buckle, the detent pawl spring and the seat lock mechanism. Get grease on the buckle tongue and the latch can seize, which is a safety problem rather than a convenience one. A paper towel under the buckle during the lube job is cheap insurance.
Why Seat Tracks Squeak, Bind and Jam
Most seat track complaints trace back to one of five causes, and only two of them are solved with grease. Use the table to identify the real problem before you buy anything.
| Symptom | Likely cause | Fix |
|---|---|---|
| Squeak on bumps, turns or stops | Dry nylon rollers or a dry pivot bolt | Degrease, then apply a thin coat of grease or silicone lube |
| Stiff fore-aft slide, no noise | Old grease hardened into a gelled ring around the rollers | Degreaser soak plus Scotch-Brite scrub before lubricating |
| Seat will not catch in a position | Detent pawl or adjuster gear gummed with grease and dirt | Clean the gear housing thoroughly; light lube on the pawl only |
| Power motor hums, strains or stops mid-travel | Track binding forces the motor to work against friction | Clean and lubricate first; if the motor is already damaged, replace it |
| Seat got stiff after a spill or flood | Water carried dirt into the channel and left a gritty paste | Full clean with solvent and a pick, then a dry film or silicone lube |
There is a minority position worth addressing directly. A commenter on r/MechanicAdvice argues that you should not spray the rails at all, because the channels are a protected environment and added grease only gives dirt a place to sit. That view is not crazy, and on a sealed modern track running through salt every winter, a dry film lubricant is a defensible choice.
The practical answer is that the decision depends on the condition of the track. If the channels are clean, dry and rust-free, leave them alone until they make noise. If the rollers are already squeaking or binding, cleaning and a light film will always beat leaving the friction in place.
Cleaning the Track Before You Lubricate
Fresh grease over old grease does not lubricate, it just adds a second layer of gunk. Cleaning is the step that decides whether the job works, and on most tracks it is the step that takes the most time.
Start with a parts degreaser or brake cleaner sprayed directly into the channel. Let it sit for several minutes so it can soften the hardened film, then wipe it out with a rag. Repeat once if the first pass brings up more grime than the second.
Next, run a strip of Scotch-Brite along the channel walls, into the corners and around each roller. A pick or small awl handles the spots the pad cannot reach. On tracks that are not designed to come apart, members report that mineral spirits or a parts-washer solvent works as a soaking agent to soften the gunk enough to scrub it out without disassembly.
Wipe the channel dry and let it sit. Do not apply grease over damp metal, because the moisture traps in the grease and turns it into a paste that collects grit faster than the original problem.
Tip: cardboard under the seat catches drips and gives you something to change when the first rag fills up. A single track can take three or four rags to wipe clean.
If the track is being rebuilt rather than serviced, the order changes. Restoreers on the NastyZ28 forum describe the correct sequence as sandblast and coat or paint the rails first, then apply a liberal amount of grease only after the coating has fully cured. Grease applied to fresh paint gums up on contact and undoes the whole rebuild.
Power Seat vs Manual Seat: Important Differences
The lubrication work is identical on both systems, but the surrounding steps are not. A manual seat is a mechanical problem you can solve at your own pace. A power seat involves an electrical system and, in most modern cars, sensors that are easy to disturb.
Power seat
- Disconnect the battery first. The seat harness runs under the rails and passes seat belt buckle switches, an occupant sensing mat and often a seat position sensor. Working with the battery connected risks a short or a false seat belt warning.
- Note your memory seat positions before you disconnect anything. Most memory seats lose their settings when power is cut and need to be re-taught with the owner’s manual procedure, usually seat at the rearmost and lowest position before you store the setting.
- Move the seat manually with the power switch disconnected so the grease spreads into the contact points, then reconnect and run it through the full range with the motor.
- Listen to the motor. A smooth hum during travel is normal. A strained whine, a click, or a motor that stops without the track reaching the end of its travel points to a motor or gearbox problem rather than a lubrication problem.
- Expect the airbag light. Some cars flag a seat fault until the seat is cycled and the system clears. If the light stays on, scan the module before assuming the lubricating broke something.
Manual seat
- Work the lever through the full range and note every position that feels gritty, especially the first notch and the rearmost stop where the detent pawl engages.
- Remove the adjuster housing cover on most manual tracks so you can see the gear teeth and the pawl. Gelled grease in that housing is a common cause of a seat that slides but will not lock.
- Keep grease off the pawl spring and detent plate. A light film on the pawl tip is fine. Grease on the spring can make the detent mushy and the seat feel unsafe.
- Re-test the lock deliberately. Slide the seat on a slight incline and confirm it holds in position. If it rolls, the detent is worn and no lubricant will fix it.
How Often Should You Lubricate Seat Rails?
For most drivers, the answer is once a year or whenever a new noise appears. Do not wait for the schedule if the seat starts complaining, because a squeak is an early warning that the rollers are running dry.
| Vehicle use | Interval | Notes |
|---|---|---|
| Daily driver, dry climate | Every 12 months | Lubricate at the first squeak rather than waiting for the full interval |
| Winter salt and road grime | Every 6 to 9 months | Clean more often than you lubricate; salt residue traps grit |
| Work truck, farm or off-road use | Every 3 to 6 months | Use silicone spray or a dry film lube, which sheds dust better than grease |
| Fleet or shared vehicle | Every 6 months | Track a squeak complaint as the trigger for service |
| Older or high-mileage car with a non-serviceable track | Every 6 months | Expect to clean more than you lubricate as the grease gells |
Cleaning and lubricating are on different clocks. A quick wipe-down and re-lube takes 20 minutes and is worth doing once a year. A deep clean of a neglected track is a separate job, and doing it every six months on a car that does not need it will not improve anything.
When Lubrication Is NOT the Fix
Three situations account for most of the disappointing results. Recognizing them early saves an afternoon and a parts return.
- A bent or corroded rail. If the channel is creased, rusted through or deformed by a footwell jam, no lubricant changes the geometry. The rail has to be replaced, and on a vehicle where the track is a structural part, the replacement is usually sold as an assembly with the adjuster and rollers already installed.
- A stripped or worn adjuster mechanism. If the seat will not hold position, the gear teeth or the detent pawl are worn. Members who fully disassembled a six-way adjuster found a factory-missing internal part creating metal-to-metal contact that cleaning alone could never have fixed. Grease would only mask it for a few weeks.
- A failed power seat motor. If the motor hums, runs hot or stops mid-travel, lubricating the track may not bring it back. A motor that has been straining against a binding track can fail outright, and it will not recover on its own once it does.
A fourth case is the seat that is simply too far gone. If the rollers are flat-spotted, the plastic bushings are cracked, or the channel is lined with rust flakes that keep coming back no matter how much you clean, replacement of the track is the honest recommendation.
Lubricating Bench Seats and Removed Tracks
Bench and low-back seat tracks from older vehicles are usually simpler to service, but the order of operations matters more, not less. Most bench tracks are riveted rather than bolted and are not meant to be disassembled, so the work happens with the seat out of the car and up on a bench.
Remove the seat, take the track off the floor, and scrub the channels down to bare metal if you are rebuilding. A wire brush followed by a degreaser will take off decades of hardened lithium. Check for rust pits and treat them before coating, because a pitted channel will keep grabbing the rollers no matter what you apply.
Coat or paint the rails first, then wait for the coating to cure fully before any grease goes near the channel. Fresh coating plus fresh grease is a sticky, gumming pair, and members restoring tracks report that the rails seized solid when grease was applied too early.
Once cured, coat the moving surfaces with grease and reinstall. On a bench track with exposed cables or slide channels, chain and wire rope lube is often a better fit than lithium grease because it penetrates the cable strands and resists the water that collects under a bench seat.
Frequently Asked Questions
What type of lubricant should I use for car seat tracks?
White lithium grease is the standard choice for most cars because it stays in place under load and resists water. Silicone spray is better in a dusty truck or convertible because it leaves a thin film that does not collect grit, and a dry PTFE film lube suits sand, mud and road salt. Apply it only to the rails, rollers and pivots, and keep it off the seat belt buckle and detent pawl spring.
How to grease seat rails?
Disconnect the negative battery terminal, slide the seat forward, remove the rail trim covers, degrease the channels with parts cleaner, scrub hardened grease out with a Scotch-Brite strip and a pick, wipe dry, then apply a thin coat of white lithium grease to the rail walls, rollers and pivots. Run the seat through its full range, wipe off the squeeze-out, and reconnect the battery. The job takes about 30 minutes.
What is the best grease to use on car seat rails?
White lithium grease wins for most vehicles because it tolerates load, heat and water better than the alternatives and it will not sling onto your carpet. Silicone spray or a chain and wire rope lube is a better match when the track sits in dust or water, and a dry film lubricant is the right pick where sand and road salt would cut through a wet grease. The single most important factor is cleaning the track before you apply any of them.
When not to use white lithium grease?
Do not use it on a freshly sandblasted, painted or coated rail until the coating has fully cured, because grease on soft paint gums up and can jam the rollers solid. Avoid it on tracks that live in permanent grit or sand, where the thick film holds dirt against the metal. And keep it off anything that must stay free, including the seat belt buckle tongue, the detent pawl spring and carpet directly below the rail.
Is white lithium grease safe to use on car locks?
No. Grease is not a lock lubricant, and it will collect dirt inside the lock cylinder and make the key harder to turn over time. Use a dry PTFE lubricant or a graphite powder designed for locks instead. White lithium grease belongs on the seat rails, rollers and pivot points only, and it should be kept well away from any latch or striker you rely on to hold the seat in place.
Can I use WD-40 on seat rails?
Use WD-40 to clean, not to lubricate. It is a solvent and a water displacer, so it works well for rinsing debris out of a channel after scrubbing, but it leaves a thin film that is not designed to carry load and will not last. Apply WD-40 first if you want it, then follow with white lithium grease, silicone spray or a dry film lubricant once the track is clean and dry.
Conclusion
Knowing how to lubricate car seat rails and tracks is a 30 minute job that protects an adjuster, a lock mechanism and, on a power seat, a motor. Clean the channel first with a degreaser and a Scotch-Brite strip, wipe it dry, then lay a thin coat of white lithium grease on the rail walls, rollers and pivots. Wipe off the squeeze-out so the grease does not travel to your carpet.
Skip WD-40 as a lubricant, keep grease away from the seat belt buckle and the detent spring, and disconnect the battery before you work under a seat with SRS wiring. Do it once a year, or the day the first squeak starts, and the track will stay quiet for years.