
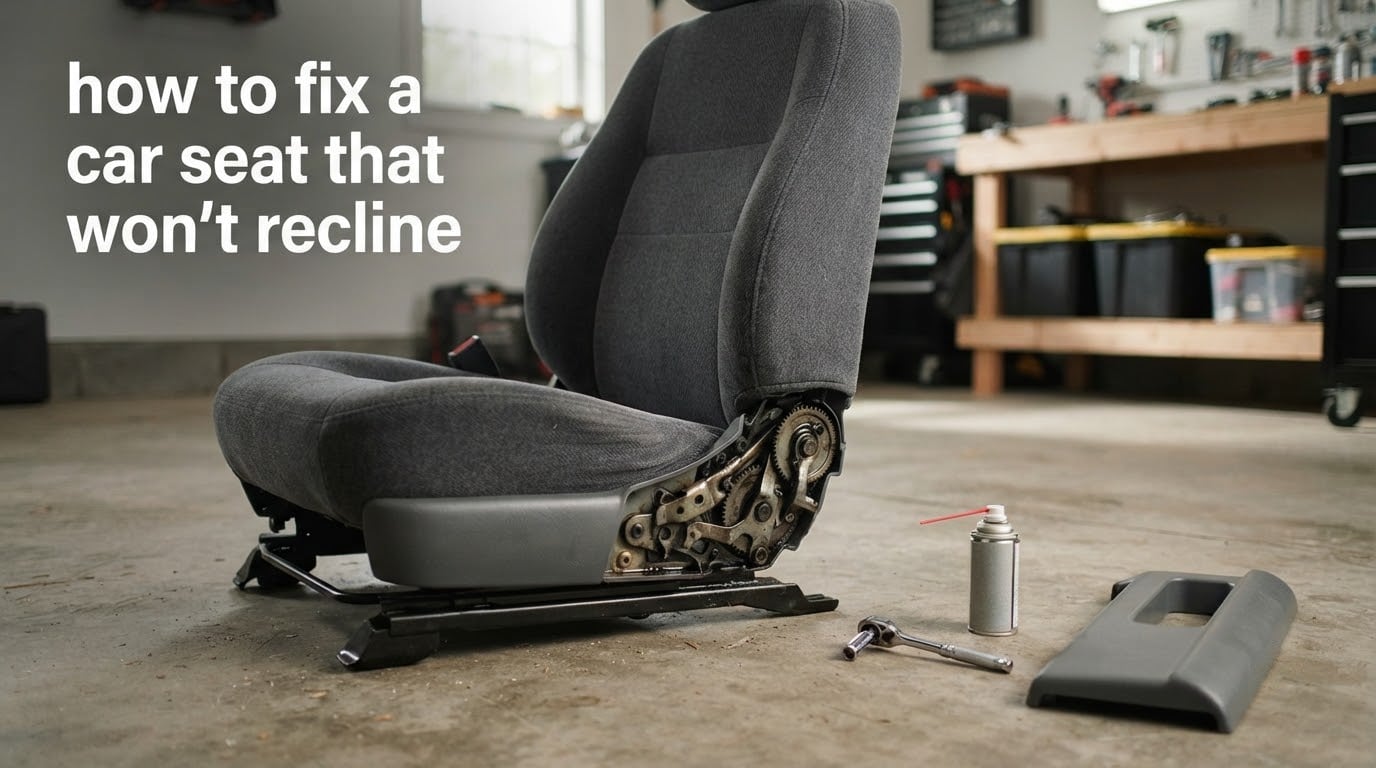
Most people searching how to fix a car seat that won’t recline fall into one of two very different problems, and the repair path depends entirely on which one you have. A seat that won’t recline almost always fails in one of two places: the mechanical recline mechanism at the seat hinge, which is the lever or knob, the cable, and the gear set it works against, or the electrical feed that drives it, which is the fuse, the seat switch, the recline motor, and the wiring between them.
That is the whole diagnosis in one sentence. Identify which of those two families is failing, and the repair becomes a short, ordered sequence. This guide walks both branches, starting with the free fixes that solve a surprising share of cases before anyone buys a part.
This guide covers the vehicle seat in your car or truck, not a child car seat. If you are looking to reinstall a child restraint, the process is completely different and safer to leave to a certified technician.
SAFETY FIRST: DISCONNECT THE BATTERY BEFORE YOU GO UNDER THE SEAT
Every front seat since the mid-1990s carries a seat-mounted airbag, and its wiring runs in bright yellow sheathing under the seat. Disconnect the 12-volt negative terminal, wrap the cable end so it cannot touch the terminal, and wait at least 15 minutes before working underneath. Plan on 20 to 30 minutes if you also have to pull a trim panel. A seat that will not recline is a comfort problem. A seat that deploys an airbag while you are under it is a serious injury. If you are not certain you can reach the airbag bolts with the battery disconnected, stop and take the vehicle to a shop.
Table of Contents
- How to Fix a Car Seat That Won’t Recline
- Is Your Seat Manual or Power? Start Here
- Diagnose the Problem First: Five Minutes and No Parts
- Fixing a Manual Recline Mechanism: Lever, Cable, and Gear Set
- Fixing a Power Recline: Fuse, Switch, Motor, and Wiring
- How to Free a Seat That Is Already Stuck Reclined
- Tools and Supplies You Need
- DIY or Shop? When a Mechanic Wins
- Vehicle-Specific Notes From Owner Reports
- Frequently Asked Questions
- Conclusion
How to Fix a Car Seat That Won’t Recline
The short version: work through the free fixes first, then branch by seat type, then diagnose by noise. Here is the full sequence in order.
These four steps are free, take under ten minutes, and fix a large share of stuck seats. Do all four before ordering anything.
- Check for an obstruction. Look along the pivot point and the side of the seat gap for a dropped coin, a pen, a cable tie, or grit. A coin in the hinge is the single most common cause of a seat that will not move one way.
- Cycle the full travel. Push the seat all the way forward, then slide it all the way back, then try the recline again. Cycling the full range of motion frees a bound-up pawl, the little latch inside the mechanism that is supposed to drop into a notch. This is the top-voted advice in owner forums, and it works more often than most people expect.
- Hand-assist while you press. Push on the seatback in the direction you want it to go while holding the switch or lever. If it moves under load, the motor, gear set, or cable has margin left and the problem is a binding pivot or a weak latch spring.
- Lubricate the mechanism. A silicone lubricant or penetrating oil worked into the recline pivot and the mechanism’s moving parts, followed by full back-and-forth cycling, resolves many seats that stopped months ago. Stick with silicone or dry-film lubricant on plastic gears: grease attracts grit and eventually makes the jam permanent.
On a 95 4Runner, one owner pulled the seat out of the vehicle, cleaned and lubed the recline mechanism, worked it back and forth until something gave, and reported the seat fixed itself. On a Jeep thread, the fix was simply pushing the seat all the way forward and then sliding it back all the way. Both are free operations and both come up again and again in owner reports.
If those four steps change nothing, the fault is electrical, damaged, or both, and the rest of this guide is for you. Everything below assumes a working battery, because a weak battery produces exactly the symptom people describe: a silent seat, a flickering switch, and a motor that clicks once and quits.
Is Your Seat Manual or Power? Start Here
Every reliable fix path starts with this split, because the manual seat and the power seat share almost no parts. You have a manual seat if pulling a handle, knob, or strap on the side of the seat moves the seatback. You have a power seat if a switch on the base of the seat moves it. Nothing else in this guide applies to the other branch.
| What you see | Seat type | What fails most often | Where to go in this guide |
|---|---|---|---|
| A lever, knob, or pull strap on the outboard side of the seat | Manual | Plastic recliner lever, popped cable, jammed pawl | Manual mechanism section |
| A switch pad on the seat base with fore, aft, and recline buttons | Power | Seat switch module, recline motor, connector corrosion | Power recline section |
| Fore and aft moves, recline is dead | Power | Recline motor or the recline switch position, on its own circuit | Diagnose, then power section |
| Nothing on the seat works at all | Power | Blown fuse, loose ground, dead switch module | Diagnose first |
| Handle exists but the seatback will not latch anywhere | Manual or power | Worn gear set or stripped shaft | Diagnose, then decide DIY or shop |
Two details from owner reports help you narrow this further. On a 6MT G35 coupe, fore-and-aft movement and the fold-flat function worked perfectly while only recline was dead, which tells you the recline motor and its circuit are separate from the others. And on a 2014 ML350, a clicking noise under the footwell when the button was pressed pointed at the actuator and gearbox rather than the switch, because a dead switch is silent.
If your seat has a memory button, treat it as a power seat. Memory seats still have a physical limit switch inside the mechanism, and a failed limit switch can block recline in one direction while the rest of the seat works normally.
Diagnose the Problem First: Five Minutes and No Parts
People describe what they hear far more often than they name parts, so the fastest route is to match your symptom to a cause. Press the recline control while someone listens under the seat, or kneel under the sill yourself with the door open.
| Symptom | Most likely cause | Next move |
|---|---|---|
| Complete silence, no motor sound at all | Fuse, seat switch, or unplugged connector | Check the fuse, then the switch, then the harness |
| One click, then nothing | Low voltage, weak battery, or corroded connector pin | Test battery voltage, clean and reseat the connector |
| Clicking under the floor while the seat does not move | Actuator gearbox or stripped internal gear | Cycle travel with hand-assist, then plan motor work |
| Grinding that continues for more than a second | Stripped plastic gear set in the recline motor | Motor replacement; on some models the seat-back frame is sold as one unit |
| Motor hums, seat creeps then stops | Binding pivot or cable tension out of spec | Lubricate the pivot, check the cable at the mechanism |
| Reclines down but will not come back up | Jammed pawl or a limit switch that has not released | Cycle full travel, then lubricate the mechanism |
| Works, then stops working days later | Intermittent switch or connector fault, often after spilled liquid | Inspect the switch and connector for corrosion |
| Works but will not latch into a position | Worn latch teeth or worn ratchet in the mechanism | Recliner mechanism service, usually a shop job |
Now run the electrical checks in this order. This sequence matters because each step costs a minute and rules out a whole branch of causes.
- Test the battery. A 12-volt battery under about 12.4 volts will click the relay and never move the motor.
- Check the seat fuse and the circuit breaker. Nearly every vehicle has one, usually in the interior fuse box, often labelled for power seats. Pull it, look at the filament, and check continuity rather than judging by eye alone.
- Check the 12-volt auxiliary battery on hybrids and on vehicles with a battery-management system, since a weak auxiliary battery causes seat motors to quit under load.
- Inspect the wiring harness under the seat rails. The harness moves with every adjustment, so it gets pinched and fatigued. This is the failure a Fisker owner found: a squished harness under the rail.
- Unplug the seat connectors and look at the pins. Green corrosion or a warm-smelling plastic housing means the joint, not the motor. Spray contact cleaner, work the connector open and closed a few times, and refit it until it clicks.
- Confirm the switch is passing current. A test light or multi-meter on the switch output tells you whether the command is reaching the motor. If the light does not come on when you press recline, the switch is the fault. If it comes on and the motor stays silent, the fault is downstream.
- Listen for the motor. A hum with no movement means power is arriving. No sound at all means the switch, the fuse, or the connector is open.
Before you buy anything, check whether your year, model, and seat configuration has an open recall or service bulletin for the recline switch or motor. Several brands have issued them, and if one covers your seat the part is covered.
Two questions settle nearly every case: is the seat manual or power, and do you hear the motor when you press the button? A manual seat with no sound problem is a mechanical job. A power seat with a sound but no motion is a gearbox or cable job. A power seat with no sound is an electrical job.
Fixing a Manual Recline Mechanism: Lever, Cable, and Gear Set
The manual mechanism is a geared latch at the seat hinge. A handle works a cable or a shaft that pulls a pawl out of a ratchet gear, and the gear teeth hold the seatback at each position. Failures cluster around the plastic parts in that chain, which is why an all-metal lever tends to outlast the original by a very long time.
- Park on level ground, set the parking brake, and disconnect the 12-volt negative terminal. Wait at least 15 minutes before reaching under the seat.
- Slide the seat fully forward on its rails. This opens the hinge area and takes the load off the mechanism, and it is the first thing you should have tried before removing anything.
- Remove the seat-back cover or side trim panel. On many vehicles the back cover clips over the top edge and pulls straight up; owners report it pops off without tools. On others it is held by clips along the side and comes off once the recliner lever is pulled out.
- Pull the recliner lever or knob out of the mechanism. It is usually a single plastic pin or spline that slides out. Owners on Acura MDX forums describe this as the moment the whole mechanism becomes accessible.
- Look for a cable that has popped off its anchor. A cable that has jumped off the stud or a broken retainer is a genuinely common and easily repaired failure, and it is found by pulling back the lower seat panel near the recline lever.
- Check the pawl and the ratchet teeth. Grit and dried lubricant here are what a stuck seat actually looks like inside. Clean with a solvent, then apply a small amount of silicone lubricant to the pivot, the pawl spring, and the shaft.
- Refit the cable or lever to its anchor and confirm the retainer is seated. A retainer that looks in place but has not clicked fully over the stud will let the cable slip again within a week.
- Work the mechanism back and forth by hand before reassembling. It should move through the full range with even resistance. If it binds at one point, that point is the jam, and it is not fixed until it is clean.
- Reinstall the trim panel and the cover, then reconnect the battery. Reassemble with the seat still fully forward and cycle it through its travel before pushing the seat back into position.
- Test latch engagement at three or four positions. The mechanism must hold the seatback where you leave it. A mechanism that moves but will not hold is worn and needs replacement rather than lubrication.
If the lever has snapped off at its base, you can often replace just the handle. Metal aftermarket levers are described on owner forums as effectively indestructible for the remaining life of the vehicle. Match the spline diameter and shaft length to your year and model before ordering, since levers that look identical across model years often do not fit.
Note the wear pattern on the shaft when you reassemble. A round shaft with a visibly flat spot means the gear set has been loaded off-center and the plastic hub is close to failing. Replace both together rather than fitting a new lever onto a worn hub.
Fixing a Power Recline: Fuse, Switch, Motor, and Wiring
The power seat uses the same gear set, driven by a small electric motor through a switch on the seat base. The motor and the switch are separate parts, and telling them apart is the skill this section teaches.
- Disconnect the 12-volt negative terminal and wait at least 15 minutes. The seat-mounted airbag connector sits directly under the rails, and the airbag lamp must go out before you touch it. This step is not optional.
- Slide the seat fully forward and down where you can reach the underside. Support the seat so it cannot slide while you work.
- Confirm the diagnosis you made in the previous section. Test light on the switch output: light on and motor silent means the motor or gearbox. No light means the switch or the circuit feeding it.
- Check the fuse one more time and test the motor’s power and ground at the motor itself. Voltage at the motor with the switch held is a clean result. Voltage at the switch but not at the motor means a broken wire, a bad connector, or a failed ground strap in the seat frame.
- Clean and reseat every connector you touch. Contact cleaner, a few cycles of the connector, and a check that the locking tab is fully engaged. A connector that looks plugged in can still be open on the ground pin.
- Replace the seat switch if the output never energises. On many models the switch is reached by pulling the seat base trim panel. The switch is a sealed module with button contacts and is not serviceable. Some switch positions are independent, so a dead recline position can coexist with a perfectly working fore-aft position.
- Remove the seat from the vehicle if the motor or mechanism is the fault. Take the battery lead off before lifting, and support the seat as you pull it clear of the bolts.
- Expose the recline motor. Depending on the design, the motor is bolted to the seat-back frame or to the seat cushion frame. On many vehicles you have to release the seat-back cover to reach the mounting bolts.
- Disconnect the motor connector and note the pin layout before removing it. Photograph it. A motor connector that will not seat correctly when reinstalled is a new fault you created.
- Remove the motor bolts. Torx heads, commonly T30, are typical. Note the bolt length and which bracket each one passes through.
- Fit the replacement motor and torque the bolts to specification. Manufacturer procedures for this repair commonly call out values in the 5 Nm range for the recliner motor bolts, which is roughly hand-tight plus a fraction of a turn. Always use your own vehicle’s specification rather than a number taken from another model.
- Reconnect, refit the cover and trim, reinstall the seat, and reconnect the battery. Cycle the recline through full travel several times.
- Run the calibration or relearn step if your vehicle has one. Vehicles with position sensors and seat memory need a calibration cycle after the recline motor or switch is replaced, and until it is run the seat may stop short of its programmed positions or the memory buttons will behave oddly.
Two shortcuts are worth knowing. A fully dead motor can sometimes be moved with a battery jumper applied directly to the motor’s power and ground pins, which is how you confirm the mechanism is free before you order the part. And the hand-assist trick works here too: push the seatback by hand while holding the recline button. If it moves, the gearbox has life in it, and lubrication plus a freed pawl may be the whole repair.
Owners on Volvo forums describe combining the motor with manual pressure on the rod and a flathead screwdriver through an access hole to move the seat by hand, which is a useful last resort before removal. Treat it as a diagnostic move rather than a permanent fix.
How to Free a Seat That Is Already Stuck Reclined
A seat lying flat is the version of this problem people find most urgent, because it is hard to see out of and awkward to climb into. Work through these in order.
- Load the seat and push it toward its upright position while holding the recline control. Combining your body weight with the switch often frees a bound pawl that the motor alone cannot overcome.
- Push the seat all the way forward, then all the way back, repeating five or six times. Full-travel cycling is the most commonly reported free fix in owner threads.
- Press the recline control repeatedly in short pulses while someone else pushes the seatback. Short pulses prevent the motor’s thermal cutoff from tripping.
- Cycle the fore-aft switch with the recline switch held. On some mechanisms the seat only clears its ratchet when the rails are loaded in one direction.
- Check for and remove a coin or object in the pivot. If a coin has migrated into the hinge, no amount of cycling will help until it is out.
- Remove the seat and work the mechanism by hand. With the battery disconnected, lay the seat on its side and cycle the recline knob or lever. This is the step that resolved the 4Runner case.
- As a last resort, unbolt the seat and work it in the vehicle footwell or on the ground. You are looking for a point in the travel where the pawl drops and the seat moves freely.
Is it safe to drive with the seat stuck reclined? You can drive, but set the seat as upright as it will go, move the steering wheel or pedals if you can, and expect reduced rearward visibility. A reclined seat also moves the driver closer to the knee, so if you are short on legroom, be careful that your knee is not being pushed forward by the reclined cushion. Fix it properly before you rely on the seat again.
Tools and Supplies You Need
For the manual procedure you need very little: trim tools or plastic pry tools, a Torx set covering the seat and trim fasteners, a ratchet with sockets, penetrating oil or silicone lubricant, a clean rag, and a socket or driver for the seat-back cover clips.
For the power procedure add a test light or a multi-meter, contact cleaner for the electrical connectors, and a torque wrench for the motor bolts. A small inspection mirror and a flashlight are worth having because the recline motor usually sits at the rear of the seat underside where you cannot see it directly.
On consumables, silicone lubricant is the safer default over grease anywhere plastic gears or a ratchet are involved. Dry-film lubricant works well on the pivot and the cable. Use a plastic-friendly penetrating oil to free a frozen pawl before you spray anything heavy, and avoid spraying solvents directly onto an electrical connector or a seat switch.
On parts, verify before you order: the seat switch module and the recline motor are separate line items, the year and seat configuration matter more than the model name, and on many vehicles the seat-back frame is only sold as a complete assembly, which is where DIY stops being sensible. Read the part number off the failed part itself and cross-check it against the listing.
DIY or Shop? When a Mechanic Wins
Some of these jobs are genuinely straightforward and some are not. Here is an honest read on when your tools and an afternoon are enough.
Clean and lubricate the mechanism, reseat a corroded connector, refit a popped cable, cycle a bound pawl, and replace a seat switch are all reasonable DIY work with a basic hand tool set. Expect a couple of hours the first time, most of it removing trim you will not recognise at first glance.
Hand over the job when any of these are true. The seat-back frame is only sold as a complete assembly and the motor is not available separately. The mechanism binds in more than one place, which means the gear set itself is worn rather than dirty. Your vehicle requires a post-repair calibration you cannot perform without dealer-level tooling. The airbag connector, the seat-mounted belt buckle, or the seat sensor mat shows any sign of damage. Or the job is under warranty or covered by an open recall or service bulletin.
Cost is the reason people hesitate, and the complaints in owner threads are consistent. Flat-rate diagnostic fees are charged before any work begins, sometimes per issue, and a seat that needs a full diagnosis can cost more in the diagnostic hour than the part. On the other side, the parts side has its own trap: a stripped internal gear on one model forces replacement of the entire seat-back frame, and one owner report describes a quote well into four figures for that assembly. That gap is exactly why cleaning and lubricating before ordering anything is the right first move.
Our view after walking through these repairs: spend the first hour on the free fixes and the diagnosis table. If you end up at a point where the part is only available as a whole frame, or where the airbag is involved and you are unsure, a shop is the cheaper decision, not the more expensive one.
Vehicle-Specific Notes From Owner Reports
A few patterns show up repeatedly in the owner threads, and they are worth knowing before you pull a single bolt.
| Make or model | Reported pattern | What it usually means |
|---|---|---|
| Chevrolet Camaro, around 2008 to 2010 | Seat stuck fully reclined with a grinding noise when trying to raise it | Owner reports point to the plastic mechanism failing, which on this platform can mean the whole seat-back frame |
| GMC and other GM trucks and SUVs | Passenger power seat will not recover from recline | Owners check the recline motor, the wiring harness for loose contacts, and the switch assembly, in that order |
| Toyota 4Runner, second generation | Manual recliner seized | Resolved by pulling the seat, cleaning and lubing the mechanism, and working it back and forth |
| Lexus LS, third generation, around 2005 | Seatback recline dead while other functions work | Owners check the related fuses and the electrical connectors for loose pins or corrosion before condemning the motor |
| Nissan Rogue | Seat stuck reclined and will not budge | Most owners in this situation end up at a repair shop rather than at the driveway |
| Mercedes-Benz ML, around 2014 | Clicking under the footwell when the button is pressed, no movement | Noise location points to the actuator and gearbox, not the switch, because a failed switch is silent |
| Acura MDX | Plastic recline lever breaks at the base | Owner forums treat a metal replacement lever as a permanent fix rather than a temporary patch |
| Tesla second row | Recliner motor service | Factory procedure specifies a torque value and a software calibration step after replacement, both of which need dealer tooling |
Two threads are worth reading in full if your vehicle matches them. The North American Motoring thread describes releasing a stuck mechanism by pulling the seat-back covers off the top, then removing the inside and outside levers to free the assembly. The Acura MDX thread covers the lever upgrade in detail, including how to tell whether your failure is the lever or the mechanism behind it.
Frequently Asked Questions
How to fix a car seat recliner?
A car seat that won’t recline fails in one of two places: the mechanical recline mechanism at the seat hinge, or the electrical feed that drives it. Start with four free fixes: clear any obstruction from the pivot, cycle the seat fully forward and back, push on the seatback while pressing the control, and lubricate the mechanism. If none of those help, identify whether the seat is manual or power and follow that branch.
Can a broken recliner be fixed?
Often yes. Dirt, dried lubricant, grit, and a jammed pawl are the most common causes and all are reversible with cleaning and silicone lubrication. A snapped plastic lever can be replaced on its own, and a popped cable can be refitted to its anchor. What usually is not fixable is a stripped plastic gear set inside the recline motor, because on many vehicles the motor is only sold as part of a complete seat-back frame.
Is there a fuse for electric seats?
Yes, nearly every vehicle with a power seat has one, usually in the interior fuse box and often labelled for power seats. Some cars also use a circuit breaker instead of a conventional fuse, which resets once the short or overload is cleared. Check that fuse first on any power seat fault, and also test the 12-volt battery, because a weak battery clicks the relay and never moves the motor.
Why won’t my electric seat recline?
Four causes cover almost every case: a blown fuse or weak battery, a failed seat switch module, corroded or disconnected wiring under the seat rails, and a stripped gear set inside the recline motor. Test light on the switch output separates the first three from the last one: no power at the switch means the circuit is open, power at the switch with a silent motor means the fault is downstream, and a hum with no movement means the gearbox or cable is binding.
How to get your car seat unstuck?
Push the seat toward upright while holding the recline control, then cycle the seat fully forward and fully back five or six times. Next, press the recline switch in short pulses while someone pushes the seatback, since long holds trip the motor’s thermal cutoff. Check the pivot for a coin or object. If none of that works, disconnect the battery, remove the seat, and work the mechanism by hand with the seat on its side.
Can you manually recline an electric car seat?
Yes, in most cases. Push the seatback by hand while holding the switch so the motor assists your weight. On some mechanisms you can reach an access hole and use a flathead screwdriver to move the rod directly while the motor turns. Treat both as diagnostic or emergency measures rather than permanent solutions, because if the mechanism moves under hand load the underlying fault is still present.
How to fix a power seat switch?
Disconnect the 12-volt negative terminal and wait at least 15 minutes, then slide the seat forward and remove the seat base trim panel that carries the switch. Unplug the switch connector, noting the pin layout, and pull the switch from its mounting. Fit the replacement module, refit the trim, and reconnect the battery. On vehicles with memory seats, run the position calibration or relearn cycle afterwards.
Is it safe to drive with the seat stuck reclined?
You can drive, but set the seat as upright as it will go and expect reduced rearward visibility. Watch the seatback behind your head and treat it as a secondary restraint, not a guarantee. A reclined cushion can also push your knee forward, which matters if you are short on legroom. Do not work underneath the seat with the battery connected, and do not ignore any airbag warning lamp after the repair.
Conclusion
Most seats that won’t recline are not broken, they are stuck, and the difference is decided in the first ten minutes. Clear the pivot, cycle the full travel, push on the seatback while you hold the control, and lubricate the mechanism. Those four steps cost nothing and they resolve a large share of cases that owners report fixing in their own driveways.
When they do not, the work splits cleanly in two. A manual seat means the lever, cable, and gear set, and most of that is cleaning, lubrication, and re-anchoring. A power seat means the fuse, the switch, the motor, and the wiring, and a test light on the switch output tells you which of those four has failed in about a minute. Run the calibration step on a vehicle that has one, check for open recalls before you buy anything, and take it to a shop the moment the part is only sold as a complete seat-back frame.
Whatever you do, disconnect the 12-volt negative terminal and wait 15 minutes before you reach under the seat. That one habit is the difference between a Saturday project and a trip to the emergency room.
Content reviewed for 2026. Always confirm procedures against your own vehicle’s service information before starting work.