
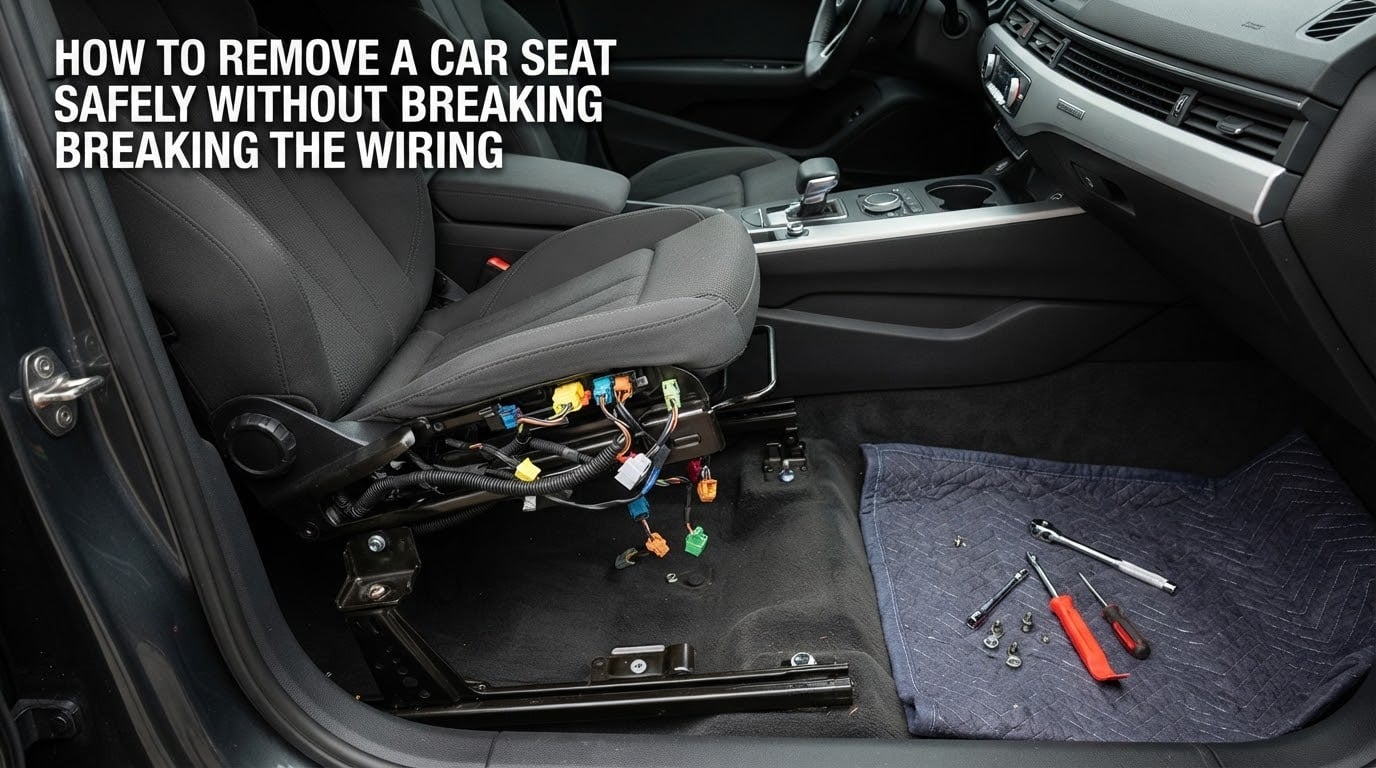
To remove a car seat without breaking the wiring, disconnect the negative battery terminal and wait 15 minutes, slide the seat fore and aft to reach every floor bolt, undo those bolts before unplugging anything, then release each connector by pressing its lock tab or sliding its safety clip and pulling the connector housing — never the wire. Label everything and refit every harness clip.
This guide covers removing a vehicle seat assembly, the kind bolted to the floor with a wiring harness, seat heater and side airbag underneath. If you came looking for how to take a child car seat out of its base using LATCH, that is a different job and there is a short section near the end for it.
The wiring under a seat looks intimidating, but almost every connector is a locking type designed to be released without tools. The reason people break these looms is rarely the connector itself. It is pulling on a wire instead of the plastic body, skipping a connector, or leaving the harness clips off so the loom later rubs against the seat frame until it chafes through. Do it in the right order the first time and the job is genuinely straightforward.
There is one safety rule with no exceptions, and it comes before anything else in this guide.
Table of Contents
- Safety First: Disconnect the Battery Before You Touch Any Connector
- What Are the Wires Under a Car Seat?
- Tools and Materials You Need
- How to Remove a Car Seat Without Breaking the Wiring: 8 Steps
- Step 1: Park, photograph and note the seat position
- Step 2: Disconnect the negative battery terminal and wait 15 minutes
- Step 3: Slide the seat fore and aft to expose every bolt
- Step 4: Remove the seat-to-floor bolts but leave them loose
- Step 5: Release the harness clips, brackets and P-clips from the seat frame
- Step 6: Disconnect the under-seat connectors, housing first
- Step 7: Lift the seat out, protecting the sill
- Step 8: Secure the harness in the cabin and inspect for pre-existing damage
- Handling Rules That Keep the Wiring Intact
- Power and Memory Seats: Getting the Seat Into a Removable Position
- How to Reinstall the Seat and Clear the Airbag Light
- How to Repair a Broken Wire Under a Car Seat
- Troubleshooting After the Job
- Is It Legal to Remove a Passenger Seat?
- If You Meant a Child Car Seat (LATCH)
- Frequently Asked Questions
- How difficult is it to remove a car seat?
- Do I need to disconnect the battery when removing seats?
- What are the wires under the car seat for?
- How do I disconnect the airbag connectors?
- What tool is needed to remove car seats?
- Why is my airbag light on after removing a car seat?
- Can you deactivate the passenger side airbag?
- Is there a manual override for electric car seats?
- Is it legal to remove my passenger seat?
- Conclusion
Safety First: Disconnect the Battery Before You Touch Any Connector
Yes, disconnect the battery. Remove the negative battery terminal, wait a full 15 minutes, keep the ignition key well away from the vehicle, and only then touch an under-seat connector.
The Supplemental Restraint System, or SRS, includes the side-impact airbag built into the side of the seat back. Its circuit runs through a bright yellow connector. A seat belt pretensioner, the small explosive device that tightens the belt in a crash, may also be wired into the seat or the buckle. Both are pyrotechnic devices. Working around them with a live battery and a key inside the vehicle risks an unintended deployment.
You will see 10 minutes quoted in a lot of owner threads, for example on elementownersclub.com. Fifteen minutes is the number to use because it matches the figure given in the most authoritative guidance, such as the go-parts technical guide for the 2008 Jeep Compass front seat, and it gives the vehicle’s capacitors time to fully discharge. Extra time costs you nothing.
While the battery is disconnected, turn the key on and confirm the airbag warning light illuminates. If it does not, the light is bulb-out or the lamp was already disabled, and you should not rely on it as a status check later.
Three more things to keep straight before you start. Never cut, splice or tape a yellow SRS connector. Never disable the passenger airbag to make a seat removal easier. And if your vehicle is a 2010s or 2020s model, expect an occupant classification sensor and buckle switch wired in, which is why those cars are riskier to work on than older ones.
What Are the Wires Under a Car Seat?
Under a car seat you will find a main multi-pin harness that carries power and ground, a yellow SRS connector for the side airbag, a small connector for the seat belt buckle switch, and a separate lead for the seat heater element. On a power seat you will also find the adjustment motor, and on a loaded seat, the lumbar pump, ventilation fan and memory module. Each one is a locking connector that comes apart with its tab.
This is the question owners ask most often, often while stopped halfway through a subwoofer install. A user on reddit r/XTerra halted a speaker install to ask what an unidentified loom under the passenger seat was for. The table below is the answer for a typical modern vehicle.
| Connector | Typical colour | What it does | Safe to unplug |
|---|---|---|---|
| Main under-seat harness | Black or grey, multi-pin | Power, ground and seat switch signals to the body harness | Yes, after battery disconnection |
| SRS side airbag connector | Yellow | Side-impact airbag in the seat back, sometimes the buckle pretensioner | Yes, but only after the 15 minute wait and never spliced |
| Occupant classification sensor lead | Yellow or white, small | Tells the Occupant Classification System whether a child or adult is seated, which decides passenger airbag deployment | Yes, treat as SRS-adjacent |
| Seat belt buckle switch connector | Small black or clear | Tells the vehicle the belt is fastened, drives the chime and the belt buckle light | Yes |
| Seat heater element connector | Black or brown, 2 to 4 pin | Supplies the resistive heating pad in the cushion and backrest | Yes |
| Power seat motor connector | Black, larger | Feeds fore-aft, height and recline motors | Yes |
| Memory and lumbar module leads | Black, small | Memory seat controller, lumbar valve pack, ventilation fan, massage motor | Yes, note the position before removal |
| Ground eyelet | Ring terminal | Seat ground path, often a separate stud or body bolt | Unscrew, do not pull |
| Microphone lead, if fitted | Thin black | Seat-mounted microphone for hands-free or seatbelt reminder chimes | Yes, pull gently, it is fragile |
Colours are a guide, not a guarantee. Some manufacturers use brown, purple or white for the airbag circuit, so identify by function and connector shape as well as colour. A seat that has already had aftermarket audio or lighting fitted may have extra taps and taps that were never there from the factory.
Tools and Materials You Need
You need a socket set covering 12mm, 13mm and 14mm, a ratchet and extensions, a battery terminal wrench, plastic trim tools and a fender cover. A label maker or masking tape is what turns a two hour job into a ten minute refit later.
| Tool or material | Size or spec | Required? | Used for |
|---|---|---|---|
| Ratchet and socket set | 12mm, 13mm and 14mm, plus deep sockets if access is tight | Required | Seat-to-floor track bolts, which are usually 12 to 14mm depending on make |
| Socket extension and universal joint | 75mm to 150mm | Recommended | Bolts tucked under the rails |
| Battery terminal wrench | 10mm or 13mm, model dependent | Required | Negative battery terminal |
| Trim removal tools | Plastic, non-marring | Required | Door sill trim and the plastic covers over the track bolts |
| Fender cover or old towel | Any | Required | Protecting the door sill, as advised repeatedly on xlrforum.com |
| Label maker or masking tape and a pen | Any | Required | Marking each connector before it is unplugged |
| Phone camera | Any | Required | Photographing the harness routing and each connector position |
| Torque wrench | Calibrated, range covering the spec | Recommended | Reinstalling the bolts to the factory figure |
| Multimeter | Continuity or ohms mode | Optional | Checking a suspect wire, buckle switch or heater element |
| OBD2 scanner with SRS capability | Any SRS-capable unit | Recommended | Reading and clearing stored airbag codes after the refit |
Set a blanket or cardboard down in the cabin before the seat comes out. Trimmed foam and plastic trim will scratch paint if the seat lands on bare metal.
How to Remove a Car Seat Without Breaking the Wiring: 8 Steps
Do the steps in this order. The order exists for a mechanical reason, and skipping ahead is what leads to a broken wire or a bent connector pin.
Step 1: Park, photograph and note the seat position
Park on level ground, in park or in neutral with the handbrake hard on, and photograph the seat from several angles before touching anything. Record the seat rail position, the recline angle and where each connector sits. If the seat has memory, let it settle into a stored position first so the module is not trying to drive the motor against your hands later.
Step 2: Disconnect the negative battery terminal and wait 15 minutes
Use the battery terminal wrench to loosen the negative clamp, lift it off and secure it out of the way, then move the ignition key at least a few metres from the vehicle. Set a timer for 15 minutes and do not work during it. This is the single step that protects the side airbag and any buckle pretensioner circuit.
Step 3: Slide the seat fore and aft to expose every bolt
Most seats use two bolts at the front of each rail, but plenty use four, and the rear pair is only reachable with the seat slid forward. An owner on toyota-4runner.org put it plainly: unplug the harness at the front of the seat last, because you need the seat to move fore and aft to reach the bolts. Keep the power connected at this point for exactly that reason.
Step 4: Remove the seat-to-floor bolts but leave them loose
Peel back the plastic trim covers over the rails, then back out every floor bolt with the socket. Leave the bolts in the holes rather than fully removing them where you can, so the seat stays partly located while you deal with the wiring. If a bolt will not break free, do not fight it; penetrating oil and patience beat snapped heads every time.
Step 5: Release the harness clips, brackets and P-clips from the seat frame
The wiring loom does not float free. It is clipped to the seat frame, the track, and sometimes the door sill at several points. Squeeze or pry each plastic clip open with a trim tool and lift the loom out, working from the front of the seat backwards. Note each clip location in your photographs. A bimmerpost X5 owner points out that a factory wire track already exists for routing, which is why a plug-and-play seat swap is possible at all.
Step 6: Disconnect the under-seat connectors, housing first
Take the yellow SRS connector first, then the OCS lead, then the buckle switch, heater and main harness. On each one, press the lock tab or slide the safety clip, grip the connector body firmly with both hands, and pull straight apart without twisting. Set each connector on a towel inside the cabin so it does not hang-load the loom or drop onto the sill. A post on mbworld.org suggests having the wiring harness schematic in hand for a car with a memory seat, which saves guesswork on the multi-pin body connector.
Step 7: Lift the seat out, protecting the sill
Lift the seat straight up and out of the rails with a second person helping if it is heavy. Cover the door sill with a fender cover or towel first, which is the standard advice on xlrforum.com, and lift rather than dragging. On a folded rear bench, expect the wiring to stay with the seat, and photograph the split point before you pull it free.
Step 8: Secure the harness in the cabin and inspect for pre-existing damage
Tape or zip-tie the now-loose harness to a solid interior point so it cannot swing near the pedals or the sharp edge of a rail. Then look at the loom while it is exposed: chafing marks, a flattened section, green corrosion on pins, or a broken conductor. On my.is, a poster’s single most useful tip was to disconnect the wire harnesses before attempting to lift the seat out. Taking ten minutes now to find a fault that was already there saves you being blamed for it after the refit.
Handling Rules That Keep the Wiring Intact
Most in-car electrical connectors use one of two mechanisms. A spring tab inside the housing, or a secondary safety slide that must be moved before the tab releases. Some use both. Pressing the tab and pulling the housing is the whole technique, and it applies across makes.
- Never pull a wire to unplug it. Grip the connector housing between thumb and forefinger, and support the loom with your other hand so the weight comes off the wires.
- Depress or slide the lock before pulling. Forcing a locked connector is what bends pins and cracks the housing.
- Do not use trim tools as levers on the connector itself. Pry the harness clips with the tool, then pull the connector by hand.
- Never pull on the yellow SRS connector under any circumstances beyond unplugging it whole. Cut, splice and tape damage is the deal breaker to avoid.
- Refit every clip, bracket and P-clip you removed. This is the prevention step behind most “I broke the wiring” stories, because a loose loom rubs against a moving rail and eventually wears through.
- Check whether any clip was a one-time-use service clip. The Tesla service documentation for the Model X driver seat lists one-time-use clip part numbers alongside torque values, and those clips go in new, not back in.
Power and Memory Seats: Getting the Seat Into a Removable Position
On a power seat, the motor and its wiring can block the lift-out, so move the seat before you unplug anything. Position it fully forward or fully back, and take the load off the motor by leaving it resting against a stop. There is no general manual override, so where the rails are jammed, the practical answer is to apply 12V to the motor terminals to drive it back into a removable position, which is the approach mbworld.org advises for a car with a memory seat.
On a memory seat, note the module location and which leads go to it before removal. If the module stays with the car and the new seat has no memory function, that is fine. If you are swapping in a seat with a different electrical spec, the OCS and memory functions will not match the car and the airbag system may fault on power up.
How to Reinstall the Seat and Clear the Airbag Light
Refit in the reverse order, and check the loom before the bolts go in. Torque values are not universal, so take the seat-to-floor figure from your factory service manual and use a calibrated wrench; a 1990s car and a 2020s truck will not share the same number, and guessing can strip the rail.
Before reconnecting, run this short verification pass:
- Every connector is home, latched, and the safety clip is seated. Give each one a light tug by the housing, never the wire.
- Every harness clip, bracket and P-clip is back in its original position, matching your photographs.
- No connector or loom is pinched between the seat and the floor pan, and nothing is routed across a moving rail.
- The seat bolts are torqued to the factory specification and the seat is firmly located with no side-to-side play.
- Reconnect the battery, turn the key on, and confirm the airbag light illuminates then goes out. A light that stays on means a stored code, not necessarily a broken wire.
If the light stays on, scan for codes with an SRS-capable OBD2 tool. Unplugging a seat will routinely store a fault code, and codes often need clearing from the module rather than simply going away with the ignition. On modern vehicles, a seat swap or a replacement with a different occupant sensor can require an Occupant Classification System calibration, which is a dealer-level step using a scan tool. If the codes will not clear after two attempts, or the buckle switch reads faulty, take it to a dealer. That is the point where the job stops being a sensible DIY task.
How to Repair a Broken Wire Under a Car Seat
If you have already damaged a wire, first establish whether it is an SRS circuit. Any wire on the yellow connector, the occupant classification sensor lead or a pretensioner is not repairable. Replace the seat or the harness, and do not drive the car with the airbag light on and a broken circuit in place.
For an ordinary non-SRS circuit such as a seat heater element, a buckle switch lead or a 12V feed, repair it properly rather than twisting and taping.
- Cut back to undamaged copper on both sides of the break, and strip only enough insulation for the splice.
- Match the original wire gauge. A thinner replacement in a heated circuit is a fire risk; a thicker one causes the module to misread the circuit.
- Use a butt splice crimped with a proper crimp tool, or solder the joint and leave a small solder fillet on each side. Solder-and-shrink is the stronger repair for a seat that vibrates in use.
- Cover the joint completely with adhesive-lined heat-shrink tubing, running it onto the insulation on both sides so no bare copper is exposed and no moisture can sit on the joint.
- Add strain relief. Heat-shrink alone is not enough on a loom that moves with the seat; a wrap of self-amalgamating tape or a small spiral wrap gives the splice something to hang from.
- Reroute the repaired section away from rails, sliders and the track, and clip it back in with a genuine harness clip so it cannot chafe again.
- Test the circuit with a multimeter for continuity, then refit the seat and confirm the function works before you close everything up.
A user on subaruforester.org drilled through a rivet holding a seat motor to the frame to free it, then replaced the rivet with a machine screw and nut. That kind of improvisation works mechanically, but the same forum thread is a reminder that a compromise made under the seat often comes back as an electrical fault later.
Troubleshooting After the Job
Most post-job problems fall into a short list, and the symptom usually tells you where to look. Work down the table before you start taking the seat apart again.
| Symptom | Likely cause | Fix |
|---|---|---|
| Airbag light stays on after refit | Stored SRS code from unplugging the seat, or a connector not fully latched | Reseat every connector by the housing, then scan and clear with an SRS-capable OBD2 tool |
| Airbag light on and will not clear | Open circuit in the yellow SRS or OCS connector, or a mismatched seat | Stop. Do not drive. Have the circuit checked by a dealer |
| Seat heater dead, other functions fine | Heater connector not seated, or a pre-existing break in the element | Reseat the connector, then test the element for continuity |
| Seat will not move fore and aft | Load still on the adjustment motor, or the rail stop is against the carpet | Drive the seat to a hard stop, then retry; check for harness pinched under the rail |
| Seat will not lift out of the rails | Foam compression or a rusted slider, or a bolt still in place | Rock the seat gently, confirm every bolt is out, and check the sill bracket for hidden fasteners |
| Seat belt chime stays on | Buckle switch connector unplugged or left behind | Reconnect the buckle switch lead, which is often routed separately from the main harness |
| Intermittent fault when the seat moves | A harness clip was left off and the loom is chafing on the track | Reroute and re-clip the loom so it has slack through the full travel |
One last diagnostic habit pays for itself. On any of these faults, wiggle the loom gently while a helper watches the connector. A fault that appears and disappears points at a marginal pin or a chafe point, not a failed component.
Is It Legal to Remove a Passenger Seat?
You can remove a passenger seat for a swap, a track use or a conversion, but leaving it out on a road-going vehicle is a bad idea. The airbag system expects that seat to be there. On most cars you will get a persistent airbag warning, the passenger airbag will be disabled or will not deploy, the seat belt alarm will not behave, and on newer vehicles the Occupant Classification System will fault. Insurers and vehicle inspections treat a deleted seat as a modification, and some jurisdictions prohibit carrying passengers in a position without a seat and belt assembly.
If the seat is going in a race car, an off-road build or a van conversion, treat the OCS and SRS connectors as parts to be properly terminated rather than abandoned, and check the rules where you drive. For a passenger seat, the honest answer is: replace it, do not delete it.
If You Meant a Child Car Seat (LATCH)
A child car seat comes out in about two minutes and involves no wiring at all. The principle is the same as with a vehicle seat, though: release the tension before you release the connector.
- Loosen the lower anchor strap or the vehicle belt first, so tension is off the connector.
- For a push-button lower anchor connector, press the red release button on the hook device and pull it straight off the anchor.
- For a J-hook or A-loc connector, squeeze the two metal arms together to open the hook, then release it from the anchor bar.
- Release the top tether the same way, then carry the seat out by the shell, not by the strap.
Push the belt or strap back into its normal stowed position afterwards so it does not hang loose in the seat.
Frequently Asked Questions
How difficult is it to remove a car seat?
For a front seat, most of the work is the bolts. Two bolts per rail on many models, four on others, all 12 to 14mm, plus a handful of plastic harness clips. Allow about an hour the first time including the battery wait, and expect 15 to 20 minutes to refit it once you know where every connector goes.
Do I need to disconnect the battery when removing seats?
Yes. Disconnect the negative battery terminal, keep the ignition key away from the vehicle, and wait 15 minutes before touching any under-seat connector. The side airbag circuit and, on some models, a buckle pretensioner are pyrotechnic devices, and a live circuit plus a key in range is how people get hurt.
What are the wires under the car seat for?
A main harness carrying power and ground, a yellow connector for the side-impact airbag, a small lead for the seat belt buckle switch, a seat heater element connector, and on power or memory seats, leads for the adjustment motor, memory module, lumbar pump and ventilation fan. Each is a locking connector that releases with its tab.
How do I disconnect the airbag connectors?
With the battery disconnected and 15 minutes elapsed, take the yellow connector first. Depress the lock tab or slide the safety clip, grip the connector housing with both hands, and pull straight apart without twisting. Never pull the wires and never lever against the housing with a trim tool.
What tool is needed to remove car seats?
A ratchet with 12mm, 13mm and 14mm sockets, extensions for the bolts under the rails, a battery terminal wrench, plastic trim removal tools, a fender cover for the door sill, and tape or a label maker. A torque wrench for the refit and an SRS-capable OBD2 scanner for clearing codes make the job much cleaner.
Why is my airbag light on after removing a car seat?
Most often it is simply a stored code from unplugging the seat, which clears with an SRS-capable OBD2 scan tool. It can also mean a connector is not fully latched. If the light will not clear after reseating every connectors and clearing the code twice, have the SRS circuit checked rather than driving with the light on.
Can you deactivate the passenger side airbag?
Do not attempt it as part of a seat removal. Deactivating the passenger airbag changes how the vehicle protects an occupant and is a legal and insurance question as well as a safety one. If the passenger seat is being replaced, swap it for a compatible seat and let the Occupant Classification System calibrate.
Is there a manual override for electric car seats?
Not in general. The practical workaround is to position the seat fully forward or fully back before unplugging, and where the rail is jammed, to apply 12V to the motor terminals to drive it back into a removable position. A mechanic can also release the adjuster gear directly.
Is it legal to remove my passenger seat?
For a road-going vehicle, no. Removing the passenger seat disables the passenger airbag, upsets the occupant sensor and the seat belt alarm, and counts as a modification for insurance and inspection purposes. Removing it for competition, off-road use or a van conversion is a different matter, but the connectors should be properly terminated rather than left hanging.
Conclusion
To remove a car seat without breaking the wiring, the whole job reduces to three habits: disconnect the battery and wait 15 minutes, undo the floor bolts before the connectors so you keep the seat travel you need to reach them, and release every connector by its housing rather than its wire.
Label and photograph each connector as it comes off, and refit every harness clip and bracket before the bolts go back in. A loose loom rubbing on a moving rail is the actual cause of most broken seat wiring, and it happens months after the job, not during it.
Know your stop point before you begin. A yellow SRS connector that will not seat cleanly, a stored code that will not clear, or a seat needing an occupant sensor calibration is a dealer job. Everything else on this page is a straightforward afternoon with the right tools, and this guide was last checked in 2026.