
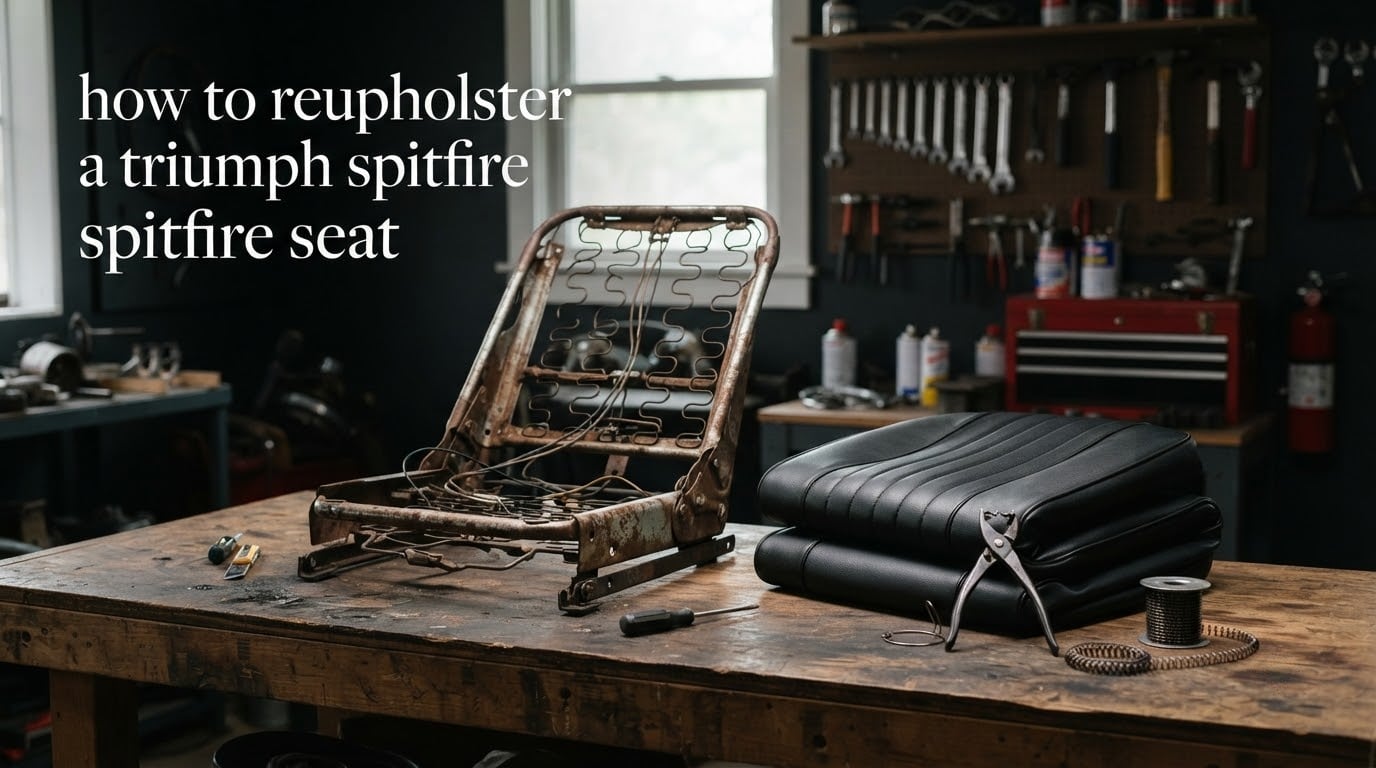
A Spitfire seat comes apart into four things: a steel frame with springs, a foam cushion, a vinyl cover, and the wires and rings that hold the cover on. To reupholster a Triumph Spitfire seat, you strip the cover and its hog rings off the frame, patch or replace the foam, then stretch the new material back over and lock it down with hog rings and listing wires. The frame, springs and mounting bolts are reused as they are.
That is the whole method, and it is how a trimmer does it too. The job looks harder than it is because the failure points are few: torn foam, lost listing wires, and covers tacked down one side at a time. Work around those and a Spitfire seat comes out looking factory.
We built this guide for owners of a 1962 to 1980 Triumph Spitfire or GT6 working in their own garage. Budget a weekend per pair of seats, a set of hog ring pliers, and a clear bench. The frame and springs do more of the work than most people expect, and most of the money usually goes on foam.
One note before you start, because it comes up in nearly every modern guide and does not apply here. There are no seat-mounted airbags on a Spitfire. The airbag disconnection and certified-stitching steps that dominate American upholstery guides have no equivalent on this car.
Table of Contents
- What You Need – Tools and Materials
- Spitfire Seat Anatomy – What You Are Working With
- How to Reupholster a Triumph Spitfire Seat – Step by Step
- Step 1: Remove the Seat From the Car
- Step 2: Strip the Old Cover, Hog Rings and Listing Wires
- Step 3: Inspect the Frame, Springs and Welds
- Step 4: Patch or Replace the Foam
- Step 5: Choose and Cut the New Material
- Step 6: Fit the Cover – The Plastic Bag Trick
- Step 7: Refit the Listing Wires and Hog Rings, Working Outward
- Step 8: Reinstall the Seat and Torque the Bolts
- Year-Range Differences – 1500 and GT6 Against Mk3
- Reupholster the Original, Buy Reproduction Covers, or Convert?
- Common Mistakes That Give Away a DIY Job
- Period-Correctness and Trim Codes for Concours Restorations
- How Long Does It Take and Should You Outsource It?
- Frequently Asked Questions
- How do you reupholster car seats?
- Can I teach myself upholstery?
- Is reupholstering car seats hard?
- How much does it cost to reupholster a car seat?
- How thick should car seat foam be?
- Do I need to disconnect the battery to reupholster a Spitfire seat?
- Which other cars’ seats fit a Triumph Spitfire?
- Is it worth it to reupholster a car seat?
- Conclusion
What You Need – Tools and Materials
Spitfire seat reupholstery needs fewer tools than most people expect. A trimmer can do a pair of seats with the list below and nothing else.
Hog ring pliers. These open and close the C-rings that clamp the cover to the frame. This is the one tool worth spending properly on. There is no substitute for pliers, and a seat held together with twist-closed rings will not last.
Hog rings, BS 561785. This is the OEM ring size for Spitfire seat covers. Ask any Triumph parts supplier for 561785 rings and specify seats, not general trim.
Listing wires. These thin wires run in sewn channels and pull the cover into the bolster contours. Salvage them from the old cover where you can. New wire is sold by trim specialists and is thin enough to disappear into the seam.
Spray contact adhesive. This bonds new foam patches to old foam. Use a temp-rated automotive contact adhesive, not a general craft spray.
High-density auto foam. This replaces the collapsed bun and rebuilds the headrest and bolsters. Foam for this rebuild is the biggest single material cost, so ask for auto grade rather than domestic upholstery foam.
Seam allowance material. These are replacement pieces for torn seams and listing wire channels. Match colour and weight to the main material so repaired seams disappear.
Marine vinyl or period cloth. This is the cover material itself. Marine vinyl is the durable choice. Match grain direction across the seat, not just colour.
Utility knife, shears and pliers. Use a sharp blade and a pair of end-cutting nippers for pulling the old rings.
You also want a marker pen, a tape measure, a camera, and small bags or a box for hardware. Photographing and labelling everything as you go is the single habit that saves you an afternoon on the second seat.
Spitfire Seat Anatomy – What You Are Working With
Before you touch a screwdriver, it helps to know what the four layers are and which of them are consumable. On a Spitfire the frame and springs last; the foam and the cover generally do not.
The frame is pressed steel, welded, and carries the seat springs. In an early car the springing can be a wire unit rather than individual springs, and it is worth knowing which you have before you judge its condition. The frame also carries the welds that the hog rings anchor into.
The foam is a shaped bun, usually split into a base cushion and separate bolster and headrest blocks. Original foam on a car of this age has usually lost its structure, and the bolster and headrest pieces are the first to go flat.
The cover is a single or multi-piece vinyl shell that wraps the whole foam assembly. It is sewn with listing wire channels running through the bolsters, and it carries seam lines that tell you how the original was laid out.
The fixings are hog rings, C-shaped rings closed with pliers, plus the odd clip. The OEM ring for this application is BS 561785, and using the correct ring is worth the small effort to source. Strip the seat and you will usually find around twenty to thirty rings per seat.
The same basic layout is used on a VW Beetle seat, which is a useful cross-check when a generic guide describes a method. A large plastic clip plus a ring of hog rings holds the cover to the frame on both cars.
How to Reupholster a Triumph Spitfire Seat – Step by Step
Here is the process in the order our workshop uses it. Each step assumes the one before it is finished.
Step 1: Remove the Seat From the Car
Take the seat out before you start, not at the end. On a Spitfire the frame and springs are far easier to work on a bench, and a seat half stripped in a footwell is a miserable place to work. Support the underside as you lift, and keep the trim clips and bolts in a labelled bag. The seat bolts go back in last, so put them somewhere safe now.
Step 2: Strip the Old Cover, Hog Rings and Listing Wires
Open the hog rings with pliers, working around the perimeter in a circle rather than one side at a time, and lift the cover clear. Take photos of the cover in place from several angles first. Keep the old cover intact. It is your pattern, and it tells you the seam layout and the order the original panels went on in, which no generic diagram will give you.
Do not cut the listing wires out. Slide them out of their channels where you can, and if a wire must be sacrificed, leave a short tail at each end so you know where it ran.
Step 3: Inspect the Frame, Springs and Welds
Run a flat blade along the frame rails to find rust, and look at the welds where the springs attach. Rust that has pitted through the metal is the point at which you stop and buy a frame instead. A bent or broken spring is a replacement, not a repair. Wipe the frame down and paint or wax it while it is bare, because once the cover goes back on you will not reach it again.
Step 4: Patch or Replace the Foam
Press firmly in ten to fifteen places across the cushion. If your hand sinks more than a couple of centimetres into any of them, that section is finished and patching it will only delay the same job next year. Where foam is sound, cut a shaped patch, coat both surfaces with spray contact adhesive, and let it go tacky before pressing down. Where it is not, fit new high-density auto-grade foam cut to the old bun’s shape.
Rebuild the headrest and bolster blocks separately, since they are distinct pieces on most Spitfire seats. Firm donor foam salvaged from another vehicle works well for bolsters, which is a trick owners have used on these cars. Domestic craft foam is too soft and too cheap for a car seat, and it will look acceptable for a season and collapse after a year.
Step 5: Choose and Cut the New Material
Lay the old cover out flat and use it as a pattern, adding seam allowance as you trace. Match the grain direction across both seats so the pair reads as a set. If you are cutting new seat covers rather than recovering existing panels, allow for the fact that a Spitfire bolster is a tight curve, and cut in the flat rather than fighting it on the form.
Step 6: Fit the Cover – The Plastic Bag Trick
Stretching a cover over fresh, tight foam is where most attempts end in a tear. The fix is a community technique, described on the Triumph forum during a 1970 GT6 seat foam rebuild, and it has never made it into a printed guide. Put a plastic bag over the headrest foam, and then pull the cover over. The bag lets the cover slide instead of catching and dragging on every foam contour.
Work the material on from the centre outwards in stages, pulling alternately left and right and keeping tension even. Warm vinyl with a heat gun on a low setting if it resists, and never hold the heat on one spot.
Step 7: Refit the Listing Wires and Hog Rings, Working Outward
Re-thread the listing wires through their channels so the cover is pulled down into the bolsters, then close hog rings with pliers. Tack four reference points first, at the front, back, left and right, and only lightly. Then alternate sides, stretching and closing rings around the perimeter a few at a time. Moving outward from the centre is what keeps the tension even. Slack at this stage is what turns into wrinkles you cannot pull out later.
Step 8: Reinstall the Seat and Torque the Bolts
Refit the seat with its trim clips and check that nothing fouls the recline or the transmission tunnel as you lower it. Tighten the seat bolts evenly rather than in one hard pull, and then sit in the seat and press the bolsters to check that the cover has no slack anywhere before you call it done.
Year-Range Differences – 1500 and GT6 Against Mk3
Not every Spitfire seat cover fits every Spitfire, and the differences show up when you start a job and get a cover that will not go on.
Early cars from the 1962 to 1970 period, covering the 1500 and the GT6, use a cover and headrest arrangement that differs from the later cars. The later Spitfires and the Mk3 range use a different headrest shape and a cover that will not pass over the earlier frame in the same way. Foam bun shapes and bolster contours changed between them too.
The practical point is that if you own both an early car and a later one, the seats are not interchangeable parts, and reproduction covers are usually offered for a specific year range rather than the model name alone. Check the year range before you order, because a cover that fits the outline can still pull differently over the foam.
Reupholster the Original, Buy Reproduction Covers, or Convert?
Buyers of these cars often ask whether they can drop in a seat from another car and save the work. British Car Forum threads cover the three most common candidates, and the results are consistently negative. That negative information is more useful than a long list of options.
Miata seats were tried more than once and reverted both times. They fit, but they sit too high, they are not centred in the Spitfire footwell, and the travel on them is poor. Sitting too high in a small car also puts the driver closer to the windscreen frame than the original seat does.
Saab Sonnet seats do physically fit, and were still not considered an improvement. There is no recline adjustment, and the bucket is skinny and deep for a Spitfire cabin.
Fiero seats do not fit at all. They will not go into the space between the driveshaft tunnel and the sill.
So the real choice is between recovering the original seat and buying a reproduction cover set. If the frame and springs are sound and the foam is patchable, recovering is cheaper, keeps the car period-correct, and gives you the original colour and grain. If the foam is beyond patching or both frames are rusted through, a reproduction cover kit with new foam is the sensible route, and your trim supplier can usually supply the cover, the foam cut to the bun, and the correct rings as one order.
Common Mistakes That Give Away a DIY Job
1. Tackting the cover down one side first. The result is uneven tension and a diagonal wrinkle run that no amount of heat will remove. Tack four points around the centre, then work outward on alternating sides.
2. Forgetting the listing wires. A cover tacked on with rings and no wires will look slack along the bolsters even when the frame is tight. Thread the wires before you start closing rings.
3. Losing a ring in the footwell. Work over a tray, keep a magnetic dish to hand, and count the rings into it as they come off. A ring dropped into a Spitfire tunnel is a long afternoon.
4. Using domestic foam. It is softer, cheaper and does not survive a summer in a closed car. Specify automotive-grade high-density foam and, where you are patching, use spray contact adhesive on both surfaces.
5. Stretching a cover over tight foam bare-handed. Use the plastic bag over the headrest and bolster blocks. It is the difference between a cover that goes on and a cover that tears at the seam.
6. Not photographing the original. Once the cover is off, the layout stops being obvious. Take a set of photos before you start and label the hardware as it comes off.
Period-Correctness and Trim Codes for Concours Restorations
If the car is being judged, the seats are judged closely, because they are the largest single piece of trim in the cabin. Original grain, original seam layout, and the correct thread colour all read at a concours, and a car with the wrong interior colour or a modern-looking seat cover gives value away faster than most other upgrades can return it.
Originality also protects resale. Classic small sports cars of this type are widely understood to be rising in value, which is a good reason to recover the original frames rather than graft in something from a donor car. Ask your trim supplier for the trim code relevant to your year range before choosing a material, and buy one removable metre of the finished cloth so you can check it against the existing door cards and rear quarters.
How Long Does It Take and Should You Outsource It?
For one seat on a bench, with the tools in hand and the frame confirmed sound, the strip and inspect stage takes an hour. Cutting and fitting the cover is the slow part at two to three hours, and the hog ring work takes about an hour. Allow a full weekend for a pair, and add several hours if the covers need sewing rather than reusing existing panels.
Hand it to a trimmer when the frame is rusted through, when both seats need new built-in covers and you do not own a sewing machine, or when the work is going to be judged at concours. Driver quality is very achievable at home. A factory-looking result across a pair of seats is a different standard, and it is the standard that costs the most to fake.
Frequently Asked Questions
How do you reupholster car seats?
You strip the old cover off the seat frame by opening the hog rings that hold it on, remove the listing wires from their sewn channels, then patch or replace the foam. You pull the new cover back over the foam and re-attach it with the same rings, working outward from the centre so the tension stays even. The frame, springs and seat bolts are reused throughout.
Can I teach myself upholstery?
Yes, for a seat cover. The techniques involved are mechanical rather than decorative: stripping, foam shaping, tensioning and ring fitting. Sewing panels and matching seams is where beginners struggle, and it is the skill that takes longest to learn. Many owners recover existing panels rather than building new ones, which keeps the sewing to repairs and a listing wire channel.
Is reupholstering car seats hard?
It is moderate rather than hard, and the difficulty concentrates in a few places. Pulling a cover over tight new foam without tearing it, keeping tension even across the bolsters, and managing listing wires are the three things that go wrong. On a Spitfire the frame is simple steel and the covers follow the existing panels, which makes the job more approachable than a seat from a modern car.
How much does it cost to reupholster a car seat?
The cost falls into two parts. Tools are a one-time outlay and the only one worth buying properly is a pair of hog ring pliers. Materials are the repeating cost, and the largest item is always foam, because automotive-grade high-density foam is several times the price of domestic craft foam. Hog rings, listing wires, adhesive and a metre of marine vinyl make up the rest.
How thick should car seat foam be?
Match the original bun rather than adding thickness, because a Spitfire seat already sits close to the windscreen and a thicker cushion raises the driving position and can change the pedal reach. Where foam is being patched, the replacement piece should be the same thickness as what came out. Rebuild bolsters and headrest blocks as separate pieces at their original density rather than one solid block of soft foam.
Do I need to disconnect the battery to reupholster a Spitfire seat?
Not for the reupholstery itself. A Spitfire seat carries no airbag, so there is no seat-mounted restraint to power down and no connector to wait on. Disconnect the battery before working on anything electrical in the car as normal practice, but the airbag step that appears in modern guides has no equivalent on a 1962 to 1980 Spitfire.
Which other cars’ seats fit a Triumph Spitfire?
The three most commonly tried are disappointing. Miata seats fit but sit too high, are not centred and have poor travel, and owners who have used them have reverted. Saab Sonnet seats fit physically but have no recline and a skinny, deep bucket. Fiero seats do not fit at all, because they will not go into the space between the driveshaft tunnel and the sill. Recovering the original is the better route.
Is it worth it to reupholster a car seat?
Usually, yes, when the frame and springs are sound. Recovering the original keeps the car period-correct, preserves the seat colours that match the rest of the cabin, and costs less than replacing both seats with a kit. It stops being worthwhile once the foam is beyond patching or the frames have rusted through, at which point a reproduction cover with new foam is the sensible answer.
Conclusion
To reupholster a Triumph Spitfire seat, strip the cover and its hog rings, check the frame, patch or replace the foam, and pull the cover back on working outward from the centre with the listing wires rethreaded. Keep the old cover as your pattern, and use a plastic bag over the headrest foam so the cover slides instead of tearing.
Start with one seat, not two. Once you have the method, the second takes noticeably less time, and the frames will still be on the car for a few days if you decide the trimmer should do the pair. If you want to check how to reupholster a Triumph Spitfire seat against a specific year range before you order material, bring the trim code to your supplier and match it against the existing door cards.