
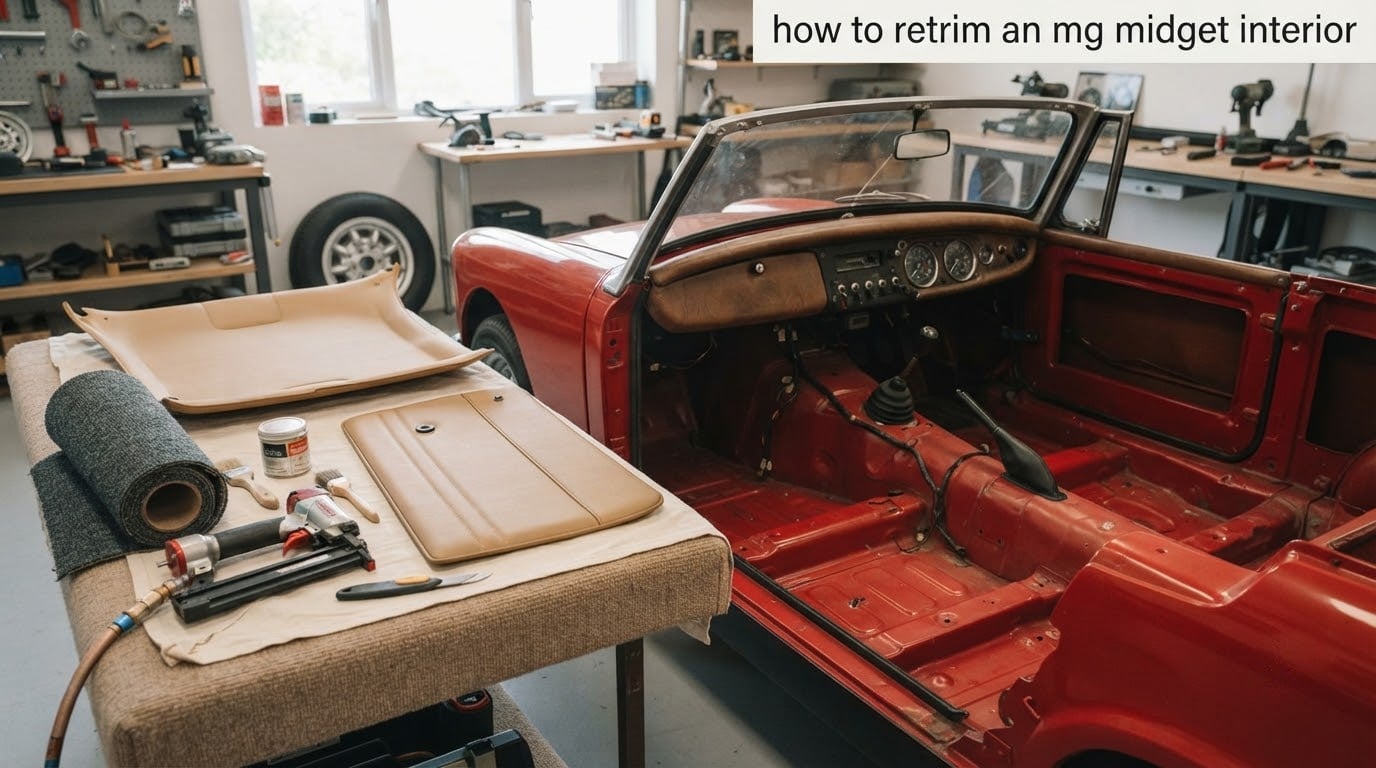
To retrim an MG Midget interior, you strip out every trim component one at a time, repair or replace the covering on each, and refit the lot in the reverse order. On a car this small that is genuinely a weekend-plus job rather than a workshop project, and the headliner is the one piece that makes most owners put it off for years.
I have watched more Midget interiors come apart than I would care to admit, and the pattern is always the same: the job gets stalled at the headlining, gets deferred, and then the whole car sits half finished. This guide covers Mk1 through Mk4 Midget and the Austin-Healey Sprite equivalents built between 1961 and 1979, and it lays out the removal order, the fasteners you will actually meet, the tools worth buying, and an honest read on which parts you can save.
Retrimming means more than cleaning. It means removing seats, door cards, dashboard and console trim, carpet, headliner, sun visors and rear trim, then putting correct new material over sound backing and refitting with the trim sitting where the factory put it. Done properly it is the single upgrade that most reliably makes a tired Midget look worth buying.
Table of Contents
- The whole job at a glance: 9 steps
- Which Midget are you working on?
- Tools and consumables you need
- Choosing materials: moquette, leathercloth, vinyl and carpet
- Reuse or replace?
- How to retrim an MG Midget interior, step by step
- Refitting in reverse order, and fitting a headliner properly
- How long each section takes
- Common mistakes and how to avoid them
- DIY or hire a trimmer?
- If you can only do part of the job
- Frequently Asked Questions
- Can I retrim an MG Midget interior myself?
- How long does a full MG Midget interior retrim take?
- What is the hardest part of retrimming a classic car interior?
- Which trim parts fit which MG Midget?
- Can I reuse the original foam and trim board?
- Should I DIY or hire a professional trimmer?
- How do I stop the new headliner sagging?
- Do I need to replace the whole interior or can I pick panels?
- Conclusion
The whole job at a glance: 9 steps
Here is the full sequence in the order I would tackle it. Read it through before you turn a single screw, because the order is what makes the job reversible.
- Photograph every interior fixing, fastener group and trim hole before anything comes off.
- Remove the seats, then note and bag every bolt, washer and spacer as it comes off.
- Take out the door cards, working the top edge last so the card does not crack across its face.
- Strip the dashboard, console, gearlever surround, kick panels and sill trim.
- Lift the carpet, including the heel pad and centre tunnel sections, and check the floor for corrosion underneath.
- Remove the sun visors, the rear parcel shelf trim and any remaining rear panel liners.
- Pull the headlining down last of all, working cold, and never lever against the screen or rear window channels.
- Repair or replace the material on every panel off the car, at a bench, with the old covering as your pattern.
- Refit in reverse order, with the headliner going back on last, worked cold and deliberately slack.
Two rules sit over all nine steps. Never fit a panel until the one below it is back in, and never staple material onto a panel that is still damp or dusty underneath.
Which Midget are you working on?
Getting the generation right before you order a single part is the step most guides skip, and it is the reason so many owners end up with trim that does not fit. Badges are the quick identifier, but the body details underneath are what actually decide which panels you need.
Mk1 and Mk1.5
The 948 and 1098 cars are the ones to slow down on. Their trim is where early Midget and Sprite practice shows through: door cards are often hardboard-backed rather than board-over-foam, headlining material is thinner and more prone to sagging, and the windscreen aperture is narrower than later cars, which makes the header trim a tight fit. If your Midget has a recessed rather than flat header, you are looking at the narrow-aperture car and the top edge of the headliner will not simply tuck under a channel.
Mk2
The 1098 Mk2 introduced changes to the door cards and to how trim fixes to the body, and the fasteners differ from the Mk1 in both type and count. Card fixings on an Mk2 are not interchangeable with Mk1 hardware, and that is a common reason a card will not go back on squarely. The 1963 Mk2 Ashley-hardtopped car documented on the Retro Rides forum is a good example of the shape of the whole project: strip the ancillaries, refurbish mechanically, respray, and only then start the interior, with the door cards as the opening job.
Mk3, Mk4, 1275 and 1500
The 1275 and 1500 cars share a longer-lived trim specification with later Mk3 and Mk4 cars, and for most interior work the panels are broadly interchangeable across these later variants. Differences concentrate around the rear deck, the console and the trim around the fuel filler, so check those areas against your specific year before ordering. If your car is badged Sprite rather than Midget, the trim itself is usually the same part; the differences are external badging and, in some cases, the fuel filler and trim details on earlier bodies.
Record the year, the engine capacity and whether the car has a removable hardtop before you start. If it has an Ashley or removable hardtop, the headliner has an interface at the roof edge that needs checking for perished sealing before you cover it with new material.
Tools and consumables you need
You do not need a professional tool wall. You do need a decent stapler, because cheap flat staples shred trim board and original vinyl. The table below covers what the job actually calls for.
| Item | Why you need it | Cost band |
|---|---|---|
| Staple gun, T50 type | Fixes covering to trim board and cards; the one tool you cannot substitute | Mid |
| Staple remover | Opens boards without gouging the original face | Low |
| Contact adhesive (trim cement) | Bonds covering to board and foam; not a general-purpose spray glue | Low |
| Pattern shears or strong scissors | Cutting patterns from old material without drift | Low |
| Awl or trim board knife | Starting holes and piercing covering without tearing | Low |
| Heat gun | Shaping vinyl into recesses and corners, on low setting only | Mid |
| Upholstery needle and heavy thread | Seams, piping and any hand-finished joins | Low |
| Screwdriver and driver-bit set | Trim screws are usually slotted or a small pozi | Low |
| Trim board and foam | Replacement backing where original board is delaminated | Low |
| Moquette, leathercloth or vinyl | Covering material matched to your year and colour | Mid to high |
| Perforated trim board sheet | New card backing that breathes instead of trapping damp | Low |
| Masking tape and marker pen | Labelling fixings and tracing hole positions | Low |
Add a vacuum cleaner and a stiff brush to that list. A surprising amount of a Midget interior job is cleaning out decades of grit before the new material goes anywhere near it.
Choosing materials: moquette, leathercloth, vinyl and carpet
Matching the original means knowing what you are matching. Four terms cover almost every Midget interior.
Leathercloth is a coating on a fabric backing rather than real leather. It is the classic Midget material for seats and door cards on many cars, and it can be matched well in a standard colour.
Moquette is a short, dense, patterned pile used for headlinings and sometimes for seat squabs. Matching an original moquette pattern is harder than matching a plain colour, so work out early whether you are chasing an exact pattern match or a close colour equivalent.
Vinyl is a leather-effect sheet with a cloth backing. It is the most forgiving material to work with and the easiest to keep in condition, and it suits door cards and visors very well.
Carpet on a Midget is usually a moulded piece with a heel pad and a reinforced centre tunnel section rather than flat flooring. Buying the correct moulded carpet is the difference between a job that takes an afternoon and one that takes an evening.
A practical point about adhesive: contact adhesive grabs instantly and then cures. That means you get one chance to position the covering, so dry-fit everything first, mark it, and follow the instructions on cure time rather than guessing. Plan your working day around the cure, not the other way round.
Reuse or replace?
Forums fill up with this question, and the answer is consistent: reuse anything structurally sound, replace anything perished. This table is the rule of thumb I use.
| Component | Reuse it when | Replace it when |
|---|---|---|
| Seat frames and springs | The frame is straight, welds are sound and springs still hold | Any frame crack, rusted seat rail or dead spring set |
| Cushion foam | It still rebounds after a firm press and is not crumbling | Delaminated, powdery, or the foam is bonded to the cover backing |
| Squab foam | Shape is still roughly square and the foam is resilient | Flat, broken into pieces, or perished to the touch |
| Door card board | Board is flat and the face has no cracks or soft spots | Delamination, swelling, or a crack across the card face |
| Trim board behind cards | Solid, with intact fixing holes | Holes have torn out or the board has gone soft |
| Carpet | Backing is sound and there is no rubber perishing or odour | Perished rubber backing, delamination, or brittle edges |
| Headliner foam | It is thin but still attached to the material | It has dropped, yellowed through, or disintegrated |
| Sun visors | Pivot mechanisms work and the board is intact | Broken ratchet, perished foam, or a sag that will not recover |
Worth knowing: a Midget’s small cabin means the original foam and board are often genuinely reusable, which is one of the reasons the job is as approachable as it is. Salvage panels from a donor car are worth more than new flat sheet for this reason.
How to retrim an MG Midget interior, step by step
Strip-down order matters less for safety than for access: you will be reaching over finished surfaces constantly if you take things off in the wrong sequence. Work from the front of the car back, and from large panels down to small ones.
1. Seats first
Remove the seats before anything else. They sit over the carpet edges and the sill fixings, and leaving them in place blocks access to three of the four corners of the floor. Take a photograph of every bracket and spacer as you unbolt, because these are the parts most often lost and hardest to replace.
Pull the seat squab covers where they are fixed to the frame with elastic or staples from underneath, so you are not fighting the material from the wrong side. A Reddit user in r/MorrisGarages described a similar cheap partial approach on a 1979 MGB, recovering a ripped brown interior trim piece by wrapping new vinyl and refitting with a staple gun and new screws, and the principle transfers well to a seat squab panel on a Midget.
2. Door cards
A door card is the panel trim covering the inside of the door. On most Midgets it is held by a mix of screws along the lower edge, a top edge that either hooks or tucks, and a window sill plate that clips over. Work the bottom screws first, then release the sill plate, then the front edge, and leave the top edge until last. That order keeps the load on the card’s soundest part and stops it snapping across the face where the speaker or handle aperture is.
If the card resists, do not force it. Work a plastic trim tool around the perimeter, tapping the fastenings gently, and accept that one card may need the handle and window mechanism removed to come free cleanly.
3. Dashboard, console and sill trim
The dashboard pad and lower fascia come off from underneath first, usually on a row of screws and clips, and any nuts are best left in place to keep the studs aligned. Lift the console and gearlever surround, then the kick panels and sill trim along the door openings. These small pieces are the most fiddly part of the strip-down, so bag them by location.
Do the plastics while they are out. A perished black plastic fascia can often be cleaned and re-finished rather than replaced, and that is far cheaper than a reproduction part.
4. Carpet and centre tunnel
The carpet comes out in sections, starting at the front edge near the bulkhead and working back to the rear deck. The centre tunnel section usually lifts last and is the piece that hides the most trapped water. Pull the toe-board and sill edge trim first so the carpet edge is exposed, and support your weight so you do not crease it if you plan to reuse the old one as a pattern.
This is your chance to look at the floor. Lift any dead sound-deadening material, check the seams and the sill bottoms for corrosion, and paint and protect bare metal before the new carpet goes down. Moisture trapped under an old carpet is the most common cause of a Midget interior smelling damp a year after a retrim.
5. Rear trim, parcel shelf and visors
Remove the rear parcel shelf trim and any rear panel liners, then take the sun visors out of their pivot mounts. A visor is the padded panel above the windscreen and above the passenger side. Photograph the mount positions, because visors that go back on crooked are an obvious giveaway of a rushed job.
6. Headlining last
Pull the headlining down last and work it cold. A headliner, or roof lining, is the covering bonded and stapled inside the roof panel, and on a small convertible it is the most visible part of the entire interior. Never use a heat gun on an old Midget headlining to try to lift it: the material and its adhesive will move before the covering does and you will tear it. Work the fastenings out one by one, support the panel as it comes down, and fold rather than bunch it.
If the headlining has sagged badly and the foam has dropped away from the material, the panel will not come down flat. That is normal on a car of this age, and it is exactly why replacement foam is worth fitting rather than reusing what is there.
Refitting in reverse order, and fitting a headliner properly
Refit is the reverse of strip-down, and it is the half of the job where care shows. Every panel goes back on the same fixings in the same holes, and every covering gets a trial fit in position before it is permanently bonded or stapled.
Set the seat bases and rear trim in place, then the sill and kick panels, then the carpet, working from the centre out so the tunnel section ends up tucked rather than stretched. Fix the carpet at the bulkhead and sill edges, not through the middle, and never pull a carpet tight enough to lift the heel pad off the floor.
Fit the door cards, then the dashboard pad, fascia and console, then the visors. The dashboard pad is the item most often fitted last and most often fitted badly, so put it on in its true position and work the fixings alternately rather than cranking one side tight.
For the headliner, the technique is the whole job in miniature. Cut your new material slightly oversize, work it cold, and start at the centre of each edge rather than at a corner. Staple the centre, then work outwards in short increments, leaving the material deliberately slack. A headliner that goes on tight will sag within a year because the material relaxes; a headliner that goes on loose takes a few weeks to settle into a flat plane.
At the windscreen and rear screen, tuck the material into the channel rather than stretching it across the aperture, and check that the trim channel and the rubber seal are still serviceable before you cover them. Finally, refit the headlining retainer and any capping strip, and leave adhesive to cure fully before the car goes back outside.
How long each section takes
The table below is what I would budget for a first attempt on a car in average condition, working with sensible periods of adhesive cure time. It is deliberately honest, because time creep is the thing that turns a partial job into an abandoned one.
| Section | Difficulty | Typical time, first attempt |
|---|---|---|
| Seats out and covers replaced | Medium | Half a day to a day |
| Door cards | Low to medium | Half a day for both |
| Dashboard, console and sill trim | Medium | Half a day |
| Carpet and centre tunnel | Low | Half a day |
| Visors and rear trim | Low | A couple of hours |
| Headliner removal and refit | High | Two to three days including cure |
| Full interior, start to finish | Medium to high | Two to three weekends |
Common mistakes and how to avoid them
Staple heads showing through the trim. The single most common fault. Fix it by stapling into the board, always leaving a margin of material beyond the staple line, and by choosing a staple length that will not punch through a thin face panel.
A headliner that sags within months. It is almost always over-tensioning. Work cold, staple from the centre outwards, and leave slack.
Heat damage to original vinyl. A heat gun set too high, or held too long, will scorch and shrink original material in seconds. Use low heat, keep it moving, and test on a scrap offcut first.
Trapped moisture under new carpet. Lift dead underlay, dry the floor, and make sure any sound-deadening sheet you refit is a breathable type rather than a sealed foil.
Trim holes that no longer line up. Photograph everything before removal, keep hardware bagged by location, and never force a screw into a stripped hole. A little patience here is the difference between a card that goes back on squarely and one that never closes properly.
Forcing trim panels. The fear of damaging a good original panel is well founded. Plastic trim tools, patience and heat only where appropriate beat brute force every time.
DIY or hire a trimmer?
Most owners land somewhere in the middle: they do the easy sections themselves and pay a specialist for the headliner and the seats. That is a sensible split, because a trimmer’s premium buys you the headlining technique, not the ability to remove a kick panel.
| Factor | DIY | Professional trimmer |
|---|---|---|
| Cost | Materials only, cost band varies widely by material choice | Labour is the dominant cost, higher for a full retrim than a partial one |
| Time | Two to three weekends for a full job | Days to a few weeks depending on queue and scope |
| Skill required | Straightforward for cards and carpet, high for headlining | None from you beyond removing ancillaries if requested |
| Finish | Good with care; a rushed headliner shows | Show standard, especially on tension and seams |
| Risk | Time creep, torn material, misaligned fixings | Cost, and a wait for the car to be off the road |
A poor DIY retrim reduces resale value, so if the car is nearly finished and the interior is the last job, weigh carefully whether the last ten percent of effort is worth the risk. Owners in MGB and Midget owner groups ask for a recommended trimmer constantly, which tells you how much the specialist route is valued when a car is going to a show or straight to sale.
If you can only do part of the job
A staged retrim is the realistic path for most restorations, and the 1963 Mk2 on Retro Rides is a good illustration: an interior job deferred repeatedly simply because it came last and the owner had no dedicated space for it. Work the order that gives you the most visible improvement for the least effort.
- Headliner only. The single biggest visual improvement available, and the hardest job. Worth doing alone if a sagging roof is what stops the car looking finished.
- Carpet only. The fastest win on a car that has been outside. Remove the dead underlay while you are in there, because that is where damp problems live.
- Door cards only. Good for a car that is otherwise sound, and the section most owners can do well on a first attempt.
- Seats only. The most expensive section in material terms and the one where a partial fix often looks better than nothing: re-covering the squabs alone can transform a cabin.
- Visors and rear trim. A couple of hours, and immediately noticeable at a show.
Whatever you choose, photograph and bag fixings as though the car will be apart for a year, because it might be.
Frequently Asked Questions
Can I retrim an MG Midget interior myself?
Yes. Most owners can do the seats, door cards, carpet, visors and sill trim with basic tools and clear instructions. The headlining is the demanding part: it is the most visible surface, it is unforgiving of over-tension, and working it cold takes patience. A sensible route is to do the straightforward sections yourself and pay a specialist for the roof if you want a show-standard result.
How long does a full MG Midget interior retrim take?
Budget two to three weekends for a full interior on a first attempt, working at a steady pace and allowing for adhesive cure time between stages. Individual sections vary a great deal: door cards and carpet are each around half a day, the seats take half a day to a day, and the headliner alone can take two to three days including drying.
What is the hardest part of retrimming a classic car interior?
On a Midget it is the headlining. The panel has to come down without tearing, the foam often has already dropped away from the material, and the new covering has to go on cold and deliberately slack or it will sag again within a year. Door cards are usually the second hardest because their fixings differ between Midget generations.
Which trim parts fit which MG Midget?
Early Mk1 and Mk1.5 cars on 948 and 1098 engines have thinner headlining material, hardboard-backed door cards and a narrower windscreen aperture, so header trim and top edges are not directly interchangeable with later cars. Mk3, Mk4, 1275 and 1500 cars share a broadly interchangeable interior specification, with differences concentrated around the rear deck, console and fuel filler area. Record your year and engine capacity before ordering anything.
Can I reuse the original foam and trim board?
Often yes, and on a Midget the original parts are frequently sound because of the car’s small cabin. Reuse foam that still rebounds under pressure and trim board that is flat with intact fixing holes. Replace foam that is delaminated or crumbling, board with torn-out holes or soft spots, and any carpet with a perished rubber backing. Sound original parts and donor-car panels are usually better templates than new flat sheet.
Should I DIY or hire a professional trimmer?
Do it yourself if the car is a driver, the interior is functional rather than show-standard, and you have a dry, ventilated space to work in. Hire a trimmer for the headlining and seats on a car being prepared for a show or sale, because tension and seam quality are what separate a good result from a rushed one. Many owners do both, handling the simple sections themselves and paying for the roof.
How do I stop the new headliner sagging?
Work it cold, start stapling at the centre of each edge, and work outwards in short increments rather than pulling the material tight from the corners. Leaving deliberate slack lets the panel settle into a flat plane over the following weeks. A headliner stretched tight at fitting is the most common reason a new roof lining sags again within months.
Do I need to replace the whole interior or can I pick panels?
Individual panels are perfectly reasonable to replace on their own. Door cards, visors, carpet sections and rear trim are all commonly sold and fitted singly, and a wrapped or re-covered single panel is a popular cheap fix for a torn or faded piece. Match the material and colour carefully, and expect to source anything discontinued rather than reproduced.
Conclusion
Learning how to retrim an MG Midget interior comes down to three things: strip it in the right order, reuse every original part that is still sound, and treat the headlining as a job to be done cold and slack rather than tight. The cabin is small enough that the whole thing is achievable across a couple of weekends with a staple gun, contact adhesive and a set of new panels.
Photograph every fixing before you touch it, work in a dry and ventilated space, and leave adhesive to cure on its own schedule. If your car is going to a show or straight to sale, book a trimmer for the roof and seats and do the rest yourself. Then get on with it, because the Midget waiting for its interior is always the one that never gets driven.